
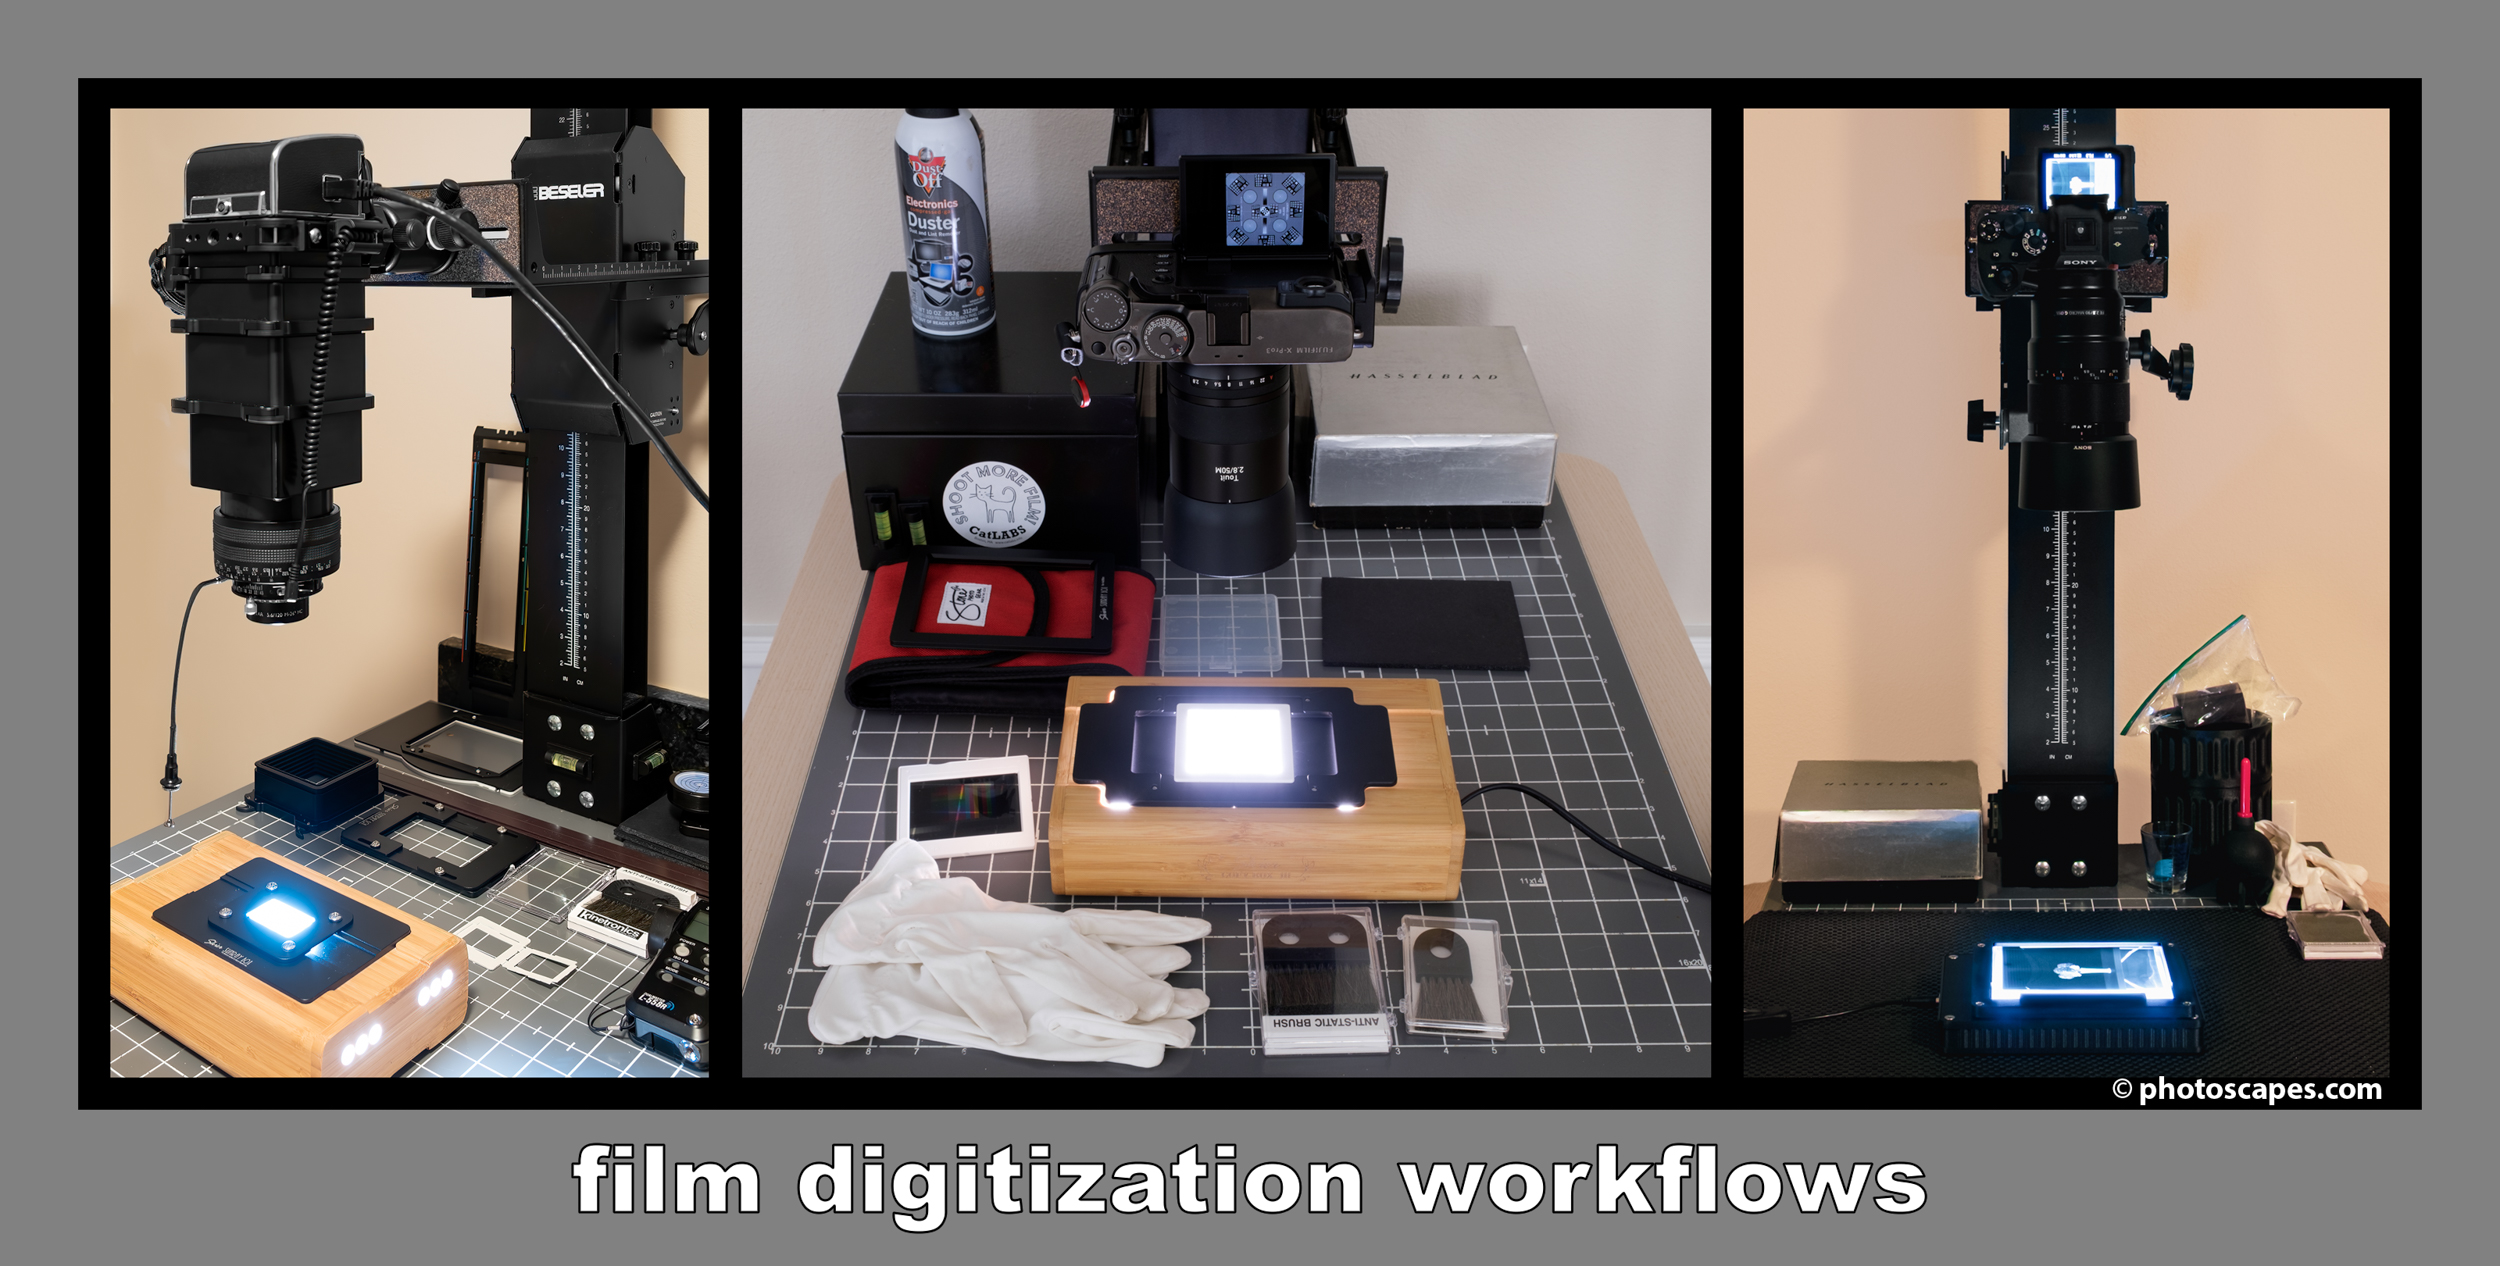
#2: APS-C - Fujifilm X-Pro3 + Zeiss
#3: Full-Frame - Sony A7R IVA + FE 90 G OSS
REVISED JUNE 2026
CAMERAS FOR DIGITIZING
Today in 2026, we have many choices available for digitizing film, often referred to today as “camera scanning,” which has become one of the most effective alternatives to traditional film scanners.
When I began moving away from traditional film scanners and into digital capture back in 2012, I reached for what I felt offered the best resolution available to me at the time: a medium format CCD system built around the Phase One P45 digital back mounted to an ALPA 12 TC with a Schneider Apo-Digitar 120mm f/5.6 Macro lens.
The amount of extension required to achieve 1:1 reproduction using ALPA Multi-Adapters and the Macro Adapter was expensive, but necessary. More importantly, tethering to a MacBook because the P45 lacked Live View technology eventually became more hassle than pleasure. While the files were beautiful, the overall workflow felt increasingly cumbersome.
Eventually, I moved to the Hasselblad CFV-50c digital back in 2014, primarily because Live View transformed the digitizing experience into something far more practical and enjoyable. Over time, however, I began questioning whether I truly needed a medium format system for the level of resolution I was seeking. That realization eventually led me toward Fujifilm’s APS-C cameras, first the Fujifilm X-Pro2 and later the Fujifilm X-Pro3.
One of the biggest advantages of the Fujifilm system was autofocus. I found the Zeiss Touit 50mm f/2.8 Macro to be an excellent lens for digitizing film, and for several years that combination became my preferred workflow. The convenience of autofocus alone made the process considerably easier.
The reason I chose APS-C rather than full-frame was simple: years earlier, I had largely abandoned full-frame after feeling medium format offered a more satisfying rendering for my personal work. For projects that did not require extremely high resolution, APS-C proved more than capable. In fact, much of my commercial studio work was produced with APS-C cameras without issue.
But in 2025, after making a heavily cropped scan from a film negative, I realized it was time to revisit where camera technology had advanced. I no longer wanted to depend on my medium format equipment if I did not absolutely need to.
My first thought was to explore autofocus macro options for the Hasselblad 907X 50C system I was already using. However, after looking at the price of the autofocus macro lenses, along with repeated user complaints regarding autofocus performance, I decided against going further in that direction.
That decision eventually led me back to Sony.
Ironically, my first mirrorless camera had been the Sony NEX-7. Even after moving to Fujifilm, I always respected Sony’s sensor technology and overall capabilities. At the same time, I have always felt Sony cameras lean more toward computers with lenses attached, whereas the Fujifilm X-Pro series feels more like a traditional photographic tool.
Still, for digitizing film, I was not searching for romance or tactile charm. I needed a reliable studio camera that would live on a copy stand, tripod, or inside a dry cabinet between uses. Ergonomics and nostalgia were far less important than precision and resolution.
What I wanted was straightforward: a camera with a 50 megapixel or greater sensor paired with an autofocus macro lens capable of producing excellent digitizing results. If it could accomplish that, the rest of its studio capabilities would be more than sufficient for my needs.
That is ultimately how I ended up with the Sony A7R IVA and the Sony FE 90mm f/2.8 Macro G OSS. The autofocus has proven extremely accurate once I understood how to properly configure the lens for close macro working distances. I also added the Sigma 24-70mm f/2.8 DG DN Art for studio work. Honestly, I could not be happier with the decision.
- A 50+ megapixel camera body
- An excellent quality macro lens with autofocus capability
- A camera-lens working flawlessly together for autofocus accuracy
- Reliable Live View performance for critical alignment and focusing
- A simple workflow that encourages you to digitize film
For my own needs, modern high-resolution mirrorless cameras paired with a strong autofocus macro lens have proven to be the best balance between image quality, efficiency, and practicality.
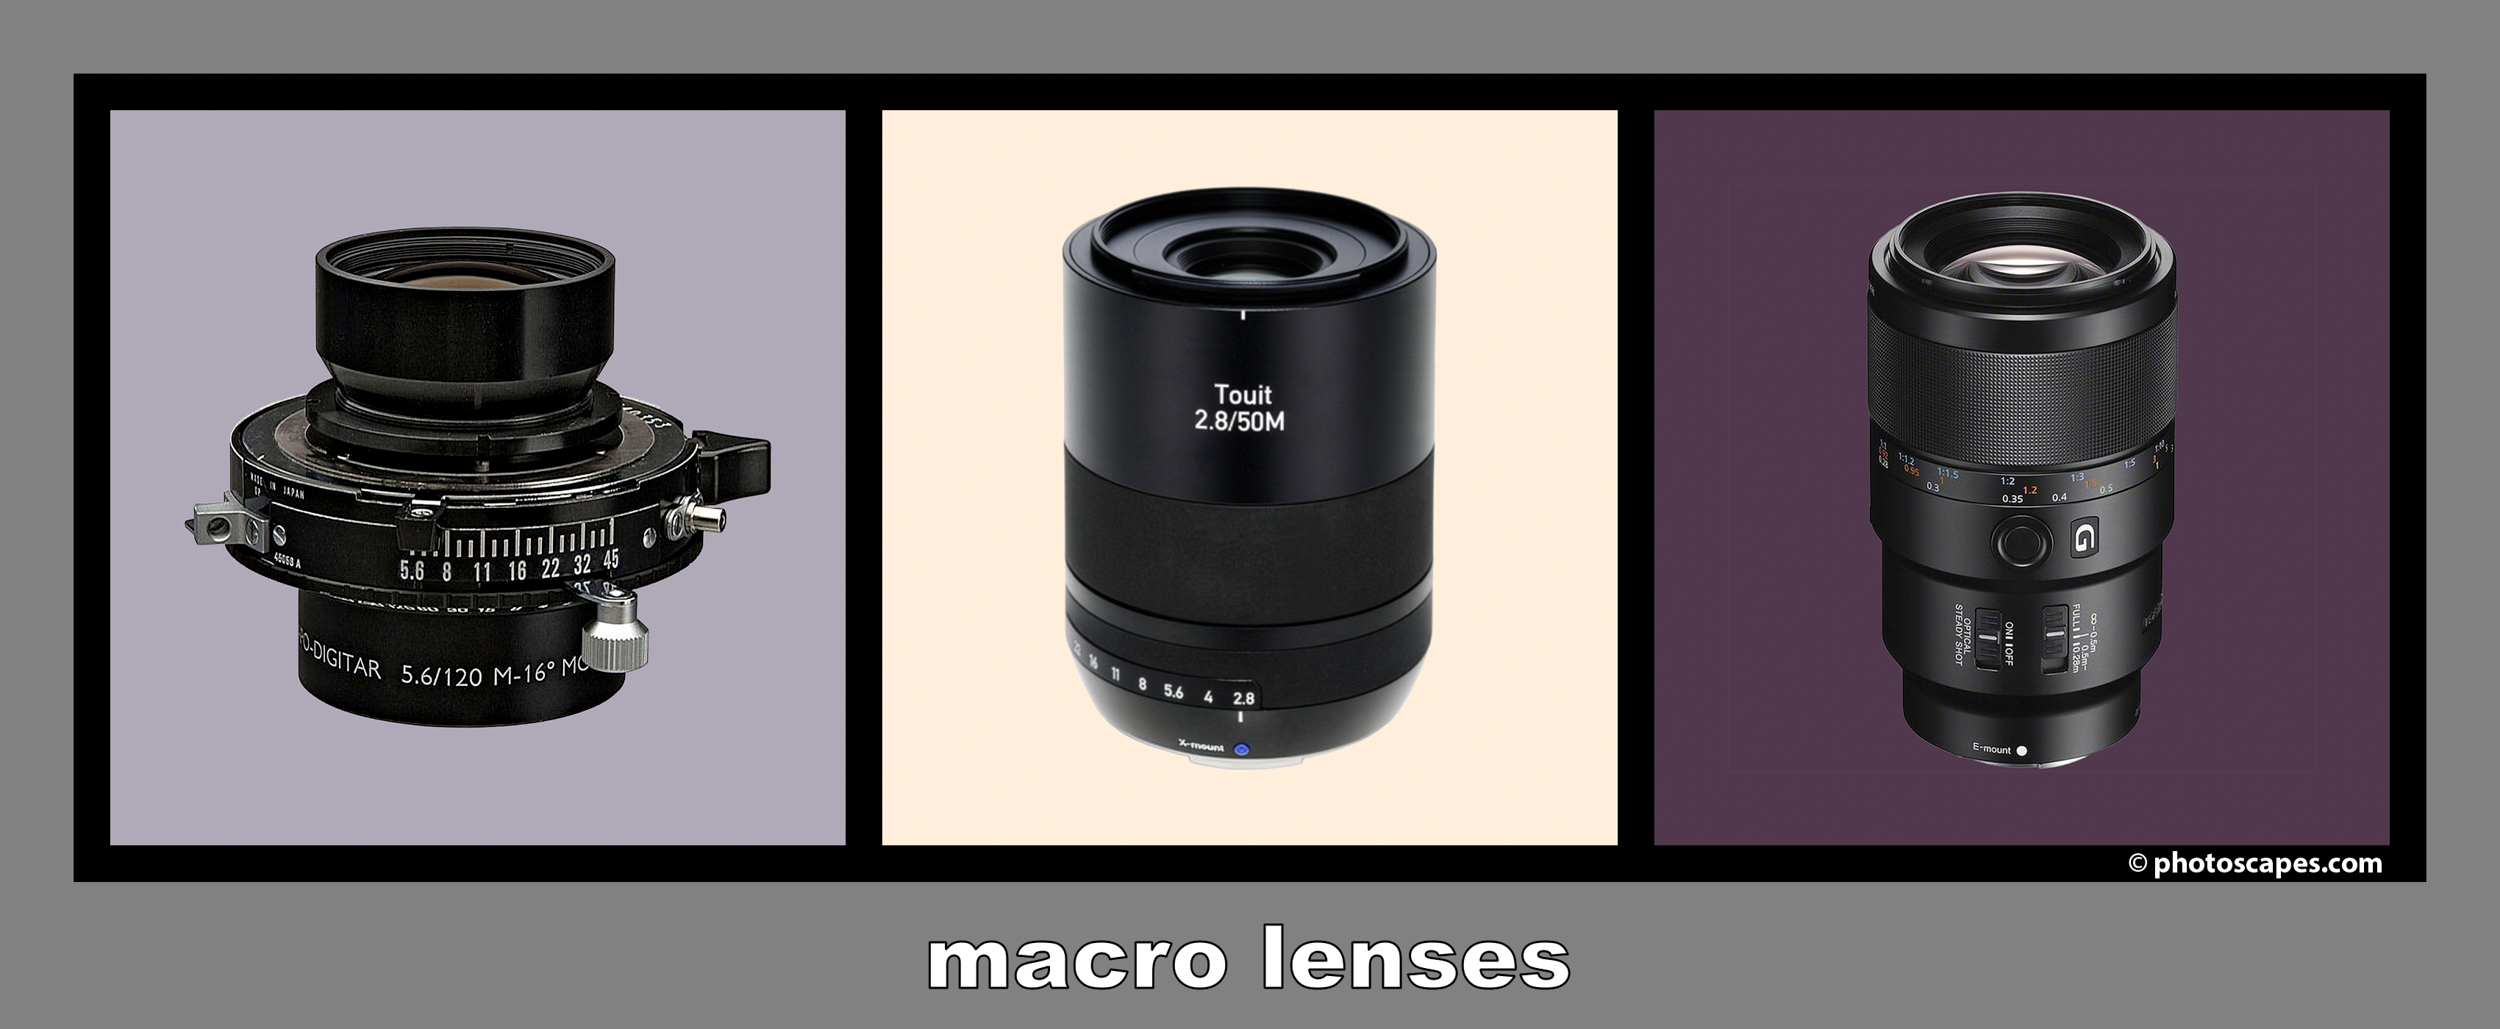
#2: APS-C - Zeiss Touit 50/2.8 M Macro
#3: Full-Frame - Sony FE 90/2.8 Macro G OSS
MACRO LENSES AND REPRODUCTION RATIOS
For digitizing film, the ideal lens design is a macro lens because macro lenses are engineered for optimal edge-to-edge sharpness across a flat surface. In simple terms, a macro lens is a flat-field lens, unlike many standard non-macro lenses, which are designed with a slightly curved field of focus.
When digitizing film, we are photographing a flat object straight on. If a curved-field lens is used, the center of the frame may appear sharper than the edges, especially at wider apertures. While stopping down the aperture can sometimes improve performance depending upon the lens design, it is generally best to use a lens specifically intended for copy work and close reproduction.
A quality macro lens is designed to deliver consistent sharpness across the entire frame, along with even illumination and minimal distortion. Those characteristics are exactly what we want when reproducing film negatives or transparencies.
Enlarger lenses are also flat-field lenses. In the traditional darkroom, printing with a curved-field lens would have been unacceptable because the edges of the print would never appear as sharp as the center. Distortion and uneven illumination would also become noticeable problems.
The same optical principles still apply today, even though the darkroom has largely been replaced by digital capture systems.
Another important factor when selecting a lens for digitizing film is reproduction ratio. The reproduction ratio describes the relationship between the size of the original film and the size of its projected image on the camera sensor. This directly affects resolution, framing, and overall image quality.
For example, a 1:1 reproduction ratio, often called life-size reproduction, means the film image is projected onto the sensor at the same physical size as the original negative or transparency. This is commonly used when digitizing smaller film formats with a full-frame camera sensor.
If an APS-C crop sensor camera is used, the effective field of view changes because the sensor itself is smaller. The camera will sit farther away from the film, and the reproduction ratio changes accordingly. In practical terms, this means less of the sensor area is being filled by the film image compared to a full-frame system.
Achieving the proper reproduction ratio is important because unused sensor space becomes wasted resolution. If the film does not adequately fill the frame, cropping becomes necessary during post-processing, reducing effective image resolution and overall image quality.
- Macro lenses are flat-field lenses designed for edge-to-edge sharpness
- Standard non-macro lenses are often curved-field designs
- Flat film requires a flat-field lens for best results
- Macro lenses minimize distortion and uneven illumination
- Enlarger lenses are also flat-field designs and can work well for digitizing
- Reproduction ratio affects framing, sharpness, and effective resolution
- A 1:1 ratio allows the film image to fill the sensor efficiently
- APS-C sensors require different working distances than full-frame systems
- Excessive cropping wastes sensor resolution and reduces image quality
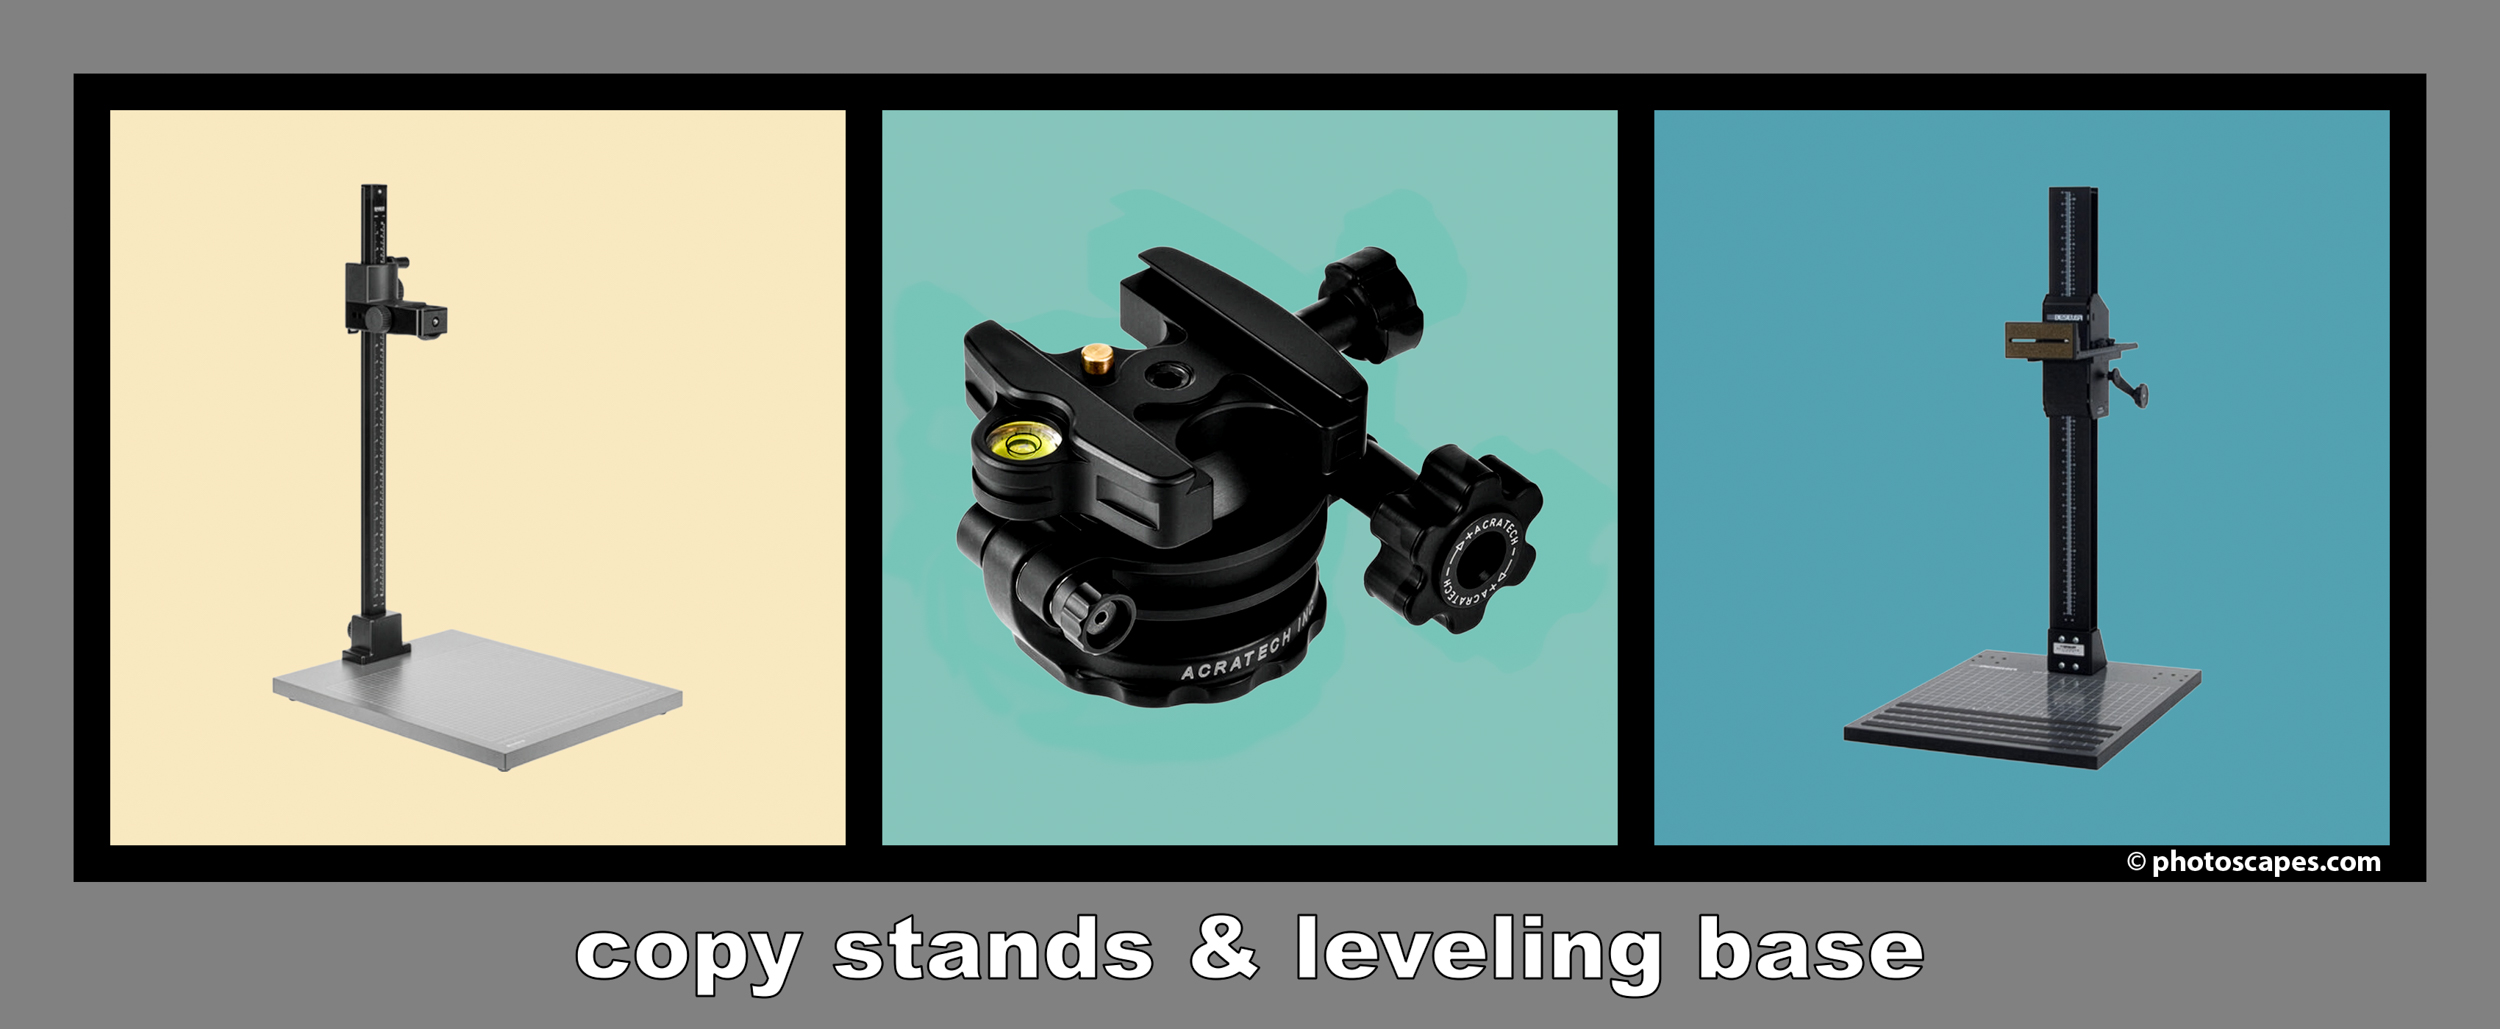
#2: Acratech Leveling Base, rated for 25 lbs
#3: Beseler CS Copy Stand, rated for 16 lbs
COPY STANDS
A copy stand is one of the most important pieces of equipment in a film digitizing setup because it provides the stability, precision, and alignment required for razor-sharp, distortion-free reproductions.
By rigidly positioning the camera directly above the film at a precise 90° angle, a good copy stand helps maintain consistent corner-to-corner sharpness while eliminating many of the vibration and alignment problems commonly encountered with tripods.
I have seen many photographers initially underestimate the importance of a copy stand, often trying various homemade solutions or improvised rigs first. While some of those setups can work reasonably well, most eventually discover that nothing compares to the stability, precision, and workflow efficiency provided by a proper copy stand.
Some photographers successfully convert older analog enlargers into copy stands, and enlargers can often be found inexpensively at garage sales, thrift stores, or auction sites. Because enlargers were originally designed for precision photographic alignment, many adapt quite well for digitizing work.
Over the years, I have used two copy stands extensively: the Beseler CS Copy Stand, designed for heavier medium format equipment, and the lighter Kaiser RS 2 XA Copy Stand, which has a payload rating of approximately 3.3 pounds. I used the Kaiser primarily with my Fujifilm X-Pro3 for film digitizing and macro work during the period when my studio was being rebuilt and the Beseler had gone into storage.
The Kaiser remains one of the most popular copy stands on the market for good reason. It is compact, lightweight, easy to use, and fully capable of handling smaller mirrorless camera systems for both digitizing and macro photography.
I rely on an Acrateck Leveling Base installed on my copy stand’s camera platform so I can fine-tune the camera’s position when leveling.
—
CORE BENEFITS OF A COPY STAND
Perfect Sensor-to-Film Alignment
To capture the fine detail and grain structure present in film, the camera sensor must remain perfectly parallel to the film plane. Even slight misalignment can create soft corners and uneven focus. A good copy stand helps maintain precise perpendicular alignment consistently.
Vibration Reduction
Digitizing film operates much like macro photography, where even the slightest vibration can soften detail and reduce effective resolution. A rigid copy stand minimizes these micro-movements far better than most tripod setups.
Precise Height Adjustment
A quality copy stand allows smooth vertical movement along the center column, making it easy to adjust framing for different film formats while keeping the camera perfectly aligned.
Faster Workflow
Once the copy stand, film holder, and light source are aligned and leveled, the entire system remains mechanically fixed. This greatly speeds up digitizing because film can be advanced frame by frame without repeatedly repositioning the camera.
- A sturdy center column that does not flex or sag
- Smooth geared height adjustment for precise framing and focusing
- An anti-rotation column design to prevent camera twisting
- Sufficient payload capacity for your camera and lens combination
- Enough working height to handle multiple film formats comfortably
In practical use, a stable copy stand often contributes more to final image quality than photographers initially realize. Even the best camera and macro lens combination cannot perform at its full potential if alignment and stability are compromised.
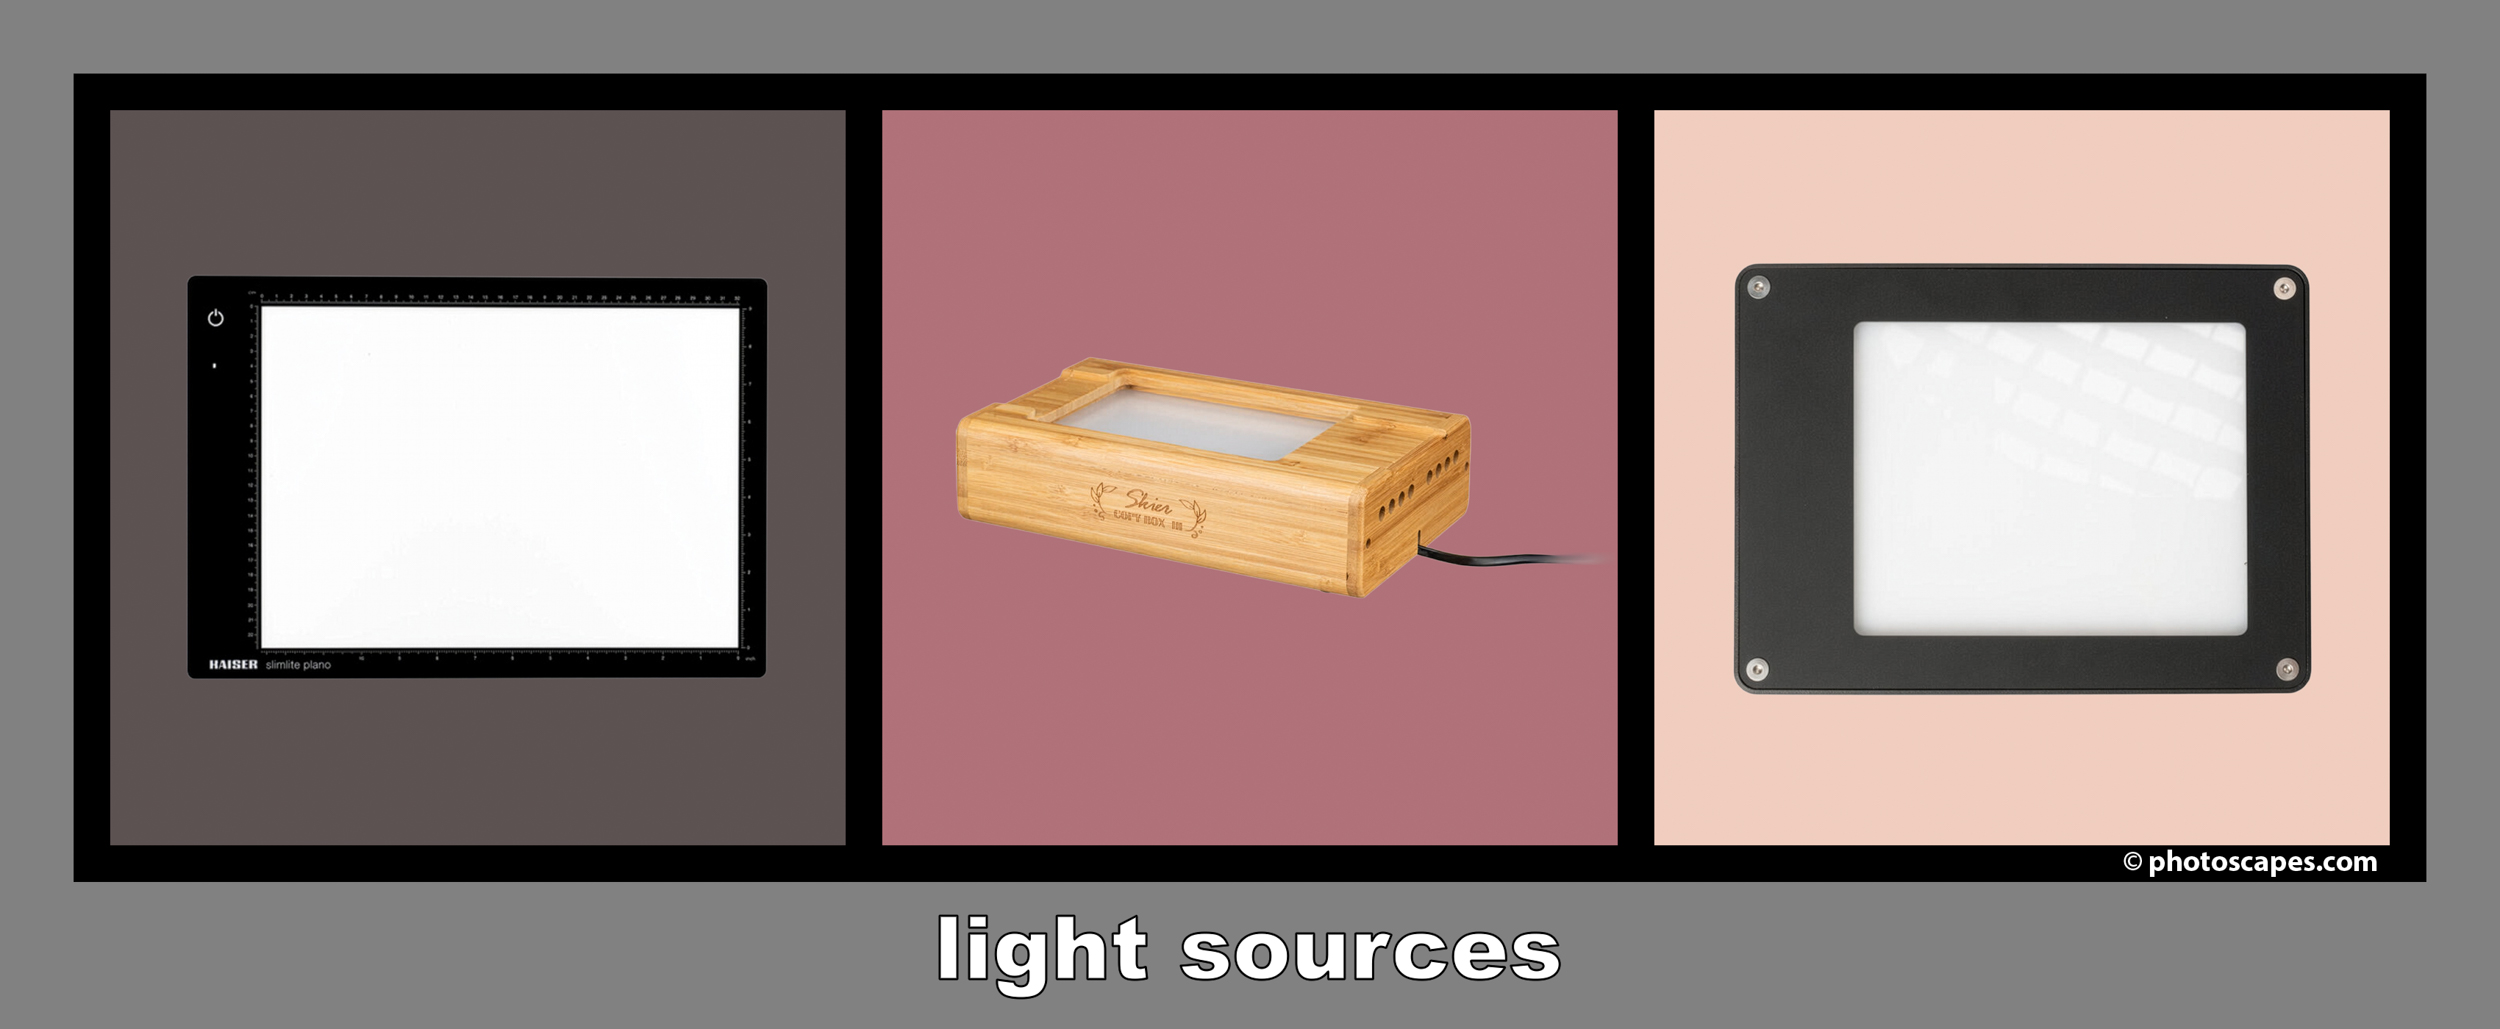
#2: Sunray Box III Panorama Lightbox (96 CRI)
#3: Negative Supply 4x5 Light Source Basic MK2 (99 CRI)
LIGHT SOURCES
The light source is one of the most critical components in a film digitizing system because every detail captured by the camera depends upon the quality, consistency, and spectral characteristics of the light passing through the film.
One of the most important considerations is color rendition. Film negatives, particularly color negatives with their characteristic orange mask, require a light source with a very high Color Rendering Index, ideally a CRI of 95 or higher. Lower quality light sources, especially inexpensive LEDs, often produce inaccurate color reproduction and unwanted color shifts that can become extremely difficult, if not impossible, to fully correct during post-processing.
Equally important is the uniformity of the light itself. The illumination must remain completely even across the entire frame of film. If the light source contains hot spots, uneven diffusion, or brightness falloff, the digitized image may show uneven exposure, color shifts, or density variations from one side of the frame to the other. A properly diffused light source helps maintain consistent illumination and cleaner reproductions.
Another factor is spectral purity. Traditional white light sources emit a broad spectrum of light across the visible range. While this works reasonably well for many digitizing setups, higher-end systems sometimes use narrowband RGB light sources that emit very specific wavelengths corresponding more precisely to the dye layers found in color film. This can improve color separation and produce cleaner, more accurate digital captures, especially with difficult color negative films.
Heat management is also important. Film is sensitive to heat, and older incandescent or halogen light sources can generate enough heat to warp, buckle, or even damage film during prolonged use. Modern LED panels and balanced strobe systems generate far less heat and are considerably safer for long digitizing sessions.
In practical terms, the light source influences nearly every aspect of the final result, including color accuracy, tonal consistency, contrast, and overall image quality. Even an excellent camera and macro lens combination cannot fully compensate for poor illumination.
- Anti-Newton Glass: If your film holder uses glass to flatten the film, make sure it uses anti-Newton or anti-reflective glass. Standard glass can create interference patterns known as Newton rings, which appear as distracting circular or rainbow-like artifacts in the digitized image.
- Capture in RAW Format: Always photograph film in RAW format rather than JPEG. RAW files preserve the maximum dynamic range and color information captured by the sensor, providing far greater flexibility during post-processing. This becomes especially important when adjusting white balance, recovering highlights and shadows, or converting negatives using software such as Negative Lab Pro or Adobe Lightroom.
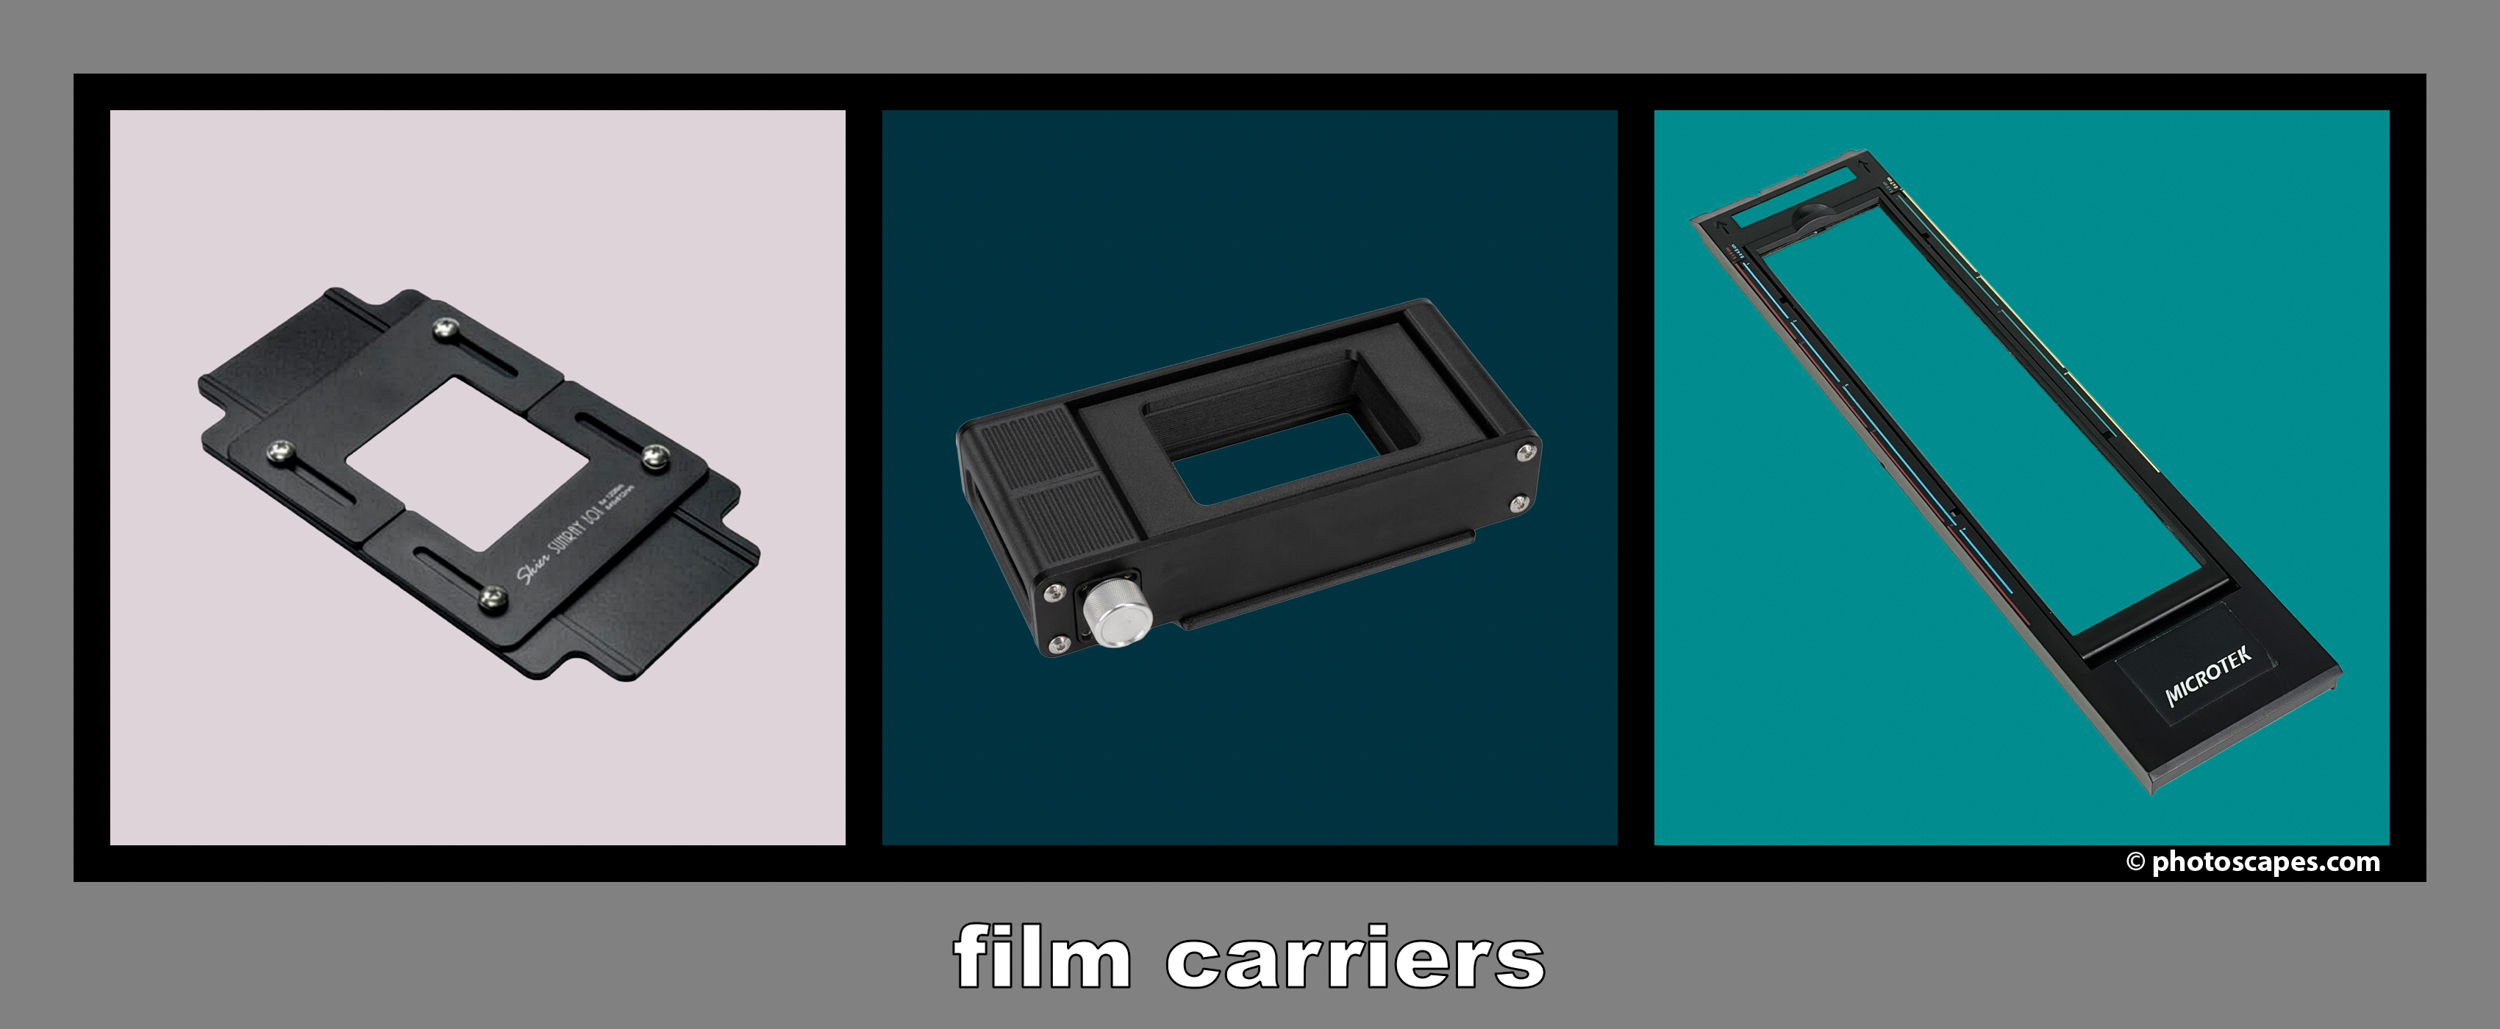
#2: Negative Supply 135, 120 (shown), 4x5
#3: Microtek ANR 120 carrier used for 6x17 negatives
FILM CARRIERS
Film carriers are one of the most critical components in a film digitizing setup alongside the macro lens itself. A quality carrier system keeps the film perfectly flat for maximum edge-to-edge sharpness, maintains accurate sensor-to-film alignment, isolates the frame from stray light, and allows the film to advance quickly without repeatedly handling the fragile emulsion surface.
When purchasing a light source, it is also important to consider whether the manufacturer offers film carriers specifically designed for that light source. Systems designed to work together generally provide better alignment, smoother workflow integration, and more consistent results.
When I began my initial journey into film digitization, I chose the Skier Sunray Copy Box system. It included a CRI 98 light source along with both 35mm and 120 film carriers. The carrier system supported formats ranging from 35mm up to 6×9, including everything in between. Mounted slides could also be accommodated simply by reversing the carriers.
Over time, the second and third generations of the Sunray system introduced several improvements, including a three-stage power setting for the light source, a dedicated 4×5 film carrier, and an updated 120 carrier capable of handling 6×12 negatives.
For my 6×17 panoramic film, I use a Microtek film holder originally designed for a scanner and place it on top of a Kaiser Slimlite Plano Light Box. Prior to the Sunray 4×5 carrier becoming available, I used a traditional 4×5 enlarger carrier positioned on the Kaiser light box for sheet film digitizing.
For contact sheets, I still use the Kaiser light box today. I place my cut negatives into archival storage pages from Print File and then lay a sheet of glass over the page to flatten the film. It remains a simple and effective solution for viewing negatives and maintaining visual references inside my Adobe Lightroom catalog.
In 2025, I invested in the Negative Supply system primarily because of its 120 film carrier workflow. I prefer splicing my 120 rolls together to create a much faster digitizing process, and the ability to smoothly advance the film through the carrier while maintaining excellent film flatness is a feature I have grown to appreciate tremendously. Since I tend to shoot more 120 film than any other format, workflow speed matters.
Although Negative Supply does not currently offer dedicated 6×12 or 6×17 carriers, digitizing those larger panoramic formats in sections has worked perfectly well for my needs.
Another feature I particularly enjoy is their full-frame 120 carrier designed for cut film. Their CRI 99 light source also runs significantly cooler than the Skier Sunray Copy Box system did. Over time, heat from the Sunray became a concern because prolonged use could cause film to curl unless the light source was periodically turned off.
Overall, I have been very happy with the Negative Supply system. It is certainly expensive, but at this point I have no plans to move away from it.
A quality film carrier system directly affects sharpness, alignment, contrast, consistency, and workflow speed. Even slight film curl can throw portions of the image out of focus because macro digitizing operates with extremely shallow depth of field. Maintaining proper film flatness and precise alignment is critical for obtaining consistent corner-to-corner sharpness.
Good carriers also help mask stray light surrounding the film frame, reducing flare and preserving stronger contrast and cleaner blacks. Finally, premium carrier systems dramatically improve efficiency by allowing film to advance smoothly frame by frame, eliminating much of the repetitive handling and setup associated with simpler light table methods.
- Helps keep the film perfectly parallel to the camera sensor
- Reduces corner softness and alignment problems
- Masks stray light to preserve contrast and deep blacks
- Minimizes flare and internal reflections
- Speeds up digitizing workflow significantly
- Allows smoother frame-to-frame film advancement
- Provides more consistent and repeatable results
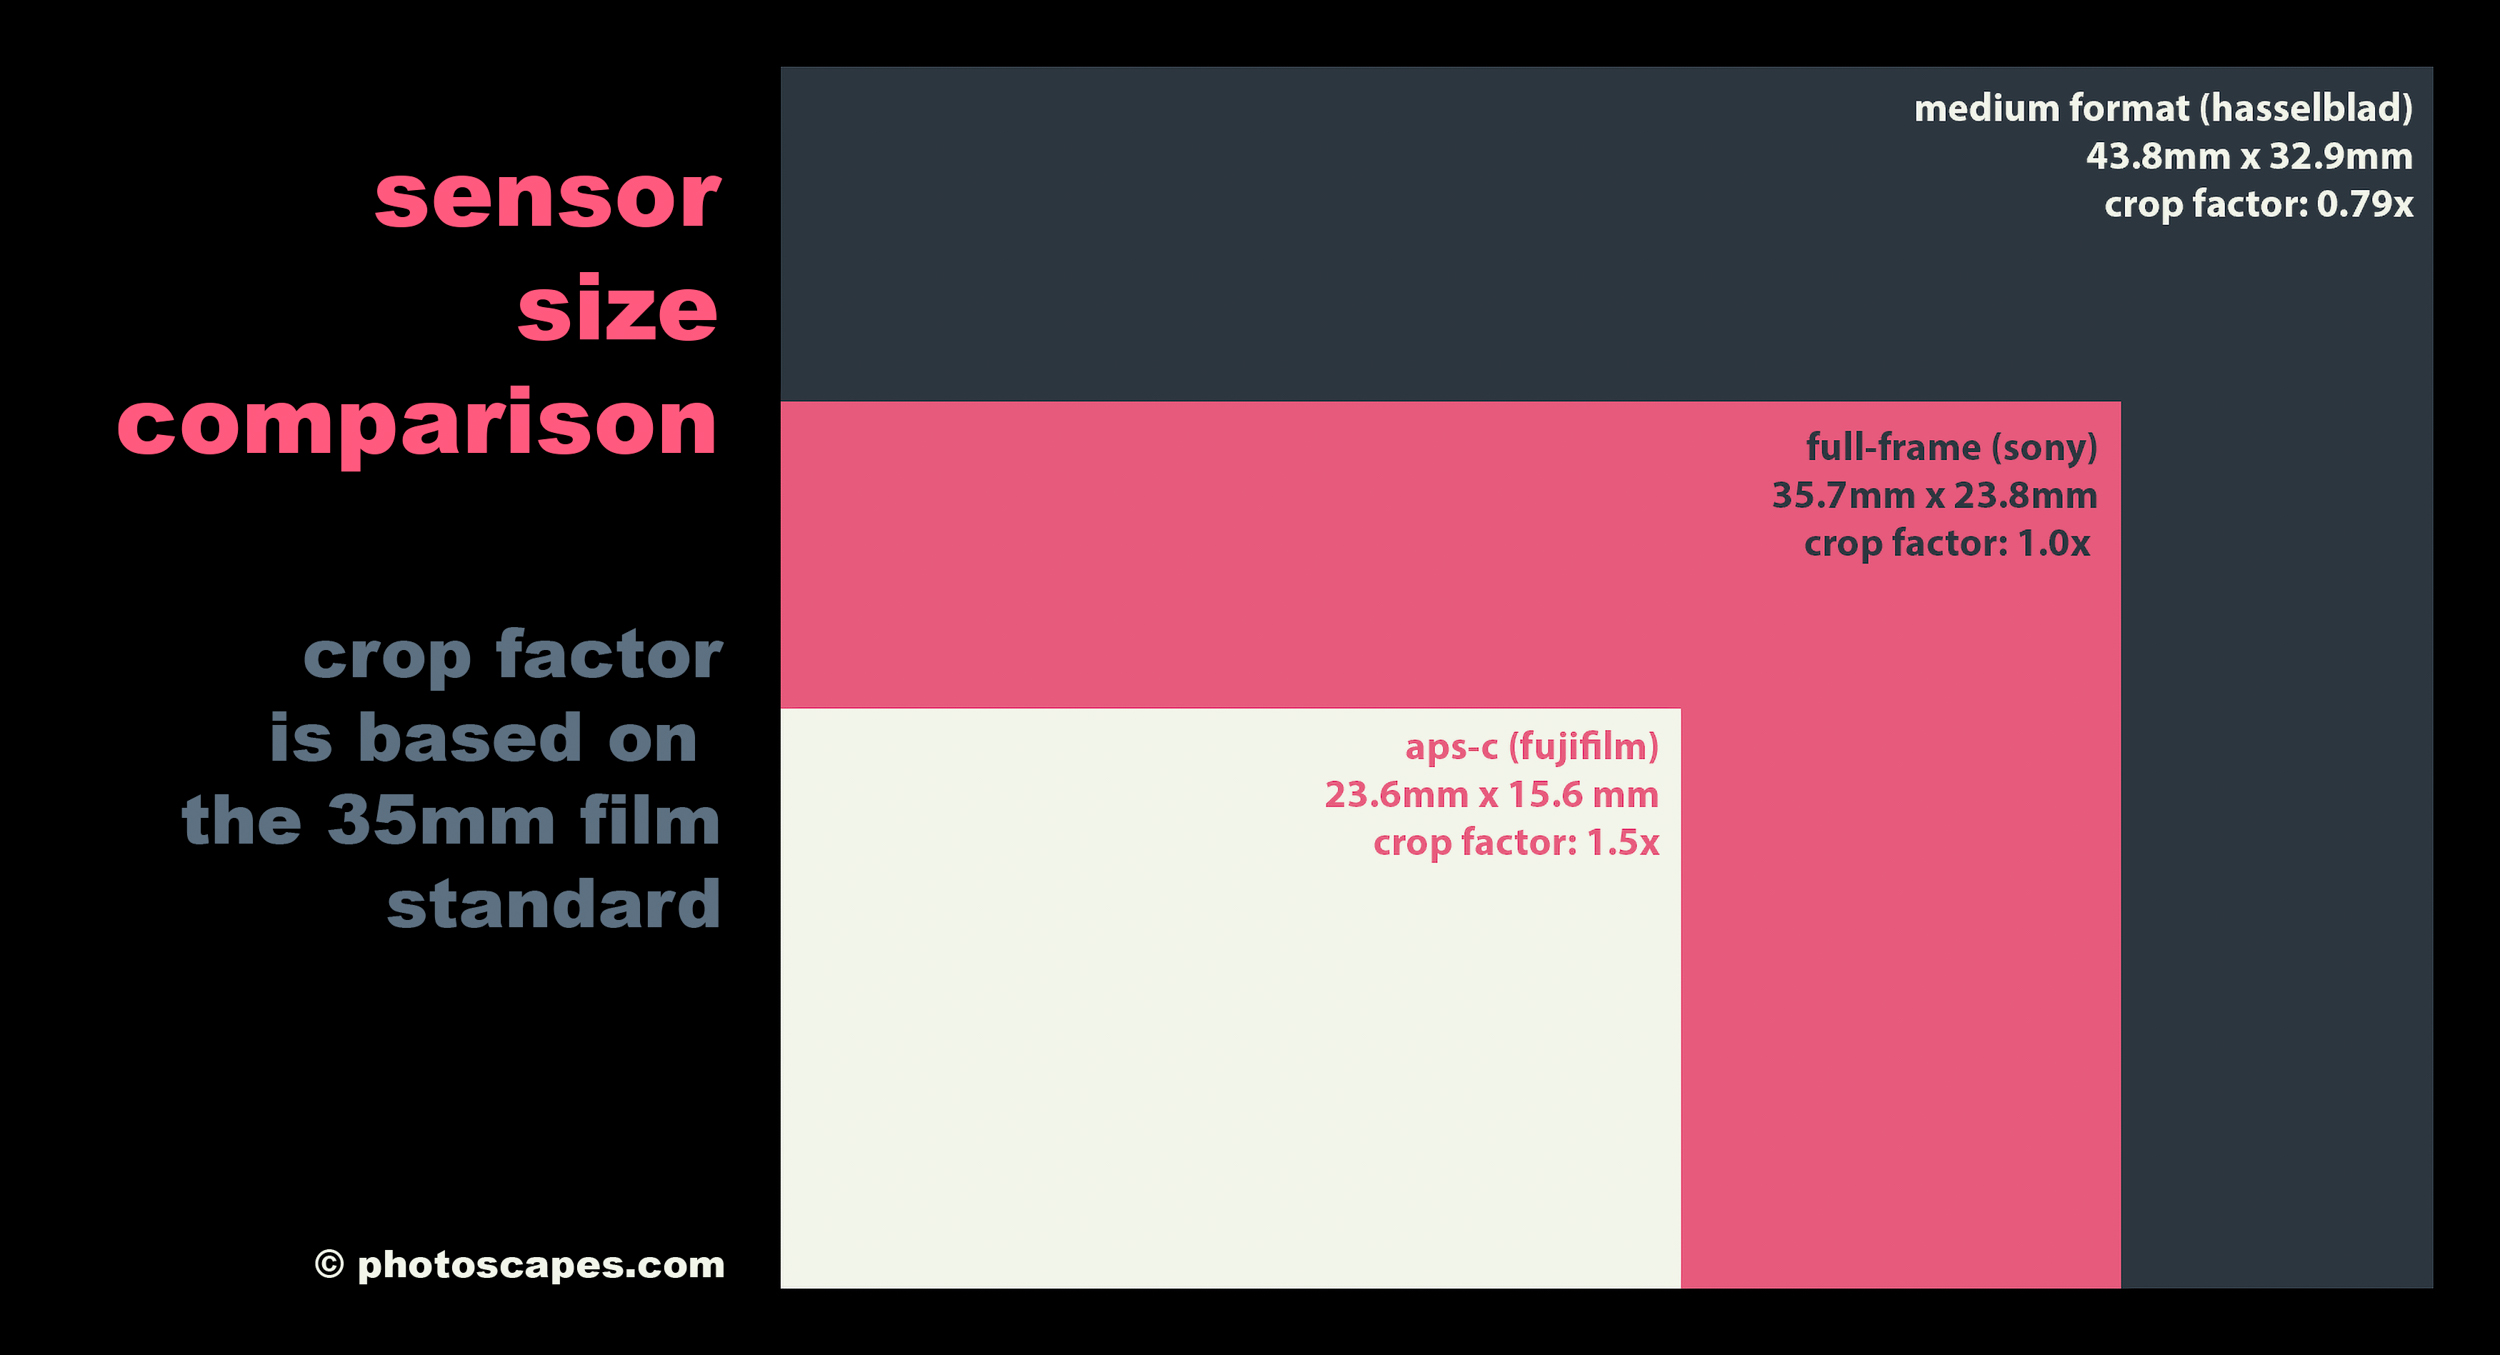
- Full-Frame: Sony A7R IVA (61mp) current
- Medium Format: Phase One P45, Hasselblad CFV 50c I/II (39/50mp)
Illustration Note: The graphic above is simplified for clarity. Sensor proportions and relative size relationships are accurate, but the sensors are not rendered at their exact physical scale.
MEDIUM FORMAT VS FULL FRAME VS APS-C
What follows comes entirely from my own experience and evolving workflow over the years.
I initially began digitizing film in 2012 using a Phase One P45 digital back tethered to a MacBook. At the time, it was one of the best alternatives available for achieving extremely high-quality film reproductions, but it was not an easy or particularly streamlined process.
My setup consisted of an ALPA 12 TC camera body combined with extension adapters and a Schneider Apo-Digitar 120mm f/5.6 Macro lens. While the image quality was excellent, the overall workflow quickly became cumbersome. Things improved considerably once the Hasselblad CFV-50c digital back arrived with Live View focusing, which made critical alignment and focusing much more practical.
Then, in 2022, a major weather event severely damaged my studio. Much of my equipment had to go into storage while the space was rebuilt, a process that lasted nearly a year. During those months, I simplified everything and digitized my film at the kitchen table using a lightweight setup built around the Fujifilm X-Pro3, the Zeiss Touit 50mm f/2.8 Macro lens, and a Kaiser RS 2 XA Copy Stand.
That experience turned out to be surprisingly enlightening.
The ability to use autofocus completely changed my perspective on film digitizing. The process became faster, easier, and honestly more enjoyable. I stayed with the APS-C format for several years and thoroughly enjoyed the workflow. For most uses, the image quality proved more than sufficient.
Eventually, however, there were a few situations where I needed to crop heavily into the film capture, and at that point I began feeling limited by the available resolution.
In 2025, I moved to the Sony A7R IVA paired with the Sony FE 90mm f/2.8 Macro G OSS lens specifically for digitizing film. At this stage, I personally prefer autofocus combined with a sensor resolution of at least 50 megapixels, giving me additional cropping flexibility without sacrificing image quality.
That said, there is still very much a place for medium format systems in film digitization, especially for photographers, museums, and archival institutions seeking the highest possible quality and reproduction accuracy. For those interested in pursuing that level of workflow seriously, I would strongly recommend exploring Phase One Cultural Heritage & Archival Solutions.
In the end, the “best” format often depends less on theoretical image quality and more on finding a workflow that is efficient, reliable, and enjoyable enough that you will actually continue digitizing your film consistently.
- Live View focusing greatly improved workflow and precision
- Autofocus macro lenses simplified the digitizing process considerably
- APS-C cameras can produce excellent digitized film files
- High-resolution full-frame cameras provide better cropping flexibility
- The Sony A7R IVA and Sony FE 90mm f/2.8 Macro G OSS became my preferred digitizing setup
- Medium format systems still excel for archival and museum-quality reproduction
- Workflow efficiency is just as important as maximum image quality