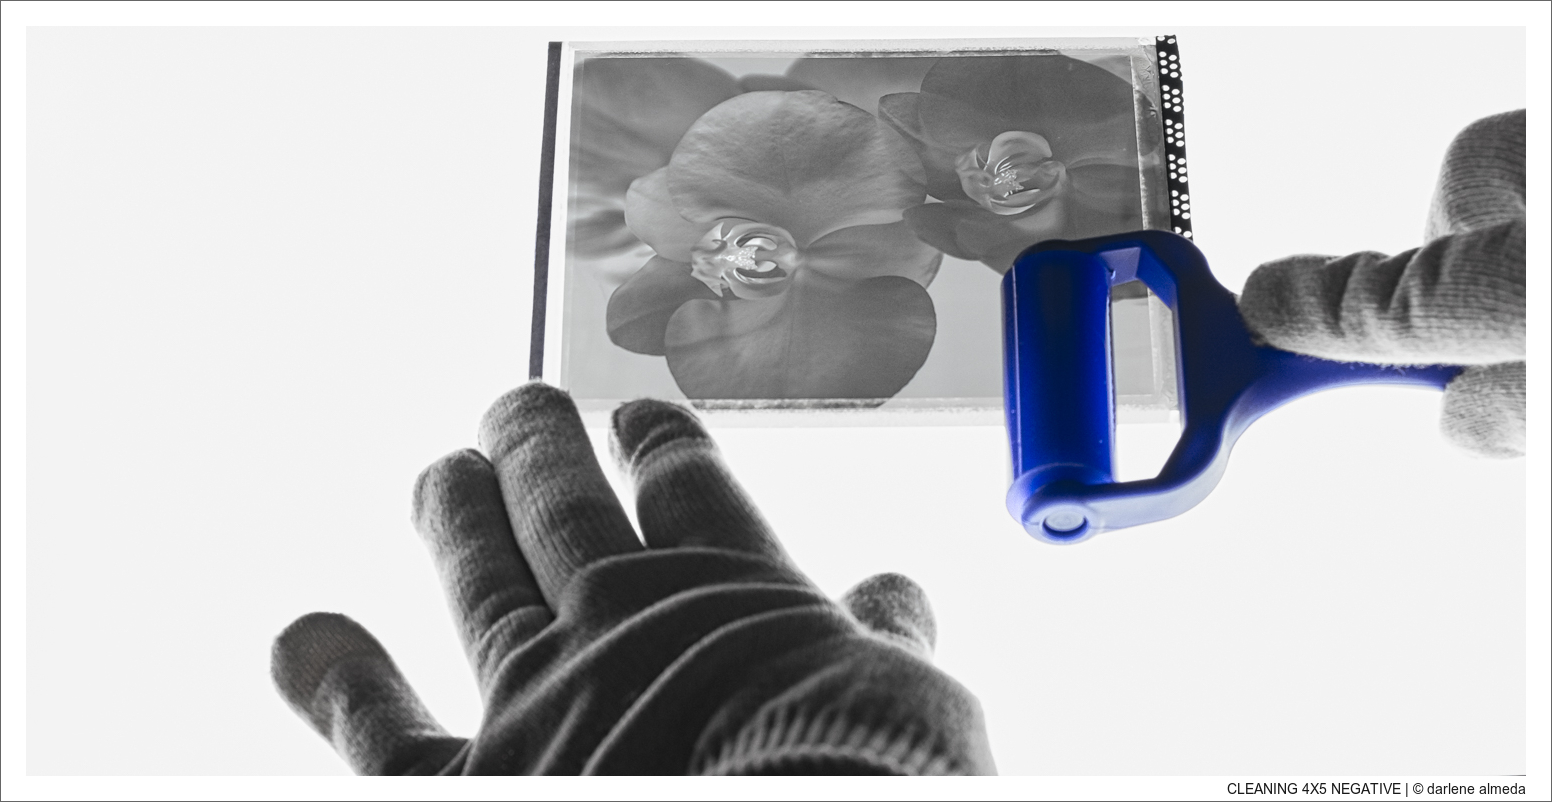
Cleaning the Non-Emulsion Side of a 4×5 Negative
Before I begin, please accept my apologies for not finishing this article sooner. When the pandemic happened upon us all, I had already started to write this article, but my attention was directed elsewhere. With that being said, I sincerely hope you and your family are safe and in good health. In Part 1, I talk about the tools I use when digitizing film. They are: a copy stand, a light source, film holders, a leveling tool, a macro lens, and a digital camera. Now we will add capturing techniques and image processing software to our list of tools.
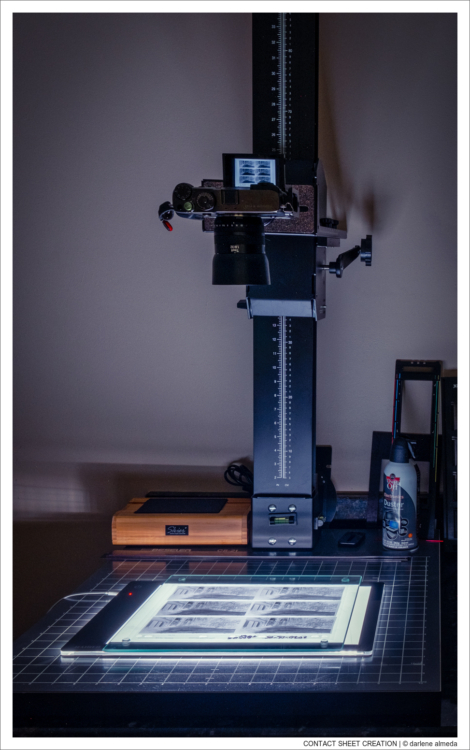
Digitizing a Print File Page of 6×12 Negatives for Contact Sheet Creation
BEGINNING AT THE CAPTURING STAGE
I perform several tasks while creating image files, including bracketing and blending exposures, as well as slicing and stitching larger film sizes. Bracketing may not always be necessary, but with the convenience a digital camera brings to this type of task, it cannot hurt.
I bracket everything I shoot on a copy stand. During culling, I decide whether a negative or slide can benefit from exposure blending. If not, the files get tossed, but I find some of my older files do benefit from bracket + blending. Stitching offers many advantages when digitizing larger film sizes that cannot be captured in a single shot. Stitching also makes it possible to have larger file sizes for huge prints. To perform these tasks well and without costing you too much time, you need a quality copy stand, a light source, film holders, and a digital camera. If your copy stand cannot shoot high and low, make minor adjustments, and hold your camera and lens without vibration, then your digitizing may suffer, and so will your energy.
When I first started digitizing my film, I naturally thought my medium format cameras were the way to go. I soon found out for myself that this is not necessarily true. It all depends on how large the end file needs to be. What I want the most from a copy stand camera besides a quality sensor is: (1) fast and reliable autofocus, (2) auto-bracketing, (3) dual card slots — I do not want to reshoot if one card fails, (4) an articulating screen, and (5) the availability of a high-quality macro lens that does not require additional attachment devices. Please remember that anything you physically attach to your camera body can cause vibration and/or a leveling issue. Please keep it simple!
Currently, I use the Fuji X-Pro3 for digitizing 90% of my film. When an order arrives for a large print, I pull out my digital medium format gear for slicing and stitching, creating an extra-large image file, but that is only 10% of the time. I find the X-Pro3 is more than adequate for my digitizing needs, and I routinely use it when creating contact sheets, files for web presentations, and files for printing. So bigger is not always better. What is more critical is technique and ensuring you have a copy station set up with the best tools available.

#1: C41 Negative
#2: After Applying White Balance Using Film Rebate
#3: After NLP Processing
#4: Finished Image for Blog Post
SOFTWARE
There are a few good software packages available for post-processing. I will not tell you what to use, but I will tell you what I use and why. I was a beta tester for Adobe Lightroom (LR) when it first appeared, and have been a Photoshop (PS) user since it hit the market in 1990. I taught PS and LR in the college classroom and to individuals for many years. I would classify myself as an expert user of these software products.
The cataloging function in LR has played an essential role in digitizing my film library and my photography in general. I have held licenses for other popular post-processing programs, but I choose to stay with LR and PS because they match my photographic needs well. I have grown as a digital photographer through the use of these products.
In 2018, I added the LR plugin, Negative Lab Pro (NLP), to help process my color negative files. I recommend NLP to LR users who want a quick and effective plugin to assist with color and black & white negatives. Another great feature of NLP is the custom metadata feature, which is placed exclusively in the LR metadata menu panel for film shooters. It allows users to add metadata such as camera, lens, film type, etc., for each image. If you, like me, have binders and binders of Print File pages filled with film and are ready to start digitizing and cataloging, do yourself a favor and check out the NLP software.
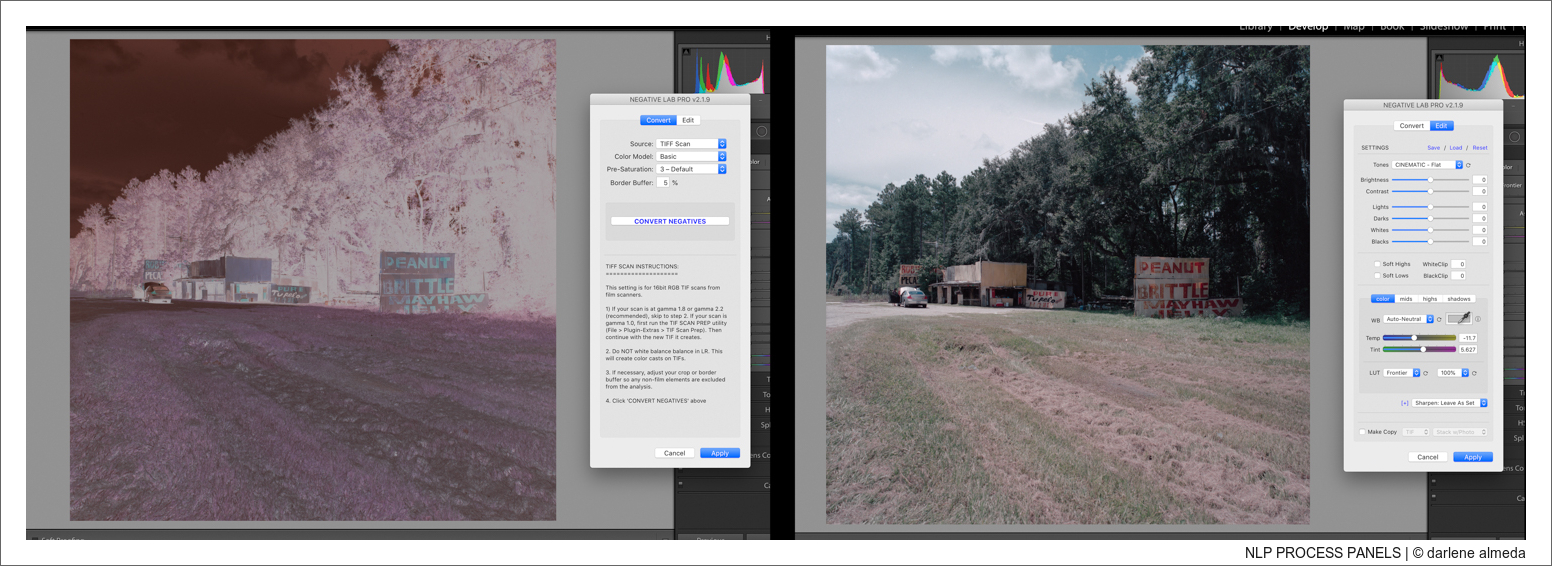
NLP Processing Panels
#1: Film after White Balancing using Film Rebate and NLP Intro Screen
#2: Film Processed for Flat Image
I use NLP for turning my negatives into positives. I do not use its post-processing features, except for selecting the best conversion for a flat file. NLP has a good following, with its owner, Nathan Johnson, available via the NLP Facebook User Group to help with technical issues.
NLP has grown to be a mature and much-loved plugin within the film community. There are NLP users who do a lot more with the post-processing tools it offers than I do. Because I spend my time processing in LR and PS, NLP produces my base editing file, and I am pleased with the results.
Please visit the NLP website if you are interested, as it offers more than I can describe. I highly recommend this plugin, and its creator is committed to the film community and is a photographer like us.

Contact Sheet Creation
CONTACT SHEET CREATION
Sometimes I need a quick contact sheet. When I do, I place the Print File page with my film on my Kaiser Lightbox with a sheet of glass on top. I then make a set of bracketed exposures and use the Negative Lab Pro plugin in LR to invert it into a positive image. Below is an example of the process. In this example, I shot film with my Cambo Wide 650 in my backyard with a sign placed at 15 feet and using my 6×12 panoramic film magazine. I was testing the hyperfocal accuracy of the lens, and the integrity of the graflok back with the magazine. After I converted the contact sheet to a positive, I added the text from my shooting notes in Photoshop as I may refer back to these test results in the future. This information stored inside my Cambo 650 folder nested in LR can easily be retrieved. The cataloging capabilities of LR are a huge advantage over other post-processing packages I have tried, and the biggest reason I stay with LR.

Bracketing Example with Finished Blended Image
BRACKETING + BLENDING EXPOSURES
By utilizing the auto-bracketing camera setting, you can automatically over- and underexpose your digital captures. I generally use an auto bracket stop sequence of [ +1, 0, -1 ] because I have found that some of my film images benefit from the varying degrees of film density available during post-processing. Not all my images require bracketing, but I have found that some of my older images, where the film was not as forgiving for a higher dynamic range, do benefit. In post, I may blend two or more exposures in LR or manually select areas for blending using PS layers. What I want is a flat base file for my master edit. We can always add contrast later, but we cannot do the reverse without penalty.
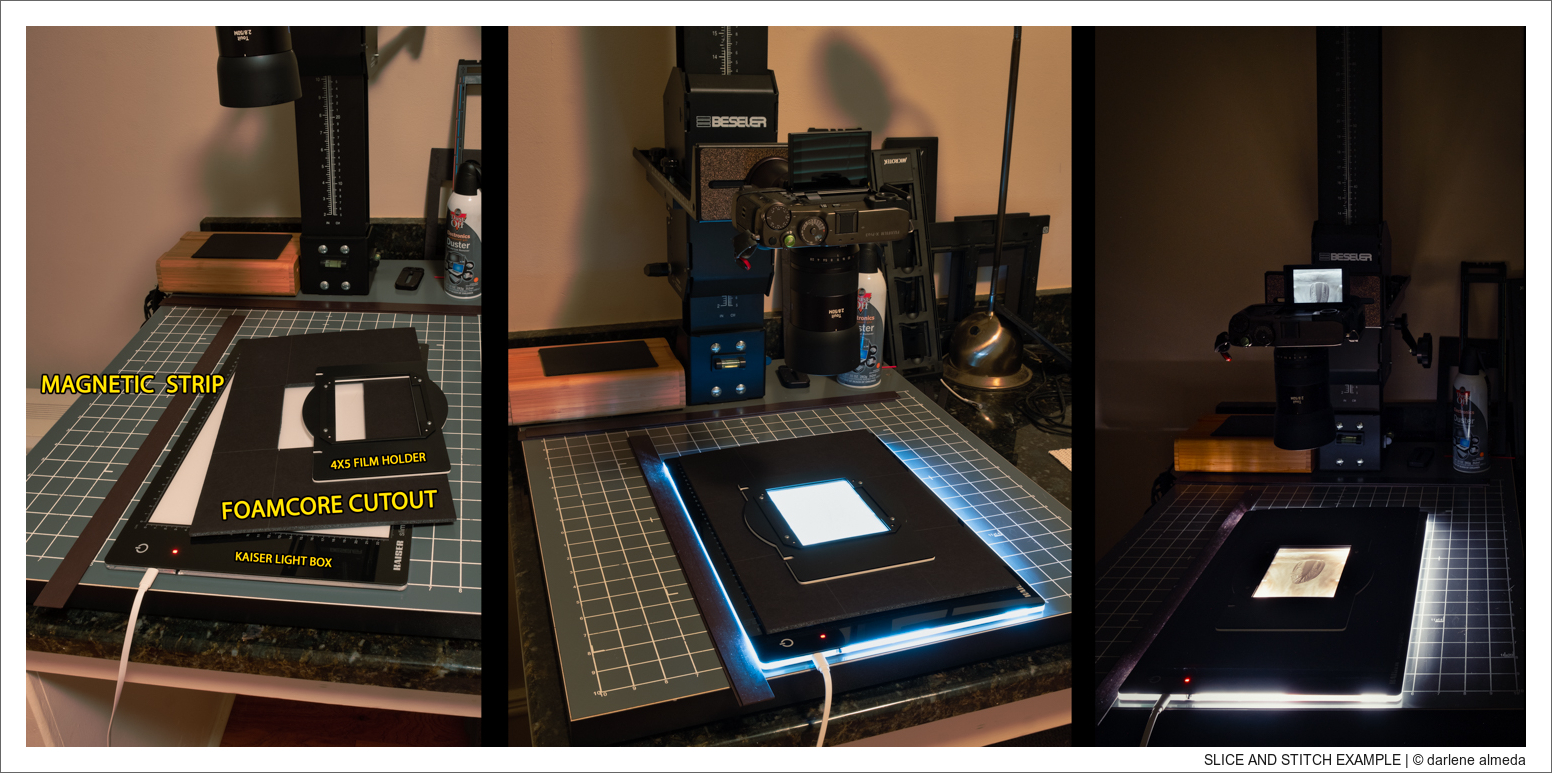
#1: Tools for Stitching 4×5 Film
#2: Lightbox will Slide Against Magnetic Strip
#3: Lights Out – Slicing 4×5 Negative
SLICING + STITCHING
I digitize my medium format and large format film using a technique similar to shooting a digital panoramic. By shooting overlapping areas or ‘slices’ of the scene and then stitching the slices together in a panoramic program allows us to make very large files. How large you ask? As large as your computer can handle. I use LR’s panoramic option and it has never failed to stitch my slices correctly. During capturing of the film slices, I use a magnetic strip on the copy stand base as a guide rail to smoothly move my light source holding my film while capturing slices. The copy stand included these magnetic strips at purchase. (Edit 9/30/2020: I upgraded the flexible magnetic strip to an aluminum magnetic bar). I find the grid painted on the base of the copy stand a big help when shooting slices.
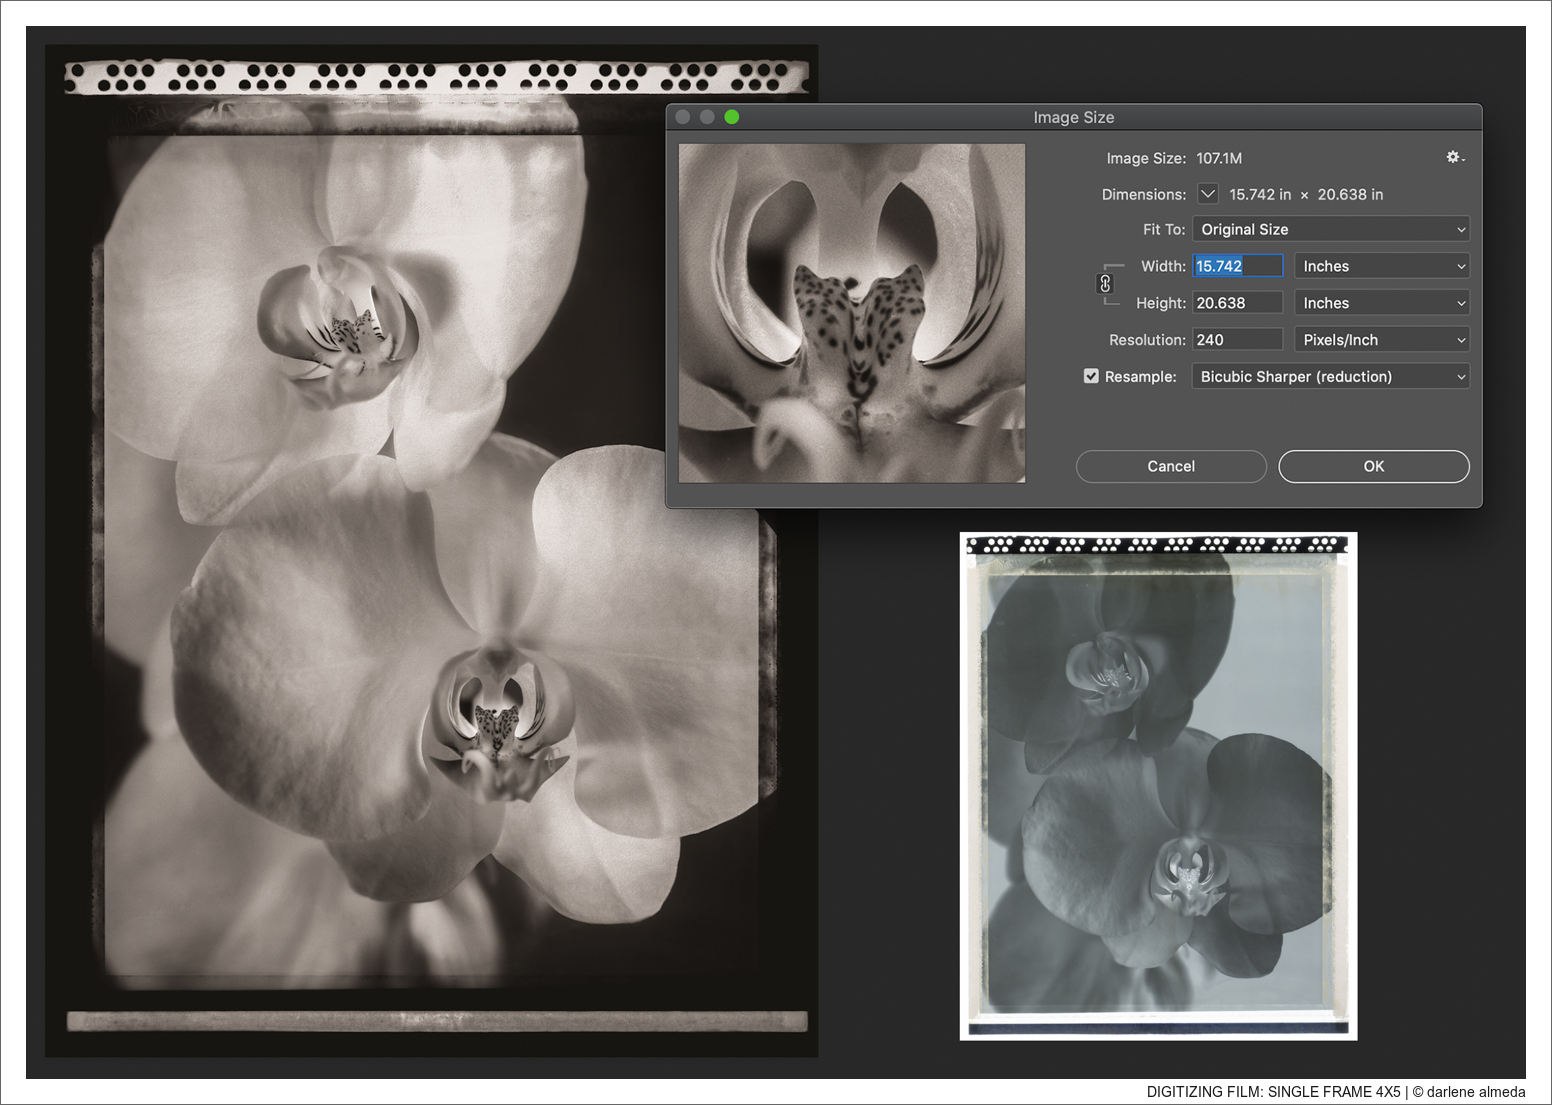
Single Shot Image of 4×5 Film = 15.742 x 20.638 Inches
on APS-C sensor
STITCHING SIZE EXAMPLE
Notice the file size differences of the 4×5 digitized film below. The single-shot file size is 107.1M (15.742 x 20.638 inches), compared to the four overlapping stitched images, which are 285.2M (25.842 x 33.488 inches). For an even larger file, we could make eight stitch images or more. I do not find an advantage to using my medium format camera setup unless I want to make a very large file with multiple stitching. Because of the quick autofocusing and ease of use of my Fujifilm X-Pro3, it just makes it a quicker task with excellent results, and that is what I want and need when digitizing my film.
In the Single Shot Image of the 4×5 Film above, the camera was raised high above the film to include all of the images in the viewfinder. Stitching is sometimes necessary when digitizing larger film sizes that cannot be covered by the lens and copy stand combination.
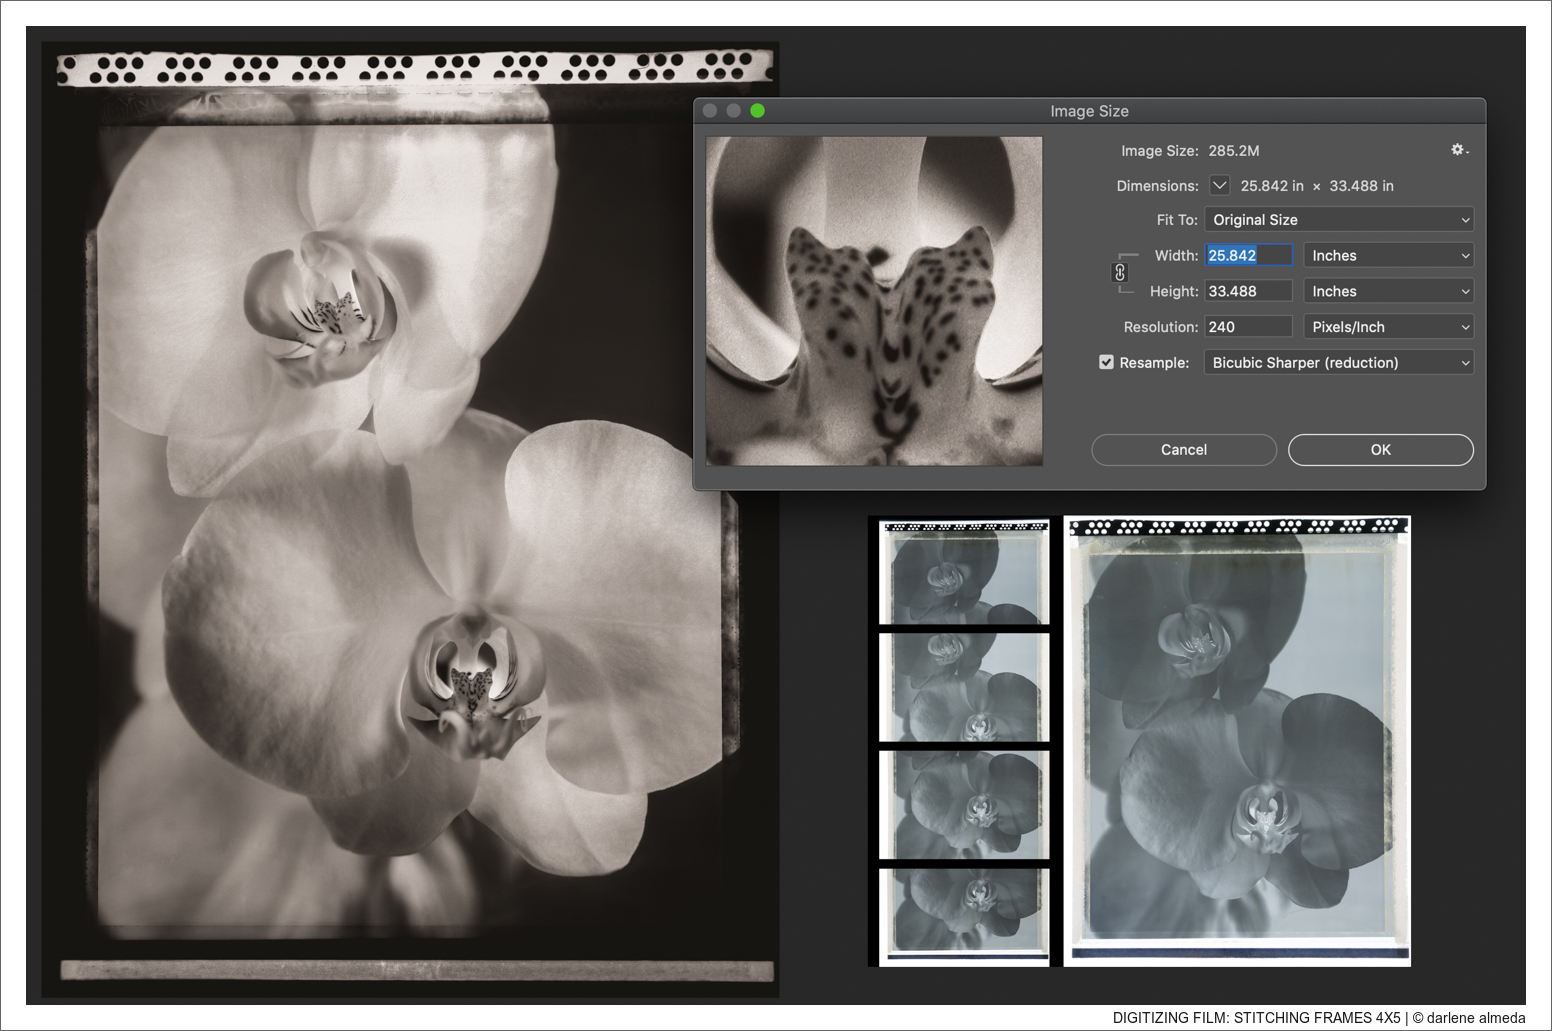
Multiple Slices Stitched of 4×5 Film = 25.842 x 33.488 Inches
on APS-C sensor
In the Stitched Image of the 4×5 Film above, I made four slices and combined them into one image using the panoramic tool in LR. Notice the amount of overlapping I chose to do. I probably could have eliminated the third frame down, but I do not like to reshoot and will instead do a bit more overkill to avoid it. Overlapping is essential for any panoramic program to align the stitched images correctly. For a much larger final file, I have two choices: (1) use my medium format digital camera and make the same number or more slices, or (2) make more than four slices with my Fuji X-Pro3. I am happy with the 285.2M file for printing purposes.

#1: ALPA TC Medium Format Digiting Kit
#2: ALPA TC Copying
#3: Tethering With Macbook Pro
#4: Fuji X-Pro3 Leveling
MY DIGITIZING WORKFLOW
Below is the sequence of steps I use when digitizing my film with my Fuji X-Pro3. Please remember your workflow will differ from mine, but this will give you a general idea of how I digitize my film during the capturing stage. When I digitize with my medium format kit, which currently includes an ALPA TC with a Schneider 120 Macro Lens and a Hasselblad CFV-50c digital back, I shoot in manual mode and tether with a MacBook Pro.
- clean off dust from the light source
- check the level of the copy stand base
- secure camera and lens to copy stand
- set camera function auto bracket: [ +1, 0, -1 ]
- set camera autofocus to a single point
- set camera function drive: 2-sec self-timer
- level the camera
- place a light source on the base under the lens and level
- dust off the film, place it in the film holder and check the flatness
- adjust light source placement for film capturing area on the camera screen
- after fine-tuning film placement, re-check leveling of camera and light source
- if slicing + stitching: place magnetic strips on copy stand base along the longest side of the light source as a guardrail
- turn on the light source, turn off ambient lights
- depress the shutter button, move the single focus point to high contrast area (if not, use film rebate text)
- trigger the shutter when focused, 2 secs past, then 3 exposures are made
- depress the shutter button, and move a single point to a different area of focus for the creation of backup files
- trigger the shutter when focused, 2 secs past, then 3 exposures are made, move to next film frame
- if slicing + stitching: move the light source along the guardrail for the next series of captures
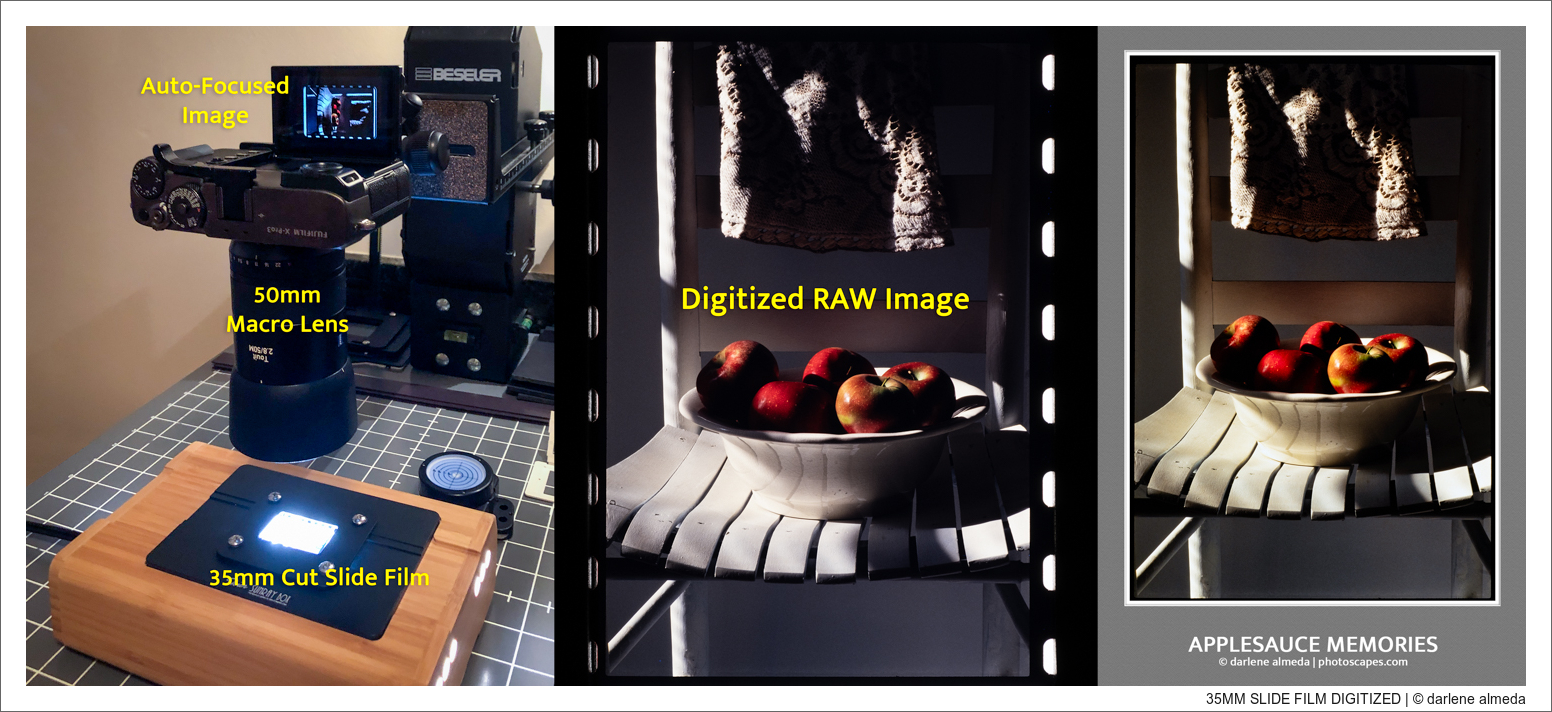
From Start to Finish, a 35mm Slide Digitized
POST-PROCESSING BEGINS
Once the film has been digitized, I upload the files into LR and look at the exposures carefully. I look for an image that might be a keeper to post-process quickly, just to see how my eyes and the capturing session went. The majority of my images are finished in LR. When a bit more heavy lifting is needed, the file goes into PS. Many YouTube videos can help you learn how to use your favorite post-processing software if you want to learn more about its capabilities. Thank you for tuning in, and best of luck with the digitizing of your film. You can see a sampling of some of my digitized images over at my portfolio page, 25 images.
