
[ MATING SEASON | Fuji XE-2 (IR 590nm) + XF 23/2 ]
In My Return to Infrared Photography Part 1 and Part 2 articles, I write about my experiences and workflow using the Sigma SD1 Merrill (SD1M) as an infrared (IR) camera. The SD1M is a simple camera to use for IR shooting because its IR blocking filter can be removed by the user. That was a few years ago, and I have since updated it to a mirrorless IR-converted camera. This article talks about why I chose the camera and lenses I use for IR photography, along with images I have made. I share my post-processing workflow and a link to a more extensive workflow video. This article is not intended to be a deep dive into IR photography, but rather an overview for the photographer seeking information and directives for further study, or who may be interested in why my black and white (BW) photography has a particular look. Let’s get started.

[ MIDNIGHT SUN | Fujifilm X-E2 (IR 590nm) + XF 14/2.8 ]
I Like IR Photography Because …
I like BW (monochrome) photography very much. However, straight digital BW photography does not interest me much, as I do not care for the look. I enjoy BW film, and shoot it every week as a hobby, always hoping for a beautiful image. IR BW interests me because it can produce interesting tones in landscape images. Color IR can look a bit weird and science fiction-like, but fine-tuning color IR in post to BW can produce pleasing results once we learn how to tweak it to our taste. In my case, I had to be selective about what IR conversion filter would work best for my BW image-making preferences. I wanted a color palette that could be tweaked to help support tones in a BW image. After much thought, I decided on the Fujifilm X-E2 camera with an IR 590nm conversion. I will explain why this was my choice next.

[ FUJIFILM XE-2 IR 590nm ] [ XF 14/2.8 & 35/2 ] [ Zeiss Touit 32/1.8 & 50M/2.8 ]
Why I Chose the Fujifilm X-E2
I wanted a mirrorless camera because they stand out from the pack for their ease of use with Infrared and Full Spectrum photography. The camera would require certain lenses because not all lenses play nice with IR photography, (more about this later), and it would need multiple batteries because I travel in a camper van for photography a few days at a time, sometimes staying off-grid. I already shoot Fujifilm APS-C cameras, so it made sense to stay with Fujifilm. My preference for a rangefinder body style led me to the X-E2. The X-E2 has an electronic viewfinder (no optical viewfinder) which is what I wanted for previewing in BW. The X-E2 checked all the right boxes for lenses, batteries (same battery as X-Pro2/X100T I was shooting), viewfinder, and body style. After searching the buy and sell sections on multiple photo forums, I located a used X-E2 in minty condition for half the price of a new one. Once I received the X-E2, it was tested and then shipped off for its IR 590nm filter conversion.

[ CABIN IN THE WOODS | Fuji XE-2 (IR 590nm) + XF 14/2.8 ]
IR Camera Conversion Process
When a student showed me the beautiful images he made with his Canon IR camera converted by Lifepixel, I decided to send Lifepixel my X-E2 for conversion. It was not expensive, and if I remember correctly, the total cost with shipping and insurance both ways was ~$300.00. The camera was back in my hands within two weeks and was very clean, with no visible signs it had been disassembled for the conversion process. I would give Lifepixel my business again, as it has now been a couple of years since the conversion and I have had no issues with the X-E2. Also included with the conversion was an online person-to-person lesson, but I did not take them up on that, so I cannot comment.
Kolari is another popular IR conversion company photographers I know have sent their cameras to for IR conversion, and I have never heard a negative comment about them. Both of these companies will convert your camera if it is listed on their site. They also offer new cameras they will convert with your filter of choice. You may be wondering why I chose to convert to Super Color IR 590nm if I primarily use the X-E2 for BW, read on.

[ TWO PINES | Fujifilm X-E2 (IR 590nm) + Zeiss 32/1.8 ]
Filter Options
There are many IR filter choices. I am not going to repeat what you can read here as I had done when I was researching my choice. I chose the Super Color IR 590nm filter because I want the ability to tweak my BW results. In BW film photography, we can use color filters to help pull certain things forward or not, giving us more design choices. Super Color IR 590nm provides more color than Standard IR 720nm, whereas Deep BW IR 830nm is a straight BW filter. If you do not want to spend a lot of time tweaking your results and want BW IR, then the Deep BW IR 830nm may be for you.
You can also have your camera converted to Full Spectrum and then apply filters to your lens for “UV, visible, IR, and everything in between depending on the filter you use.” That would be ideal, but too expensive for my budget. The cost of the filters and having to carry them, set them up, look through them, etc. is not how I want to shoot IR.
IR camera conversion is a personal preference and one only you should choose (not what another photographer says). Make your choice wisely, because once your camera is converted, its sensor will capture differently from its original state. In theory, if I installed a 665nm or 720nm or even deeper filter (must be deeper than 590nm), I could override the internal 590nm filter and bring my X-E2 back to accepting light in the visible range of the electromagnetic spectrum, but I do not need to try this to see its results. When I travel with my Fujifilm kit, my X-Pro3 is my color camera, and my X-E2 is my BW camera.

[ GARDEN GATE | Fujifilm X-E2 (IR 590nm) + XF 23/2 ]
IR Shooting & Lens Issues
When I travel for photography I take two systems: a technical camera for 4×5/120 film & digital, and my Fujifilm APS-C kit. Both kits fit into their respective 20 and 26-liter backpacks and have been shaved down over the years so my small, petite frame can carry them for a mile or two when necessary. My Fujifilm pack carries my X-Pro3, X-E2, and four lenses with space left for other necessities. I generally walk around with either the 18-55 or 50-230 zoom on my APS-C camera.
Unfortunately, the zoom lenses will not work on the X-E2 converted camera. The problem is hot spots, and this is not uncommon with IR-converted cameras. Especially susceptible are zoom and telephoto lenses. Be aware of this prior to acquiring a converted camera and look at this comprehensive list of lenses to see what you can expect from your IR camera and lenses. It was sad for me to see my zooms could not be used on the X-E2 after conversion (test shots show it all) because I enjoy shooting with them. Once I reminded myself it is ‘the landscape’ I want to capture with the X-E2, I saw I was able to use lenses I already owned which made me and my pocketbook very happy.
My X-E2 and my favorite wide lens, the XF 14/2.8 are stellar performers together. Also, the 23/2 and 35/2 are wonderful IR shooters from my experience. I sold off the 23/2 because the 14-23-35 lineup was too close together. I felt I had to let the 23/2 go, but I do feel it is an excellent choice and wish I still had it when I look at the images it produced. The Zeiss Touit 32/1.8 is a lovely lens on my X-Pro3 and can do okay on the X-E2 (see the Two Pines image above), but it has on occasion, produced hot spots, so the 32/1.8 stays at home when I travel because the 35/2 works flawlessly. The Zeiss Touit 50M/2.8 does okay if I do not go past f/8, and is a stellar performer for digitizing my film with the X-Pro3, so it stays home unless I know I will need its reach.

[ MY FUJIFILM APS-C TRAVEL KIT ]
Some Lens Advice
Because I have experienced my Zeiss 32/1.8 displaying hot spots in some images, but sometimes not, do test your lenses under different lighting conditions (clouds, sunshine, etc.) to see how they perform, and with different apertures. I read lens coatings can cause hot spots, so test your lenses before traveling so you do not get an unhappy surprise staring back at you from the middle of the frame. From my experience, some hot spots can ruin an image, while others can easily be fixed in post. When a lens has produced an image ruined because of a hot spot, it will not be used again on my IR camera.
Up next, post-processing IR and looking at an example from a location where a large drop to the road below prevented getting it all in one frame; can we use a shooting technique with IR as we use with non-IR?

[ INFRARED PROCESS STEPS EXAMPLE: Fujifilm X-E2 (590nm) + XF 23/2 ]
Post-Processing Infrared Images
Look at the image above. It shows the four stages of post-processing my IR files go through
#1 what it looked like coming out of the camera, no processing.
#2 custom white balanced, then swapping red and blue channels in Photoshop.
#3 has been tweaked for better contrast, color and white balance using Lightroom.
#4 after converting to BW using the NIK Collection software, Silver Efex Pro
When I created this series, it took less than 30 minutes from start to finish. I know, I have 30 years of experience working with graphic files and Photoshop, but Photoshop was used only for channel swapping (a very simple process), and then again for creating the graphic showing the four images.Post-processing infrared images do not have to be complicated, but it is a learned skill you will need to work at (*). Like all post-processing techniques, it takes time and experimentation to find what works for you. I use Lightroom as my primary post-processor with a few plugins. I shoot for a low contrast file and work the contrast up to where I want it to be. If you shoot a higher contrast file than what you want for your final image, you cannot undo too much of the contrast without the file suffering in some way. Learn to shoot lower contrast so you can have more control of the contrast in the final image.The four-image sequence was an automated process except for my eyes tweaking contrast, white balance, color, and saturation. It was my eyes that decided how much of this, and how much of that during the process. Just like when I prepare a meal, I decide how much of this seasoning and how much of that (or not) by taste. This is how you learn to process images, by doing it over and over again until you develop a look or a technique that is yours. I have my favorite post-processing software, and they are Lightroom, NIK Collection, and when heavy lifting or graphics need to be produced, Photoshop.Below are the three handheld frames I used to create the above example image. Is it perfect? Nope, but I created it during a teaching lesson while on location. It is shown as an example of how you can create panoramas with an IR-converted camera. This series was done quickly, handheld, and Lightroom easily matched up the pano slices because of adequate overlapping, so in this situation, it was a perfect location (chosen by the student) for a teaching session.

[ HANDHELD IR PANO EXAMPLE: Fujifilm X-E2 (590nm) + XF 23/2 ]
Lightroom IR Processing Video & More
Here is a link to Rob Shea’s YouTube video, Edit Infrared Photography in Lightroom Classic. In this video, he talks about three different ways to process IR images including channel swapping (with a link to the specific channel swapping video in the show notes). I highly recommend Rob’s videos for IR post-processing. Another IR photography video I enjoyed, Infrared Photography by Wanderlust Imagery is a rather long video (1:55:40), but watching it over a few sessions was worth my time. It is full of excellent IR images, behind-the-image shooting tips, and post-processing examples. The photographer and presenter, Timothy Moon, I found to be an exceptional artist, instructor, and presenter.

[ BABY DEER & MOTHER | Fujifilm X-E2 (IR 590nm) + XF 23/2 ]
Closing Comments
Whether you want to create IR images in color, BW, or both, it can be an enjoyable image-making process that will surprise you, and I encourage you to give it a try. Being able to have a dedicated mirrorless camera for IR photography is a blessing, especially if you have a background shooting IR film through the darkest filters you have ever seen! Mirrorless cameras have brought new ways of shooting, and not just with IR image making. IR is not what I shoot all the time, but it is a creative avenue that I enjoy having and consider to be an extension of my BW work. Even though I share color IR images from time to time, my intent when I pick up the X-E2 is to create beautiful, sometimes magical, but mostly BW images. I hope you have enjoyed this article as much as I enjoy sharing my adventures. Thank you for giving it a read, and be well.
(*) If you do not like tweaking images on a computer, you might prefer analog film photography and darkroom processing; as of this writing, IR film is available.
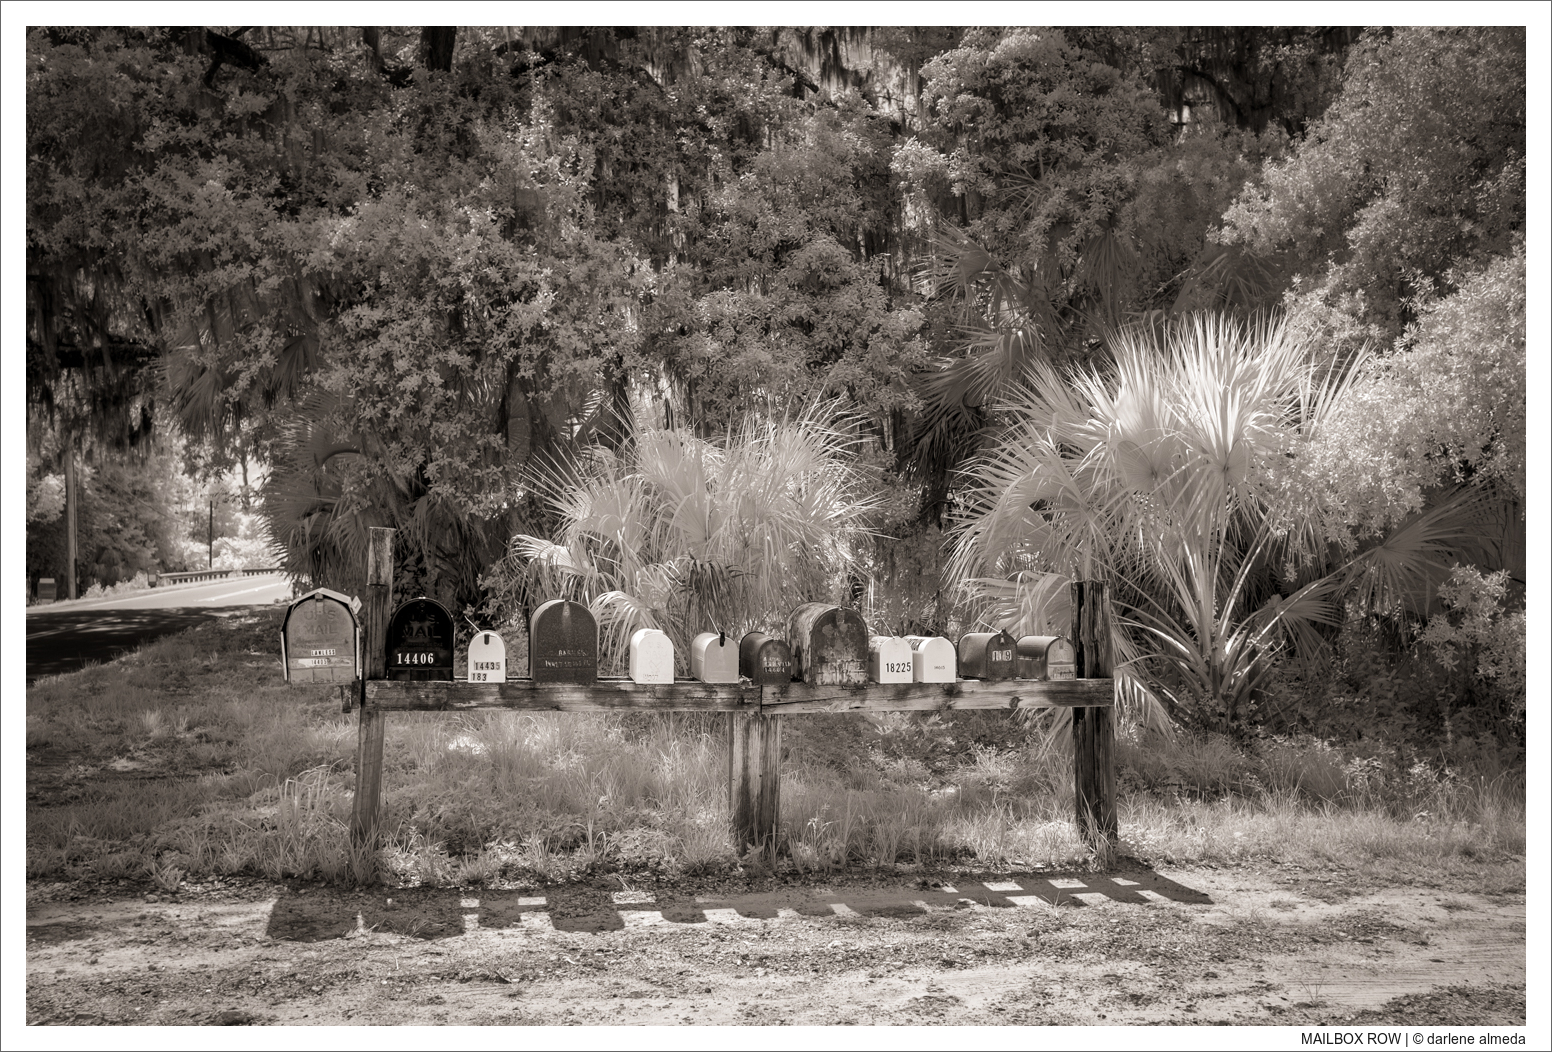
MAILBOX ROW
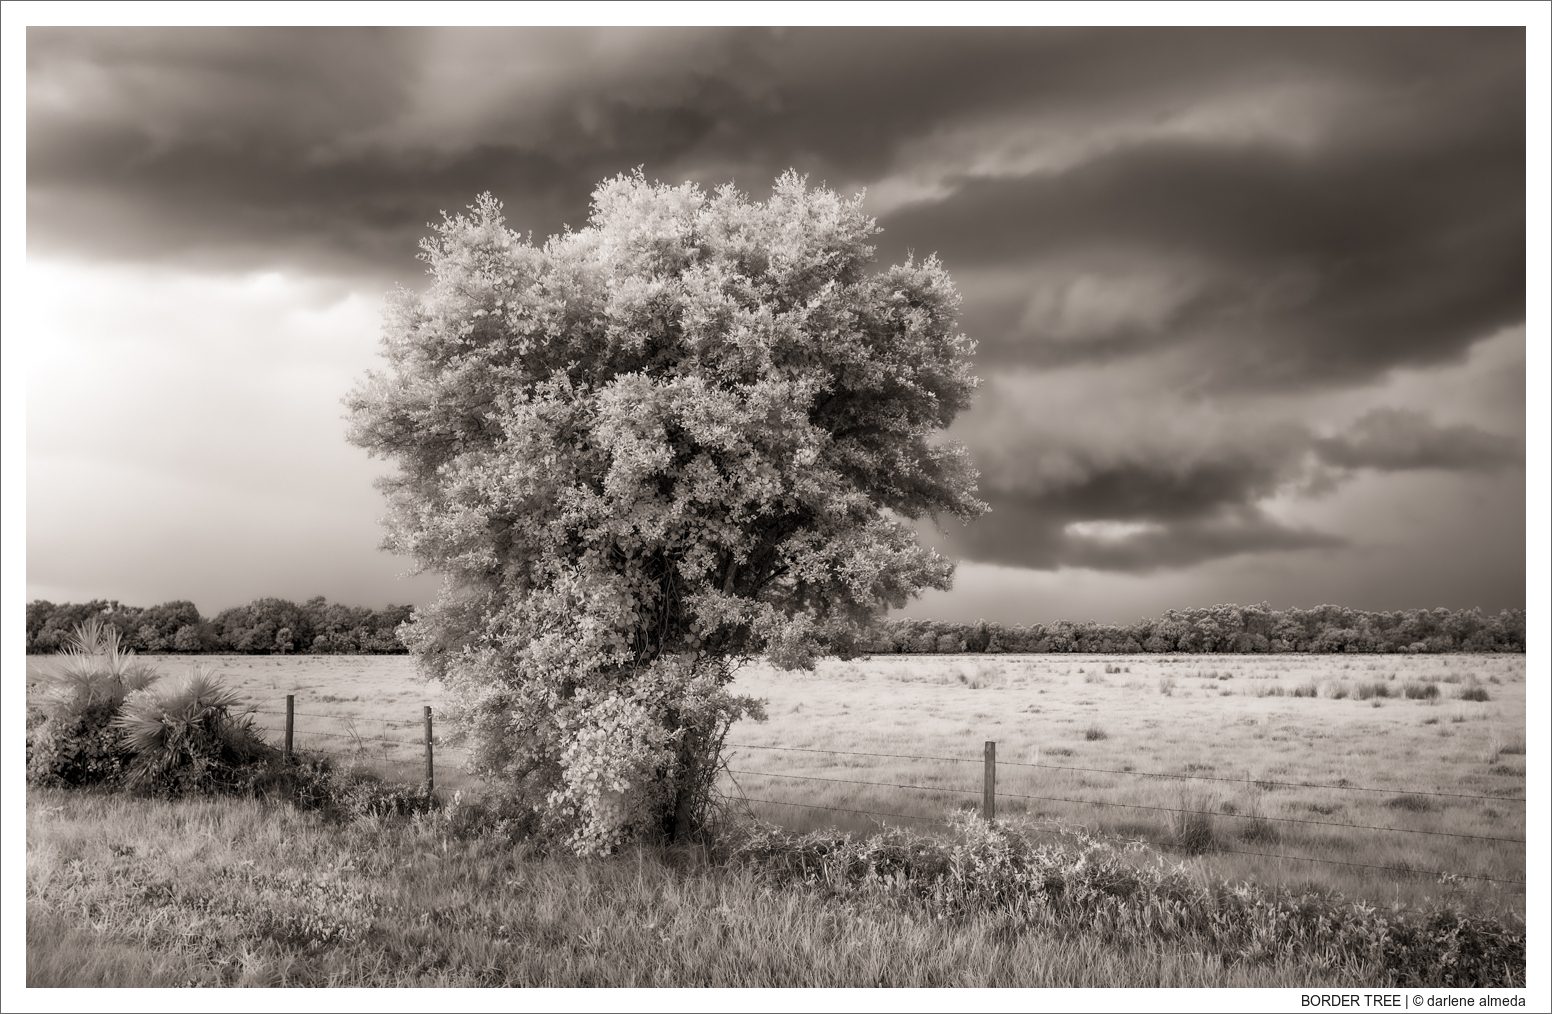
BORDER TREE
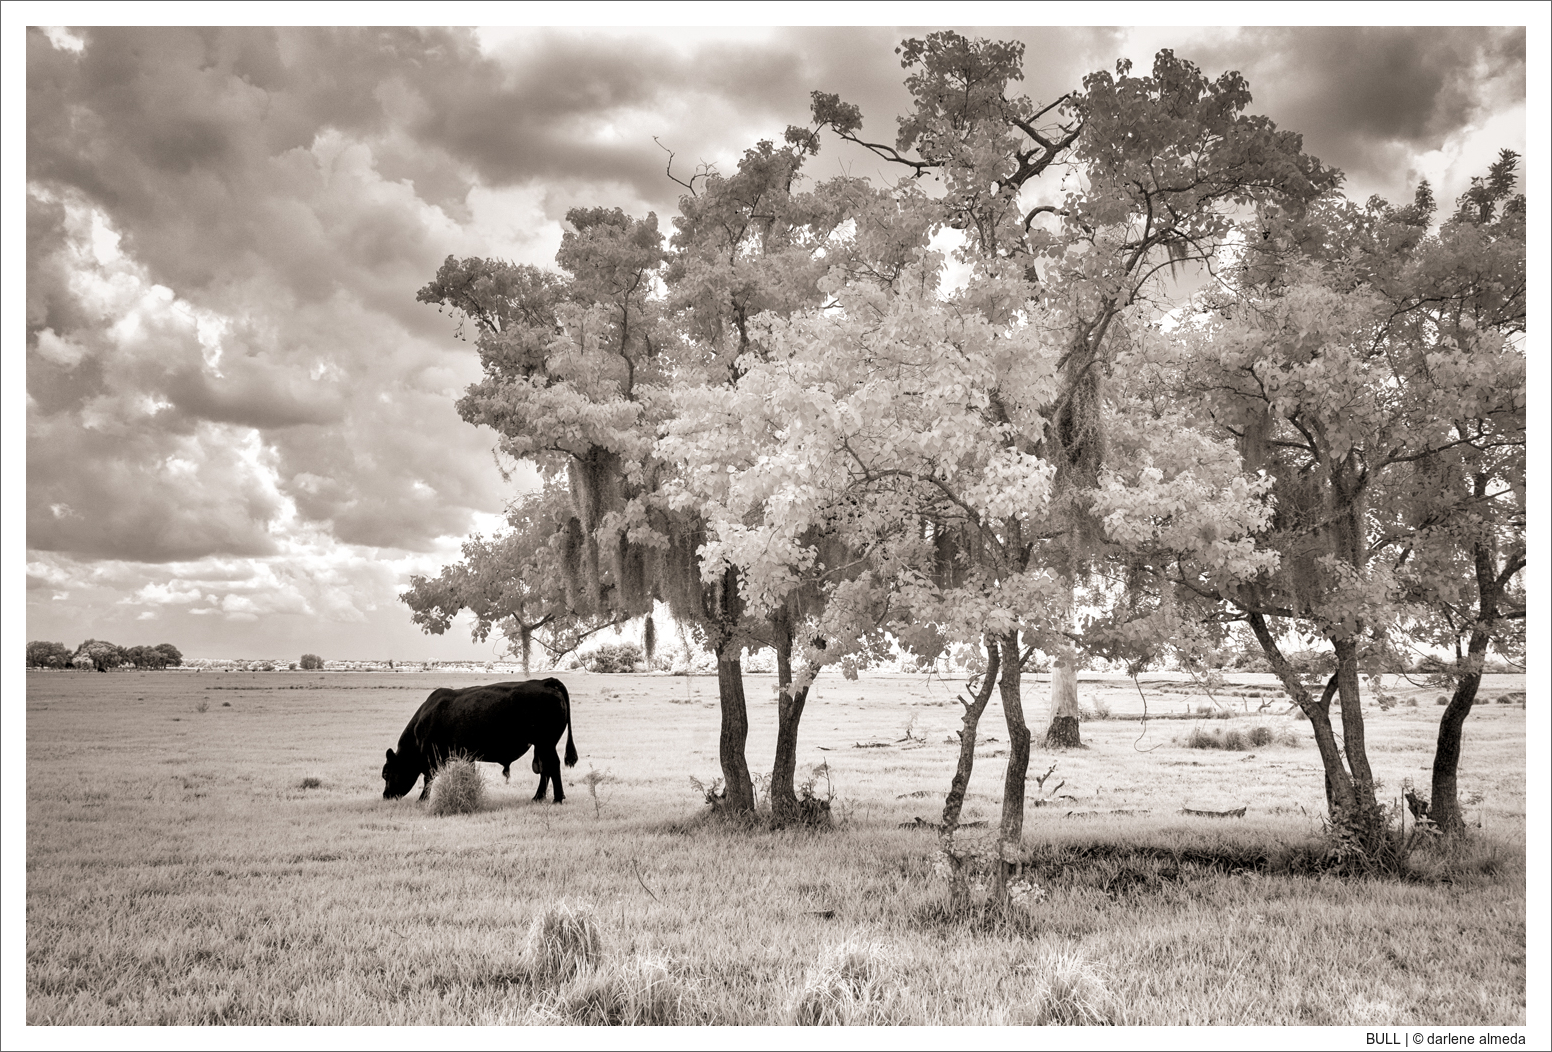
BULL
