MY DIGITIZING STATION
Explaining the tools and my digitizing process would make this post too long, so I will start with the tools I use and share my process later. The information I share about the tools I use is not meant to be a commercial for selling these products. If you choose to purchase what I share in this article, I hope it is only after you have done product research. I will not talk at great length about the specifications of a product. Still, I will include the manufacturer’s web address or contact information so you can research the exact specifications.
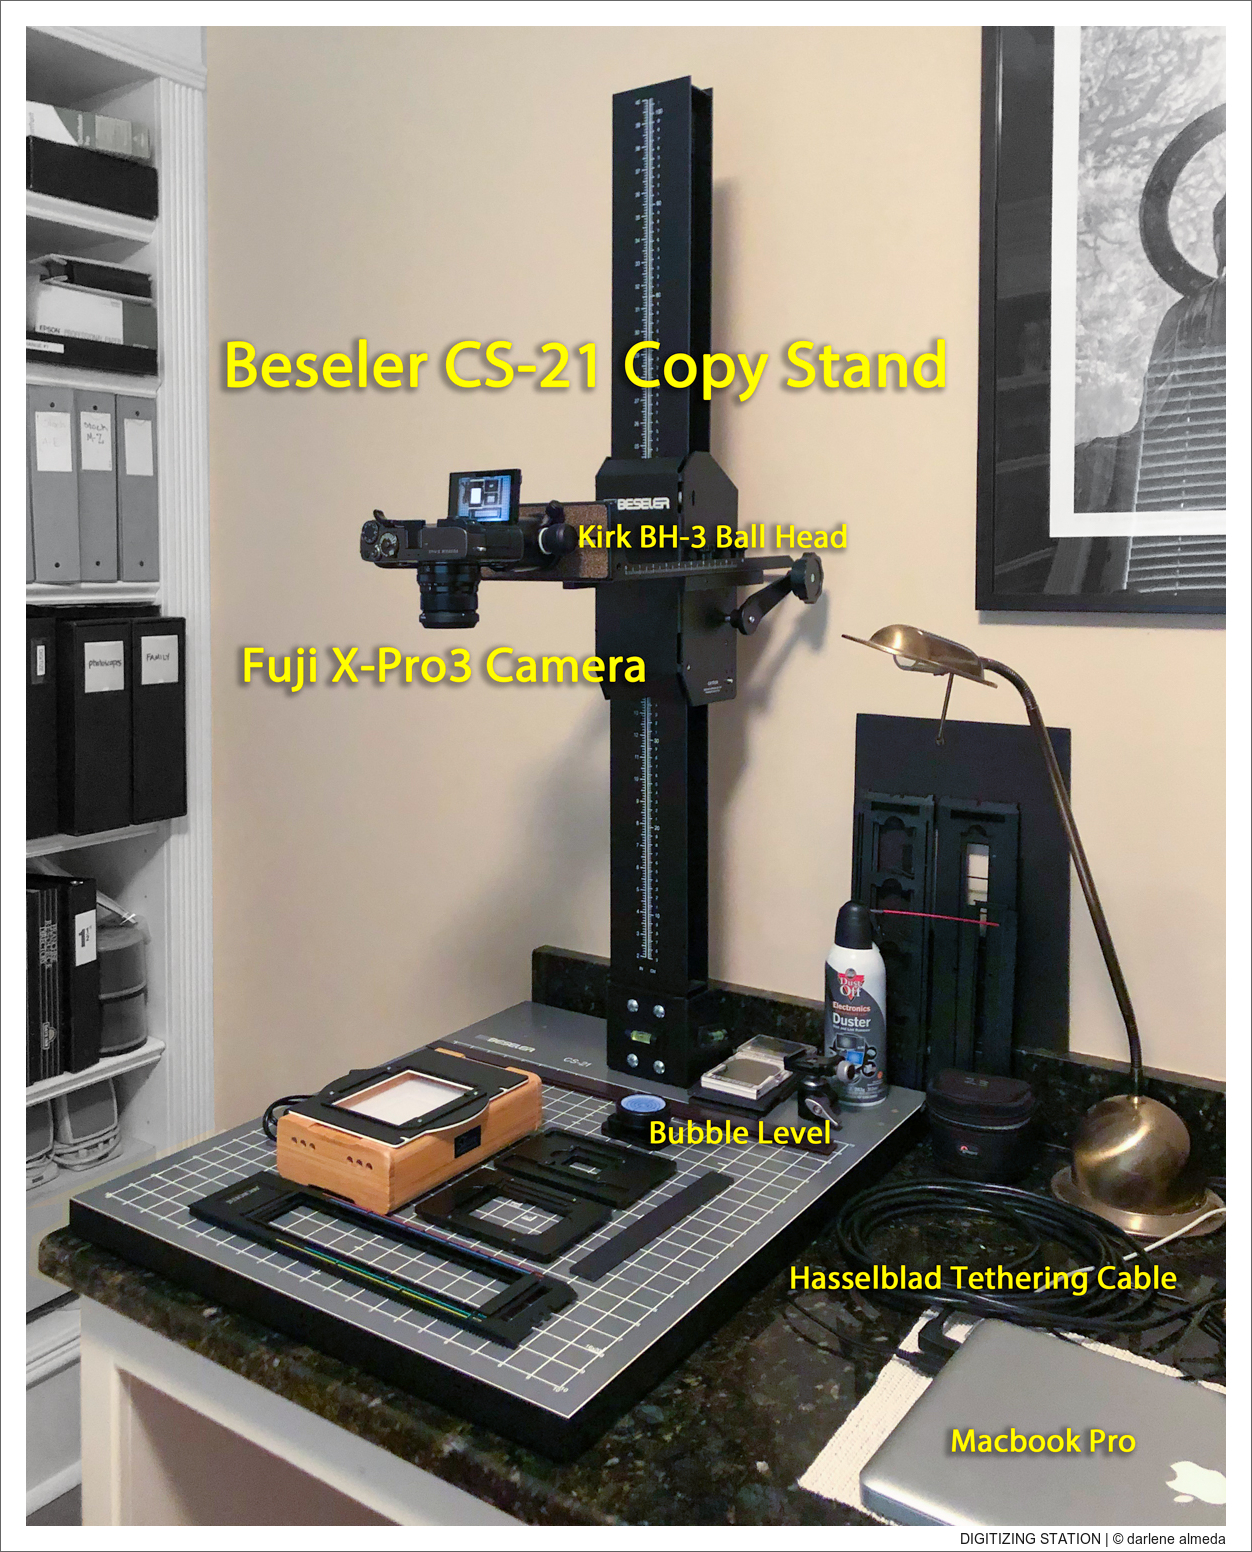
With all that said, the pictures above (and below) show what my digitizing workstation looks like. I dedicated an office in my home to preserve and catalog my film, stored in three-ring binders and Print File pages. I started storing film in this manner decades ago, and it has proven to be a successful storage solution.
The necessary equipment to digitize film includes a copy stand, a camera, a lens (a quality macro lens designed for 1:1 reproduction is best), a light source, and film holders. Depending upon your camera, a computer for tethering may or may not be necessary when digitizing. Let’s get started.
AT A GLANCE
- COPY STANDS
- BESELER CS-21 COPY STAND [image]
- HASSELBLAD FLEXBODY [image]
- CAMERAS & LENSES
- LIGHT SOURCE
- SUNRAY COPY BOX II [image]
- SUNRAY COPY BOX II
- FILM HOLDERS [image]
- FILM HOLDERS
- ADJUSTABLE FILM GATE [image]
- DIGITIZING UNCUT FILM
MY DIGITIZING STATION
COPY STANDS
Before I discuss cameras, light sources, and film holders, it is essential to understand the necessity of a quality copy stand. I have seen other photographers not prioritize this area until after they have used whatever gizmo they created, only to find that nothing compares to the stability, precision, and versatility a quality copy stand provides. Some photographers successfully converted an analog enlarger to a copy stand, and enlargers can be found at garage sales and auction sites.
I use two copy stands: the Beseler CS-21 (pictured above), which is made for medium format cameras, and a lighter copy stand with a payload of 3.3 pounds, the Kaiser RS 2 XA. I use the Kaiser with my Fujifilm X-Pro3 for digitizing film and macro work during the time my studio went through a rebuild, and the CS went into storage. The Kaiser is one of the most popular copy stands on the market. It is small, lightweight, and handled all the tasks I need it to do.
I have placed a leveling base on each copy stand to help with the squaring of the camera. On the CS-21, an Acratech Leveling Base with Quick Release Clamp has been installed, and on the Kaiser, I use a Manfrotto 338 QTVR Leveling Base. These leveling bases work well in the squaring process, which I will explain in Digitizing Film Part 2: Software, Contact Sheets, Bracketing, Stitching, Workflow.
Before adding leveling bases, I used ball heads on the copy stands, which were far from ideal. For a few years, I’ve used the Acratech leveling base on two different tripods and much prefer it over ball heads. After trying another well-known leveling base, I ultimately chose Acratech and decided to find one for the CS-21. I searched for a used one in excellent condition at a fair price—and found it! I couldn’t be happier with the switch from a ball head.
FLEXBODY + CFi 120/4 + CFV50c
CAMERAS
I digitize my film using medium-format digital backs and APS-C cameras. The digital backs I’ve worked with, in order of acquisition, are the Phase One P45, Hasselblad CFV 50c, and Hasselblad CFV II 50c (50c). For APS-C cameras, I’ve used the Fujifilm X-Pro2 and X-Pro3, and for contact sheets, the Fujifilm X100V. My initial attempt at film digitization dates back to 2012 with a Nikon D700. Still, at that time, there was very little shared online about digitizing film, so my early results were disappointing. It took another year or two of experimentation to develop my techniques, starting with the P45, which, in hindsight, was quite a challenge to use compared to what I use today.
When I initially digitized film with the P45 digital back, I had to tether it to a computer because of its lack of Live View. I brought life back to an old MacBook Pro that had collected dust for several years. After replacing the MacBook’s battery, which I purchased from Other World Computing, the old MacBook found its new home at my digitizing station. The P45 CCD sensor has a distinct color palette compared to the newer 50c, though I prefer shooting with the 50c. Its Live View and electronic shutter (no cords) make for a more seamless experience and provide the freedom from tethering. I save my files directly to an SD card, and once my digitizing session is complete, I upload everything into Lightroom on my iMac workstation in the studio. In the next post, I’ll dive into the different software and techniques I use.
UPDATE: As of 2024, I mainly prefer shooting with my X-Pro3 for its autofocus and the flexibility to produce larger files through stitching if needed. I’ll be updating this article soon, but in the meantime, you can check it out for a quick overview or visit this page for a more in-depth look at my current digitizing approach.
UPDATE: As of June 2025, I replaced my studio camera with a SONY A7 IVa 61 MP, thus using the SONY for digitizing as well.
LENSES
For digitizing film with the Fuji X-Pro3, I currently use the Zeiss Touit 2.8/50M macro lens for individual film frames and the Fujinon XF23/2 R WR for creating contact sheets. I eventually sold the XF23/2 lens after purchasing an X100V, which includes an updated version of the XF23/2 lens. When digitizing with medium format cameras, I rely on the Hasselblad 120/4 CFi Makro lens or the Schneider 120/5.6 Apo Digitar M lens for individual film frames when using an ALPA camera.
The X-Pro3 doesn’t require extension tubes when paired with the Zeiss Touit 2.8/50M lens. Medium-format cameras, however, do require extension tubes, which add bulk and weight, and necessitate manual focusing. I also own a Hasselblad 907x that integrates smoothly with the CFV 50c II digital back and offers autofocus capabilities. However, I would need to acquire the XCD 120/3.5 macro lens to utilize autofocus on the 907x, and that is not practical for me, given that I already have excellent macro lenses. Additionally, I’ve heard feedback from XCD 120/3.5 owners that autofocus often hunts, requiring manual focus anyway. One of these days, I will rent one of the XCD 120 macro lenses and test it out.
6×17 & 6×12 NEGATIVES + MULTI-FORMAT FILM HOLDER
LIGHT SOURCE
There are a few options for a light source, ranging from an inexpensive tracing lightbox to more costly alternatives. Differences appear in output levels, color temperature, and CRI (color rendering index) values, so do your homework if you want to know why one light source is more expensive or highly recommended over another.
I initially began digitizing my film with a tracing lightbox and film holders from my Microtek ArtixScan 120tf; the lightbox was not very bright, nor was the color temperature consistent. The film holders did well, but there was no option to digitize an entire uncut roll of film. I made contact sheets by digitizing my Print File pages on top of the lightbox, but as I continued to shoot film, digitizing an entire roll of 120 at one sitting was appealing before cutting it up for storage in Print File pages.
Around 2018, digitizing film using a digital camera was finally recognized as a high-quality option within the photography community. It was time for me to begin researching what other tools may be available.
UPDATE: I now roll up my processed 120 films as soon as they’re dry and store each one in individual Ziploc sandwich bags until I’m ready to digitize. During digitizing, I feed them one frame at a time through the film holder over the Sunray Copy Box, keeping the rest clean and secure until their turn. This method works great!
SUNRAY COPY BOX II + FILM HOLDERS
SKIER SUNRAY COPY BOX II/III
After some research, I found that other photographers recommended the Skier Sunray Copy Box through a Facebook group I belong to. I waited a little while because I heard there would be an updated version. When Skier announced their Sunray Copy Box II was in production, I went ahead and placed my order. Skier is located in Taiwan, and the delivery time was about six weeks. The company updated me via email about delays and delivery times. I felt doing business with Skier was a pleasant experience, and I would not hesitate to order from them again (customer service speaks LOUDLY to me).
The advantages I have gained using the Sunray Copy Box are well worth its price. Going from a 1/2 second to a 1/60 second exposure does not sound like much unless you digitize hundreds of film frames! Saving time in post-processing is always a winner, in my book. Remember the struggle of using a scanner and all the time it took to scan, and then having to mess with the color balance? Do yourself a favor and get the best light source you can afford. Whether you use a tracing lightbox or purchase a light source designed specifically for digitizing film, film holders will become an essential deciding factor. My needs extend beyond the typical 135 and 120 films. With the Sunray Copy Box, I can digitize all my film formats using a scanner and enlarger film holders.
UPDATE: I upgraded to the Copy Box III so that I could digitize 6×12 and 4×5 film with their new film frames.
FILM HOLDERS REVERSED
FILM HOLDERS
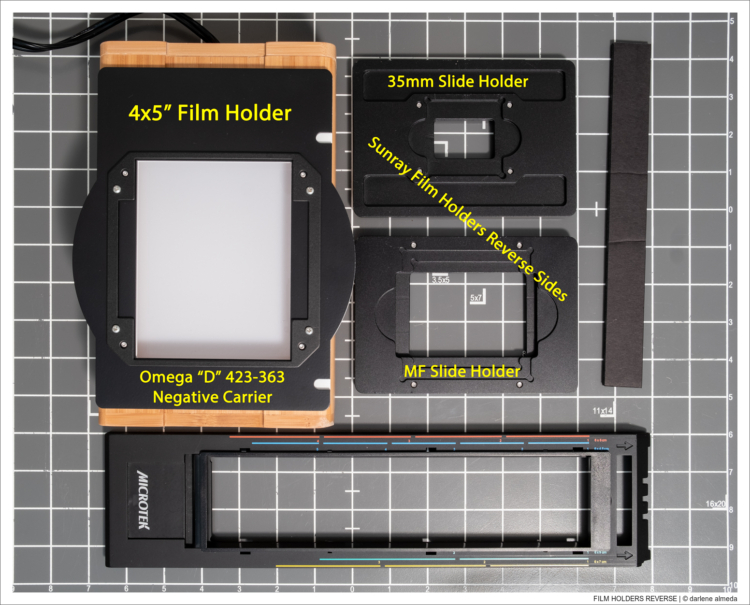
Because I shoot multiple film formats, I need to digitize different sizes of film and require various types of film holders. I digitize single frames, film strips, entire rolls, and both mounted and unmounted slides, and I create contact sheets. My film archive goes back forty years, and I have a family film collection over eighty years old that contains odd sizes of film. Since I continue to shoot 120 films in the 6×12 and 6×17 formats and an occasional 4×5″ project, I require film holders for these sizes as well.
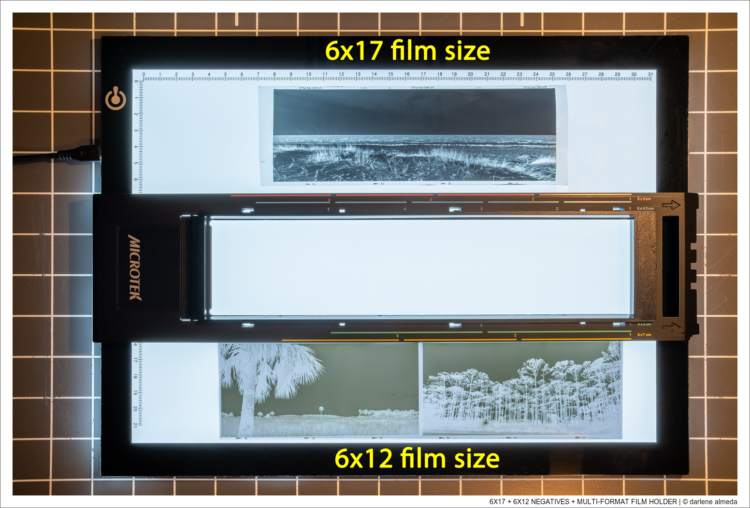
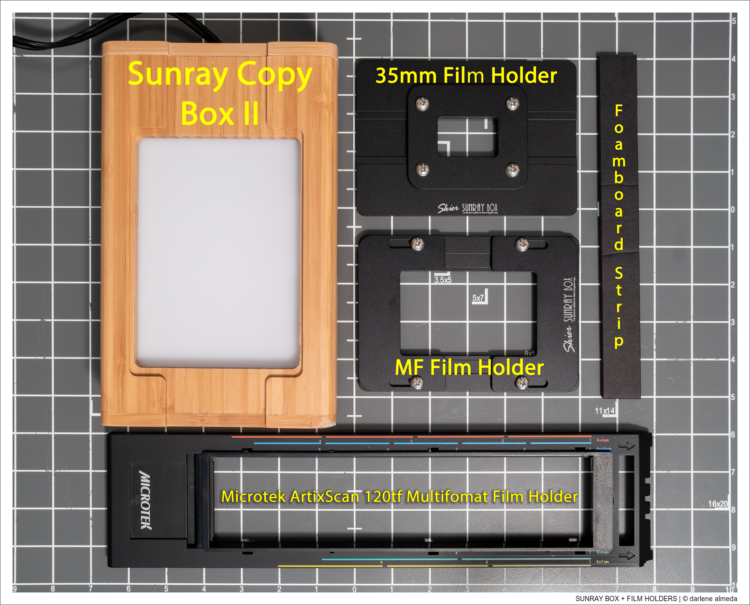
The Sunray Copy Box comes with 120 and 135 film holders that work well for film up to 6×9. For 4×5″ film, I use a film holder from an enlarger and find it works better than what came with my Epson V700 scanner. The multi-format film holder from my Microtek scanner works well for digitizing my most challenging formats: 6×12 and 6×17. All of my film holders fit over the Sunbox’s light source. For contact sheet creation, I continue to use the tracing lightbox.
UPDATE: I upgraded to the Copy Box III so that I could digitize 6×12 and 4×5 film with their new film frames.
SKIER 120 FILM HOLDER + FILM ON SUNRAY COPY BOX
DIGITIZING UNCUT FILM
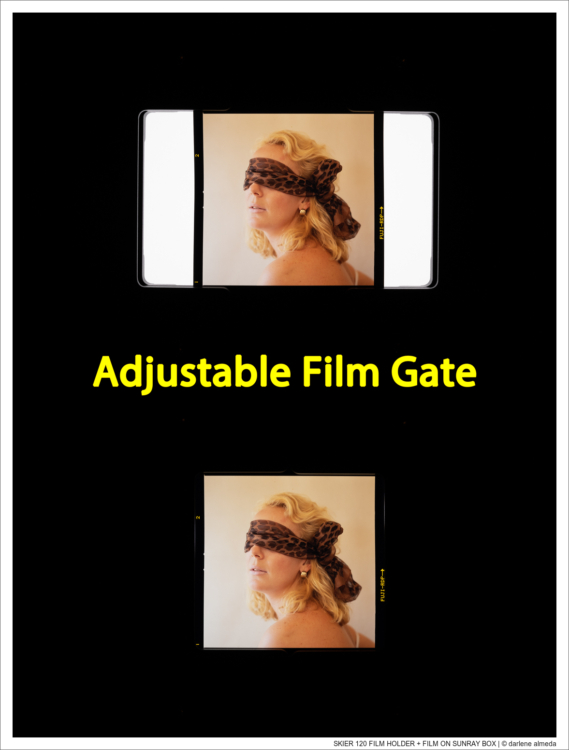
The Sunray Copy Box’s 120 film holder includes an adjustable gate that holds 120 films in 645, 6×6, and 6×9 formats snugly. Running film strips and rolls through both of Skier’s film holders performs excellently. If you run high-production long-roll digitizing, the Negative Supply Film Carriers 120 and 35 might be a better option, but you would still need a light source.
When you reverse the Sunray film holders, they have areas designed to hold mounted slides. I find this not only a convenient way to save space by avoiding another set of film holders, but also well-designed to keep the slides flat. The only slide mount I found that does not work with the Sunray film holder is the Polaroid 135 slide mount.
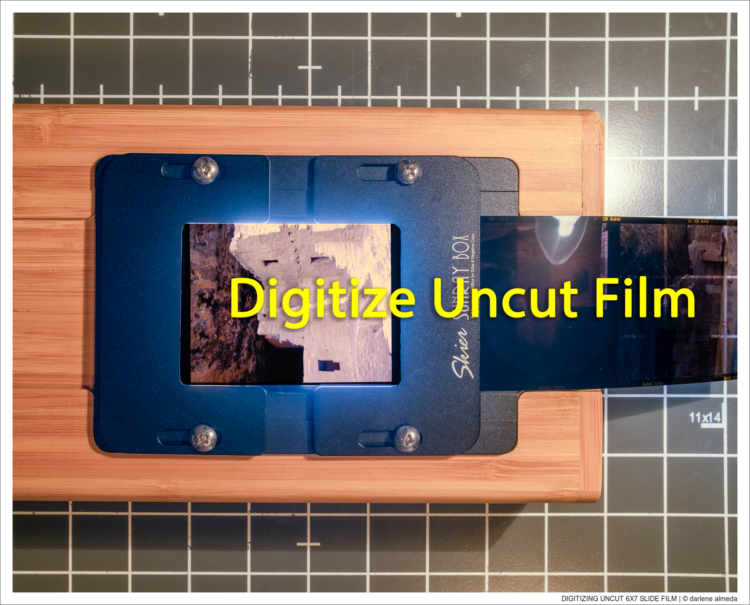
When I encounter slide film that has been re-mounted (not original) in one of these, I remove it and run it through the 135 film holder using a scrap piece of film – problem solved! I get asked about film flatness and will say I do not have a problem with most of my film, but when I do encounter an issue, it is with 6×17 film. I find some films are curlier than others, and I will explain how I deal with this occurrence and how I use the tools outlined here in Part 2.
UPDATE: I now roll up my processed 120 films as soon as they’re dry and store each one in individual Ziploc sandwich bags until I’m ready to digitize. During digitizing, I feed them one frame at a time through the film holder over the Sunray Copy Box, keeping the rest clean and secure until their turn. This method works great!
DIGITIZING UNCUT 6X7 SLIDE FILM

