[ HASSELBLAD CAMERAS: 500C, 500CM, 501CM, 503CX, SWC, FLEXBODY & 907X ]
HASSELBLAD CAMERAS & GEAR
HASSELBLAD and related gear I’ve used together:
CAMERA BODIES:
500c, 500cm, 501cm, 503cx, SWC, Flexbody, 907x
C LENSES:
30C, 50C, 60C, 80C, 150C, 250C
CF, CFE & CFi LENSES:
60 CFi, 80 CF, 80 CFE, 135 CF, 100 CFi, 120 CFi, 150 CFi, 180 CFi
XCD LENSES:
28/4 P, 45/4 P, 75/3.4 P
V PINHOLES:
CCB Pinhole cap + 0.25mm, 0.30mm, 0.35mm, 0.40mm & 0.45mm pinhole inserts
HASSELBLAD V BODY to SINAR ADAPTER BOARD:
use a Sinar’s bellows with complete movements
DIGITAL BACKS:
CFV-50c & CFV-50c II
FILM MAGAZINES:
C12, A12, A16, A24, A70
INSTANT FILM BACKS:
Polaroid 100 Back, NONS Instant Back
FILTERS (B50/60):
Softars, Proxars, Light Balancing, Color Correction, and more
FILTERS (4×4/100mm):
Prosoft Filters, B&W Contrast Filters, Trichromatic Filters, more
ACCESSORIES:
Auto Bellows, Extension Tubes, Grips, Viewfinders, Proshade 6093T, more
The Pacific Rim Camera Reference Library has Hasselblad catalogs from various years past. Its library contains a great collection of information on many different brands and vintages of photographic equipment.
I found no other medium format camera system so complete. A system that could take what a long commercial career’s abuse can seize on camera gear. Much of my work was done on location, where we were continually breaking down, shooting, packing up for transport, and rebuilding again. This will quickly show which equipment is built for the commercial arena and which will fail or get beaten up too soon. I tried a few other medium-format camera systems over my career but quickly learned their plastic housings, weak lens mounts, or electronic builds could not compete with what I knew I had with Hasseblad. This page will show that I continue using Hasselblad cameras for film and digital and what I choose for my kits.
DATING HASSELBLAD GEAR
For those interested, using the first two letters of any Hasselblad serial number for bodies, film magazines, and other items, the year of manufacture can be determined using the code below. For Hasselblad Zeiss lenses, please go here.
| V | H | P | I | C | T | U | R | E | S |
| 1 | 2 | 3 | 4 | 5 | 6 | 7 | 8 | 9 | 0 |
HASSELBLAD MODULAR SYSTEM
Hasselblad cameras are modular cameras. You start with a camera body, then add the interchangeable parts: lenses, viewfinders, film magazines, digital backs, plus accessories. These items are interchangeable between each camera body, and I often incorporate Hasselblad lenses, viewfinders, and digital backs with ALPA gear. The Hasselblad components I use with ALPA cameras work seamlessly. Because ALPA does not offer similar camera components that I like and Hasselblad does, I have grown to appreciate the beautiful design that Hasselblad built upon.
The digitization of my film is another area in which the marriage of Hasselblad and ALPA gear works for me. When I want the optimal digital file of my film, I use a Hasselblad CFi 120 macro lens mounted on the Variable Extension Tube 51691 with the CFV II 50c digital back on an ALPA TC. It does not matter the film format or type; if I need a digital file created from the best available equipment, it is digitized with this setup on a Beseler CS copy stand.
What is not to like about a camera system that has stood the test of time for quality, dependability, and adaptability? In my opinion, no other medium-format system has been built like Hasseblad.
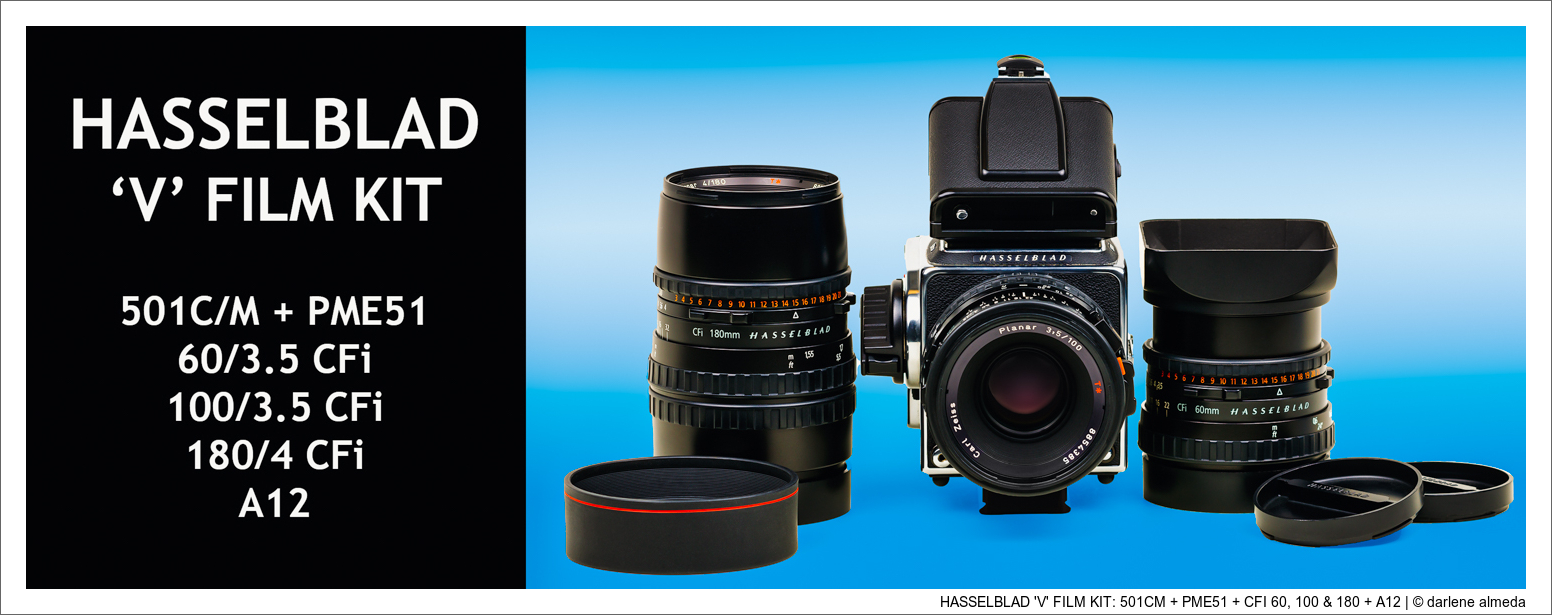
MY CURRENT V FILM KIT
[ HASSELBLAD ‘V’ FILM KIT: 501CM + PME51 + CFI 60, 100 & 180 + A12 ]
Pictured above is my current Hasselblad ‘V’ film kit, and I have included the year of manufacture for these items: a chrome 501cm (1999) with the CFi lenses: 60/3.5 (2003), 100/3.5 (2000), and 180/4 (2000). At the beginning of my commercial career, and for 15 years after that, it was the popular lens trio: 50/4, 80/2.8, and 150/4 in the C and CF mounts. The CFi lenses are the most recent V lenses, although they are over 20 years old. As long as I maintain them, they should last as long as I can use them.
I added the CFE 80/2.8 (2001) to my kit in 2023 because I missed the ‘normal’ lens. I thought about going for a beat-up old chrome C lens, but even they were expensive! So, I sprung for the CFE model at a dealer’s site I have been buying from for many years. They gave me an excellent price considering its minty condition. I have only seen two CFi 80/2.8 models in forty years. They made very few, and the CFE is identical, plus electronic contacts, which I will not need.
I have had many Hasselblad V bodies and lenses over 30+ years of professional shooting. The banner at the top of this page shows all the different models I have shot with. I mostly used them for portraiture, products, and corporate and consumer special events. They were my workhorses. I knew what to expect, and they always delivered the desired results. Today, I shoot my V film kit just for fun, with black & white film and a digital back for color.
Also in my current toolbox are a 503cx and a Flexbody. The 503cx is primarily used with a digital back and is my backup to the 501cm when it needs maintenance. I chose this model because it has the ‘T’ (time exposure catch) setting, which the 501cm does not. It comes in handy when implementing Live View on the digital back.
The Flexbody, with its shutter winding knob operation, is the best mechanical Hasselblad to use with a digital back, even though it comes with a non-rotatable back. The Flexbody will stay ‘open’ for Live View with a simple turn of the knob, and when ready to take a photo, turn the knob again to close the shutter. Easy-peasy.
GALLERY #1: FILM IMAGES
HASSELBLAD CAMERA BODIES: 501CM, FLEXBODY, 503CX
[ HASSELBLAD CAMERA BODIES: 501CM, FLEXBODY, 50CCX ]
HASSELBLAD V BODIES
The 501cm, Flexbody, and 503cx camera bodies are pictured above. They are empty of lenses and film magazines or digital backs. The 501cm on the left has a Waist Level Finder attached, but the other two bodies do not. This is where you start when you want to build a Hasselblad with specific components. I shoot the 501cm with film magazines and the 503cx with a digital back, and when shooting the Flexbody, I shoot with either.
***
501CM
The 501cm is one of the last 500 series of bodies Hasselblad made. Its manufacturing run began in 1997 and ended in 2005. Its Gliding Mirror System (GMS) ensures no vignetting in the finder image with focal lengths greater than 100mm lenses. The 501cm was initially available as a kit or standalone body in chrome or black. You can view the 501cm user manual here.
I use my 501cm camera only as a film camera. It has a bright Acute-Matte D Grid (#42217) screen installed. I prefer grid lines with any camera’s focusing screen and use them as a design aid. When I look through the viewfinder, PME51, my finder of choice for this camera because of its built-in exposure meter and upright view, everything I see will be included in the composition.
***
503CX
The 503cx is my digital & film travel body and has a custom mask on the focusing screen corresponding to the sensor size of my digital back. The 503cx was manufactured beginning in 1988 and ending in 1994. It is available in chrome or black and was designed to have an automatic dedicated flash system, a much brighter Acute-Matte focusing screen, and a new Palpas coating on the interior surfaces, reducing the possibility of flare. You can view the 503cx user manual here.
I acquired the 503cx because I wanted the newest 500 series with the time exposure lock (TEL). The TEL has two settings: O (disengaged) and T (engaged). Use the TEL for time exposures set at Bulb (B) when you want to lock it. Set the lens to B, depress the shutter, and secure it with the catch set at T. This is handy when utilizing Live View on a digital back instead of using a mechanical locking release cable to lock the B setting. The winding crank can only be advanced once the lock is reset to O. A cable release cannot be used while engaging TEL.
***
FLEXBODY
The FlexBody is a small-view camera that performs similarly to a 4×5 but in a 6cm x 6cm package. Its rear tilt of ±30° makes focusing for a deeper depth of field possible without stopping down too much. Its shift of ±15 mm helps keep your perspective in control, and its 22mm bellows extension enables macro work with the CF/i 120 macro lens without carrying extension tubes.
Hasselblad manufactured the Flexbody from 1995 till 2003. It accepts all 15 CF lenses, all Hasselblad film magazines, viewfinders, and “V” style digital backs. Keep the bellows in when you do not want that extra reach, and use the Flexbody like any other 500 series camera body. The Flexbody came in two models, but there is no documentation I can find that says there were two models, just a difference in that one has a bubble level on the shift control knob, and the other does not. A Flexbody manual is here. It is a good choice for use with a digital back. (More information is below in the Digital section.)
***
Here is a recommended video from Carl Bozza demonstrating how the Flexbody operates and its different movements.
IMAGE CIRCLE COVERAGE FOR ‘V’ LENSES
If you enjoy using the FlexBody for its movements but find the limited wide-angle lens movement frustrating, keep in mind that this is precisely why the ArcBody was developed. Designed with special Rodenstock lenses featuring larger image circles, the ArcBody offers greater flexibility for movements, addressing the limitations of the FlexBody in wide-angle applications. Here is a copy of the ArcBody’s user manual.
GALLERY #2: 501CM, FLEXBODY, 503CX IMAGES
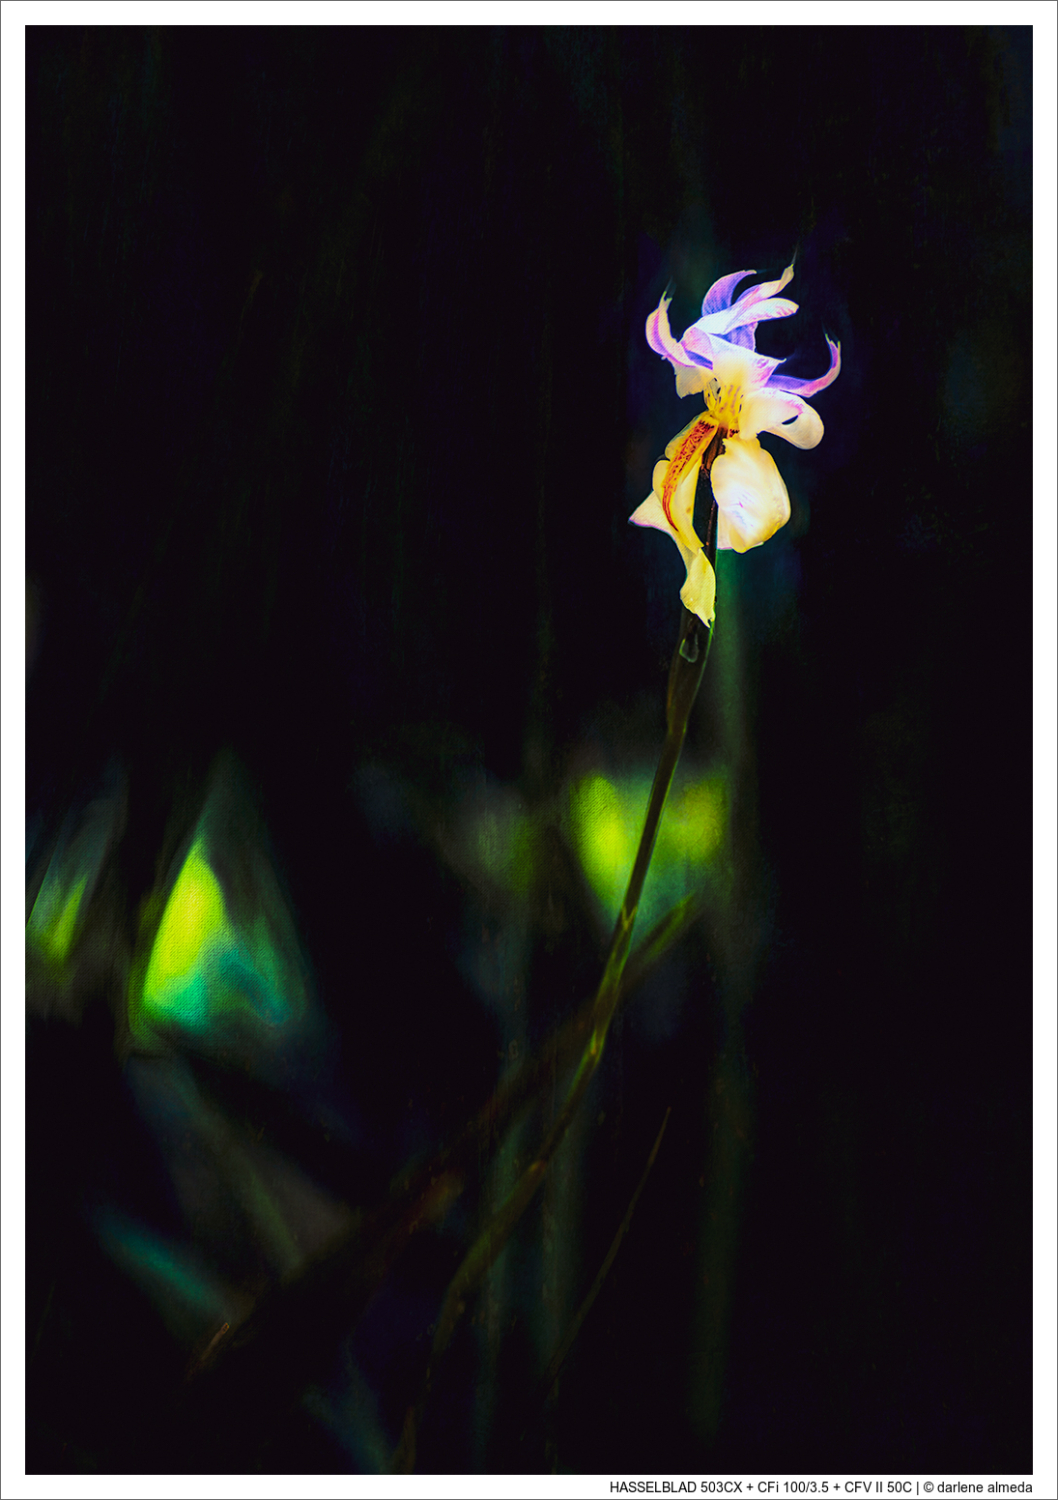
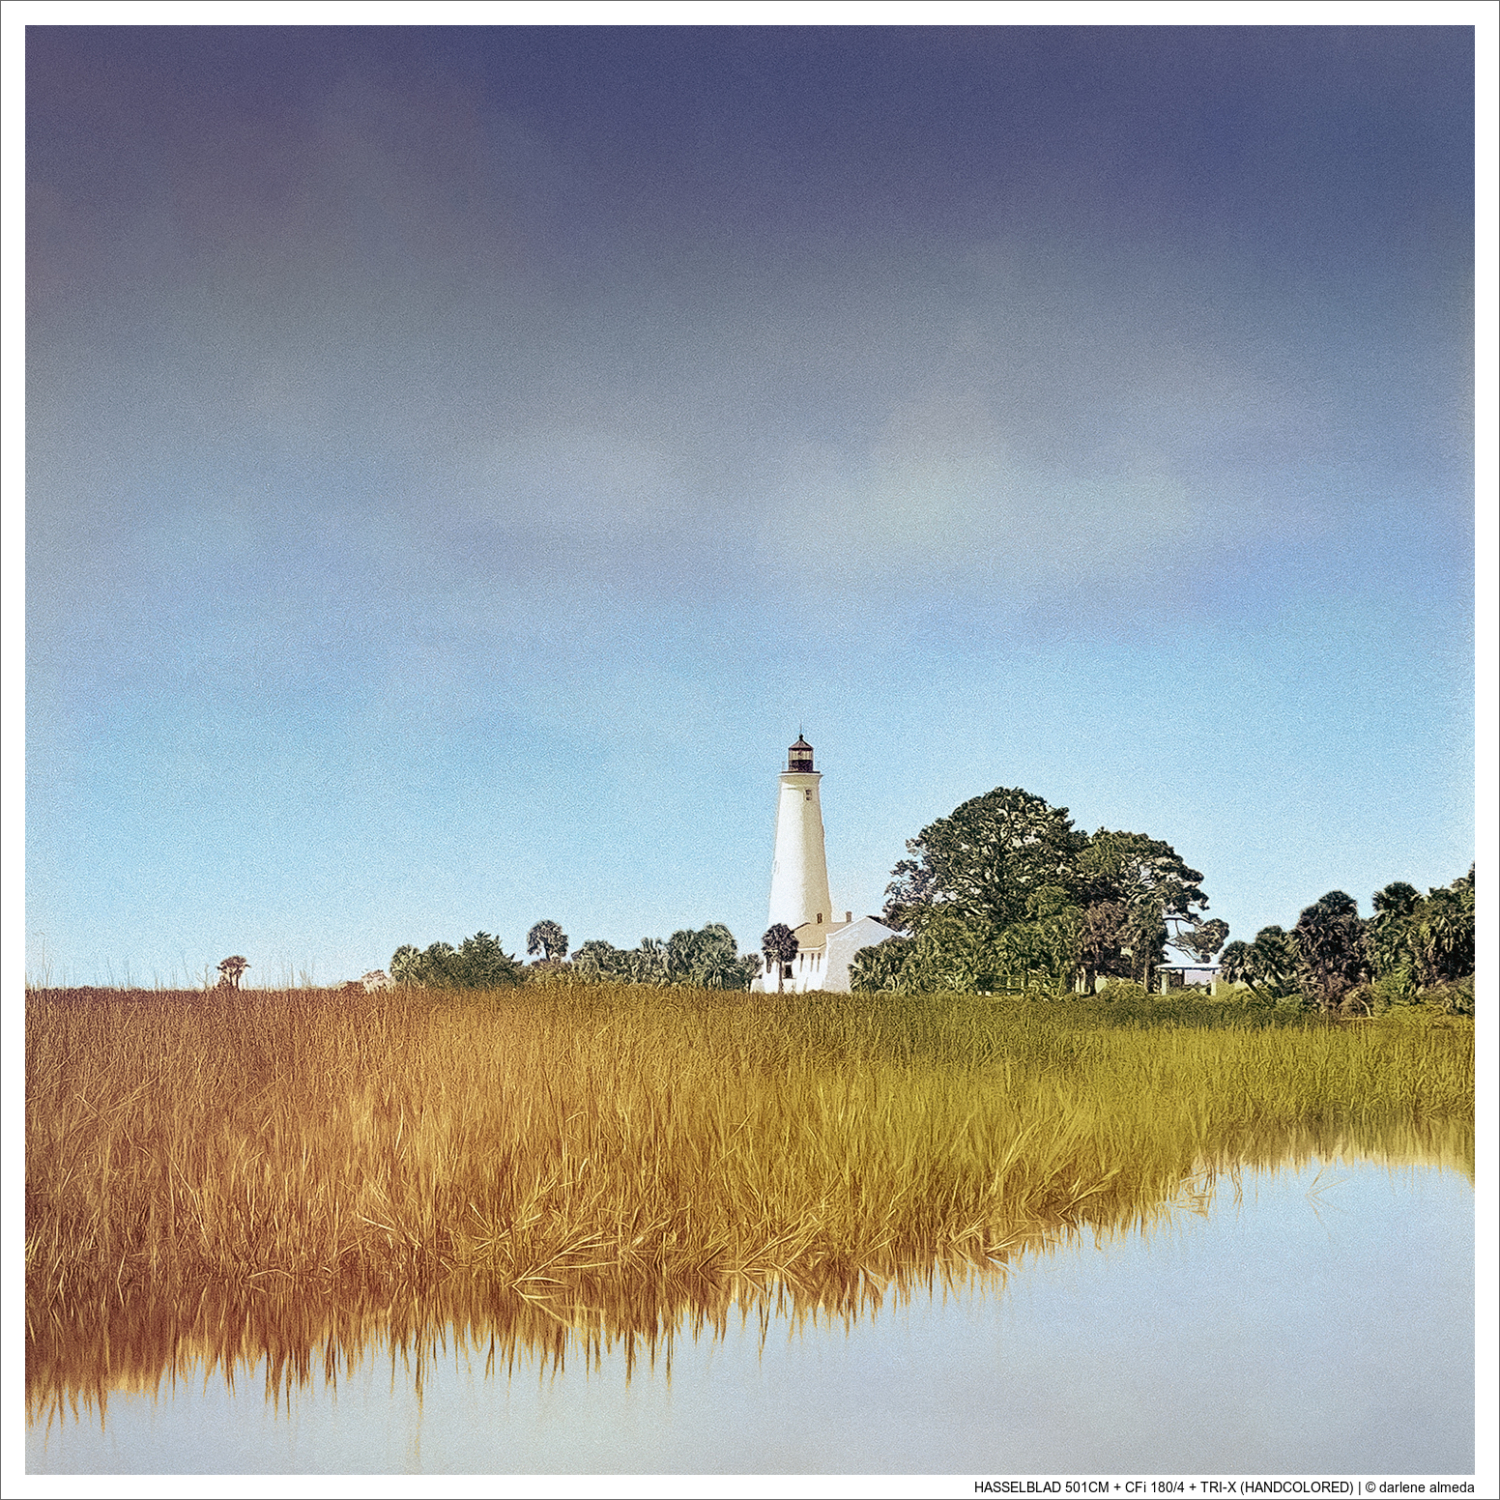

HASSELBLAD ‘V’ LENSES
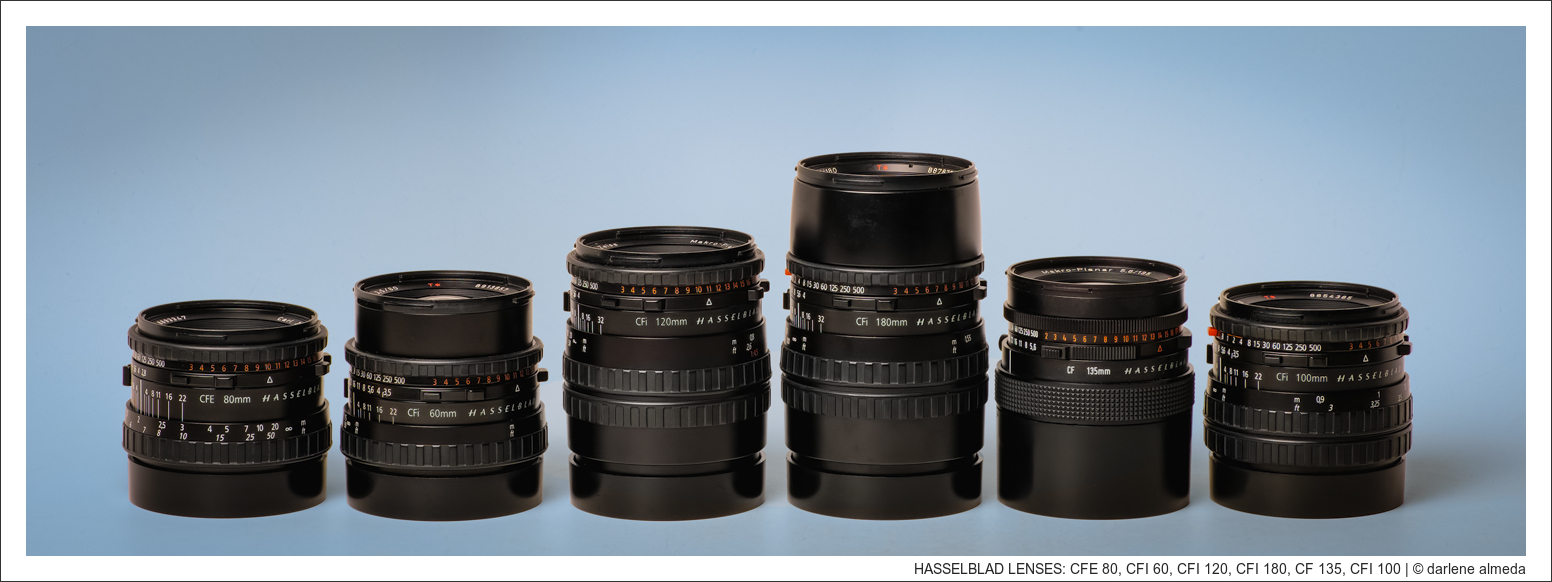
MY CURRENT LENSES
Shown above are my current assortment of Hasselblad V lenses, comprising the CFE 80/2.8, CFi 60/3.5, 100/3.5, 120/4, and 180/4 lenses, alongside the CF 135/5.6, which I use in conjunction with the bellows unit or variable extension tube. These lenses serve me in my travels and the studio. Among the 60, 80, 100, and 180mm range, I typically opt for three lenses to accompany me on my photography journeys. These lenses conveniently fit into my preferred compact backpack, the Think Tank Retrospective 15. I carry three lenses in this pack: a 501cm or 503cx camera body equipped with a waist-level viewfinder, a PME51 viewfinder, a film magazine or digital back, and various accessories. These lenses were selected based on their field of view (FoV) and compatibility with digital backs. The 120mm and 135mm lenses remain in the studio, predominantly utilized for macro and copy work.
***
CFi 60/3.5 Distagon T*
The 60/3.5 is a wide-angle lens that does not produce the noticeable, sometimes distorted perspective of the 50/4. It has a comparable FoV of a 33mm lens on a 135 film camera or a full-frame digital. I prefer this lens over the 50/4, which I have used for decades performing special event photography. This lens is very sharp and works well with digital. Here is its datasheet.
***
CFE 80/2.8 Planar T*
I have had a few Hasselblad 80/2.8 Planars in my life. As soon as I think I will no longer need it, I need it again. It is the CFE this time because it was the cleanest one I have found. The Planar lens is the most triumphant design in the history of camera lenses. Its almost symmetrical structure furnishes lens makers with extensive methods to exceptionally correct aberrations, even at wide-open apertures. This forms the perfect foundation for high-end lenses characterized by excellent color correction, rapid speed, a flat image plane (derived from the name), and minimal distortion. The Planar lens design is the basis for most professional ‘workhorse’ lenses used on our planet and in space. Here is its datasheet.
***
CFi 100/3.5 Planar T*
The 100/3.5 is a planar lens with a reputation as the sharpest lens in the Hasselblad V series. Hasselblad states it is an exceptional lens and “is optimized to deliver virtually zero distortion and at the same time extremely well-defined image details – sharpness – over the entire frame, and all this even at full aperture.” It has a comparable FoV of a 54-56mm lens on a 135 film camera or a full-frame digital. This lens is super sharp and works well with digital. Here is its datasheet.
***
CFi 120/4 Makro-Planar T*
The CFi 120/4 macro lens is a beautiful lens optimized for serious copy work and for half-life-size (1:2) to infinity. It works well with digital and has been my go-to close-up lens for product photography and for digitizing my film. I have used the CFi 120/4 with the FlexBody for macro work and with digitizing film. I use it primarily with a 64-85mm variable extension tube on a Beseler CS copy stand today. I have had fun making abstract images with this setup as well. Its data sheet is here.
***
CF 135/5.6 Makro-Planar T*
The CF 135mm f/5.6 is a close-up/macro lens similar to the CFi 120mm f/4 but lacks a built-in focusing mechanism. It was specifically designed for use with a bellows extension. I have used it with the Auto Bellows, achieving life-size (1:1) magnification without difficulty. Additionally, I have paired it with the Variable Extension Tube 64-85 (51691), which is optimized for the 135mm Makro-Planar CF f/5.6, allowing a focusing range from infinity down to 1.15m. Based on my experience, this lens performs well with both digital and film. Its data sheet is here.
***
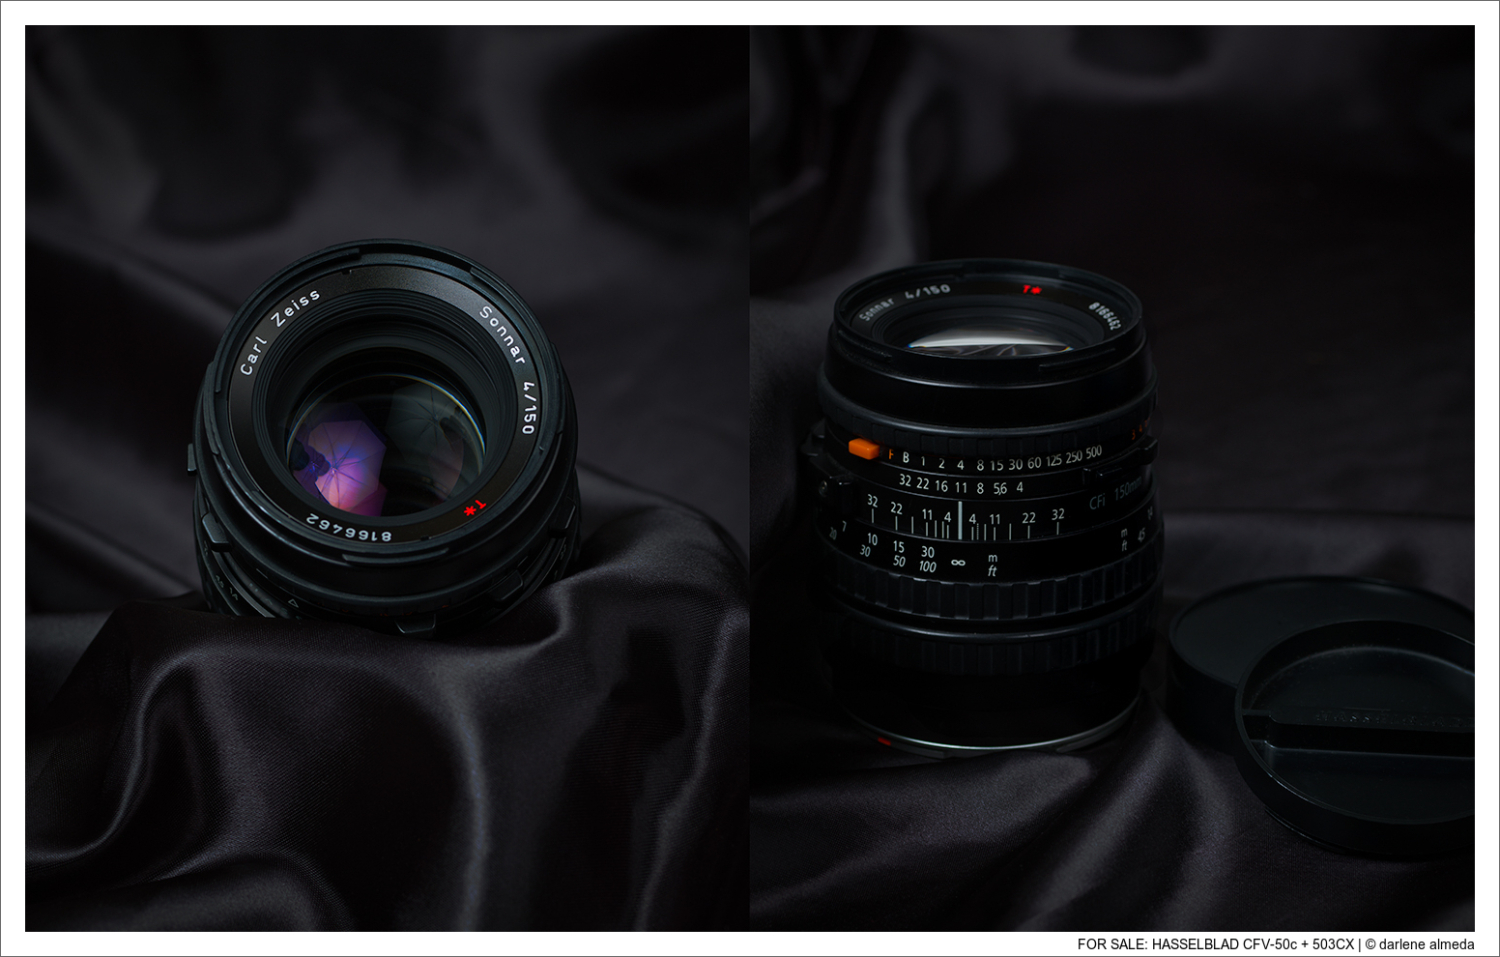
CFi 180/4 Sonnar T*
The 180/4 is a telephoto lens. I replaced a CFi 150/4 only because I wanted the extra 30mm reach of the 180. The angle of view between 150 & 180 is more noticeable than I thought. The 180’s reach was well worth any increase in heft as it is an excellent portrait lens and for constructing stitched panos. This lens is sharp and works well with digital. It has a comparable FoV of a 97-100mm lens on a 135 film camera or a full-frame digital. Here is its datasheet.
***
GALLERY #3: IMAGES BY HASSELBLAD LENSES
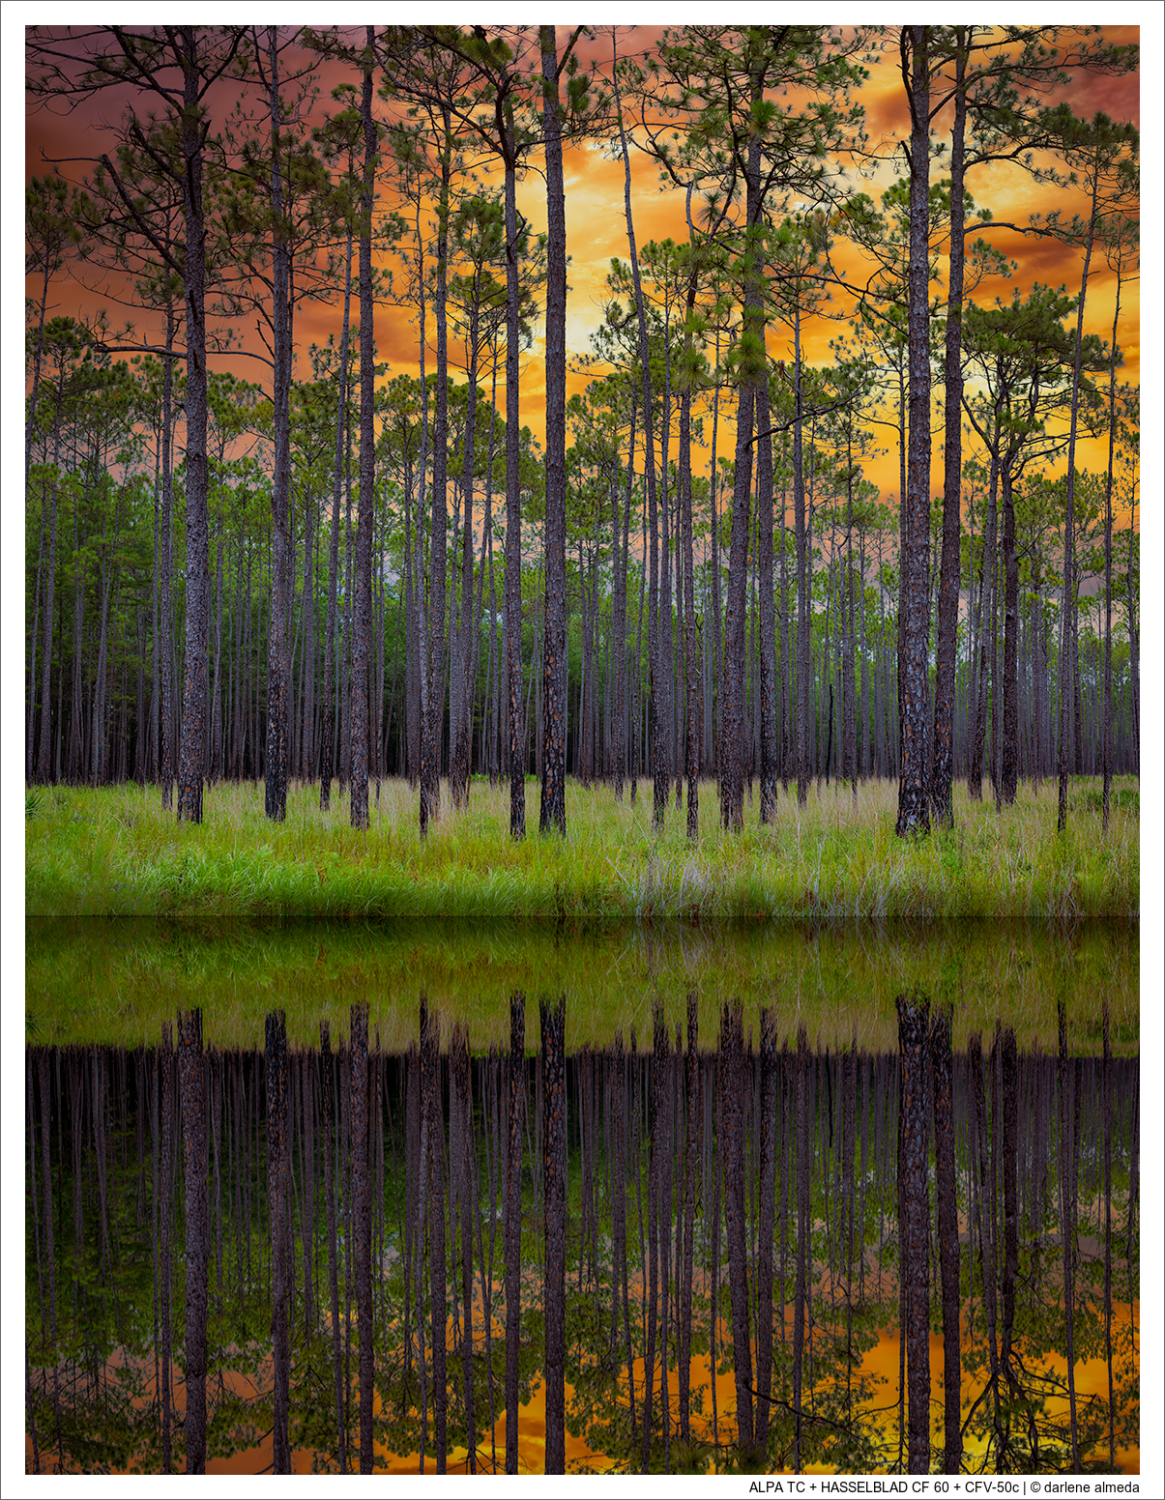
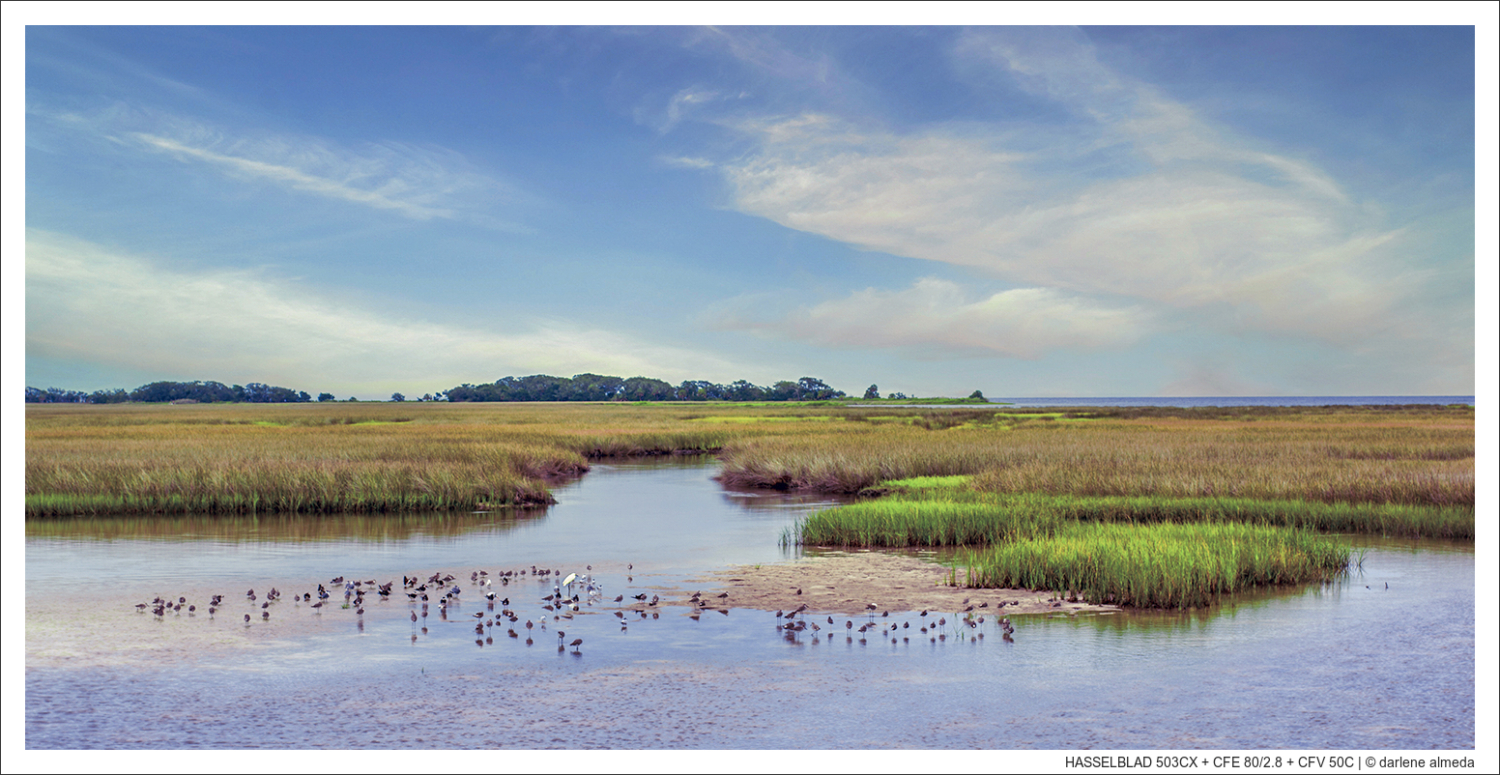
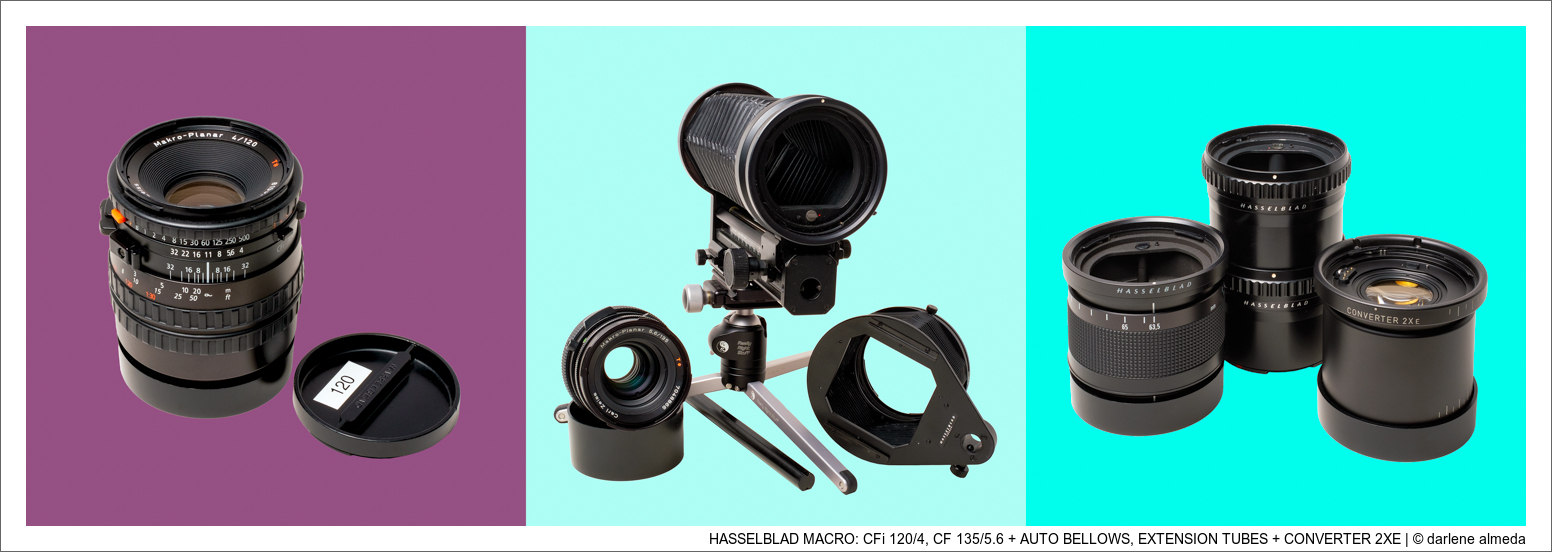
HASSELBLAD MACRO: LENSES, BELLOWS, TUBES, & 2XE
[ HASSELBLAD MACRO: CFi 120/4, CF 135/5.6 + AUTO BELLOWS, EXT TUBES + 2XE ]
HASSELBLAD MACRO OPTIONS
When it comes to employing macro tools with my Hasselblad 500 series cameras, Hasselblad offers a variety of options—these range from macro lenses to bellows and extension tubes, providing ample choices for photographers. In the following discussion, I delve into the macro equipment I have personally owned and utilized, as illustrated in the accompanying graphic.
***
CFi 120/4 Makro-Planar T*
The CFi 120/4 macro lens is a beautiful lens optimized for serious copy work and for half-life-size (1:2) to infinity. It works well with digital and has been my go-to close-up lens for product photography and for digitizing my film. I have used the CFi 120/4 with the FlexBody for macro work and with digitizing film. I use it primarily with a 64-85mm variable extension tube on a Beseler CS copy stand today. I have had fun making abstract images with this setup as well. Its data sheet is here.
***
CF 135/5.6 Makro-Planar T*
The CF 135mm f/5.6 is a close-up/macro lens similar to the CFi 120mm f/4 but lacks a built-in focusing mechanism. It was specifically designed for use with a bellows extension or the Variable Extension Tube 64-85 (51691). I have used it with the Auto Bellows, achieving life-size (1:1) magnification without difficulty. Additionally, pairing it with the Variable Extension Tube 64-85, which is optimized for the 135mm Makro-Planar CF f/5.6, allows a focusing range from infinity down to 1.15m. Based on my experience, this lens performs well with both digital and film. Its data sheet is here.
***
Hasselblad Auto Bellows (40517)
The Hasselblad Automatic Bellows (AB) connects the camera to the lens, allowing the camera to operate as if the lens is directly connected to the camera. The AB offers adjustable knobs and an extension range of 63.5mm to 202mm. Used with the CF 135/5.6 Makro-Planar lens, it delivers a focusing range from infinity to a reproduction scale of life-size (1:1). Also pictured above with the AB & CF 135/5.6 is the Lens Shade (40525) to which the transparency holder is attached.
***
Extension Tubes: Variable, 56mm & 2XE Converter
Hasselblad made many extension tubes for the 500 series in various millimeter (mm) lengths, including 8, 10, 16, 21, 32, 55, and 56. They made one variable tube, the 64-85mm, which I use with the CFi 120/4. Tubes can be used individually or in combination with other tubes. I have used two 56 tubes together (pictured above) for macro work. It is not recommended to combine more than three tubes. Extension tubes must be attached to the camera body before the lens is attached to the tube. When using more than one tube, attach the first one to the camera body and then build out, attaching the lens last. Remove the lens from the extension tube first before removing the extension tube from the camera body. If using multiple tubes, remove the tube closest to the lens first and work back toward the camera body.
The 2XE Converter can be used with all Hasselblad V fixed lenses except the CF 135/5.6. It will double the lens’s focal length. For example, 2XE with the CFi 180/4 converts the focal length to 360mm. Because teleconverters magnify the lens, they also emphasize quality faults in the lens. They can produce excellent-quality images when combined with excellent-quality lenses like Hasselblad lenses. The “XE” in 2XE means it has the electronic Databus connection for the metering system in 200 series cameras. I use the 2XE converter for macro work and abstract digital image-making.
***
GALLERY #4: IMAGES BY HASSELBLAD MACRO LENSES
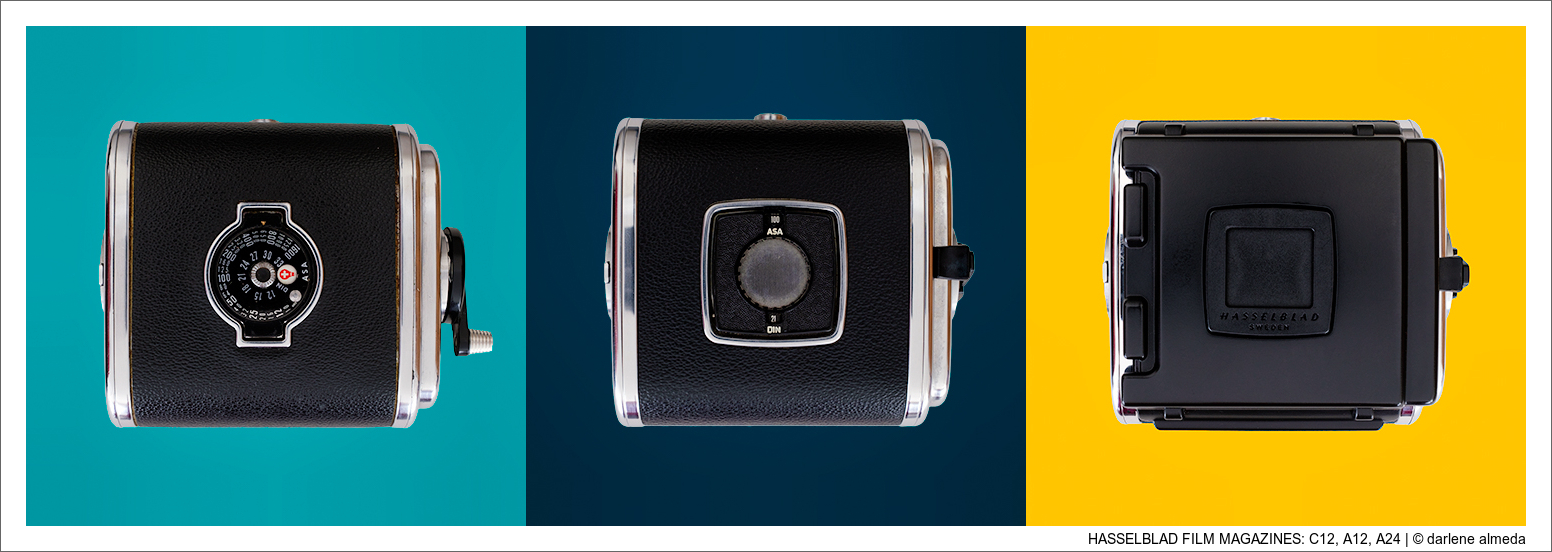
HASSELBLAD FILM MAGAZINES
[ HASSELBLAD FILM MAGAZINES: C12, A12, A24 ]
FILM MAGAZINES INTRO
In the past, I used Hasselblad V cameras on shooting sets with multiple magazines, some with 120/220 color film, others with 120 B&W, another for Polaroid shots to test the color temperature or direction of lighting, and lastly, many special event jobs required using 70mm magazines. I like the convenience of switching different magazines, viewfinders, screens, etc., and I appreciate Hasselblad’s modular system as this deep dive into what I shoot continues to confirm this liking.
There are a few different-looking magazines for the V system, some that look different but function the same, and some that look different but do indeed operate a bit differently. I photographed three magazine backs for the above graphic to show some differences. Once you become familiar with the V system film magazines (backs), you can quickly distinguish what makes them different operationally.
***
C 12 MAGAZINE
The first photo in the graphic shows what has become known as a “C” magazine. Hasselblad originally called it “Magazine 12” based on an early datasheet called “220 film.” It may have later gained the “C” designation for “classic” from photographers to distinguish it from the later “A” “automatic” film magazines.
You should know why these particular non-automatic film magazines are popular today. For some photographers like myself who enjoy shooting medium format film and digital, the “C” magazine can be used on a camera that takes a Hasselblad V digital back plate. Manual film advancement is necessary because these cameras do not have the film advance mechanism built into a Hasselblad camera. The manual film advancement advantage makes the “C” backs usable on some non-Hasselblad cameras.
On a “C” magazine, we use its rear peephole (covered with a circular metal plate in the photo above) to see the film frame numbers on its backing paper. This and the manual film advancing allow me to shoot 120 film on my ALPA cameras without purchasing an expensive, extra heavy, non-6×6 format ALPA-Linhof film magazine. I have two very clean “C” magazines manufactured in 1957 & 1967 and added a Quick Winding Crank #41076 to each. Shortly after I received them, I sent them to be rebuilt as necessary and replaced all seals so they would last another 50 years. I use them on my Hasselblad and ALPA cameras with excellent results.
***
A 12 MAGAZINE
The second photo shows an older “A 12” magazine. According to the year dating code, this magazine was manufactured in 1972. This magazine has served me well over the years. A primary difference between this “A” magazine and the latest model, as shown in the above graphic (image #3), is the convenience of having a designated area to store the dark slide while shooting. There is little difference besides convenient dark slide storage and updated cosmetics. To my knowledge, the film gate produces the famous ‘two triangle cutouts’ (“V”s for Victor) on the left side of the film frame on all 120/220 Hasselblad film magazines. Instructions on how to load any of the “A” magazines can be found here.
***
A 24 MAGAZINE
The third magazine pictured in the above graphic is of a late model A24. I also have a late model A12 that stays on my 501cm. When I shot special events, I had at one time six 220 film magazines. You can use 120 film in an A24 magazine, so I have kept mine (see below). You could pick these A24 magazines up more reasonably than A12 because the film is no longer made in 220, which is a bummer. I prefer the newest film magazines for the dark slide holder and cosmetics.
***
120 FILM IN 220 MAGAZINE – YES!
[ HASSELBLAD A24 w/120 FILM ]
120 FILM IN 220/A24 MAGAZINE
Many affordable, used, and functional Hasselblad V-series 220 film magazines are on the market. This presents an opportunity for film photographers. However, a challenge arises when we realize that no manufacturer produces 220-size rolls of film. I wrote an article after thoroughly testing two rolls of 120 film, one in an A12 and the other in an A24 magazine, photographing the same subjects and testing the developed film for flatness, sharpness, and frame spacing. I also explain how to load 120 film in an A24 magazine to get 12 frames. Follow this link to read the article.
GALLERY #5: FILM MAGAZINE-SPECIFIC IMAGES
HASSELBLAD VIEWFINDERS
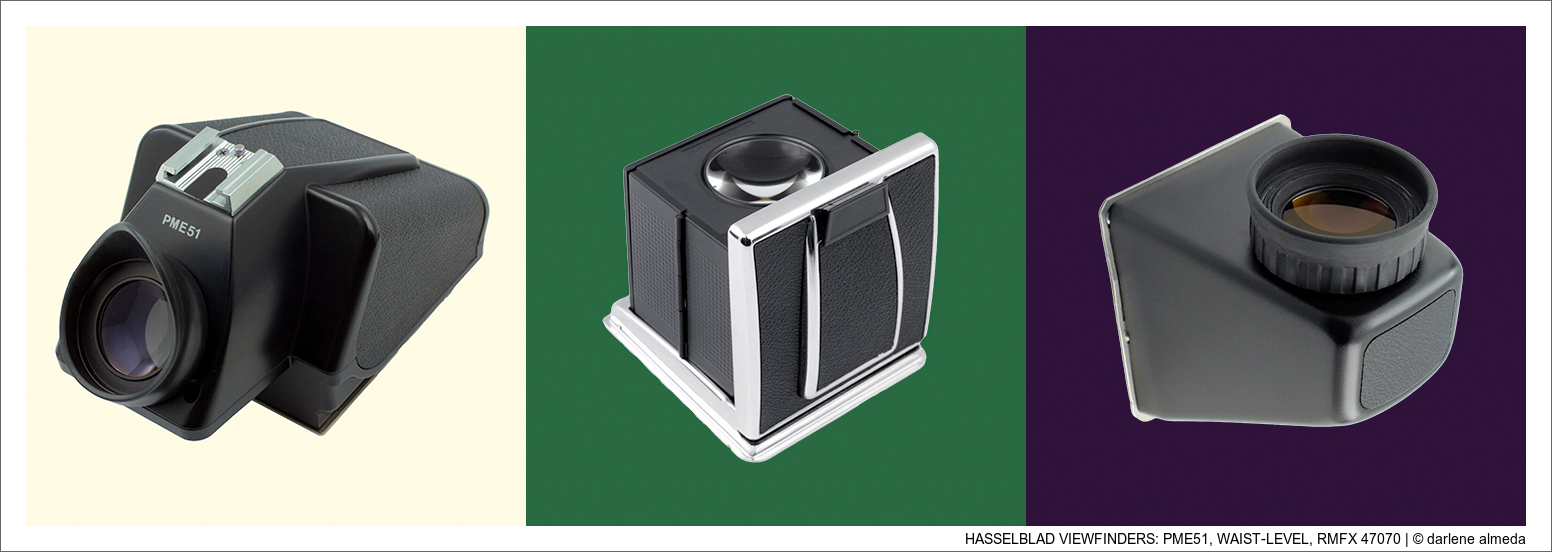
[ HASSELBLAD VIEWFINDERS: PME51 #42296, WAIST-LEVEL #42315, RMFX #47070 ]
HASSELBLAD VIEWFINDERS: PME51, WAIST-LEVEL & RMFX
Pictured above are the viewfinders I use the most. They are not the only Hasselblad viewfinders I use, just the ones that get the most mileage. I will go into greater detail about why I use these viewfinders and what cameras or shooting scenarios I use them for.
***
PME51 (#42296)
The PME51 is my most used viewfinder (VF) when shooting the 501cm and 503cx cameras. The viewing angle is 45° to the vertical, and the focusing image is unreversed and magnified 3x. It has a centered-weight integral meter that is fast and accurate and is designed to be used with the Acute-Matte focusing screen. The operating knobs and buttons are countersunk, and the scales and indicators are behind windows to protect them from damage and the elements. It has a cold shoe on top that I installed a bubble level but will slip in a Profoto Air (remote trigger) when using the 501cm/503cx in the studio.
The PME51 uses a 6V PX28 battery, which I fulfill with a Duracell 28L 6V lithium battery. I highlight the 45° to the vertical above to remind folks this is not a 90° VF, but I do use it as such. I stand slightly to the side when I flip the camera to the vertical position (using a digital back) and get used to it. Even though I have a PM90 VF in the gear closet, I prefer the PME51 as my ‘daily viewfinder,’ so to speak. I found in photography; I can use gear that others seem to have conniptions over.
Below are instructions on how to meter with the PME51. I include this checklist because a few photographers who purchased their PME51 used without instructions were using it incorrectly. If you have a PME51 or plan on getting one for your 500 V camera, read over the checklist to see how you are supposed to use this meter, it might change how you shoot with it a little.
***
Operating the PME51:
- The lens must NOT be stopped down; readings should always be taken with the lens wide open.
- Set the lens maximum aperture on the left side window where requested.
- Set the ASA/ISO of your film where requested, left of the lens aperture setting.
- Compose image, press meter start button, and do not leave it in as ½ second is best.
- Exposure value is displayed on meter’s EV scale underneath VF image for 10 seconds.
- Transfer the reading to the orange EV scale on the right-hand side of the lens.
- Adjust your lens aperture to your shooting aperture. Repeat to memory.
***
WAIST-LEVEL FINDER (#42315)
The foldable Hasselblad waist-level finder (WLF) shields the focusing screen from stray light. It displays a full, upright, but reversed image even with the camera at hip level. It has a built-in magnifier that enlarges the image 4.5x, which I appreciate greatly. Hasselblad made interchangeable correction magnifiers ranging from -4 to +3 diopters for this finder, but I have never used one.
The best use I find for the WLF is in its folded position on the camera to protect the focusing screens while in storage and transport. I had used WLFs in the past during indoor shoots when my back was up against a wall, but I found it annoying if it was a group portrait session and having to remember, since the image is reversed, to look up and tell the subjects to go a little more right or left. If I did it while looking through the WLF, I would say the wrong direction 50% of the time. But truth be told, I find it better for this type of shooting (back up against the wall) than the Magnifying Hood #52096 (below).
I have a WLF for my ALPA cameras since I need to protect the Hasselblad ground glass I use with the ALPAs, and because the magnifier 4.5x is an excellent focusing tool. I love how Hasselblad gear will integrate with my ALPA gear, and up next is the viewfinder I use the most with my ALPA and FlexBody cameras.
***
REFLEX VIEWFINDER RMFX (#47070)
Designed for use on the SW/SWA/SWC and Flexbody cameras with the necessary focusing screens #41025 or #41050 (see below), the Reflex Viewfinder RMfx (RMfx) provides a comfortable working position from a 10° viewing angle. The RMfx has an enlarged eyepiece to provide a full-screen image for users with eyeglasses and displays an upright and non-reversed image. I used this viewfinder with the FlexBody and adapted it for use with my ALPA cameras for composing before shooting with a digital back or film magazine. The RMfx + #41050 setup is superior to anything ALPA has offered for viewfinder/ground glass options.
***
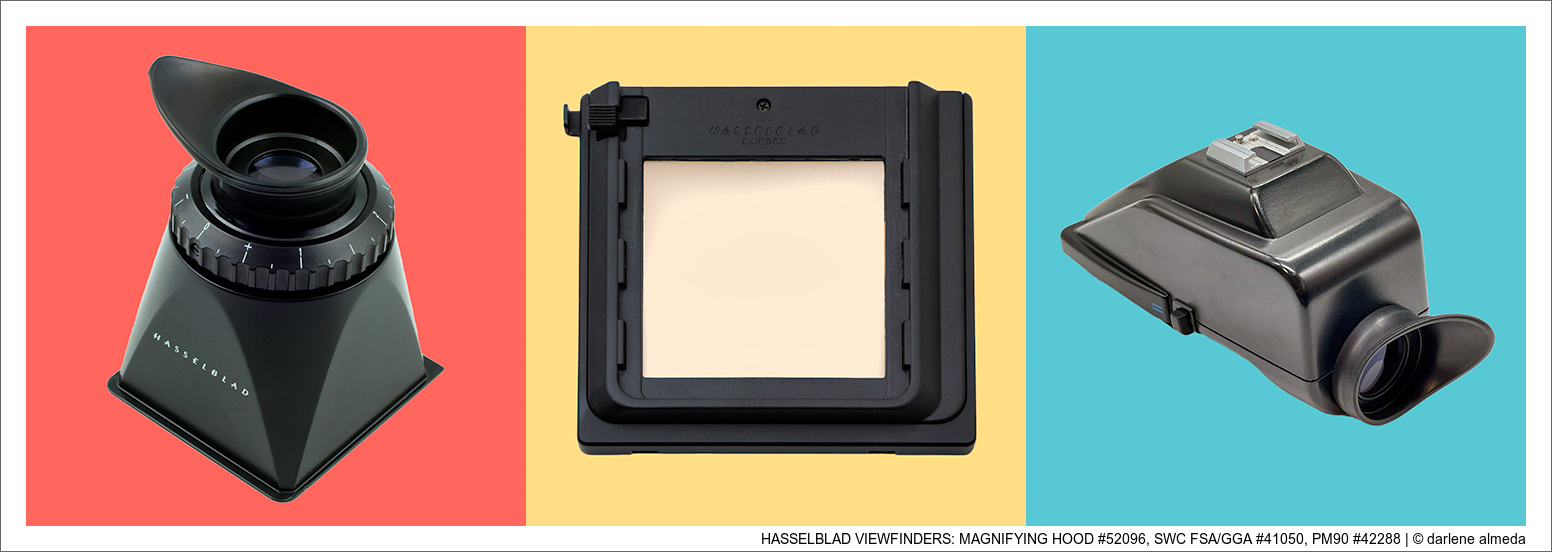
[ MAGNIFYING HOOD #52096, SWC FOCUSING SCREEN/GROUND GLASS #41050, PM90 #42288 ]
HASSELBLAD VIEWFINDERS: MAGNIFYING HOOD #52096, SWC FOCUSING SCREEN, PM90
Do you like having certain gear available, but it is not your ‘daily use’ stuff? Pictured above are the viewfinders I use some of the time. I could go without them except for the #40150 Ground Glass. I will go into greater detail about why I use these viewfinders and what cameras or shooting scenarios I use them for below.
***
MAGNIFYING HOOD (#52096)
Better than the WLF for some photographers but not as convenient for others, the Magnifying Hood #52096 (MH) does not fold but does not take up too much space in a camera bag. It has an adjustable magnifying scope from -3 to +3 magnification, and the image is upright but reversed like the WLF. When my back is against a wall, this viewfinder can help, except I cannot see the entire image at a glance. I need to move my head around, from corner to corner, when looking through the MH, which is inconvenient.
Known to many photographers as the chimney viewfinder or hood, the #52096 can also be used as a critical focusing lens for the ground glass on my large format cameras and is perfect for viewing negatives or slides on the lightbox or contact prints. The only thing missing is a cord to wear around your neck. These are not expensive, and if you already have a WLF and are looking for a backup substitute that can also aid as a loupe for your view camera or film viewing, this might interest you.
SWC FOCUSING SCREEN/GROUND GLASS ADAPTER (#41050)
The SWC Focusing Screen Adapter (FSA) #41050 was specifically made for the Hasselblad SWC and FlexBody cameras. It has a line grid and a split image rangefinder in the center. It is made with the same material as the Acute Matte screen. The top and bottom line in the grid outlines the borders of the 6×4,5cm image format. The FSA attaches to the camera in the same way as a film magazine. It accepts all viewfinders of the Hasselblad V system. The older, similar model, #40125, is not made with the Acute Matte material. I had one, and because I was familiar with the brightness of the Acute Matte screen, I immediately noticed the difference and sought a replacement #41050.
Besides using #41050 on the FlexBody, I use it on my ALPA TC and SWA cameras, along with the Reflex Viewfinder RMfx. To do this, you must have an ALPA-Hasselblad digital back plate. Install the digital plate, then install the #41050 and any Hasselblad V viewfinder you choose. I sometimes walk around with my ALPA TC with the #41050 and RMfx, looking for compositions before shooting it with a digital back. It works well for my needs and is bright and easy to focus on.
***
PM90 (#42288)
The PM90 #42288 is a low-profile prism viewfinder that allows the photographer to see at the eye-level position of the camera. It is suited for switching between portrait and landscape composing and shooting. It has a 2x enlarged unreversed image that covers the entire focusing screen. The large, easily interchangeable eyepiece is designed to give eyeglass wearers an image without vignetting. Corrective power eyepiece replacements range from -4 to +3 diopters.
I find this viewfinder a pain to use with a digital back. It can be difficult to install and remove due to its low profile. It can also be difficult to install/remove with a film magazine, but this is not as costly as a digital back. You do not want to play with the safety of an expensive digital back; talk about stress!
Here it is if you want a non-metering 90° viewfinder for your 500/200 series camera. I do not use the PM90 often enough to justify keeping it since I got used to shooting with the PME45 in the portrait orientation.
***
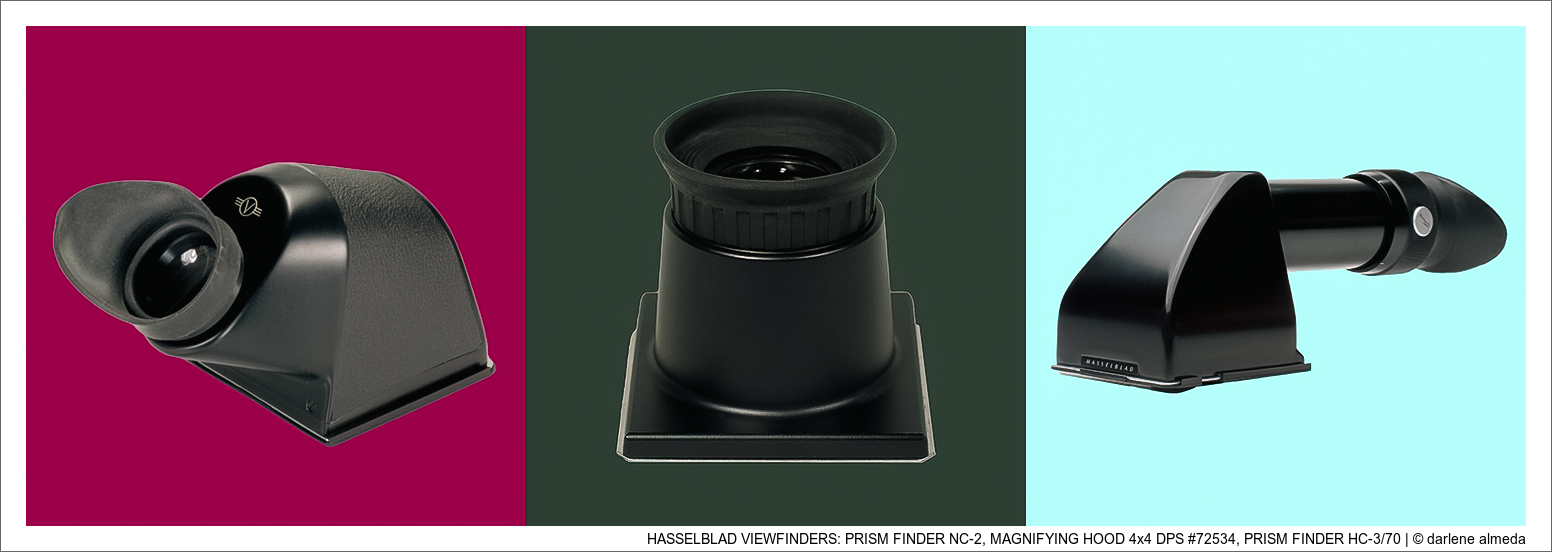
[ PRISM FINDER NC-2, MAGNIFYING HOOD #72534, PRISM FINDER HC-3/70 ]
HASSELBLAD VIEWFINDERS: NC-2, MAGNIFYING HOOD #72534, HC-3/70 #52043
Pictured above are two viewfinders I used the most in my past film career and one designed to help focus when using a digital back before Live View. I will go into greater detail about why I used these viewfinders and what cameras or shooting scenarios I used them for.
***
PRISM FINDER NC-2
The NC-2 provides a sighting angle of 45° about the lens’s optical axis. The view provided is an unreversed, 3x enlarged image on the focusing screen. The short light path of the NC-2 maintains a minimum of light loss. I used the NC-2 for over a decade with my 500c and 500cm cameras at special events, portrait sittings in the studio, and environmental settings. It served me well. If you want a non-metered 45° prism finder, this might fit the bill. Because of their age, I recommend buying from a reputable dealer with a clearly stated return policy if the mirror, glass, or overall condition does not meet your expectations.
***
MAGNIFYING HOOD 4×4 DPS (#72534)
The Magnifying Hood 4×4 DPS #72534 was designed to help users focus while utilizing a digital back on a Hasselblad V series camera, FlexBody, or a Hasselblad digital back on a view camera. They were recommended for use with a 37mm x 37mm sensor area (and marginal usable for the 44mm x 33mm sensor of CFV-50C and other digital backs). I have a digital sliding back made by Kapture Group (now defunct) for my Sinar Norma + Hasselblad V digital back that came with this magnifier hood. It does a good job, but I no longer need it because of having Live View with the CFV II 50c.
***
PRISM FINDER HC-3/70 (#52043)
Designed to be used with the larger A70 film back and a V series camera, the HC-3 has a sighting angle of 45° about the lens’s optical axis. The view provided is an unreversed, 4x-enlarged image on the focusing screen, and the HC-3’s eyepiece is adjustable ± 5 diopters. I used this viewfinder for over a decade while shooting 70mm at special events. It was a lifesaver if you shot 70mm, which many photographers did not. Back then, I would purchase 100-foot rolls of Kodak VPS III and load the film into 70mm cassettes. Kodak Portra is what VPS III evolved into. I do not know if this viewfinder is necessary today without the availability of 70mm film and having to use an A70 magazine. You could still use it, but it might be or look a bit awkward.
***
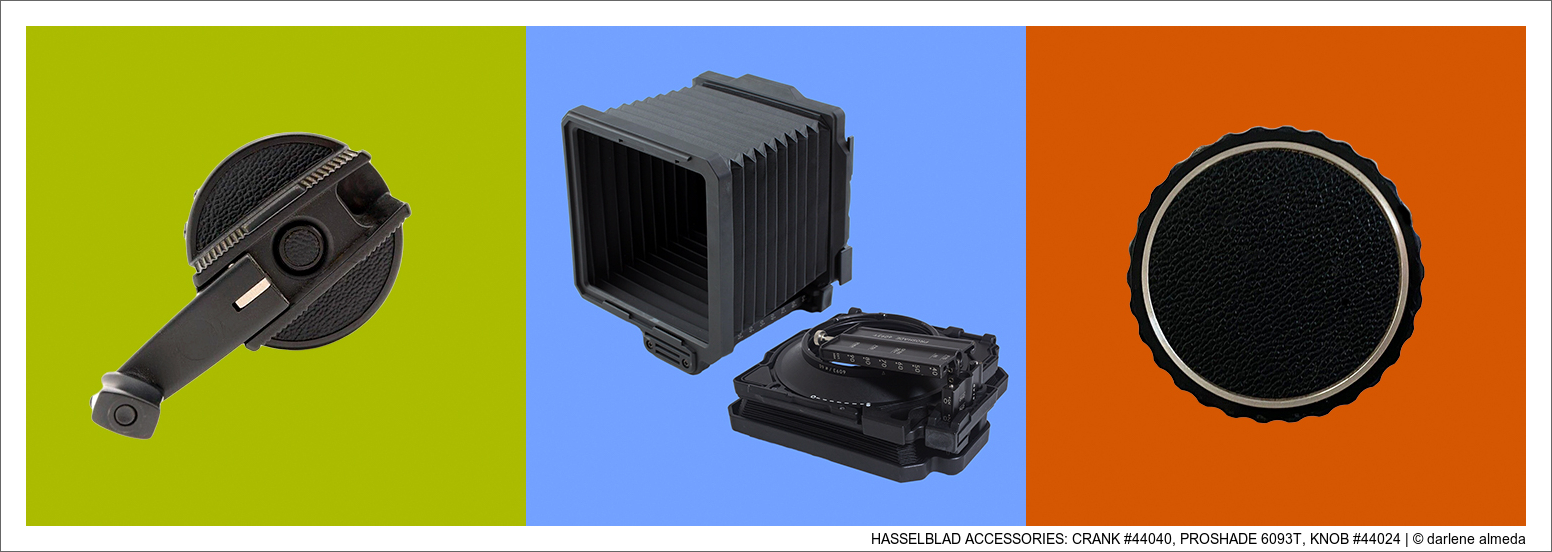
HASSELBLAD ACCESSORIES
ACCESSORIES INTRO
The Rapid Winding Crank #44040, Proshade 6093T, and winding Knob #44024 are Pictured above. Why are these the only accessories I show today? Please read below to discover why these particular accessories are important to me when shooting film and digital with my Hasselblad cameras.
***
RAPID WINDING CRANK #44040
The Hasselblad winding knob on the 500 series cameras can be replaced with a Rapid Winding Crank for faster film winding. It increases shooting speed and advances the film quickly and smoothly. Marketed as an excellent advantage for studio, fashion, and wedding photographers, but realistically speaking, it is good for all types of shooting unless the mounting of your camera prevents its usage, which is why on my 503cx, it was removed (more below). If your V series camera did not come with one (originally sold as an accessory), I recommend it for its easier grip and faster film winding.
***
PROSHADE 6093T
A versatile lens tool, the Hasselblad Proshade 6093T bellows lens shade/hood is a very useful accessory. It fits all Hasselblad lenses from 38mm to 500mm using the different adapters available. It gives you total control of the lens shading and prevents the degrading of the image from stray or direct light on the lens surface. The 6093T can be used with different kinds of filters: Bayonet filters mount on the front of the lens and can be changed without detaching the 6093T. Hasselblad, 93mm filters, go behind the 93mm lens adapter, and the 93mm Polarizing filter can be operated with the 6093T attached to the lens.
The rear filter holder accepts 100mm square resin, glass, or gelatin filters, and multiple filters with a total thickness of 4mm can be inserted simultaneously. The rear holder drops down and out of the way when needed. This is a deal-maker for anyone like myself who uses 10± ND filters like Lee’s Big Stopper series of filters. Find your composition, load the filter, drop the rear holder so you can see through the lens, ensure the focus is still where you want it, and then push the rear holder back up and shoot.
I like all of the above, plus it folds! My preference for single-lens hoods, especially rubber, is no secret. But when I shoot and need to use filters, this is my hood of choice. It takes up hardly any room in my travel pack, and I would keep one in my gear closet even if I did not use it as often as I do with 100mm filters. If you want a Proshade for your Hasselblad, seriously consider the 6093T. You can view the Proshade 6093T user manual here.
***
WINDING KNOB #44024
The Winding Knob #44024 is the standard knob with all-new V series cameras. My 501cm and 503cx had Rapid Winding Cranks (RWC) installed when I purchased them. I prefer the RWC except when my digital V, the 503cx, is used with my panoramic setup. When the 503cx is placed sideways and in the vertical position for making pano slices with my Fotopro E-6 Gimbal, the RWC is too difficult to grab onto because there is not enough room between the RWC and the tripod—easily fixed by installing the Winding Knob #44024.
***
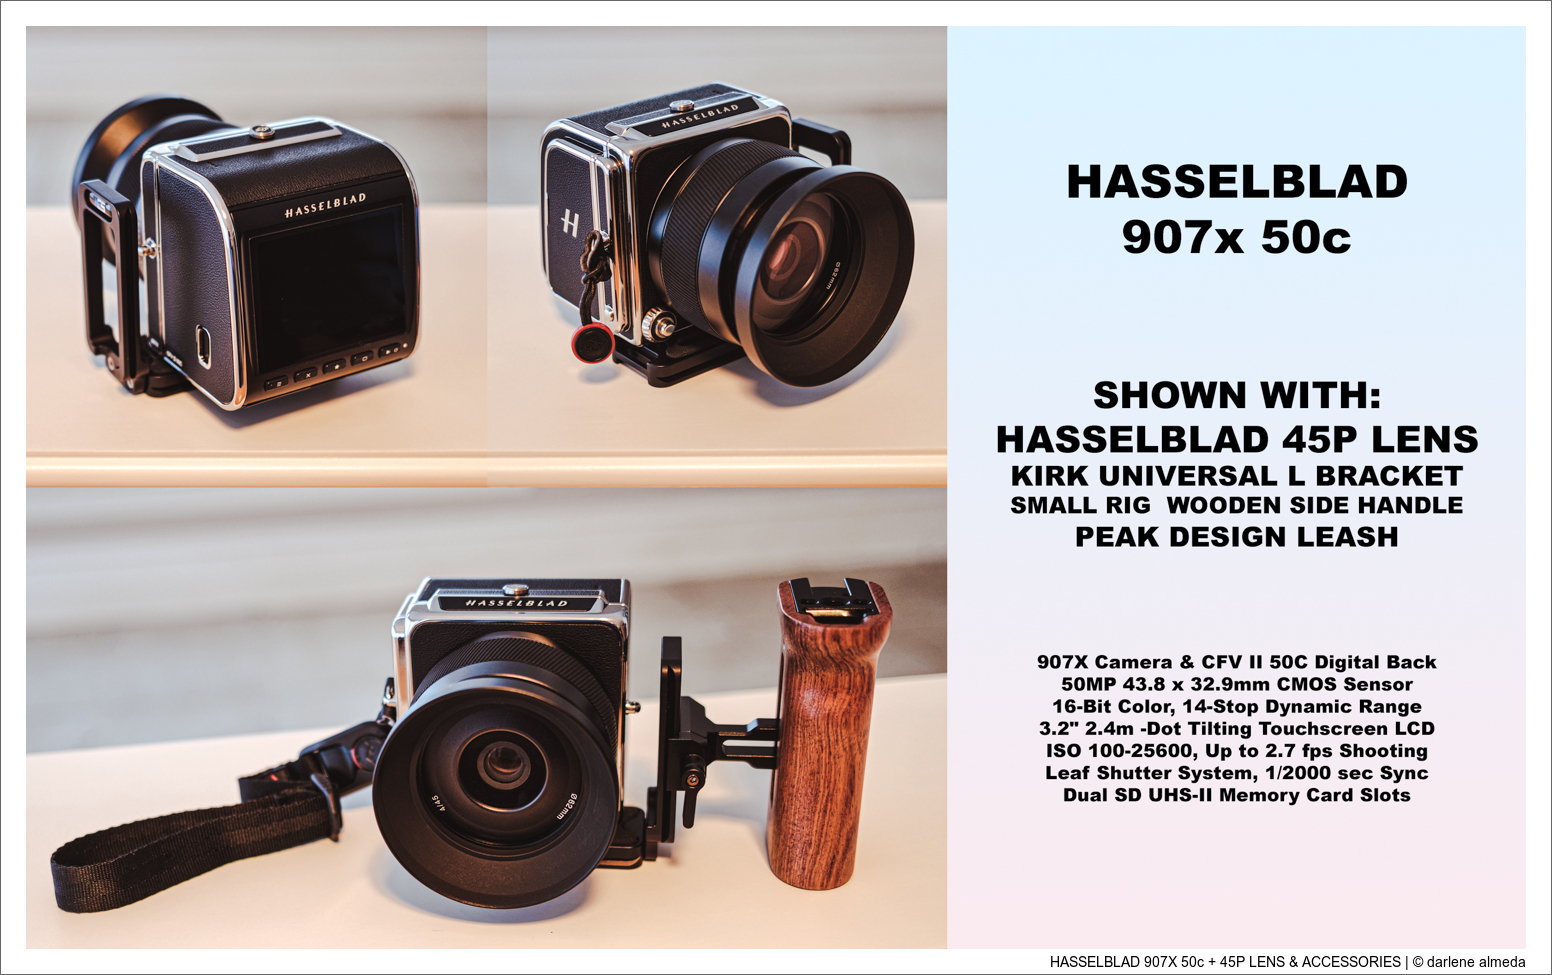
HASSELBLAD 907x 50c
[ HASSELBLAD 907X 50c + 45P LENS & ACCESSORIES ]
The Hasselblad 907x 50c draws inspiration from the iconic Hasselblad 500 series. Its 50-megapixel back, the CFV II 50c (50c), seamlessly attaches to 500 series bodies and, with a flash sync cable, to technical cameras. Utilizing the 50c on the 907x body offers photographers automatic operation for focusing, various forms of bracketing, and more.
It is a delightful camera, yet its compact design calls for a grip or strap. I secure it with a wrist strap, which works well for me. It offers a comfortable hold when cradled in the hands like a 500 series with the waist-level finder attached.
I initially acquired the 907x solely for the 50c, replacing my original CFV 50c. However, I later decided to add the 45P lens to explore their combined potential. The pairing worked seamlessly. I’ve used this setup handheld for street photography with excellent results. Now it is 2025, and I have my XCD three-lens kit—all “P” lenses: the 28, 45, and 75. This setup should keep me happy for a while.
Hasselblad offers a Control Grip, and while it can add to the ease of automatic settings, it does not interest me. As pictured above, my more economical answer for a grip is the Kirk Universal L Bracket and a Small Rig Wooden Side Handle. The Peak Design Wrist Strap is what I use for most of my cameras, and I use it with the 907x without difficulty.
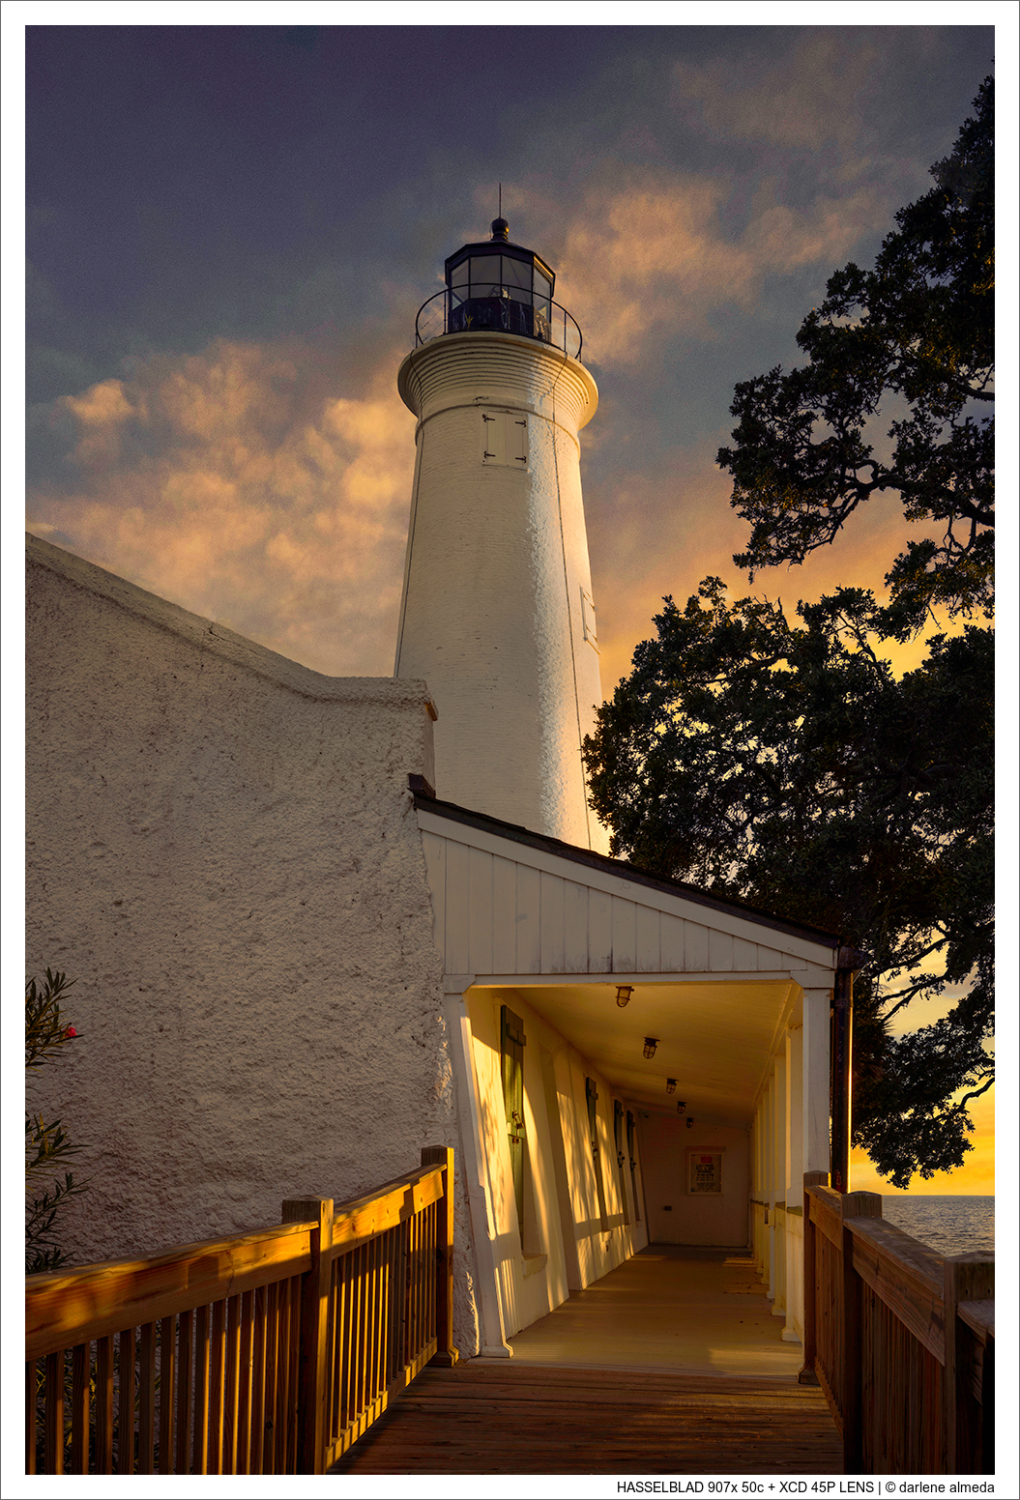
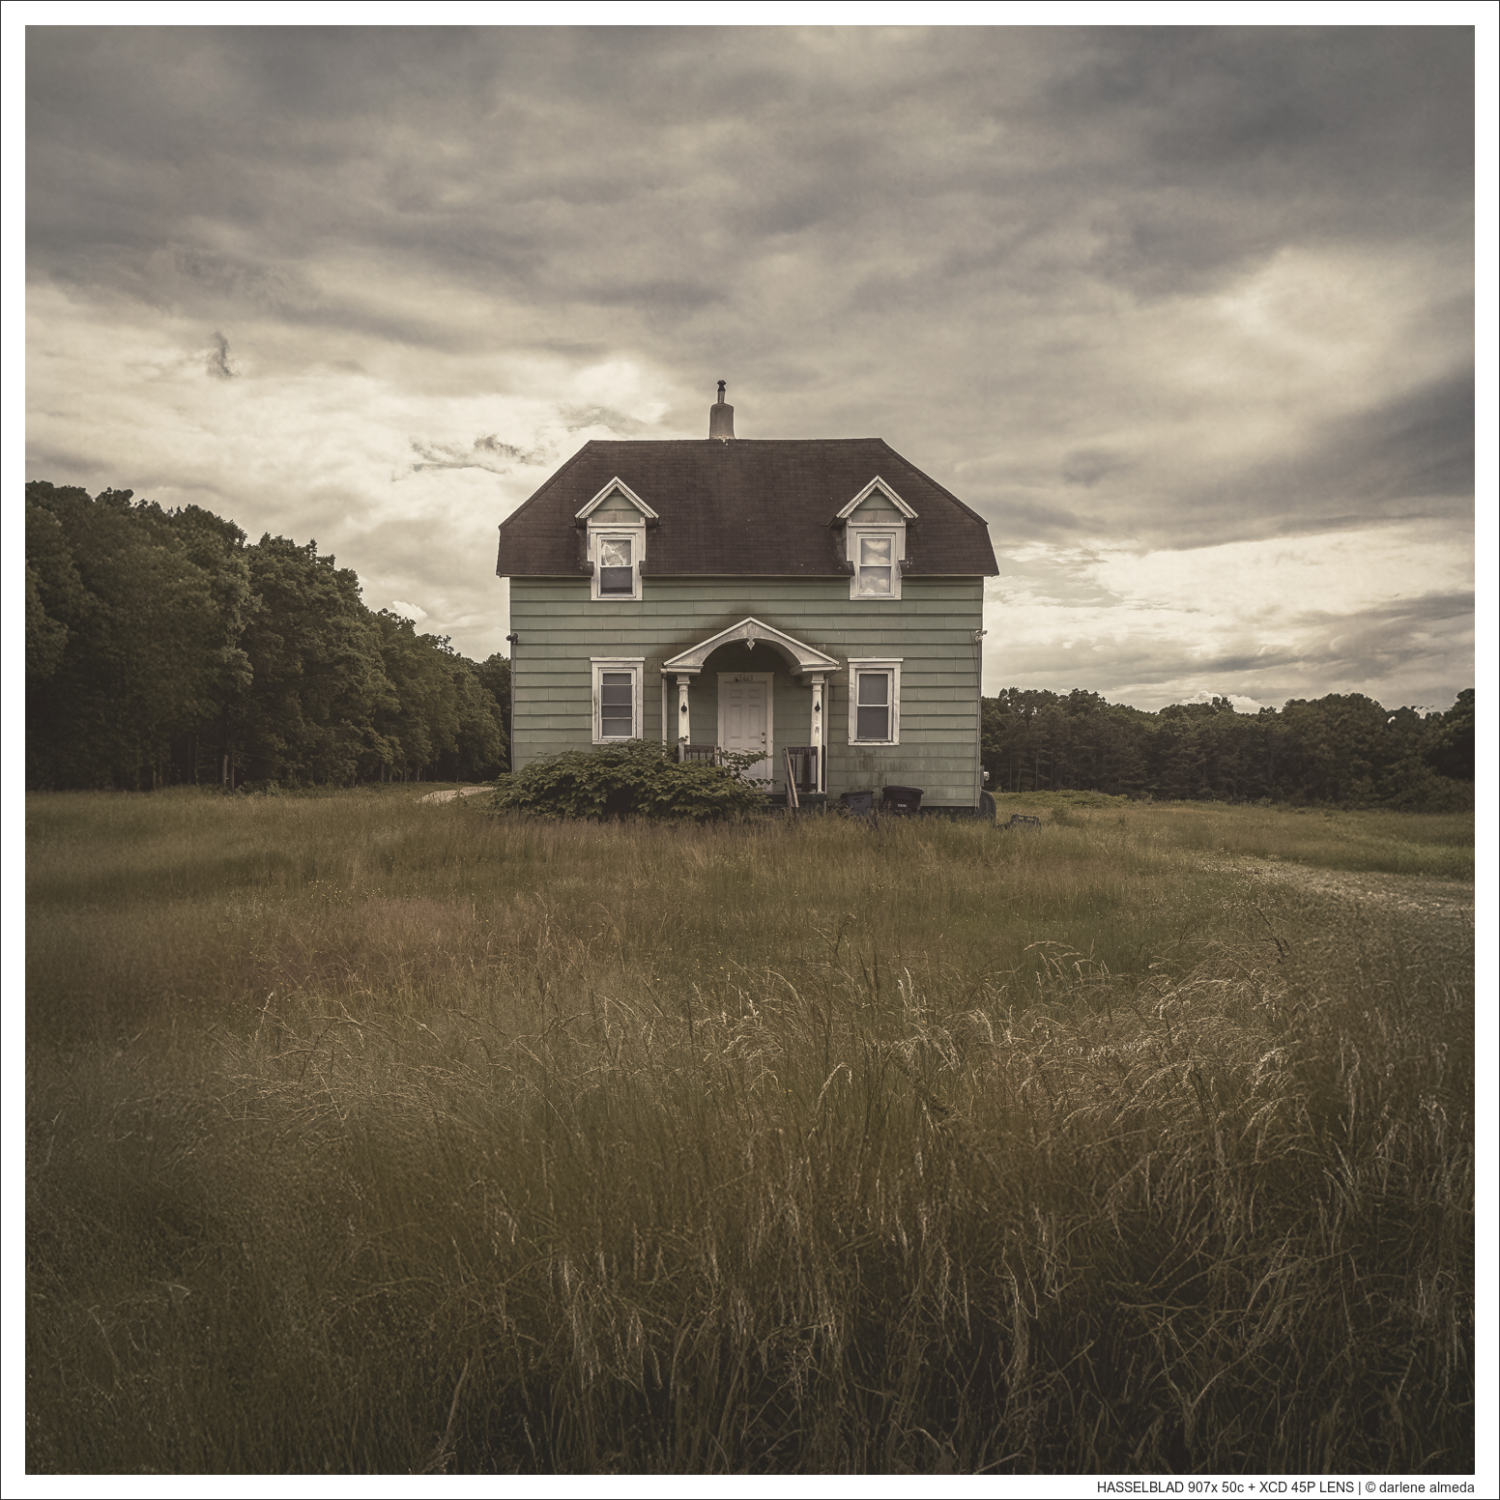
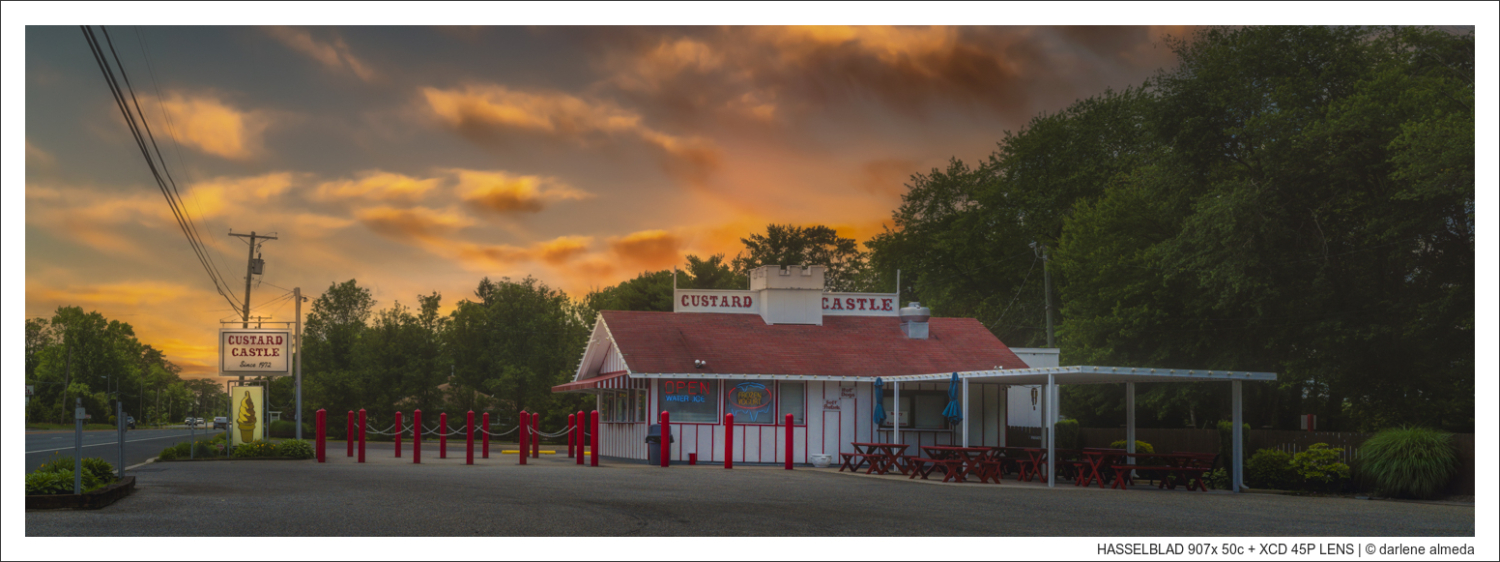
GALLERY #6: 907x Images
HASSELBLAD DIGITAL BACKS
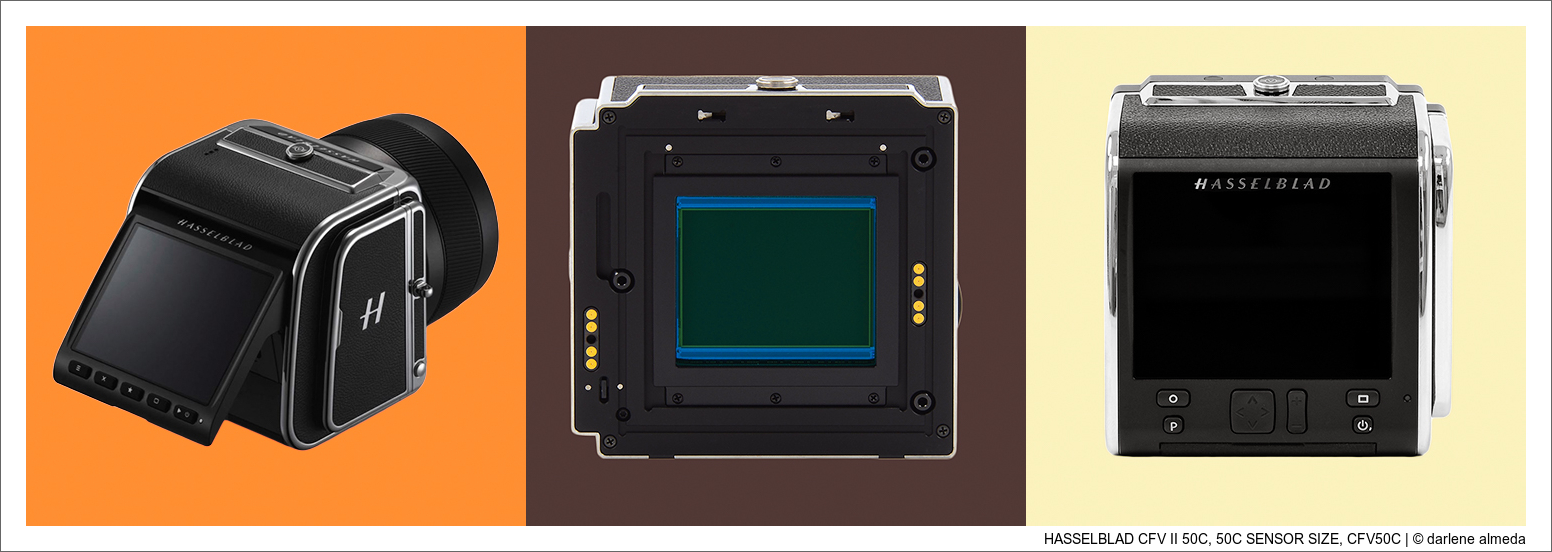
[ HASSELBLAD CFV II 50C, 50C SENSOR SIZE, CFV50C ]
DIGITAL BACK: CFV II 50c
Pictured above in the first photo is the CFV II 50c back on a 907x camera and lens. The CFV II 50c is an updated CFV50c digital back featuring a classic V-system interface for the included 907x (below) and all Hasselblad V cameras. Designed with the classic look of the A12 back, this digital back has been outfitted with versatile digital capabilities revolving around a 43.8 x 32.9mm 50MP CMOS sensor, which yields high-resolution imagery with a wide 14-stop dynamic range, 16-bit color depth, and an ISO 100-25600 sensitivity range. The CFV II 50c incorporates a rear 3.2″ 2.4m-dot tilting touchscreen LCD. The rechargeable lithium-ion battery is now nestled internally for a sleeker overall profile. Additionally, built-in Wi-Fi permits wireless remote control and file transferring via Hasselblad’s Phocus Mobile 2.
The significant differences between the Hasselblad CFV50c and the CFV II 50c digital backs are the User Interface (UI) and the rear tilting screen. Other photographers owning both backs, such as I have, may notice another difference I may not use in the CFV II 50c UI or a tool added to the newer back I do not use. The sensors are the same in the CFV50c and CFV II 50c, but the rear screen and UI differ. There is also a better screen resolution on the II, but not enough for me to justify an upgrade.
I only chose to upgrade from the original CFV50c because it got damaged and had to be sent to Sweden for sensor glass replacement. I needed another back for commercial work ASAP, and my backup, the Phase One P45, stepped in, but the color pallet is different. When you work for a client where you maintain their website catalogs and web graphics, the colors need consistency. Sweden got the CFV50c back to me in about 3-4 weeks, and the cost was ~ $2,500.00. I decided to sell it because, learning from my P45 backup, it would not get enough use, and selling the P45 did not make good economic sense; it would go for peanuts, and I like having a CMOS and a CCD back in my gear closet.
***
THE 50C SENSOR
The second photo shows the 50c sensor in both the 50c and 50 II digital backs. This 43.8 x 32.9mm 50MP CMOS sensor yields high-resolution imagery with a wide 14-stop dynamic range, 16-bit color depth, and an ISO 100-25600 sensitivity range. Hasselblad’s Natural Color Solution delivers realistic, pleasing color tones for consistency and smooth tonal transitions.
***
DIGITAL BACK: CFV50C
The CFV50c back is shown in the third photo. It uses the world’s first medium-format CMOS sensor, a leap forward in digital imaging technology with Live View (LV) availability. It broke new ground for photographers who wanted to achieve digital quality with V system equipment using LV capabilities. Like the CFV II 50c, the 43.8 x 32.9mm 50MP CMOS sensor in the CFV50c yields high-resolution imagery with a wide 14-stop dynamic range, 16-bit color depth, and an ISO 100-25600 sensitivity range.
The CFV50c was my first Hasselblad digital back and my first digital back with LV. LV alone was a breakthrough technology, and the CFV50c was the first to offer it. Shortly after it hit the market, Phase One came out with its back with the same sensor and LV technology. The CFV50c was an excellent back. I sold it after it returned with a new protective sensor glass from Sweden. It served me well and would still be in my toolbox if I did not need to replace it.
***
GALLERY #7: CFV STUDIO IMAGES
FOCUSING ISSUES WITH V CAMERAS & DIGITAL BACKS
Using a digital back with vintage mechanical cameras, like the Hasselblad, introduces unique focusing challenges. Film and digital sensors differ in how precisely they require the focus plane to be aligned; film is comparatively lenient, whereas digital demands exactitude.
The mechanical nature of these older cameras means components like the mirror—which reflects the image to the focusing screen—can shift out of perfect alignment, complicating the task of accurately focusing on the digital sensor. The traditional focusing method relies on this mirror and screen system; any misalignment here can cause errors in focusing. Misalignment can happen for several reasons, but one is mirror movement over time.
The advent of Live View (LV) technology on digital backs has significantly mitigated these issues. LV allows direct focusing between the lens and the sensor, circumventing any potential misalignment issues with the mirror. Thus, even with a slightly off-kilter mirror, LV’s direct lens-to-sensor focusing method renders this misalignment moot, ensuring accurate focus every time.
Alternatively, tethering to a computer offers a solution for precise focusing, although modern computers might lack the specific ports needed for a CCD digital back to function correctly. A potential fix involves incorporating an older laptop equipped with the required connections like FireWire, but this method might reduce your efficiency.
Therefore, if your budget allows, invest in a digital back equipped with LV. This bypasses the hassle and ensures a smoother workflow.
LIVE VIEW 500 SERIES HASSELBLAD: HOW IT WORKS
To utilize Live View with a ‘V’ series camera body, follow these steps:
- Switch the camera to ‘B’ (Bulb) mode.
- Lock the mirror up to allow the sensor visibility through the lens.
- Ensure the lens shutter remains open, typically achieved using a locking shutter release cable.
- Frame & Focus your shot on the Live View screen.
- Disengage ‘B’ mode.
- Advance the film crank to prepare for capturing the photo.
- Take the image.
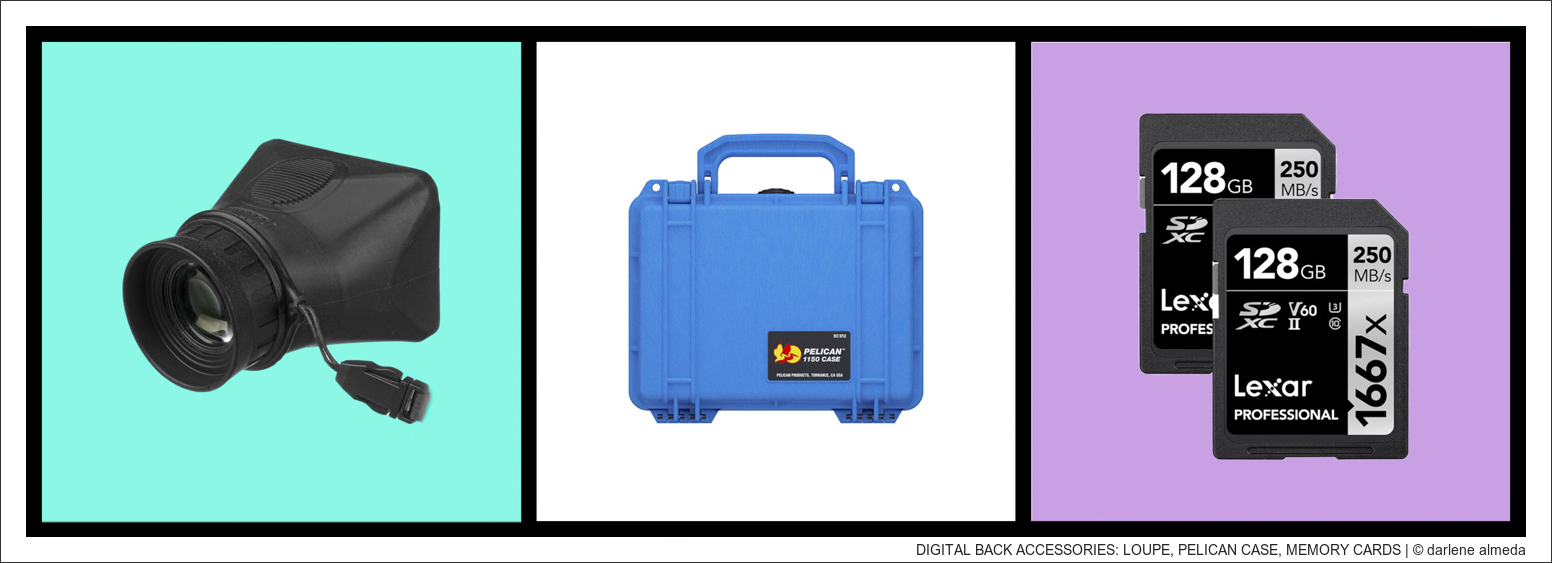
DIGITAL BACK ACCESSORIES
HOODMAN 3.0 HoodLoupe
If you plan to shoot in bright, sunny conditions with your digital back, investing in a Loupe designed explicitly for camera digital screens is highly recommended. I’ve used the Hoodman 3.0 HoodLoupe since 2011 with my first digital back, a Phase One P45. Despite the absence of Live View on the P45, I still required visibility of the data on its screen for proper operation. That’s when I acquired the HoodLoupe 3.0, which has consistently met my visual requirements when working with a digital back in sunny conditions. It is made from a durable rubber-like material that does not scratch my screen. Today, Hoodman offers an updated version, the HoodLoupe 3.2.
***
PELICAN CASE 1150
Depending on the camera system I’m using with my Hasselblad CFV II 50c, either the 503CX or ALPA technical cameras, I must carry the digital back separately from the 907x. For each camera setup, I utilize different cases. When traveling with the 503CX, I rely on a DIY Tamrac lens case to securely store and transport the digital back alongside the camera body and lenses in a backpack. On location shoots with my ALPA technical camera gear, I house the digital back in a Pelican 1150 case with four batteries. When traveling with the 907x, the digital back and 907x body are kept in a Gnass case (no longer manufactured), resembling a Stone Photo Gear 49495 case.
***
MEMORY CARDS
When it comes to memory cards, it’s advisable to invest in the best and fastest ones within your budget. The cards depicted above are the ones I currently utilize with my CFV II 50c. They were the finest and quickest options available when I acquired the back, and they still perform admirably.
***
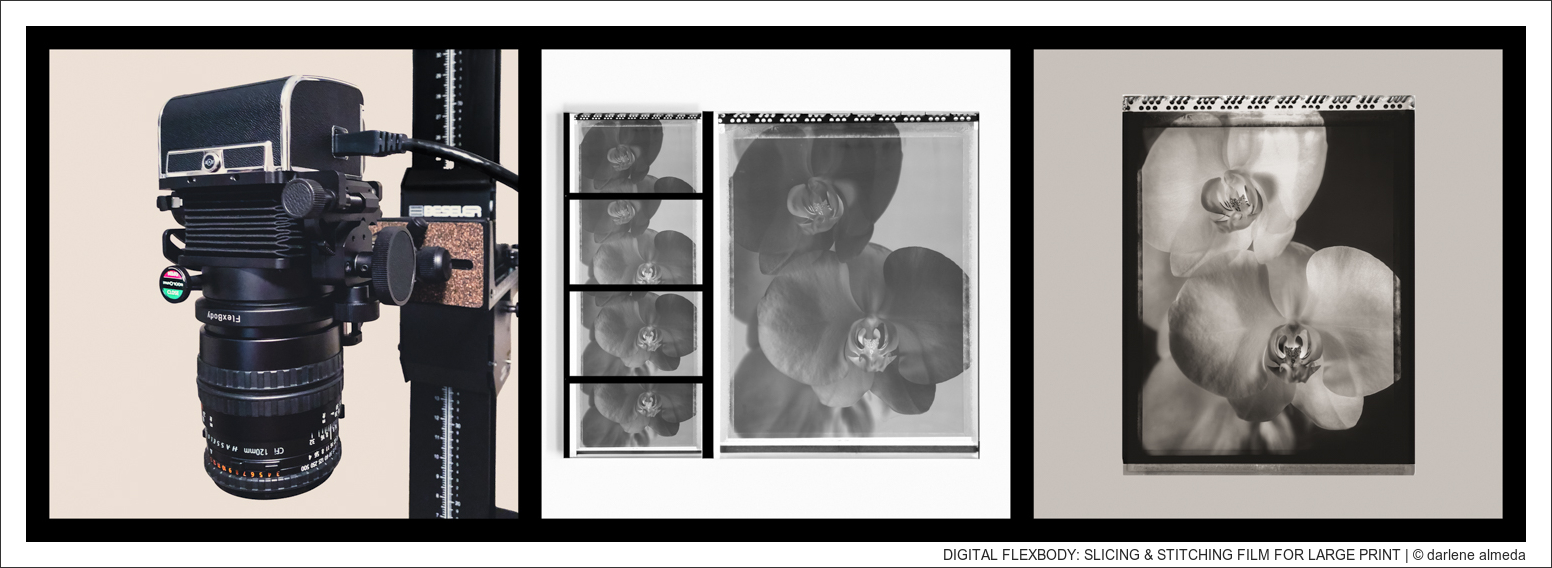
DIGITAL FLEXBODY
[ DIGITAL FLEXBODY: SLICING & STITCHING FILM FOR LARGE PRINT ]
I use the Flexbody primarily for digitizing film with my digital back, especially when generating very large files. Additionally, it serves me well for macro art image creation. While I haven’t yet ventured to use it for landscape photography outside the studio, I’m confident in its capabilities for this purpose. I’m aware of several photographers who utilize it exclusively for landscape shooting, attesting to its effectiveness in such scenarios.
The only thing I wish was different would be to rotate the film plate for use with a digital back. The rear of the Flexbody is just like a 500 V camera, stationary in a square orientation. Over the years, photographers have asked me if a Flexbody has rear tilt in portrait orientation, which it does not. I tell them you can orientate the Flexbody with the correct tripod head or use an “L” Bracket in portrait view, but the tilt now becomes swing. They ask because they want to use the Flexbody with a digital back in portrait orientation for stitching. Unfortunately, this ends up being a deal-breaker for many, but digital backs can offer live view (LV) in square mode, which may help some.
***
USING A DIGITAL BACK WITH THE FLEXBODY
There are a few differences between a V body and a Flexbody. Besides the obvious being, the Flexbody is a mini view camera with 22mm bellows and tilt (±30° via image plane) & back shift (±15mm); there is the rear ground glass for viewing and focusing, there is no release button on the Flexbody; instead you must use a cable release via the cable release port to take images. There is also a different way of cocking the lens. It is the unique way of cocking the lens that makes the Flexbody one of the best Hasselblad V cameras for digital back shooting. Here are the steps for making a digital exposure on the Flexbody:
1. Rotate the shutter winding knob (SWB) clockwise one full turn to wind and open the shutter.
2. Now that the shutter will stay open, turn on LV to compose & focus your image.
3. Turn off LV and lightly press the cable release for the shutter “closed” position.
4. Press the shutter release again to take the image.
5. Start back at step #1 to make your next image.
***
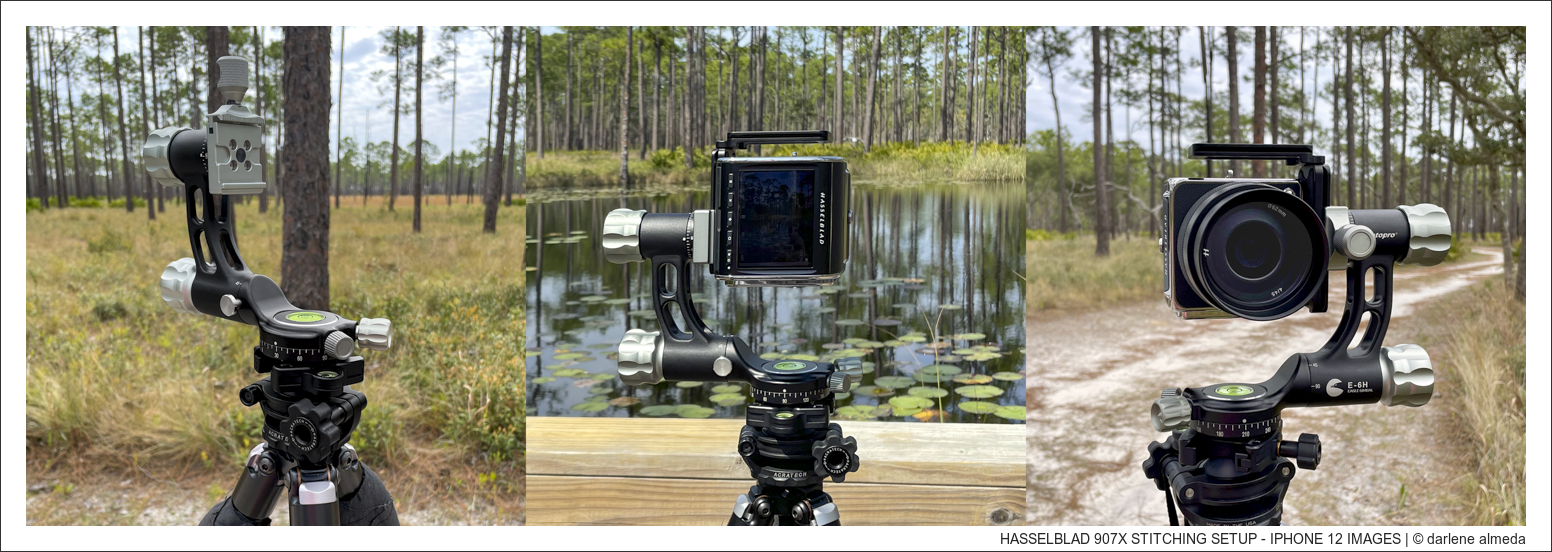
STITCHING SETUP: HASSELBLAD 907x & ALPA TC w/CFi LENSES
[ HASSELBLAD 907X + XCD 45/4 P + STITCHING SETUP ]
When capturing landscapes on a clear, wind-free day using stitching technique, I rely on my proven stitching setup: an RRS Series 1 Tripod paired with an Acratech Pano Head and Leveling Base, complemented with a FotoPro Eagle 6 Gimble type head as shown above.
This configuration seamlessly supports my 907x camera, fitted with a Kirk Universal L Bracket, and my ALPA TC with its dedicated attachment shoe.
The ALPA TC, being a square frame camera, eliminates the need to change camera orientation, simplifying the process by simply attaching the digital back in either landscape or portrait orientation.
While I’ve successfully utilized this stitching setup with my 500 series bodies, the 907x is preferable due to its automatic features like exposure, electronic shutter, and bracketing modes. However, when I opt for the 100 or 180 lens for stitching, it will be the ALPA TC due to its lighter weight than the 500 bodies and the absence of a long lens for the 907x.
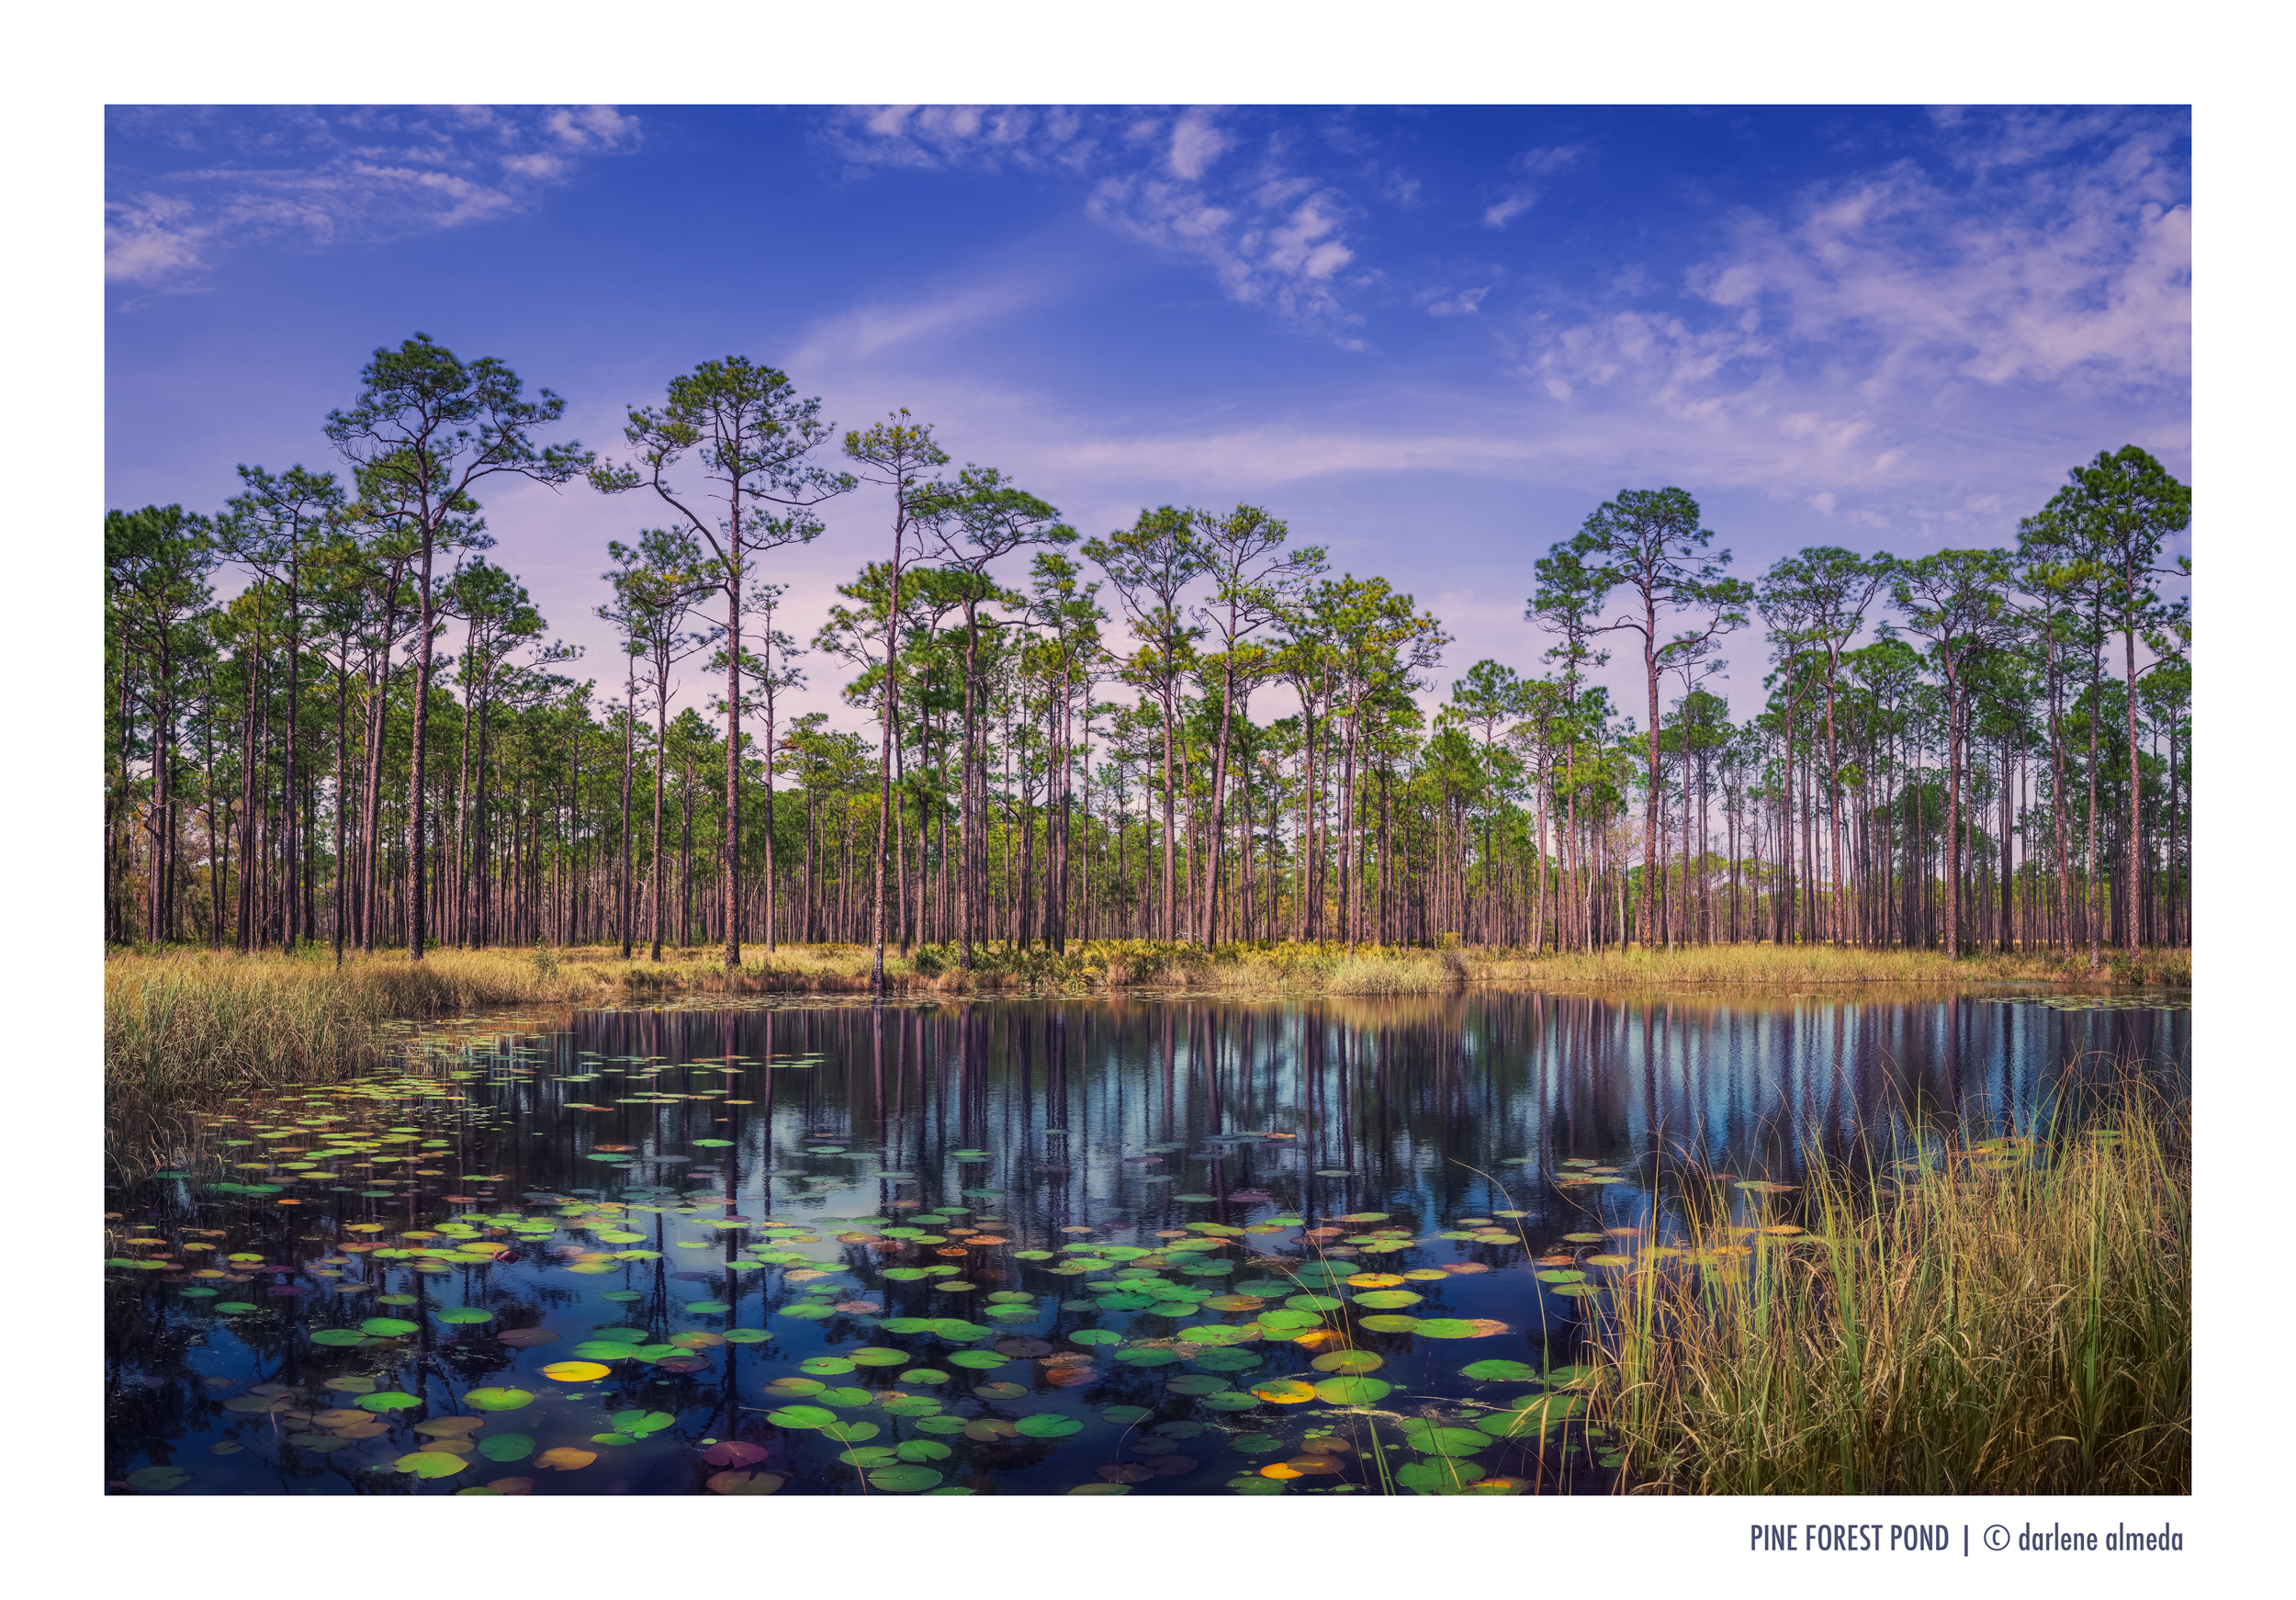
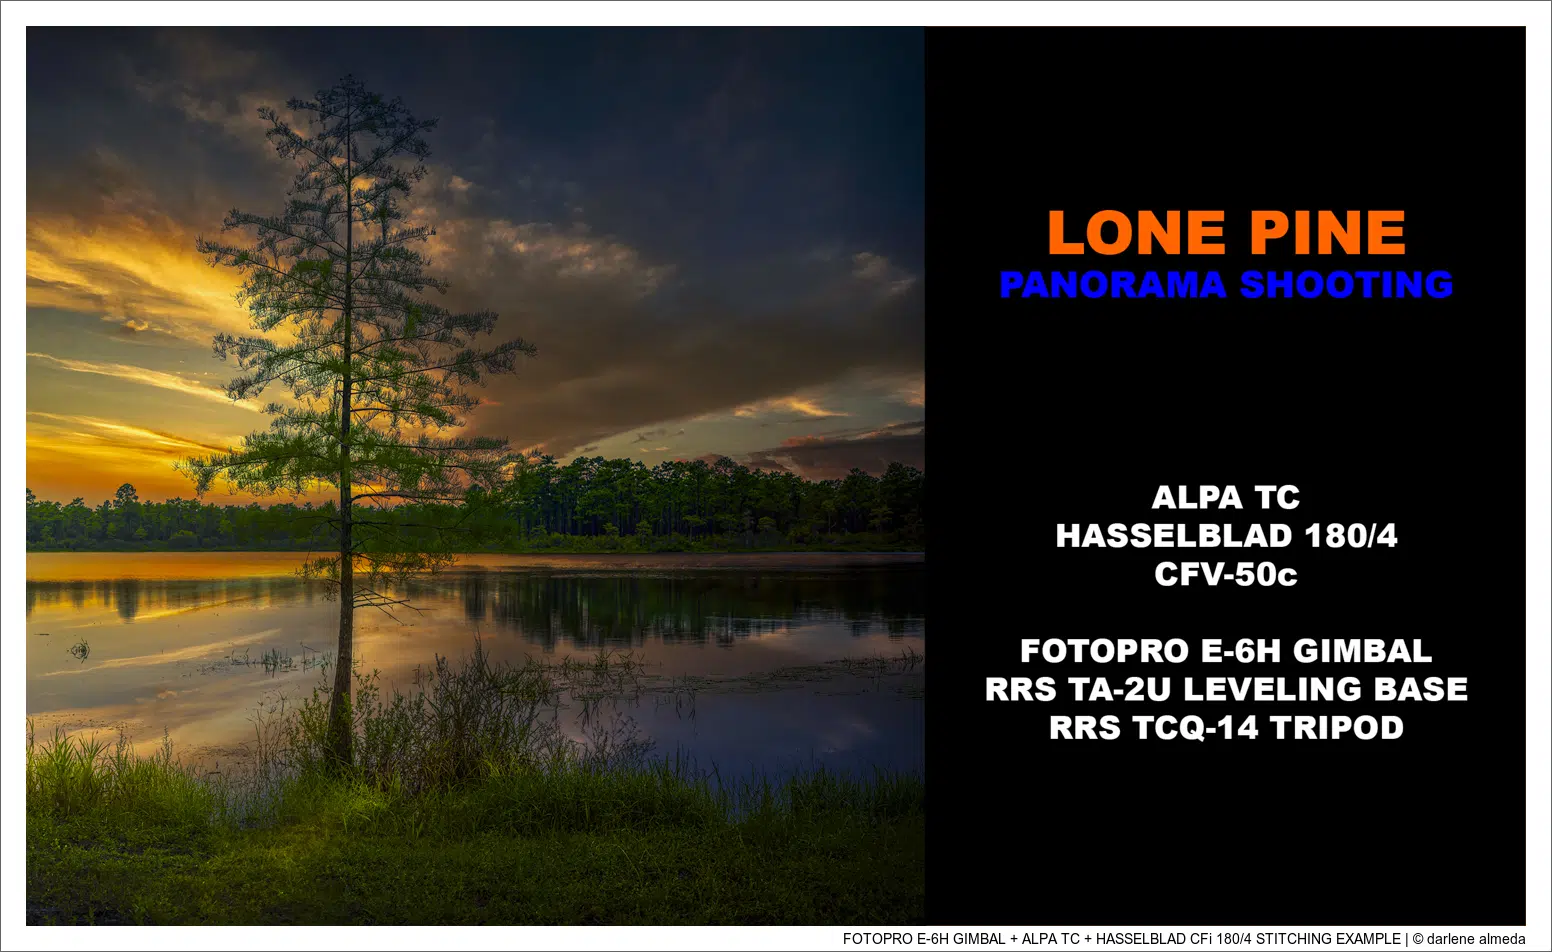
In galleries #8 & #9 below, I showcase stitching examples created using the 907x with the 45P lens and another made with the ALPA TC with the CFi 180/4 + CFV50c combination.
HASSELBLAD + ALPA: LIGHT HASSELBLAD SETUP
[ LITZ STUDIO V LENS ADAPTER + (ALPA TC + SK35 + CFV50C) + ALPA TC BODY ]
The lightest setup I have for shooting Hasselblad lenses with a digital back is with an ALPA TC (image #3), which is possible because of the Litz Studio Hasselblad V Lens adapter for ALPA cameras (image #1). It operates precisely like the Flexbody and can rotate the back.
I do not have a Hasselblad V lens wider than the CFi 60/3.5. I shot with the CF 50/4 for decades, which was extremely useful for some of my commercial film work, but I don’t like how it renders digital sensors. Hasselblads CF 40mm lenses are a choice. Still, they are expensive, especially when you already have a top-quality wide angle in your toolbox that can easily fit in your bag when you trek out into the field; the ALPA Schneider XL 35/5.6 APO Digitar (image #2).
The CFi 180/4 is one of my top picks for stitching shots with my ALPA TC. There’s a distinctive charm in capturing landscapes through a telephoto perspective. While it might not suit every scene, it can create captivating views. As illustrated in the following image, I’ve discovered that stitching is the optimal technique to achieve my desired visual effect.
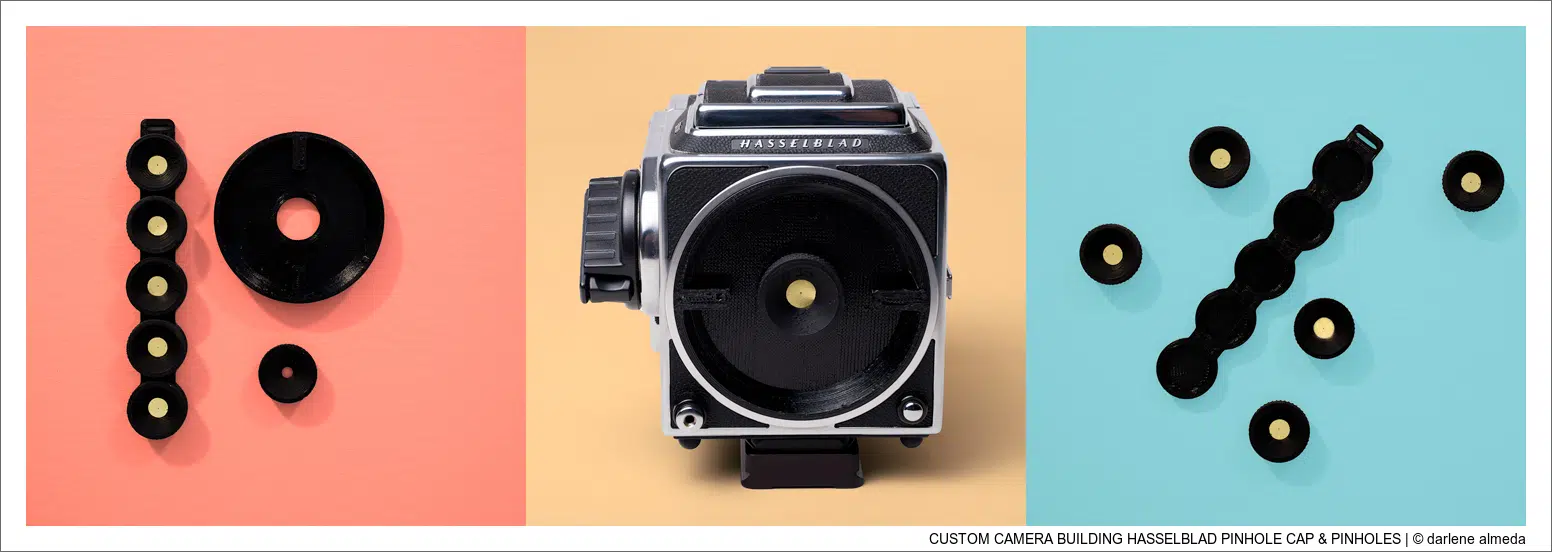
HASSELBLAD V PINHOLES
[ CUSTOM CAMERA BUILDING HASSELBLAD PINHOLE CAP & PINHOLES ]
CCB V PINHOLE CAP & PINHOLES
The Custom Camera Building (CCB) Hasselblad Body Cap & Pinholes should be on your shopping list if you enjoy pinhole photography and own a Hasselblad 200, 500, or 2000 series camera.
My initial feelings about shooting a pinhole negative less than 6x17cm or 4×5″ were not very positive. My thoughts drifted toward the added blurriness a smaller negative might produce. Pinhole images are already unsharp, but just enough to where I like it. I assumed shooting a pinhole with a smaller film frame might cause the image to be less likable due to more blur. Boy, was I surprised. Not only were my images artistically fulfilling with the unsharpness I like, but there was an added workflow bonus I had never thought of until my first shooting.
On the 2023 Worldwide Pinhole Day, April 30, I used my Hasselblad 501cm as a pinhole camera for the first time, using the 0.35mm (77mm/220) pinhole. The ability to take a few pinhole images with the CCB body cap in place, then remove it to take an image or two with my CFi 180/4 lens was priceless to this photographer. I never thought of that option before. When I travel with my Hasselblad kit, the CCB Pinhole Cap & Pinholes will travel with it. This is a nice and easy way to be creative with the same subject.
The CCB Hasselblad #4 kit contains five different pinhole sizes, plus the cap and an empty pinhole holder to use alone or for installing a customized pinhole. Miroslav Francuz from CCB was kind enough to answer my questions and responded with helpful information about why different pinhole sizes are included in the kit.
Different pinhole sizes do not produce better image quality per se, but are good for:
(1) helping to adjust exposure length (larger pinholes allow more light in when needed),
(2) creating more blur by using a pinhole size that goes away from the ideal size,
(3) trying different pinholes with extension tubes or homemade cameras.
So you can see all our creative options using different pinhole sizes. Thanks to CCB’s kit and the information they provided, I will test these various pinholes on my 4×5 with my Hasselblad lens adapter and my digital back before shooting film and will report back. I can’t wait to see what comes from this.
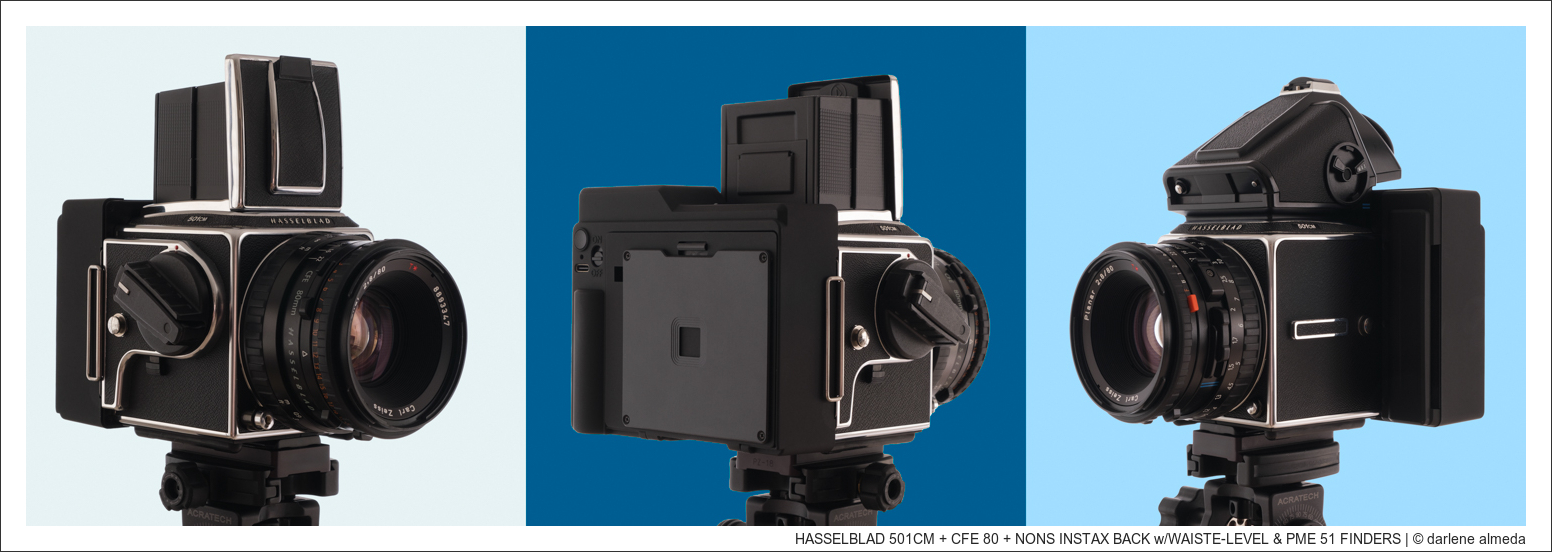
NONS INSTANT BACK
[ HASSELBLAD 501CM + CFE 80 + NONS INSTAX BACK w/WAISTE-LEVEL & PME 51 FINDERS ]
The NONS Instant Back is a plastic marvel with metal bits lighter than a feather and softer than my bunny slippers. They’ve coated it with some fancy rubberized texture to ensure it doesn’t slip through your fingers like a bar of soap in the shower.
This sweet little box is tailor-made for your Hasselblad, ready-to-rock Instax Square film like it’s nobody’s business. It’s like the yin to your camera’s yang, fitting snugly like a favorite pair of boots. And did I mention the sleek design? It’s so close to Hasselblad’s square format that you’ll get a full Instax frame with a small black border – because every picture needs a little black frame, right? [continue]
MORE TO EXPLORE
The related posts below are connected by camera, technique, topic, or the quiet pull of curiosity.


