Finding Inspiration in Simple Things: Overcoming Creative Slumps

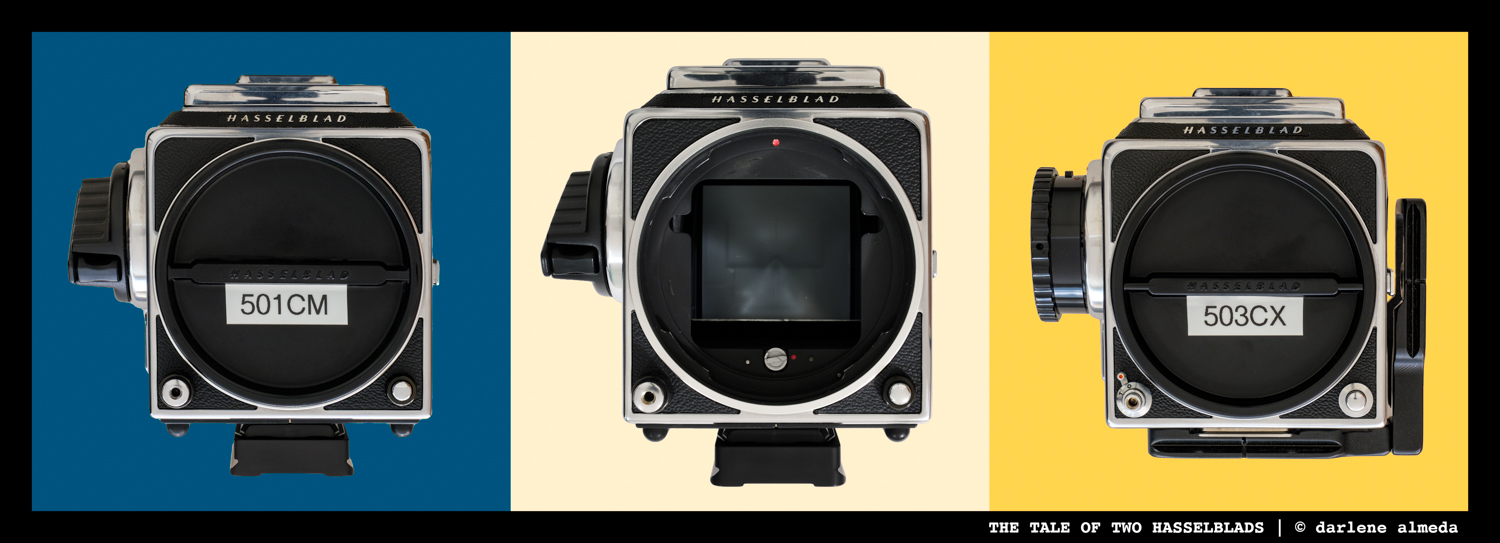
Camera: Hasselblad 501 CM
Lens: CFi 120 f/4 Macro
Film: Kodak Tri-X
Dev: Pyro HD

  Location: Studio
  Date: 2017
  Lighting: Profoto 500 Air
  Genre: Still Life

How do you navigate a slump or a period of boredom in your photographic journey? Every creative faces it at some point. When it happens to me, I turn to my other interests—reading books beyond photography, immersing myself in music, and engaging with mathematics, a lifelong fascination of mine. I spent three years majoring in math at a technical college before shifting paths when my mother was diagnosed with cancer. Caring for her became my priority, but my appreciation for mathematics never faded. It continues to shape the way I see and interpret the world.

I believe my love for mathematics is also tied to my fascination with nautilus shells—their elegant spirals, a perfect example of nature’s precision. But I don’t collect only nautilus shells. I have a shoebox filled with various shells that I turn to when I need inspiration. Photographing still life in my studio is my version of creative “comfort food”—a way to reconnect with my artistic side when boredom strikes.

As creatives, we all need something to sustain us through dry spells. For me, it’s still-life photography—a quiet, familiar space where inspiration returns. When I say “studio,” I don’t mean a grand setup; it’s simply a place with special light and comfort. You don’t need much space to create.

I started in a small Brooklyn apartment while working in commercial art for a Manhattan ad agency back when photography was just a hobby. I learned to position a simple chair near a window where warm afternoon light poured in. As the hours passed, the light would shift, bouncing off surrounding buildings, becoming more directional and dramatic. That’s where I learned to truly see light. Even in a small space, a draped tablecloth transformed a surface into my own personal still-life studio.

Those were beautiful days, and even now, they bring me immense joy when I reflect on them. It was a special time in my photographic journey—everything felt new, and I saw the world with the wonder of a child. My curiosity burned brightly, and my thirst for knowledge felt endless.

As a photography instructor, I shared that experience with my students. Many of them were in the same position I had been—financially struggling but eager to learn. They, too, discovered how something as simple as a chair and window light could unlock their creativity.

When creative slumps come—and they always do—remember that inspiration doesn’t have to come from grand gestures or faraway places. It often lies in the simplest of things: familiar objects, favorite subjects, or the quiet play of light. Whether it’s still life, portraits of friends and pets, wildlife, landscapes, or street photography, turning to what you love can be the bridge that carries you through.

Thinking smaller, embracing what’s within reach, and working with the light and space you have can reignite the spark. Creativity isn’t about the perfect setup—it’s about seeing possibilities in the ordinary, about finding magic in what surrounds you.

So when the slump comes, don’t wait for inspiration to strike like lightning. Pick up your camera, focus on something that makes your heart stir, and begin. Even the smallest steps can lead you back to the joy of creating.

Technical Notes

Even though I have far more resources today than in my Brooklyn days, I still gravitate toward using window light or a single studio light with mirrors or fill cards. It feels natural to me. But I have a photographer friend who takes a different approach, often using four or more lights to craft the stunning portraits his clients love.

That’s the beauty of photography—and creativity as a whole. Our personal styles shape how we see and express the world, and that individuality is what makes it all so rich and interesting. If every bird sang the same song in the same tone, the morning chorus wouldn’t be nearly as magical. That’s why, when the first light of day arrives, I pause to listen, appreciating the unique voices blending together. In the same way, we are all like those birds—each sharing our own creative voice, adding something special to the world.

[ NAUTILUS SHELL CONTACT SHEET ]

Pictured above is the contact sheet from the Nautilus shoot, made on Kodak Tri-X 400. What stands out most is how I used my Hasselblad A16 magazine, designed for a 645 crop—yet I still ended up cropping to a square!

This particular magazine is unique because Hasselblad originally took an A16 ‘S’ (Superslide) back—designed to produce 4x4cm frames cropped from the standard 6x6cm format—and modified it into an A16, 645 format. A few of these converted backs exist, and I picked mine up years ago on the used market for a bargain. While I mostly use it for testing, since it allows 16 frames per roll instead of 12, I occasionally run a roll through it just to give it some love—like in this instance.

[ HASSELBLAD A16 MAGAZINE CONVERTED FROM A A16’S’ BY HASSELBLAD ]

The shoot itself was straightforward, but I was clearly experimenting with light. In some shots, I placed a piece of transparent plastic beneath the shell to observe how the light bounced. I also used what I call “shooting putty” to keep the Nautilus in place. If you haven’t tried it, I highly recommend it for stabilizing objects in still-life photography. There are several brands available, but my go-to is BlueStik by DAP—a reliable and versatile option for keeping small items steady.

The best part? I walked away with two images I really like, and I’ll be sharing the second one in a future post.

Closing Comments

[ CANON AE-1 + 50/1.8 + EKTACHROME + COKIN FILTERS ]

The beauty of creativity lies in how we each interpret the world through our own lens. Whether you’re drawn to still life, landscapes, portraits, or street photography, embracing what feels natural to you will always lead you back to inspiration. Even in creative slumps, the smallest moments—like the way light falls on a surface or the familiar curve of a favorite object—can reignite your passion.

So take what’s in front of you, work with what you have, and let curiosity guide you. Whether it’s a simple window, a well-loved object, or a shift in perspective, creativity thrives when we open ourselves to seeing the extraordinary in the ordinary. Keep creating, keep exploring, and most importantly—keep finding joy in the process.

Recent Articles

DIY Custom Case for Your Digital Back

DIY Custom Case for Your Digital Back

I’ve assembled a collection of photography-related items, such as lens cases, equipment bags, and backpacks. While some of these cases are passed on with gear I’ve sold, I’ve retained a specific type of Tamrac lens case due to its durable and lightweight design, featuring a convenient top handle. The centrally located top handle in lens cases proves highly practical, facilitating easy access when reaching into a backpack from above. In this DIY article, I’ll guide you through how I created a custom case for carrying my digital back and backup batteries on location, using readily available materials. Typically, I store my digital back and batteries in a Pelican case when not shooting. Still, I occasionally leave my gear in its bag after a shoot and leave the digital back and batteries in the DIY case, as it offers excellent protection within my camera bag.

DIY Camera Caddy: Secure Your Gear While On-The-Go

DIY Camera Caddy: Secure Your Gear While On-The-Go

I had an older Stanley Tool Caddy I used on environmental portrait shoots years ago. It held an extra lens, a light meter, film, and other small items I would like to access during a shoot. It was a good size for my needs, easy to carry, and durable enough with a thick waterproof bottom.

Shooting a Rolleiflex with Studio Flash and Rolleinars

Shooting a Rolleiflex with Studio Flash and Rolleinars

In this fast-changing age of digital photography, one ingredient missing is a full frame square format camera or digital back. Yes, you can always crop off for a square, but this is not the same as looking through a dedicated square format camera’s viewfinder and being able to achieve full-resolution files. So, what does a photographer preferring the square format do? My option has always been to shoot square format film cameras.

Camera Bag Versatility

Camera Bag Versatility

While assembling my Fuji X-Pro2 (XP2) kit, I began looking for a lightweight bag to store it all in. I wanted the bag to carry my lenses in cases and be easy to work out of from the back of a vehicle. I also use the XP2 in the studio, so the bag had to offer something. Would it be possible to find such a versatile bag?

Panorama In Pieces

Panorama In Pieces

While away on a quick personal trip to Marietta, Georgia, I tried using my favorite point-and-shoot camera, the Fujifilm x100t for panorama making. Earlier in the week, I instructed my students to make a panorama using Lightroom (LR), vertical slice shots, and manual focus for their weekly shoot assignment. After a brief walk around Marietta Square, I thought I would try and photograph a beautiful church and challenge the software with vertical and horizontal slices to see if a tourist with a point-and-shoot camera could make a decent-looking panorama and then share the results with my students.

Infrared Photography Part 2: Sigma SD1M

Infrared Photography Part 2: Sigma SD1M

In Part 1 of this discussion, I explained my current foray into digital infrared (IR) photography and used the Sigma SD1M as my camera of choice. My reasons for choosing the SD1M are the user-friendly removal of the IR blocking filter, and the fact that I currently use the SD1M in my color art photography work. I like the Foveon sensor of the SD1M very much and if you want to use a Foveon sensor, you will have to use a Sigma camera.

Infrared Photography Part 1: Sigma SD1M

Infrared Photography Part 1: Sigma SD1M

I first tried infrared (IR) photography back in the mid-1990s with a Nikon F3 camera and lenses and the now discontinued Kodak High-Speed Infrared film (Kodak HIE). It was more difficult to shoot IR film when compared to my recent tryout with IR digital because: (1) the film had to be loaded and unloaded in total darkness which made reloading out in the field difficult and (2), you had to wait for the film to be processed to see the results.

Black & White Film Clip Testing

Black & White Film Clip Testing

A film clip test can reveal if your developer and fixer are in good working order. If you enjoy shooting B&W films and want to learn how to develop your film (see my article on how to develop B&W film here), you should include learning how to do a film clip test. I have listened to photographers over the years say how they lost film to a bad developer (it can happen), or their reusable fixer reached its limit, and they made the mistake of using it one more time, only to find out it was too weak to do the work. If these photographers had only done a simple film clip test before they started the development process, it could have saved them their film and disappointment. This article outlines how I do my film clip tests.

Polaroid 55 P/N: How I Shoot It

Polaroid 55 P/N: How I Shoot It

Polaroid Type 55 film was designed for large format cameras and was popular among professional photographers and artists. It offered a unique and versatile feature: each exposure produced both a positive print and a high-quality negative. This made it a favorite among photographers who needed an instant print for quick reference and a negative for further processing and enlargement.