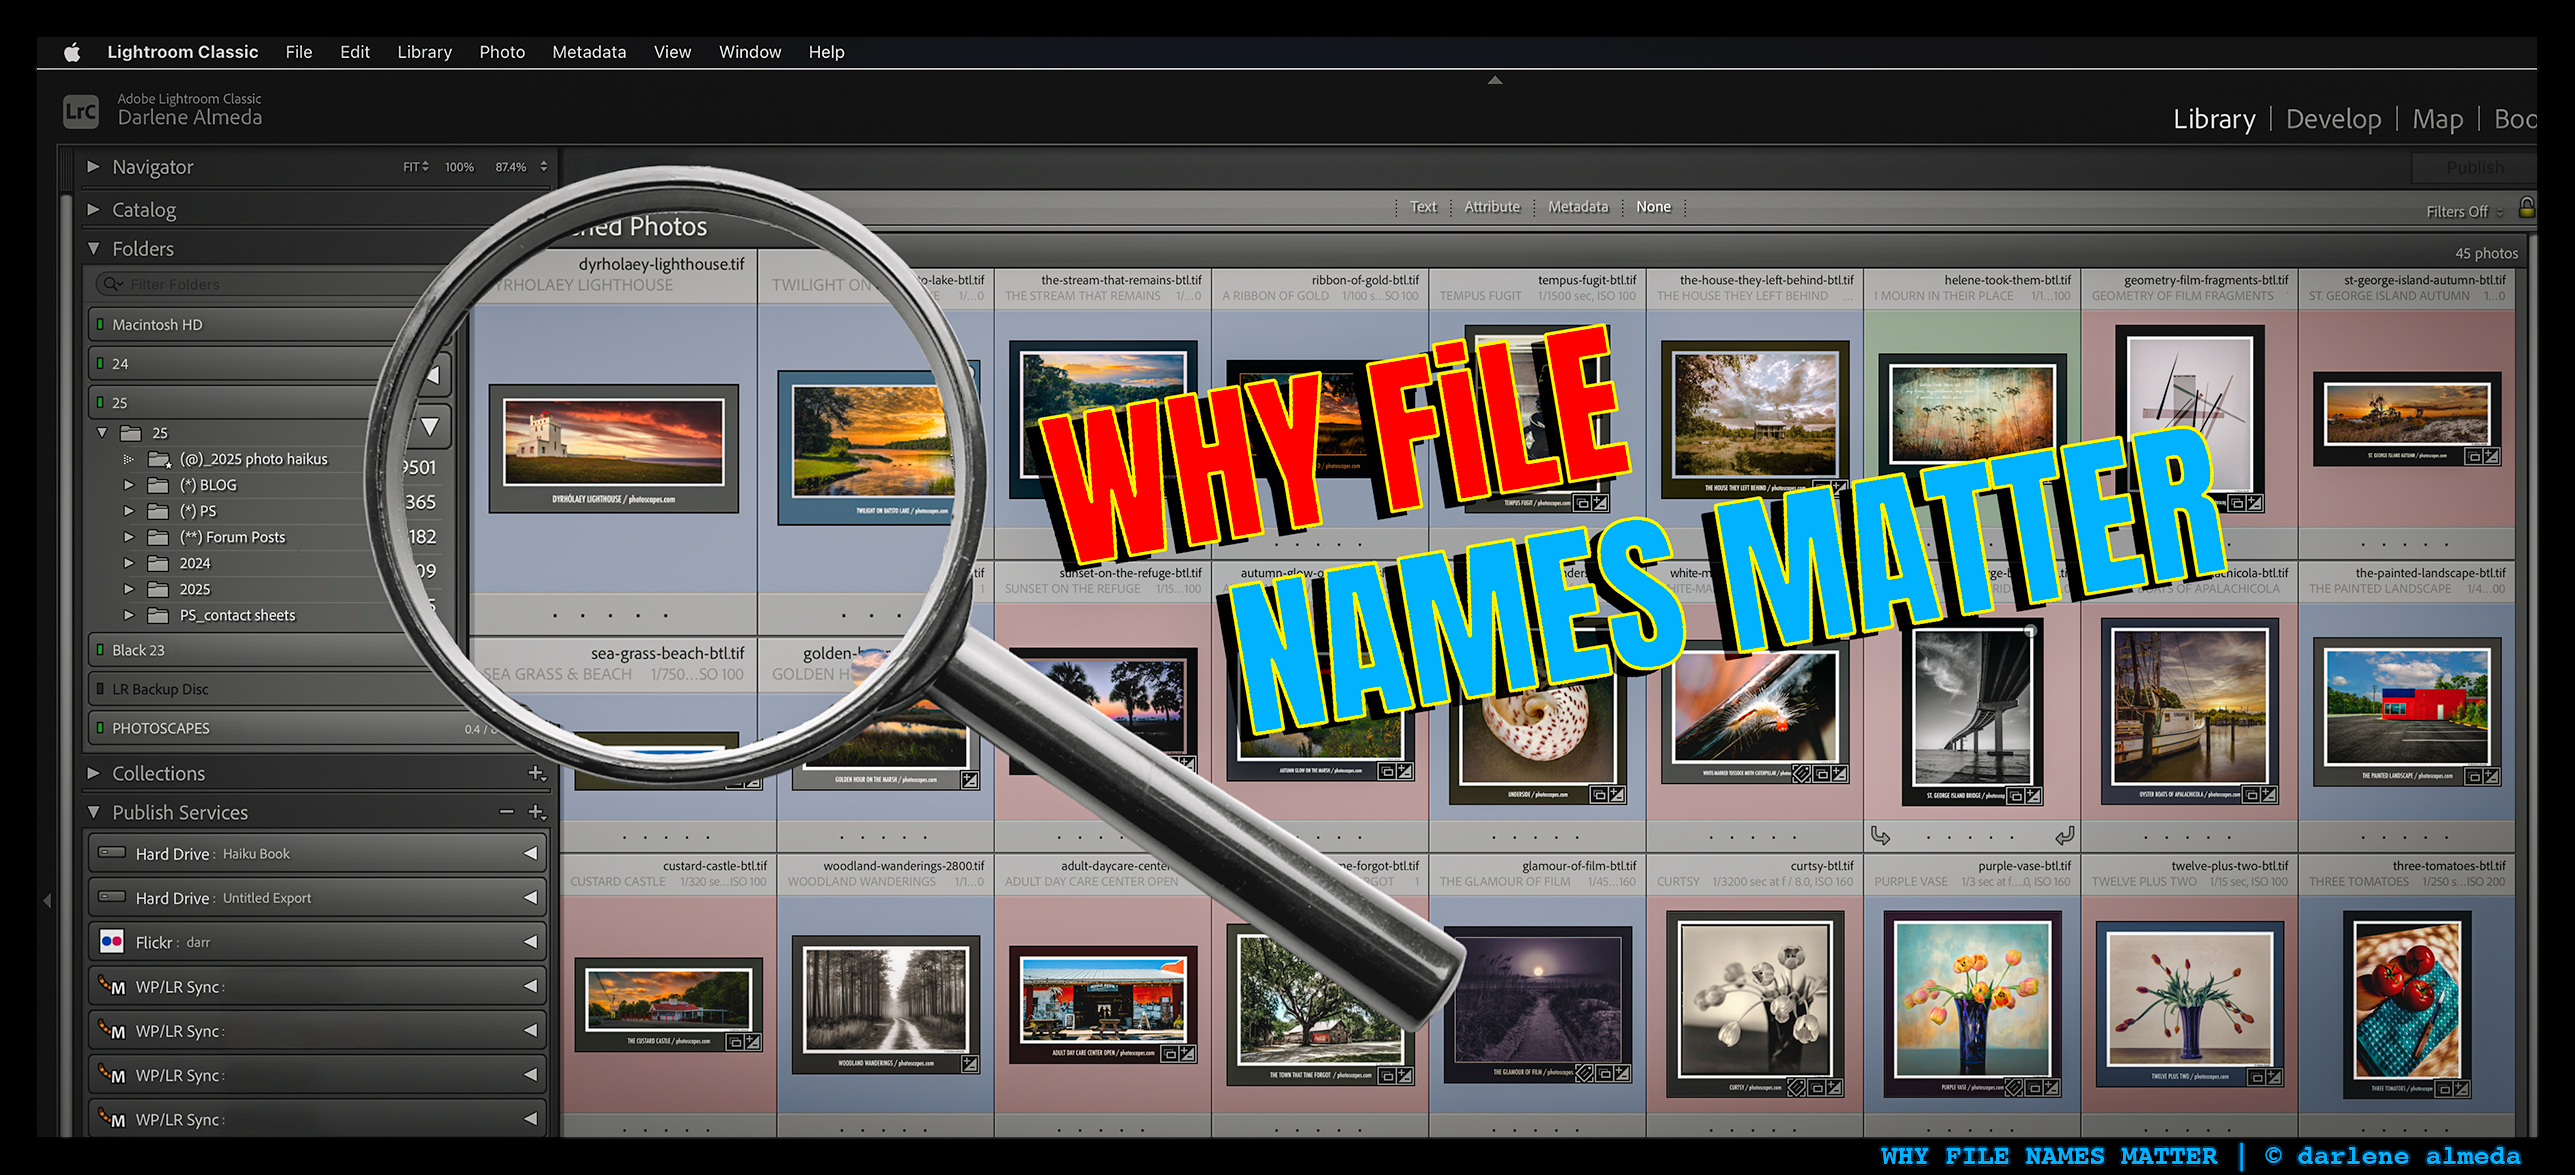
FIND WHAT YOU’RE LOOKING FOR
Organization is the backbone of any photography workflow. Whether I’m shooting for clients or for myself, Adobe Lightroom has been my go-to for years—keeping images neatly filed, easy to find, and ready for post-processing.
When I moved from film to digital, adopting Lightroom early was one of my best decisions. Its robust file organization, smart keywording, and evolving editing tools have kept pace with my needs. After more than a decade of teaching Lightroom, I’ve honed a few methods that always work. Let’s start at ground level.
Defining Our Path
LIGHTROOM FOLDER STRUCTURE
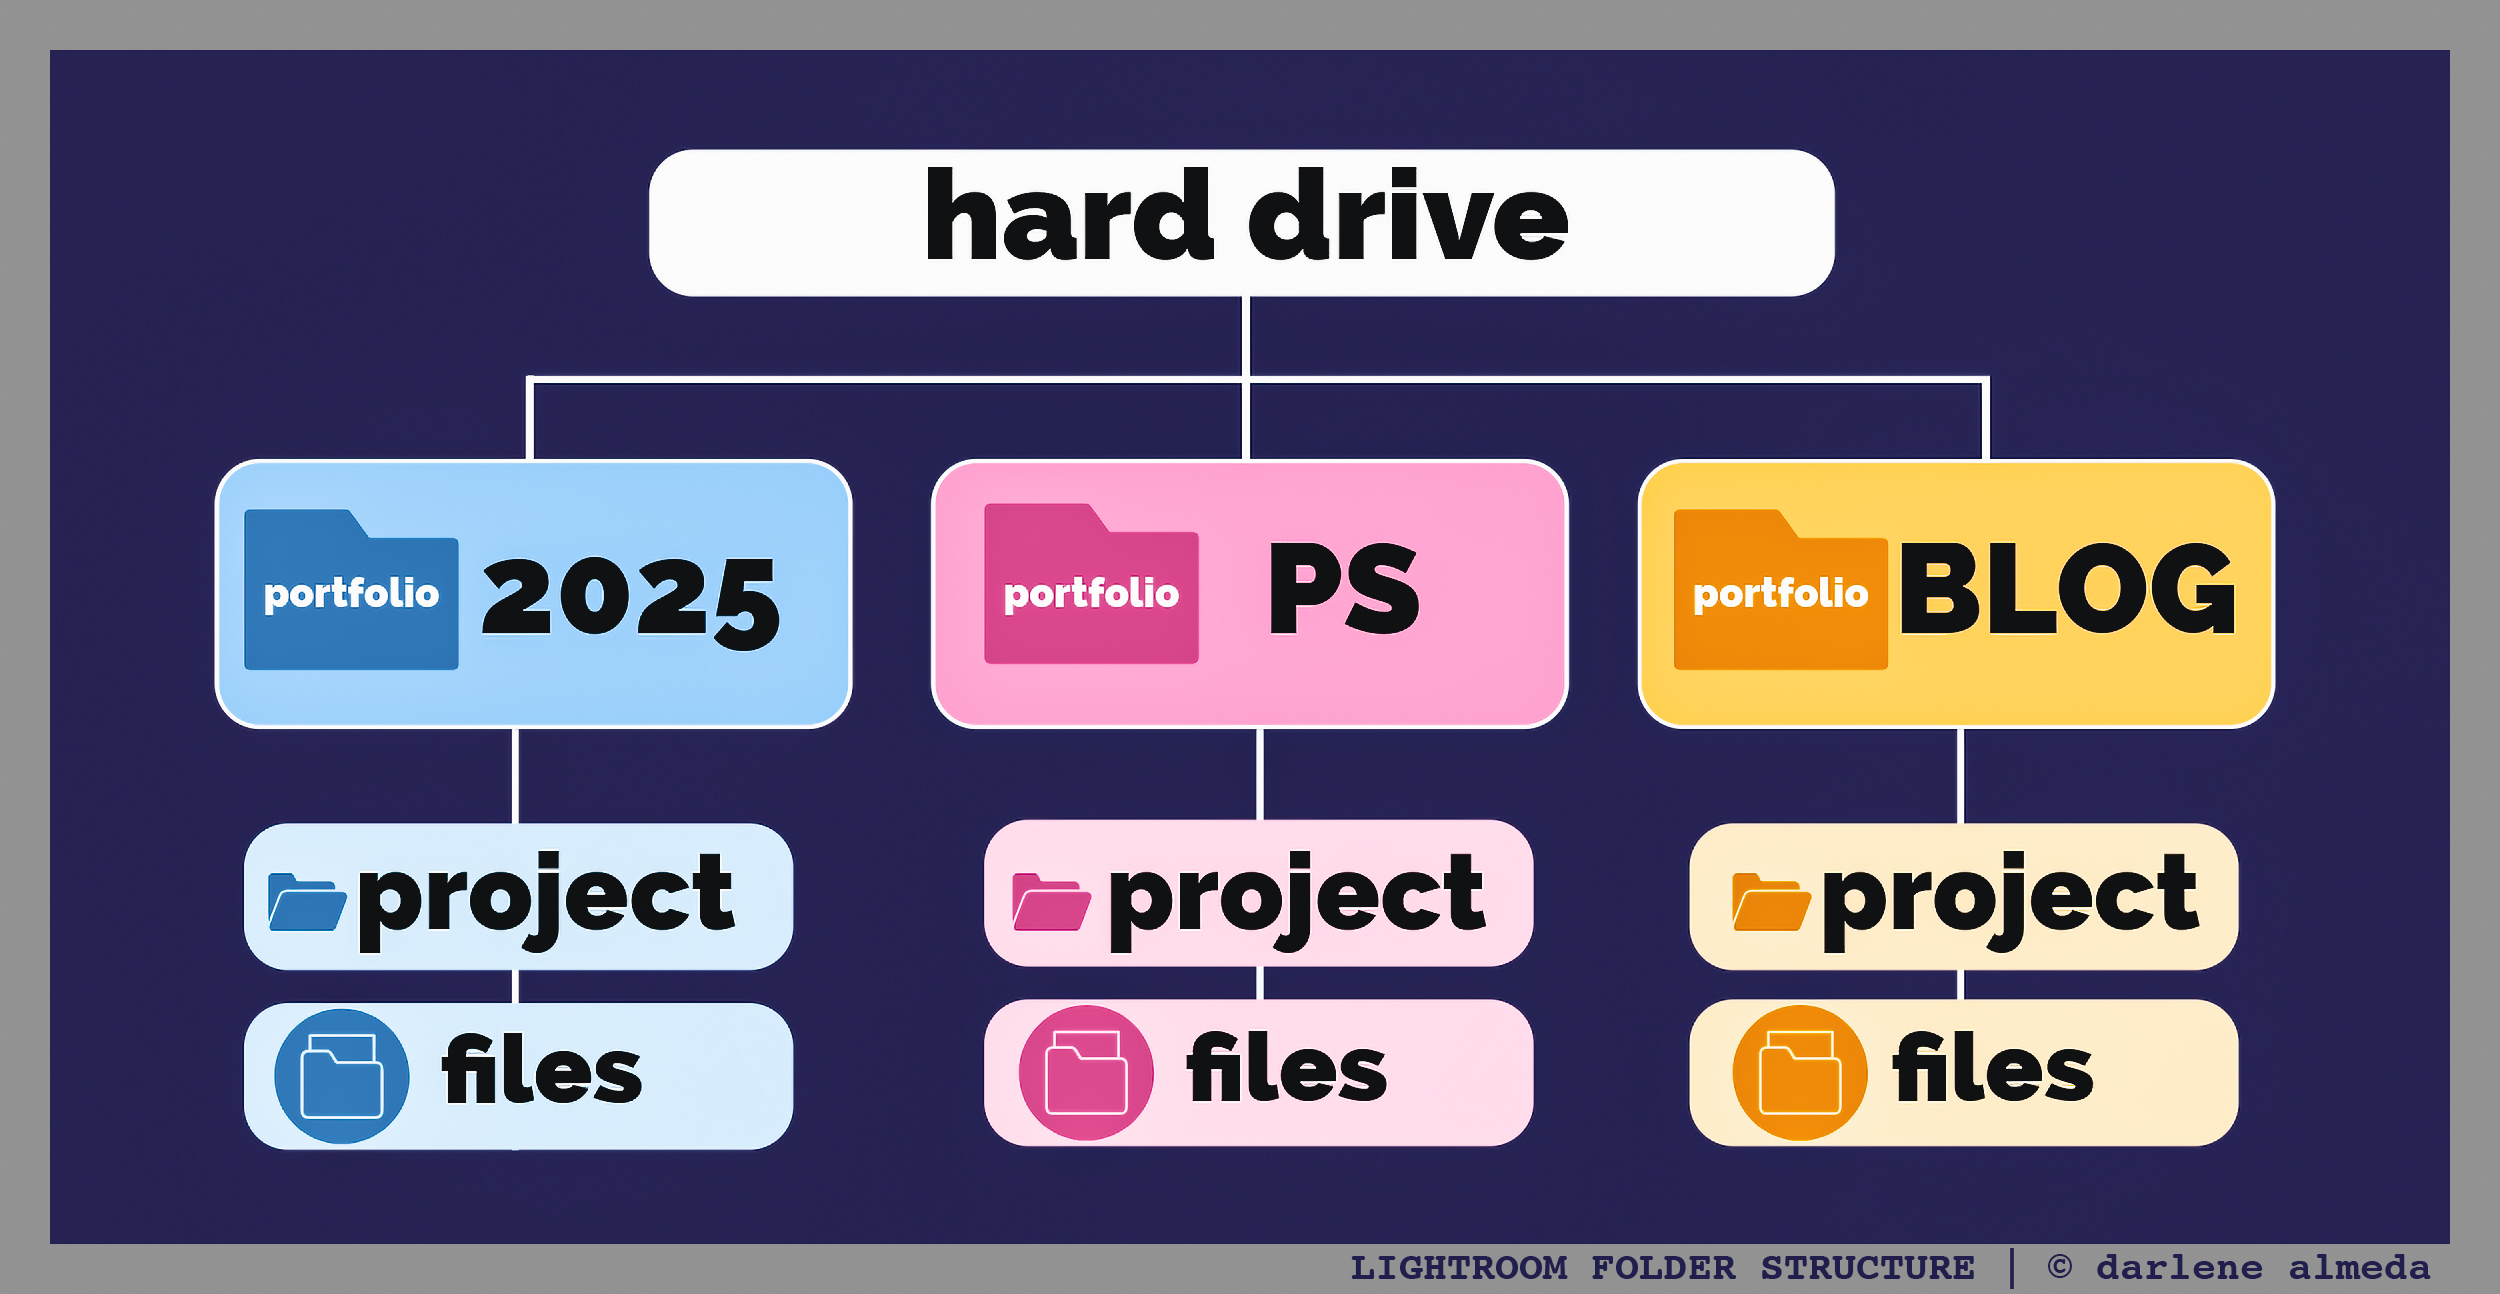
Each December, I set up a new hard drive for the coming year (this year’s is “25”) and create top-level folders I call Portfolios:
-
2025 – Intake hub for all new work
-
PS – Images for photoscapes
-
BLOG – Images for photohaikus
Inside each Portfolio are Projects—clearly labeled folders containing bodies of work. All new jobs start in 2025, in dated folders labeled by location or subject. RAW files stay here until selected images move to PS, BLOG, or another Portfolio.
This system works for anyone—website or not—who needs quick, reliable file access for social media, client delivery, or personal archives.
1: Intake
MY BASIC FOLDER STRUCTURE
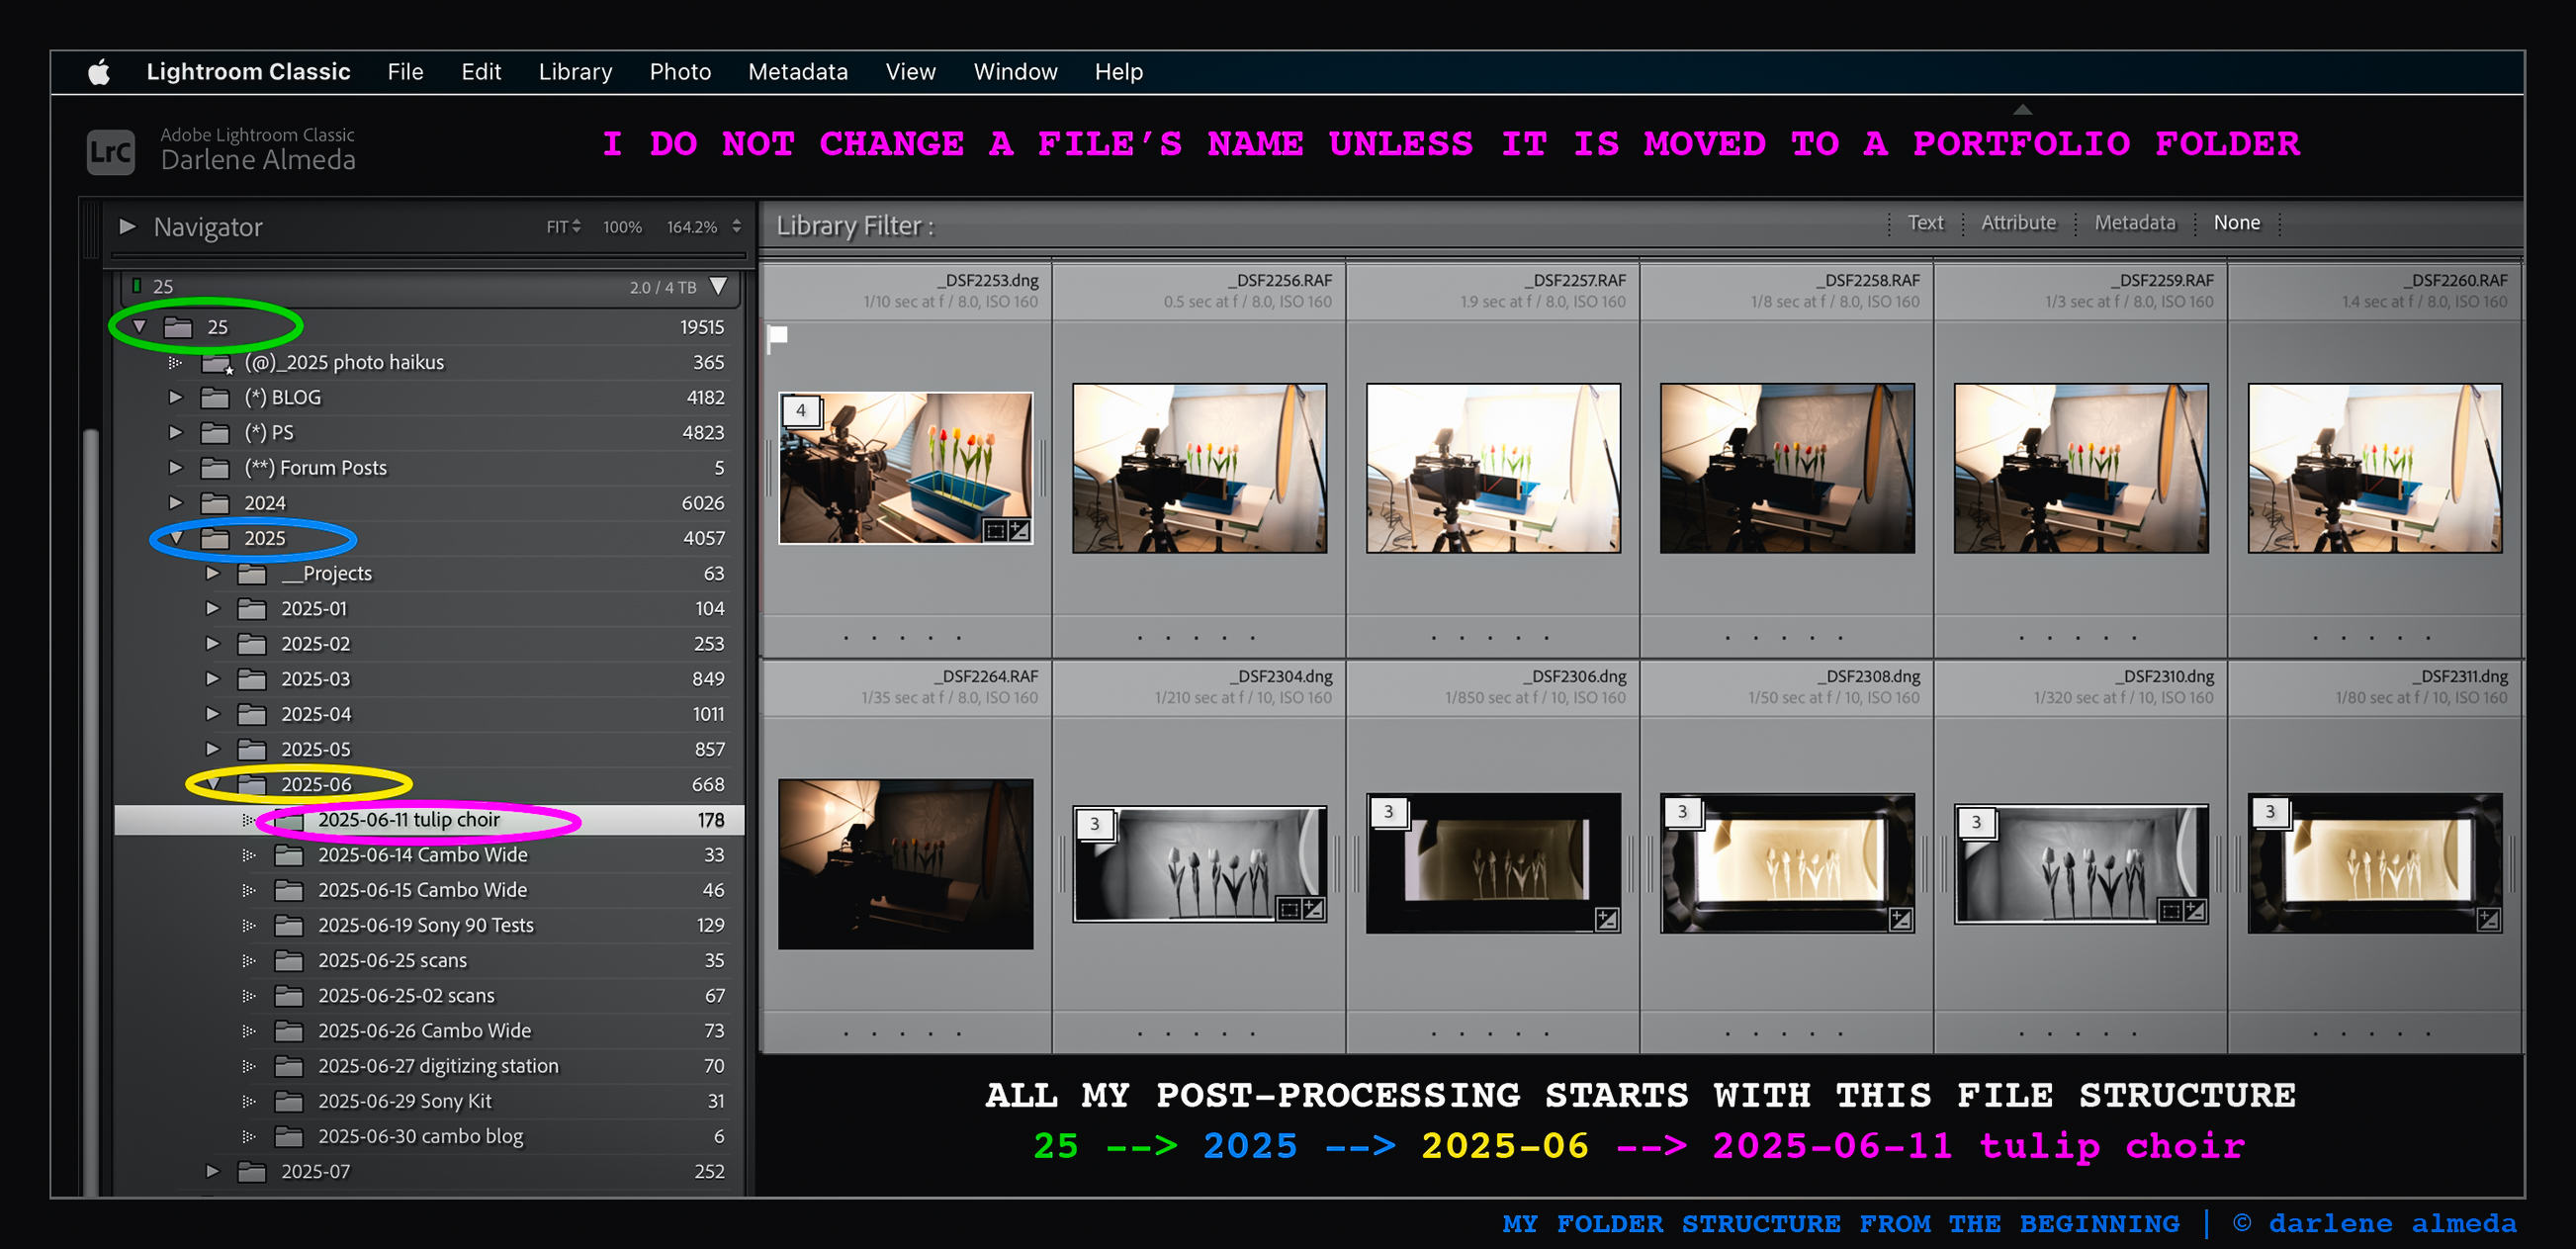
On June 11, 2025, I photographed for my article Cambo Wide Meets Tabletop Photography. The standout image, Tulip Choir, is filed in the intake folder as 2025-06-11 tulip choir—a date-plus-description format that makes it instantly findable later.
After selecting images for the article, I move them to a PS Project folder.
2: Out of Intake & Into Processing
LIGHTROOM PORTFOLIO FOLDER STRUCTURE
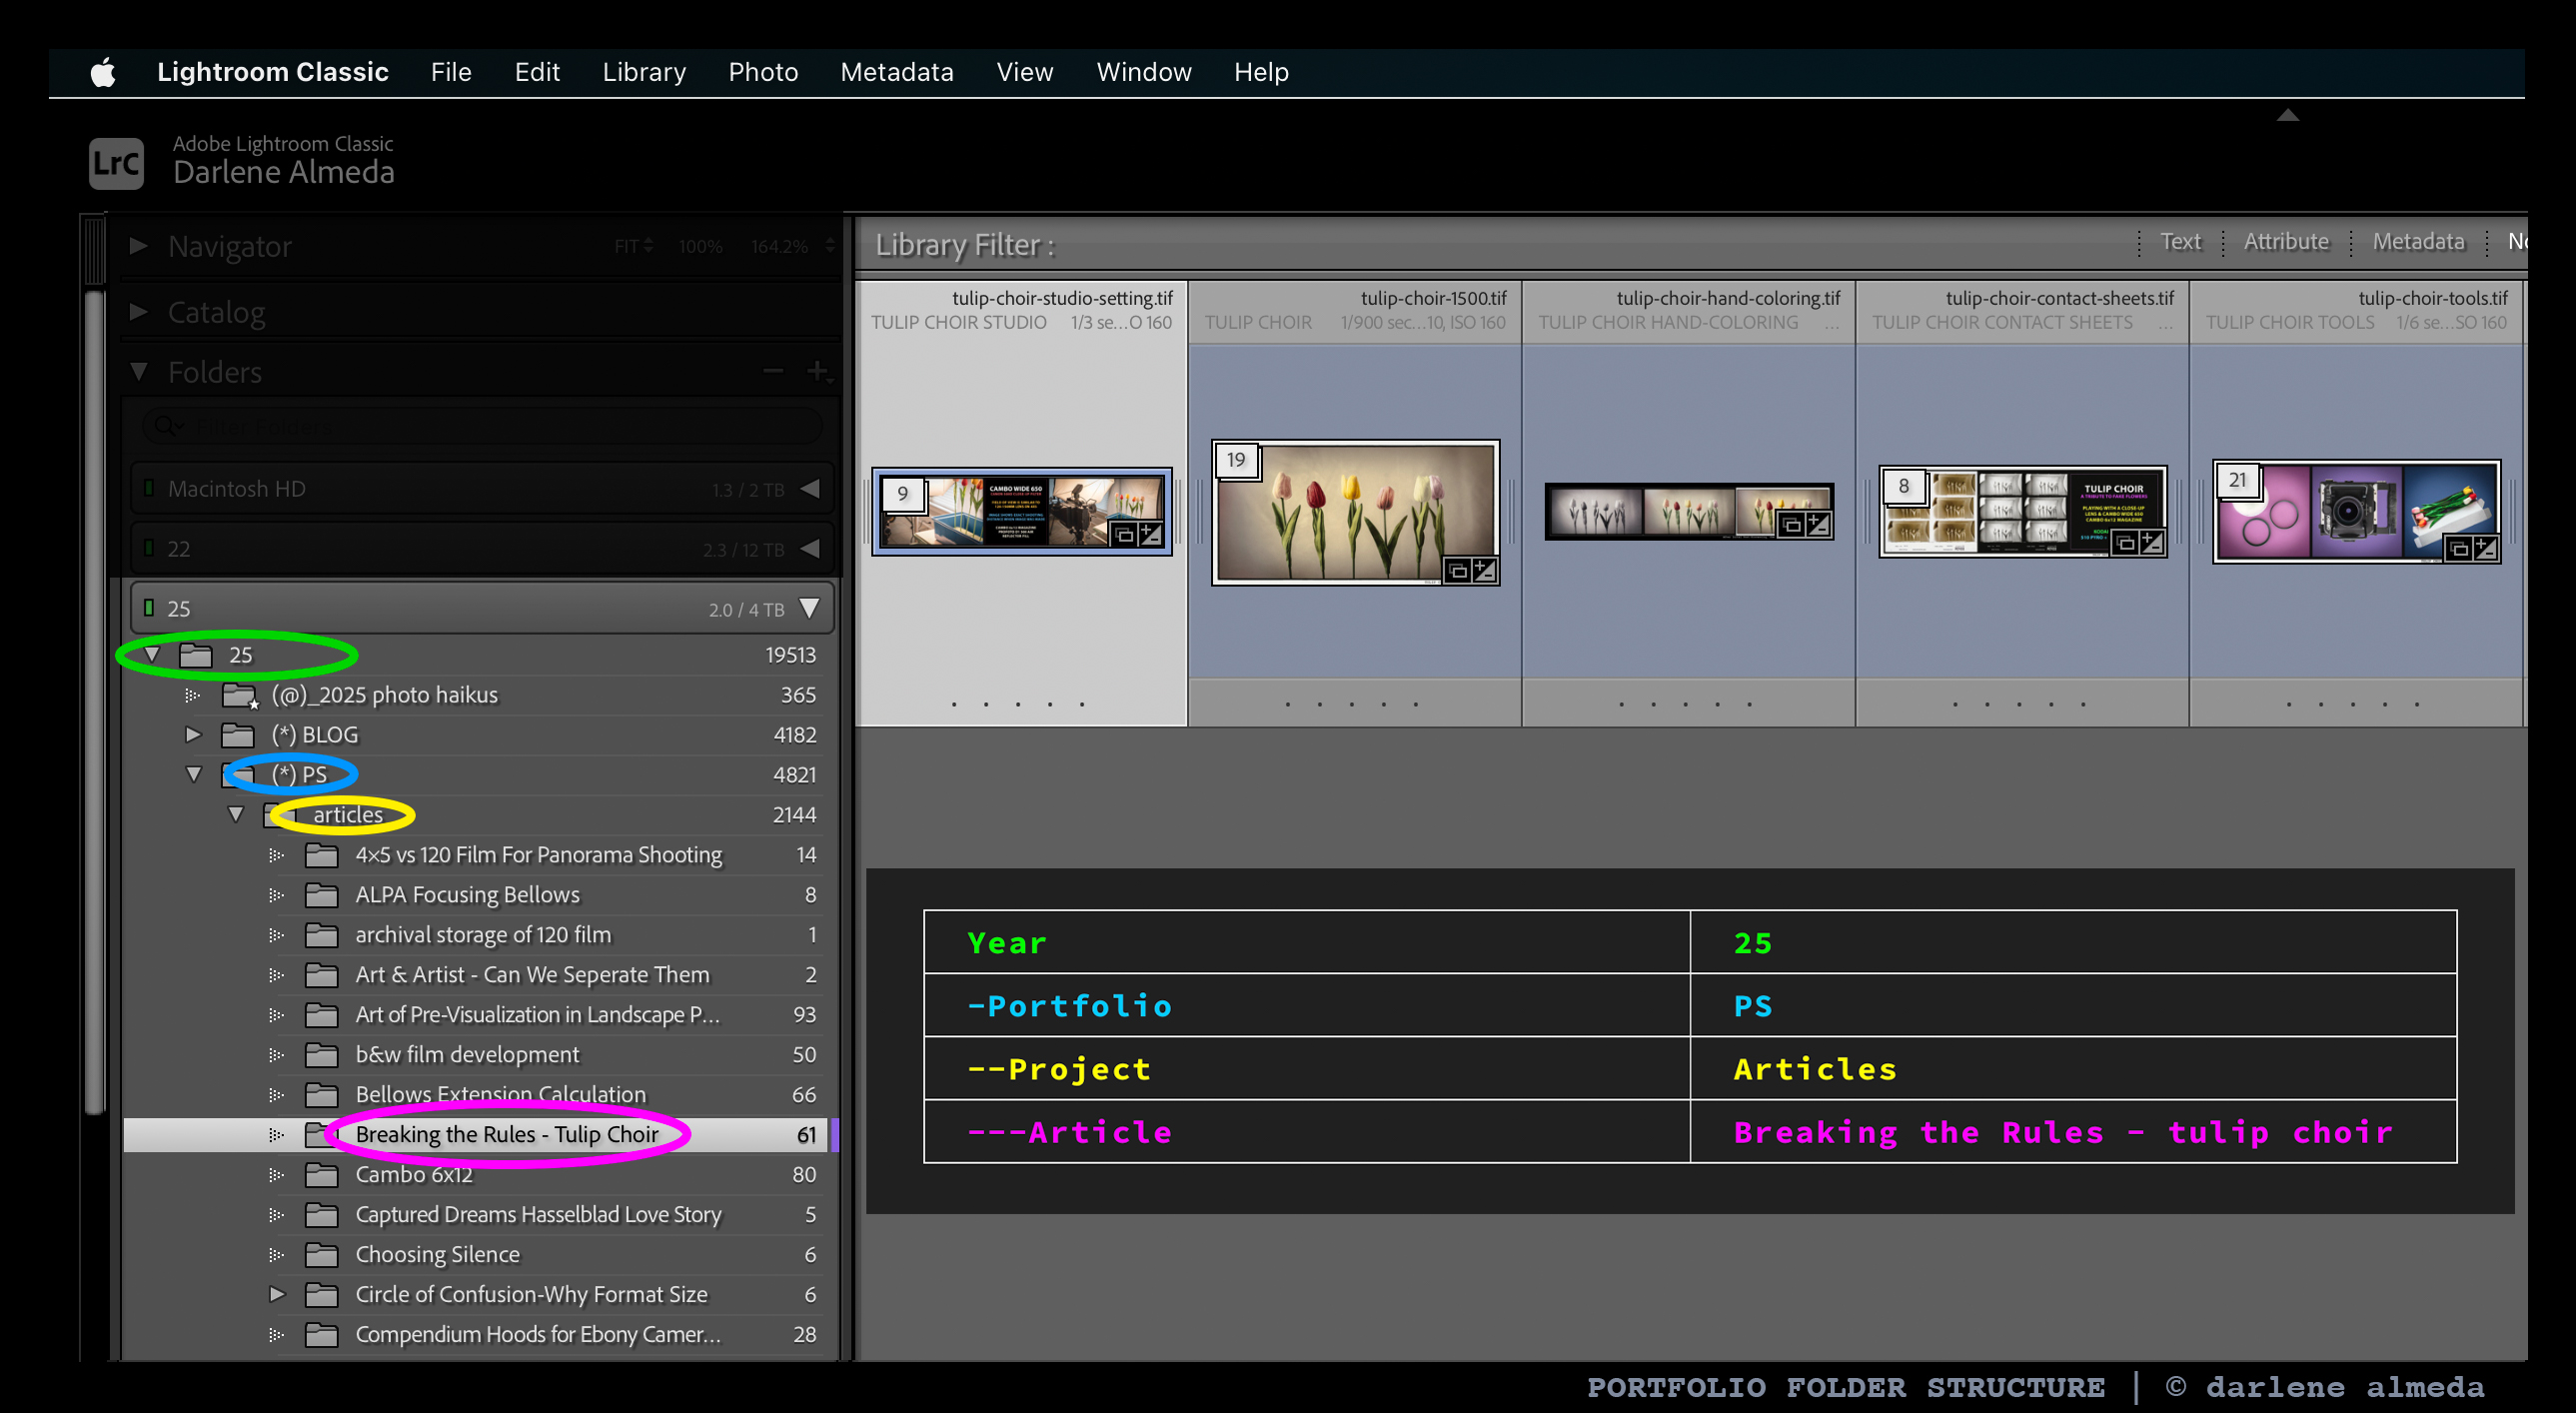
Once in their new folder—Breaking the Rules – Tulip Choir—I begin editing. This project came from a film negative, not a digital file, and also included custom graphics and behind-the-scenes images of the shoot for the article.
Even after changing the article title, searching for “Tulip Choir” pulls up everything. That’s Why File Names Matter. I sometimes bend creative rules (never financial ones—gotta get paid), because part of my goal is to show the human side of my work.
3: Stacks, Tags, & Master File
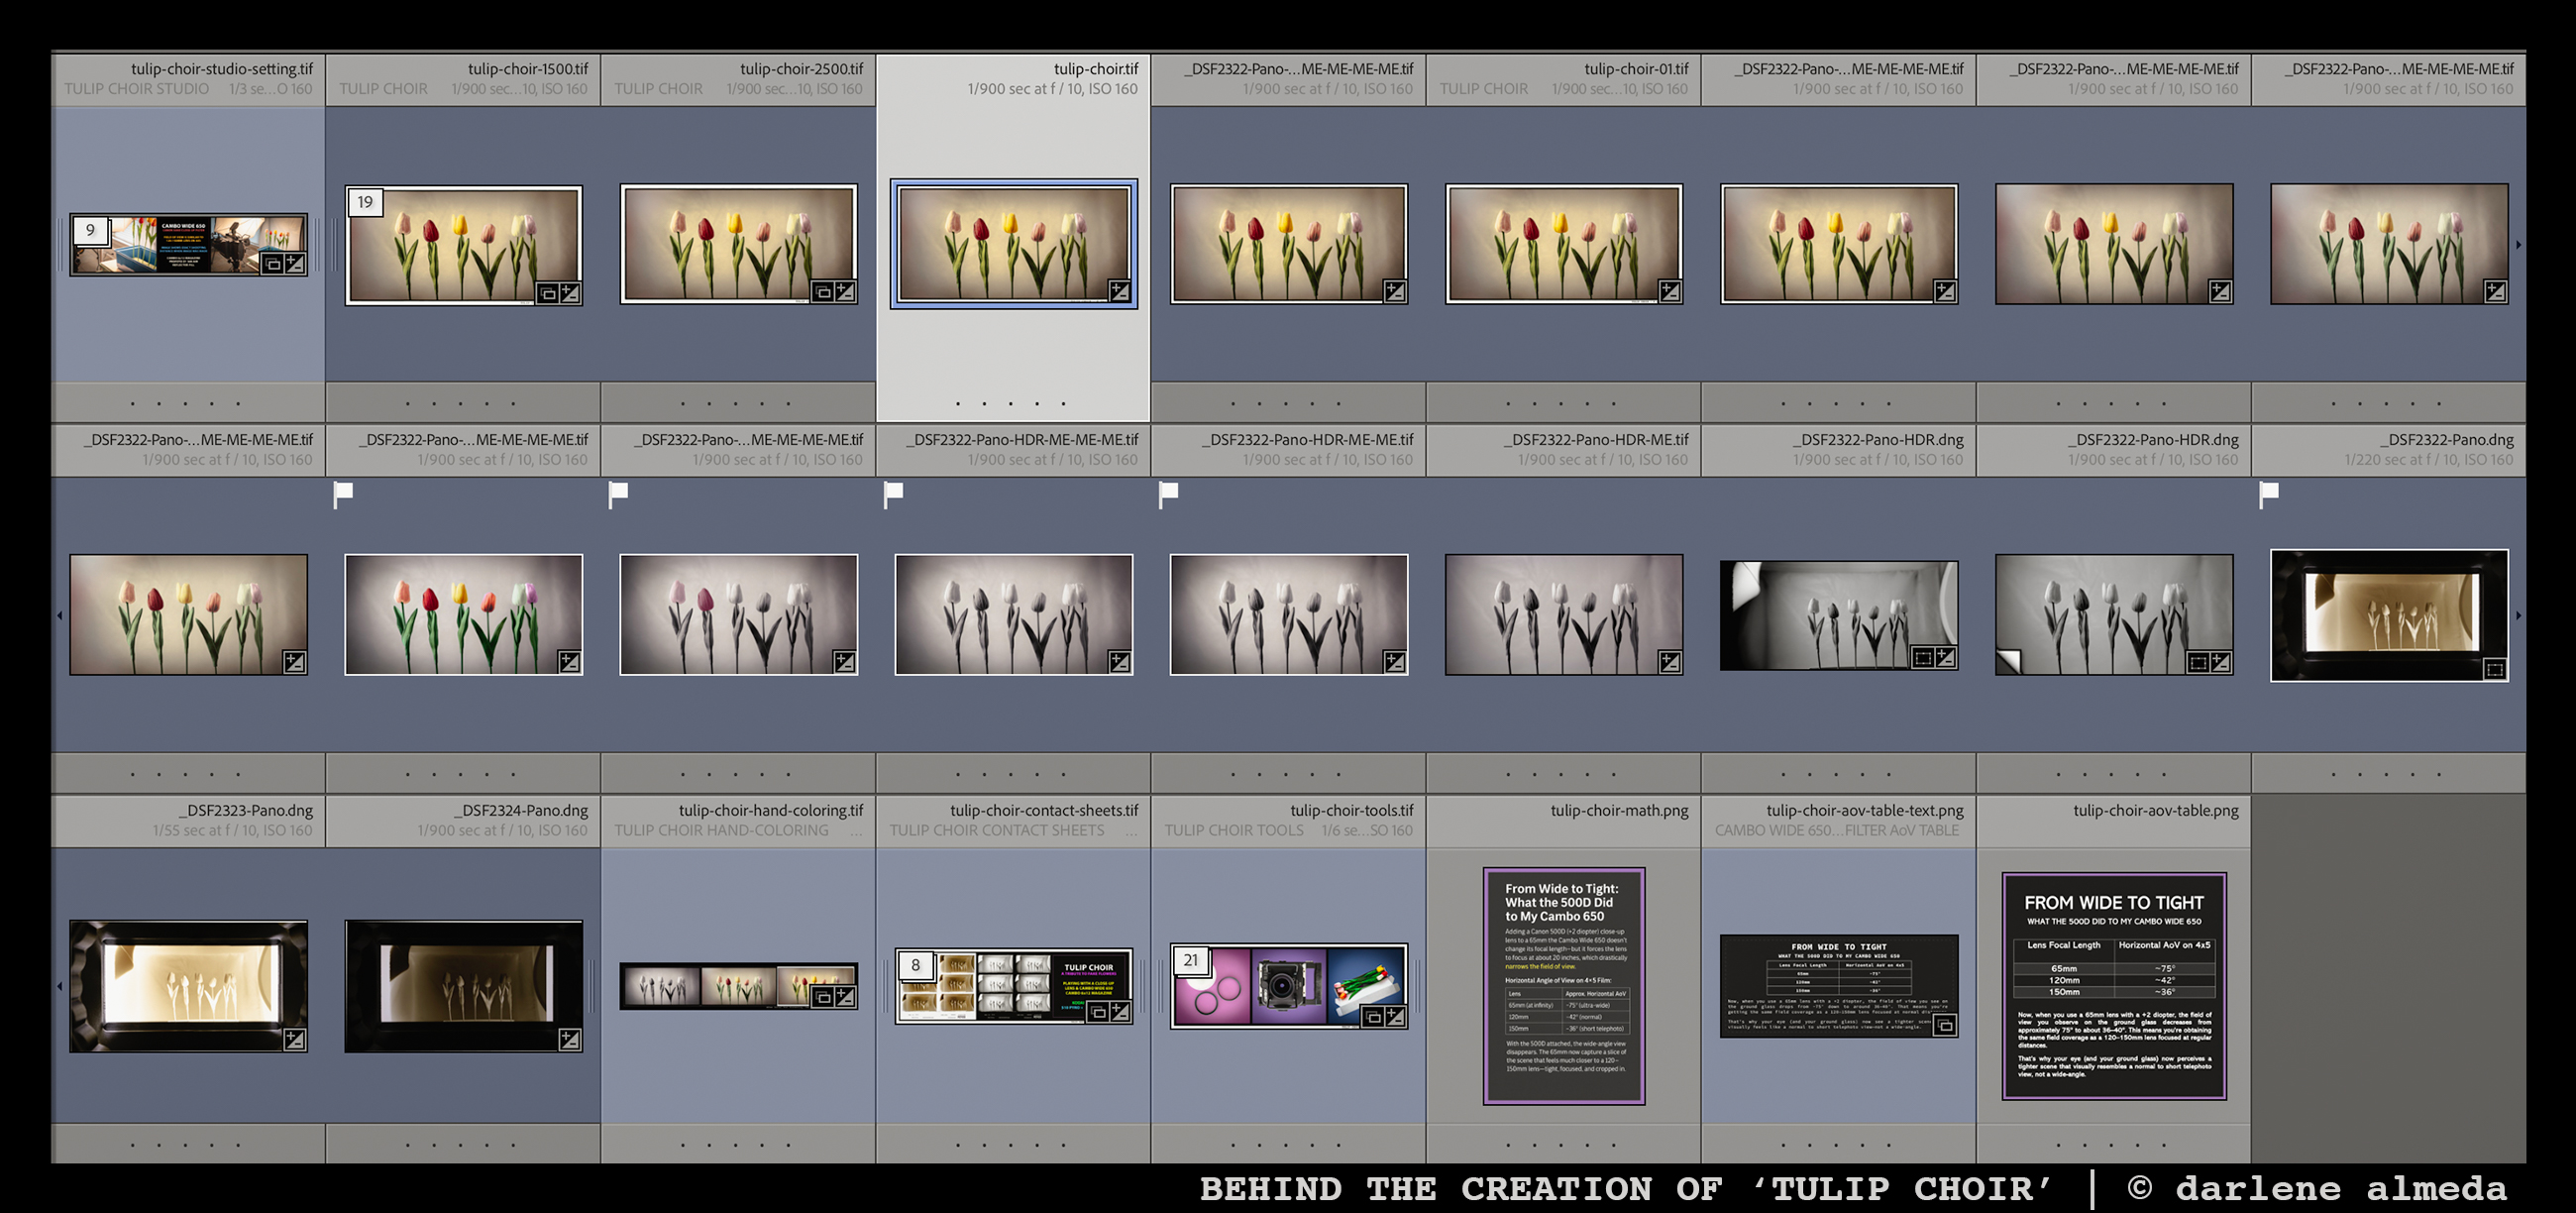
OPENED STACK OF 19 IMAGES FOR ‘TULIP CHOIR’
Stacks keep chaos in check. My master file sits on top; beneath it are the original RAW, alternates, and edits. When I need a version for print, web, or another use, I duplicate the master and adjust as needed.
Each master image gets a proper title—like a book in a library—because titles give identity and make images easy to locate. I apply keywords to the entire stack by selecting all images and syncing metadata in Lightroom.
4: Uploading Options Through Lightroom
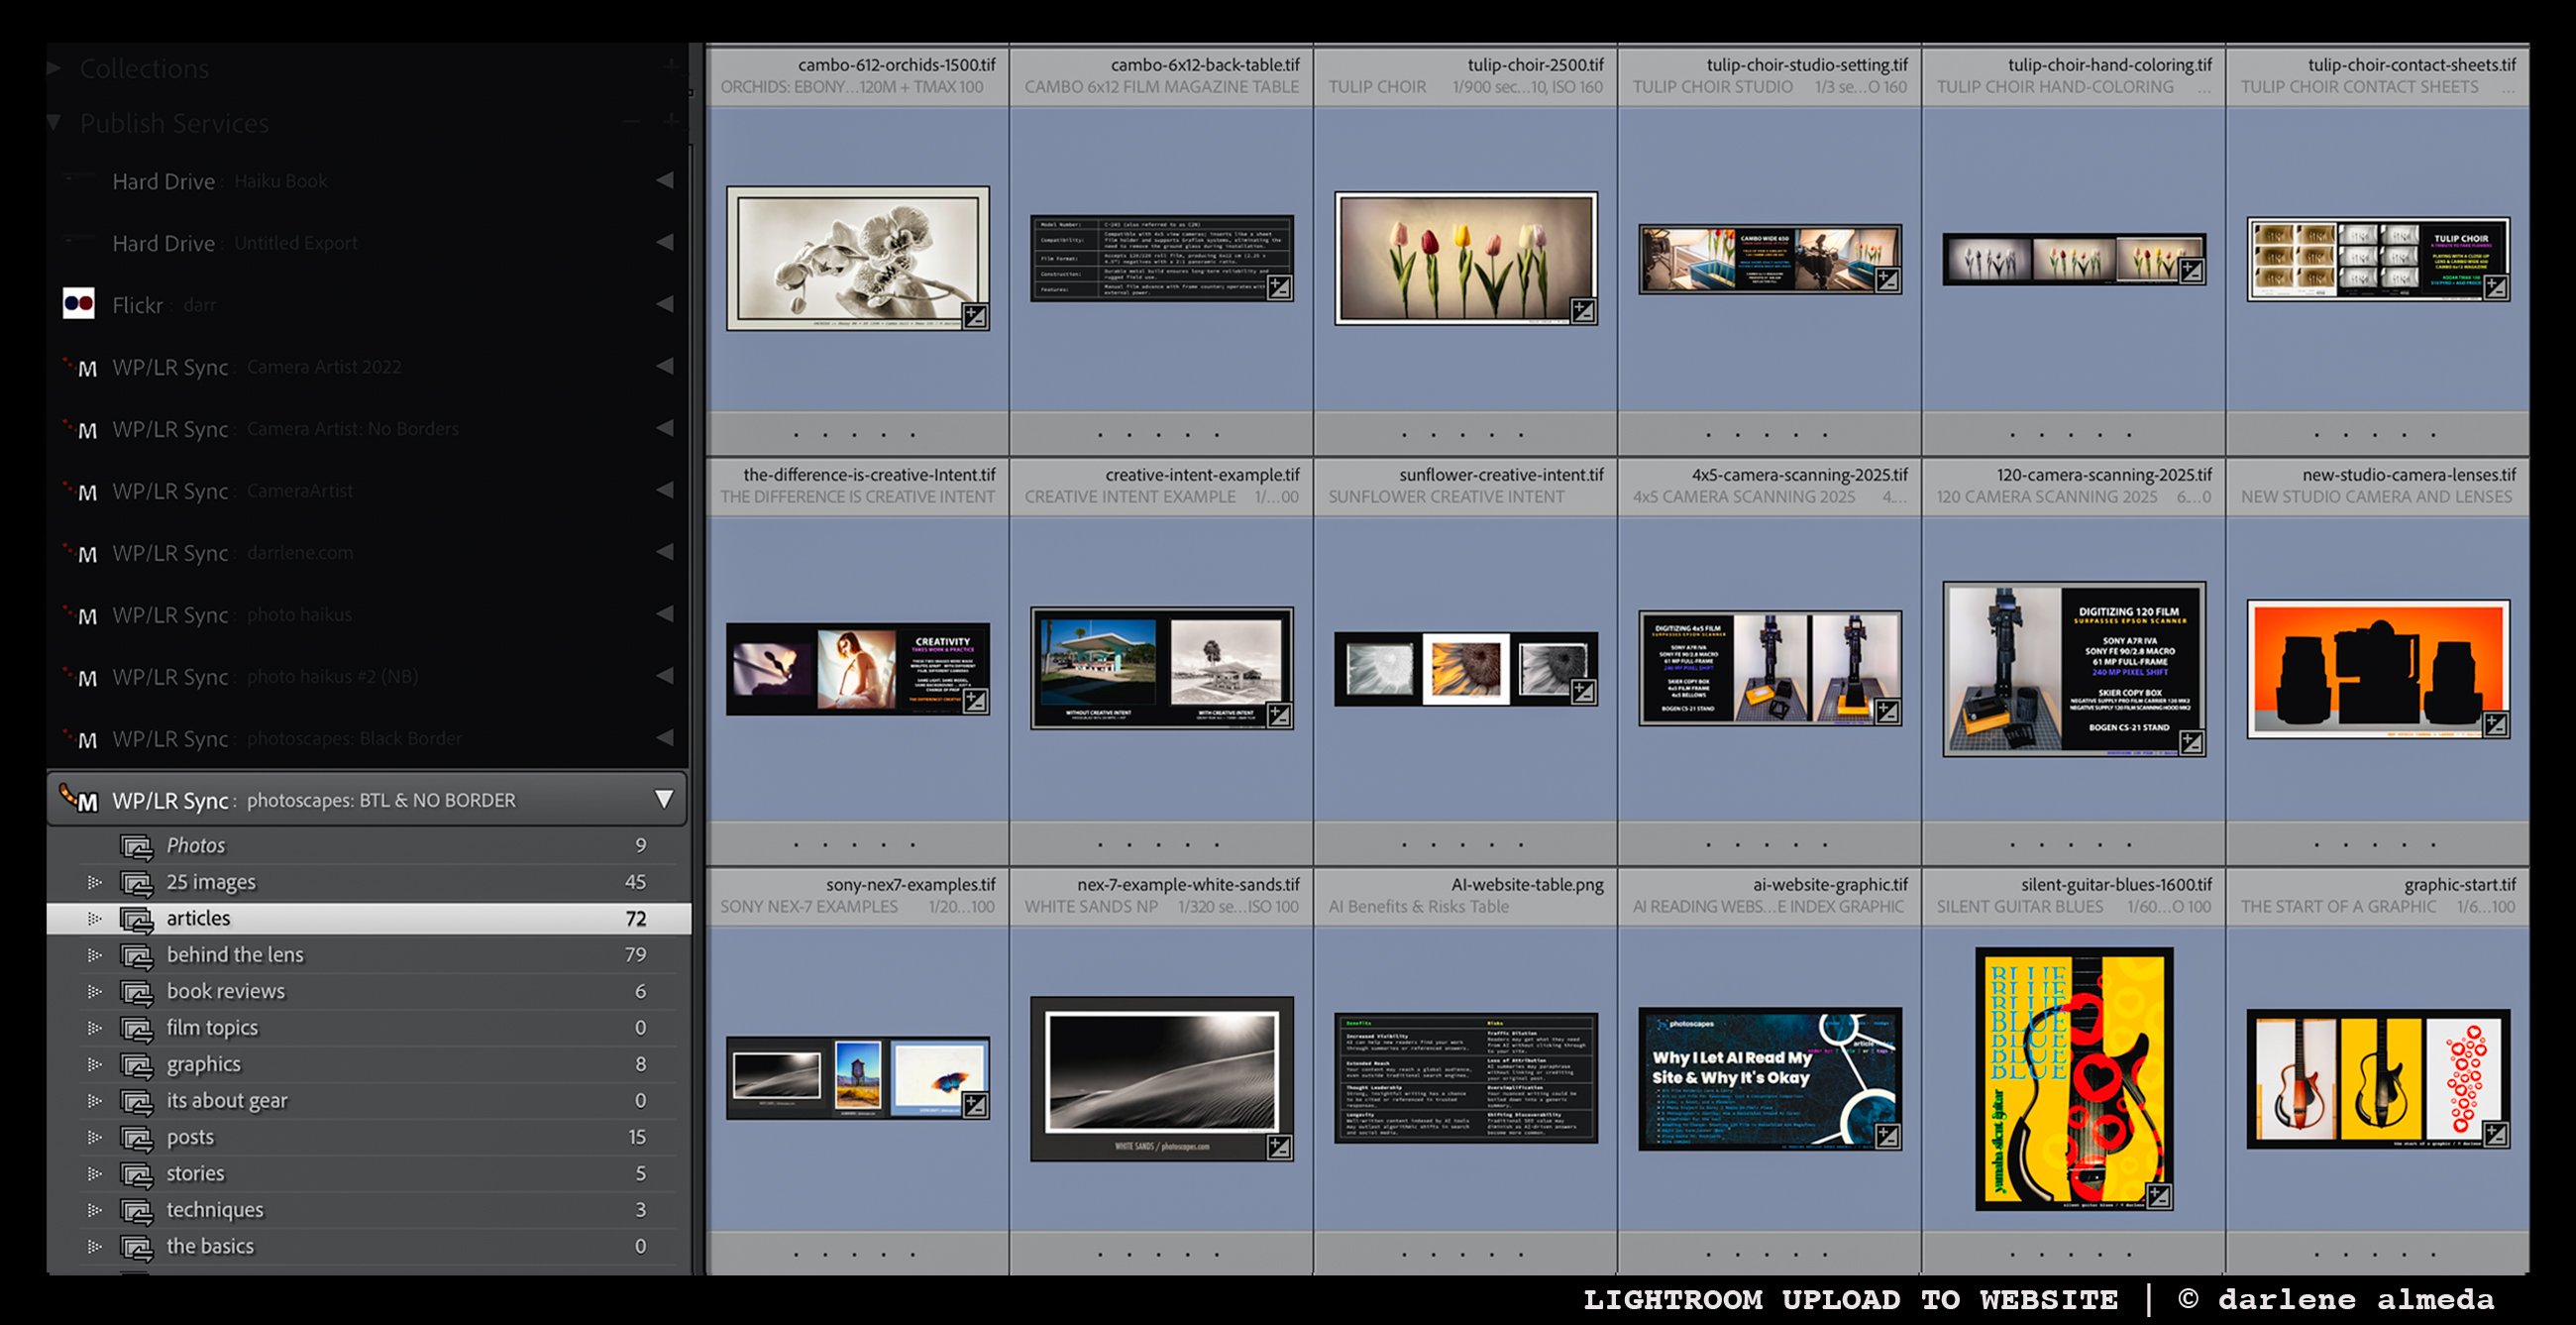
UPLOADING MY IMAGES TO THIS WEBSITE
I upload images to this site using the WP/LR Sync plugin, which I’ve trusted for nearly a decade. The blue frame around my images marks 2025 uploads, part of my color-coded year system.
For Tulip Choir, the uploaded file is tulip-choir-2500.tif—title intact, resolution added. Again, Why File Names Matter.
5. Backup Routine & Search Habits

BACKING UP LIGHTROOM
I back up Lightroom and files weekly to a dedicated drive, with RAW files duplicated at import. Each January, I migrate the prior year’s data to the new drive and retire the oldest in my five-drive rotation. Alongside cloud backups, my images live in multiple places but remain organized.
If an image is in a Portfolio, I can find it instantly by title. Sometimes I search keywords just for fun, rediscovering older work or noticing patterns in my gear choices.
A Final Word on Simplicity
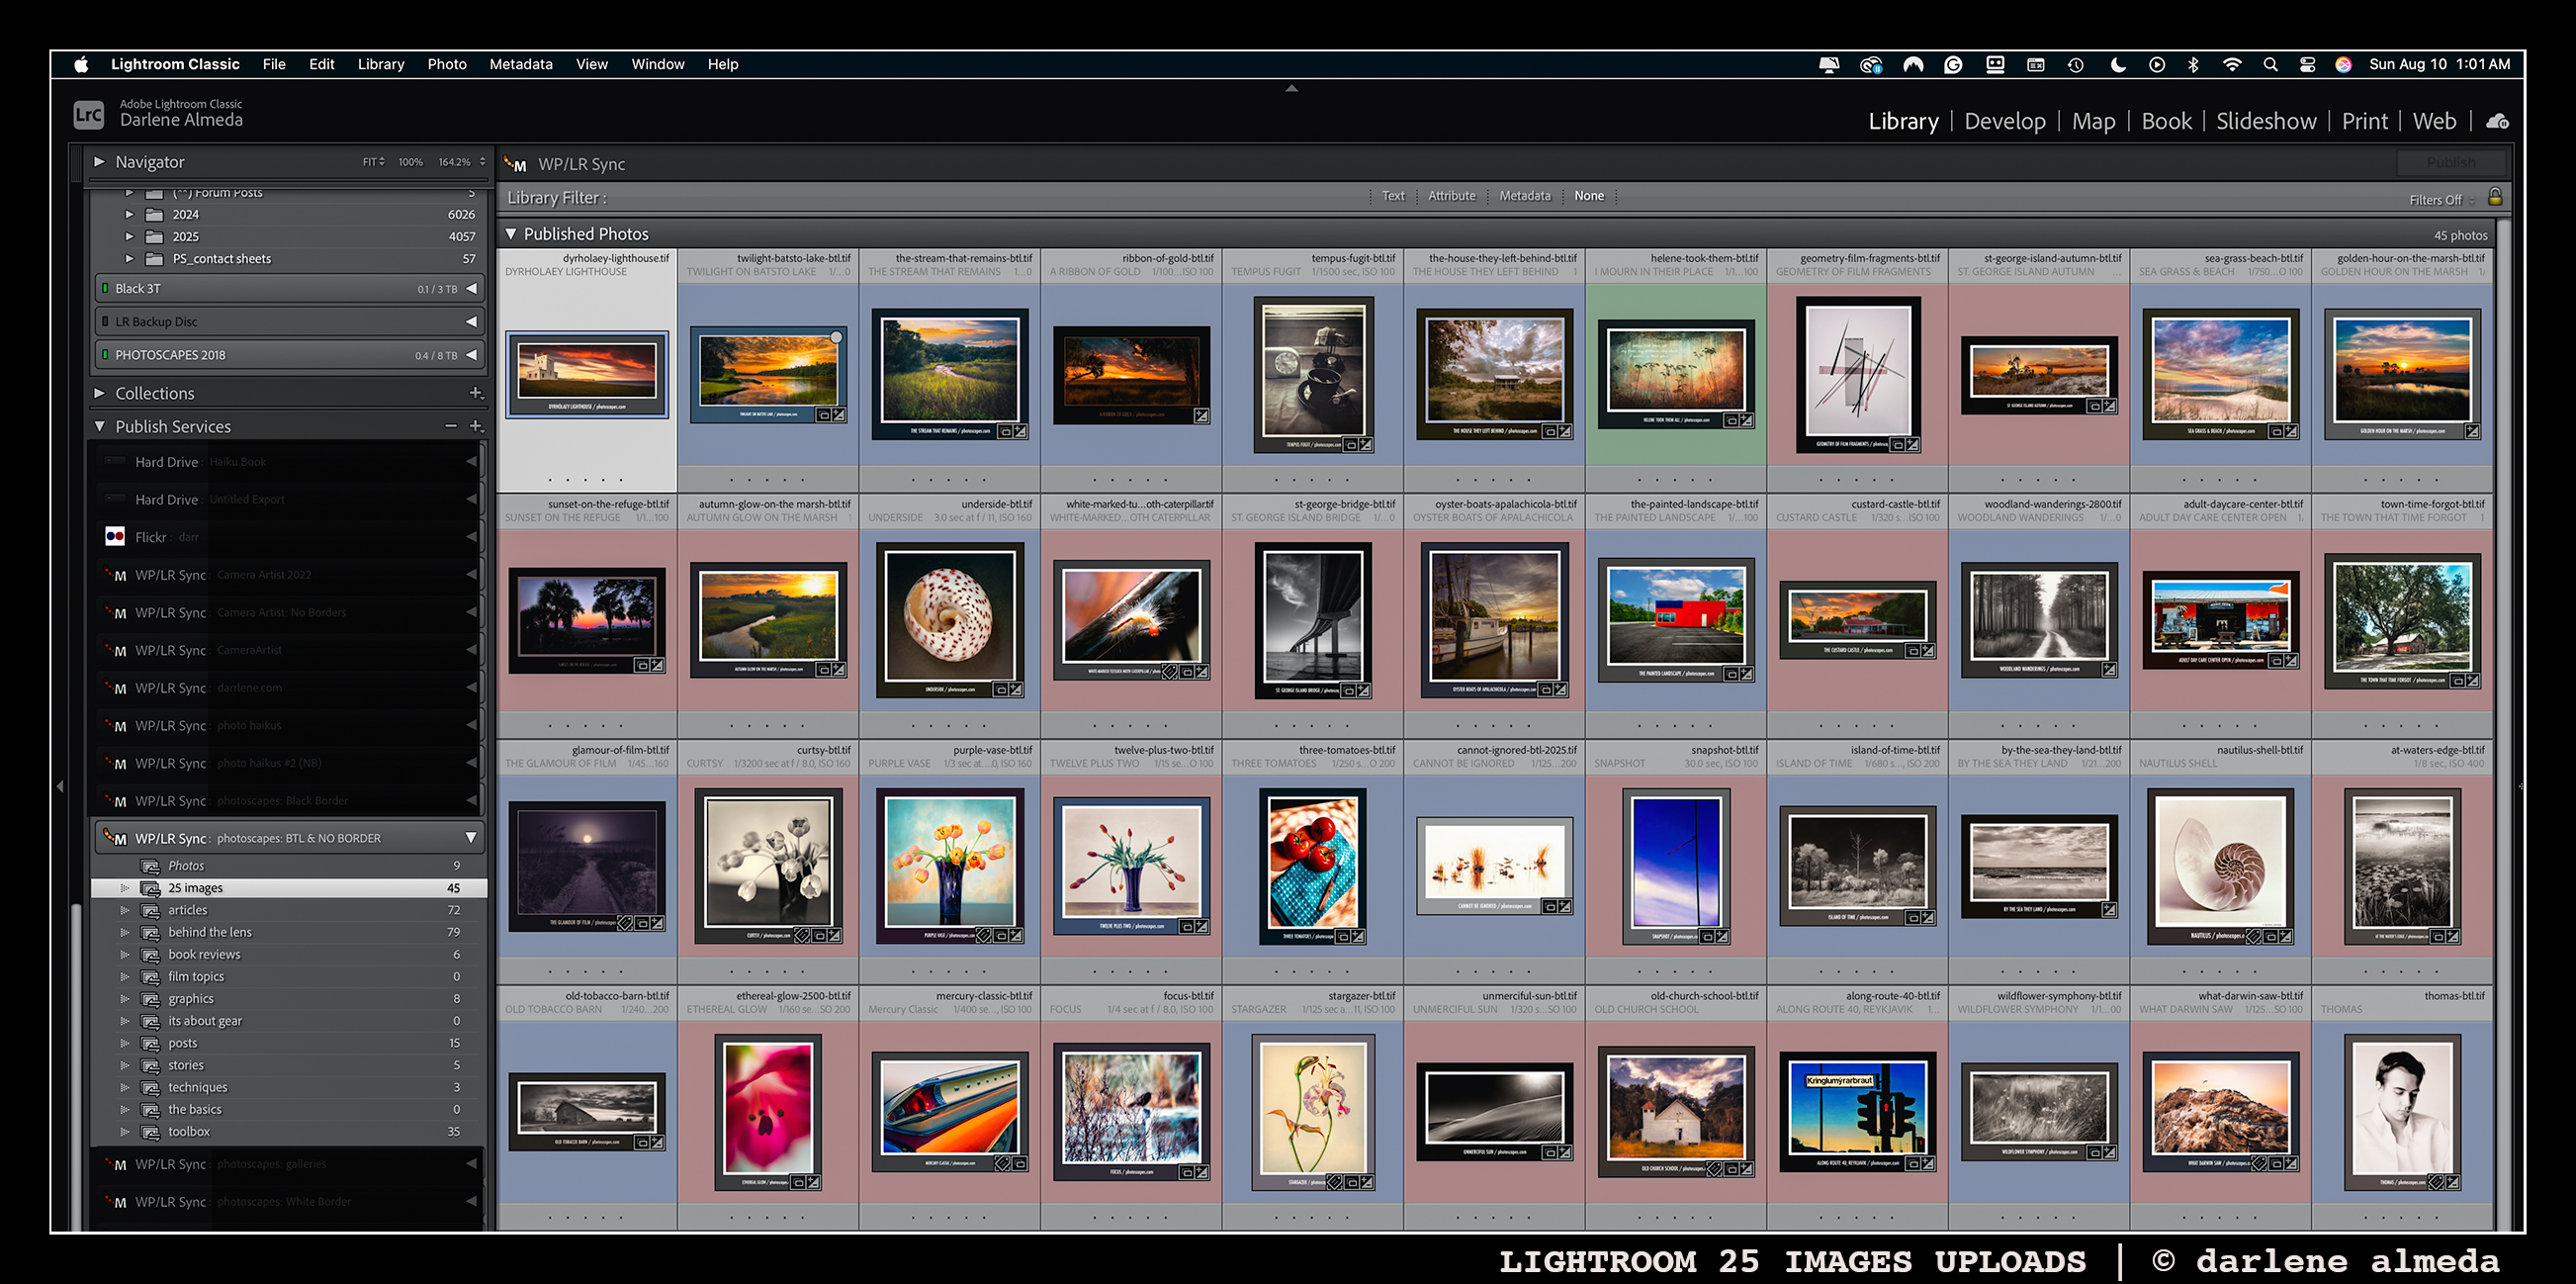
LIGHTROOM 25 IMAGES PORTFOLIO
On this site, I display just 25 portfolio images at a time in an auto-running slideshow. A small, curated set keeps the focus sharp.
Updating is simple: pick images by title in Behind the Scenes, locate them in Lightroom, and upload. Minutes later, they’re live.
Staying organized doesn’t have to be complicated—it just has to work for you. A little structure and consistent naming can save hours and sanity.

