
[ SOME OF THE FUJIFILM APS-C CAMERAS & GEAR I HAVE USED OVER THE YEARS ]
FUJIFILM CAMERAS, FILM & GEAR
FUJIFILM cameras and related gear I’ve used together:
CAMERA BODIES:
X-Pro2, X-Pro3, XE-2 (IR 590nm), X100T, X100V
FUJINON SW LENSES:
Fujinon SW 90/8 mounted on a Fotoman 6×17 camera
XF LENSES:
14, 23, 35, 56 APD (manual), 18-55, and XC 50-230
ZEISS TOUIT LENSES:
32/1.8 and 50/2.8 Macro
LENSBABY:
Composer Pro II + Sweet 50, Macro Converters
OTHER:
MCEX-11, MCEX-16, TCL-X100, WCL-X100, SP-3 Printer, NONS Instax Hasselblad Back
B&W FILM:
ACROS Neopan I: 4×5 QL, 120 & 35mm, ACROS Neopan II: 120 & 35mm
COLOR FILM:
Velvia 50/100: 4×5, 120, & 35mm
INSTANT FILM:
Instax Square & Wide
The Fuji APS-C system is my go-to small format. What is not to like about aperture rings on lenses and back-illuminated sensors (X-Pro3 & X100V)? Fuji has some of the best glass available and listens to its customers. ACROS Neopan I & II black-and-white film is a favorite of mine. So is Instax since my 4×5 LomoGraflok back showed up, and the NONS Instax Square film holder for Hasselblad. I love Fujifilm!
FUJIFILM X-PRO CAMERAS

[ FUJIFILM X-PRO CAMERAS: 1, 2 & 3 ]
My first try at Fujifilm APS-C cameras came when I was ready for a change in small-format cameras. I had shot Nikon for decades during the film era, and when digital took hold, it was a D200, then a D700, and finally, my last Nikon, a D750, was purchased by the tech college I worked at for my instructional use in the classroom, but I did pick it over a Canon, etc.
MY MIRRORLESS HISTORY
I acquired a used Sony NEX-7 after reading about mirrorless technology and seeing it was causing a divide among photographers; I had to try it. I became smitten by the NEX-7, but I did not warm up to its computer-like feel of operation. After hearing from other photographers about Fujifilm’s APS-C camera designs feeling more “film-like” in their hands, I decided to rent their latest flagship, the X-T1.
IMAGE: WHITE-MARKED TUSSOCK MOTH CATERPILLAR

[ FUJIFILM X-PRO3 + ZEISS TOUIT 50M/2.8 – HANDHELD ]
IMAGE: ETHEREAL GLOW

[ FUJIFILM X-PRO2 + XF 56M/1.2 R APD ]
WHAT FUJIFILM GETS RIGHT FOR ME
I liked how Fujifilm lenses had aperture rings but was not thrilled with the X-T’s body style. The buttons were in the right place primarily, but the center-styled viewfinder was a deal breaker for me. I liked the NEX-7’s side-mounted EVF and decided on no more centered viewfinders. Then I discovered the X-Pro2, which might meet my wants and needs, so I rented an X-Pro2 with many lenses to see if I would be happy with their system. The rest is history, as Fujifilm is what I was looking for in a small camera design, and I have not looked back ever since.
IMAGE: PAINTED SHELL

[ FUJIFILM X-PRO3 + ZEISS TOUIT 50M/2.8 – 2″ SHELL]
After owning and shooting with the X-Pro2 for a few years, I upgraded to the X-Pro3 for its screen and back-lit sensor. Upgrading the screen might sound slightly different from other photographers’ dislike, but it is handy when digitizing film. When I digitized with the X-Pro2, because its screen is non-movable, I had to stand over the copy stand, which can be uncomfortable depending upon how high up the chassis the camera body has to go. The X-Pro3 and its flip-up screen work perfectly for my digitizing needs at the copy stand. Other than that, I could care less about the screen as I am not a pixel-peeper. Once I experienced the back-lit sensor and could see its difference in some images, I upgraded my X100T to the X100V since it has the same sensor as the X-Pro3 and uses the same batteries.
GALLERY #1: X-PRO IMAGES

FUJIFILM X100 SERIES

[ FUJIFILM X100 SERIES: 100, 100S, 100T, 100F & 100V ]
HISTORY TIDBIT ABOUT ORIGINAL X100 CAMERA
Interestingly, the initial offering for the original X100 came in silver only. Then, they offered a limited edition of 10,000 X100 Black Premium Editions. They came in a package that included a genuine leather ‘ever-ready’ case, a lens hood, an adaptor ring, a protective filter, and a card with a unique X100 Black Premium Edition number printed, identifying which of the 10,000 units it was. Because I prefer black cameras, I wonder if that may have been an issue for me; no, because the only Leica I owned was a chrome M7.
IMAGE: INDEPENDENCE DAY PARADE CANDID

[ FUJIFILM X100V CANDID EXAMPLE ]
WHAT SOLD ME ON THE X100 SERIES
After owning the X-Pro2 for a few months, I decided to replace the NEX-7 with a small, fixed-lens camera as the X-Pro2 was gaining ground in the studio for web-based photography. Taking studio production cameras out and about for stuff that does not help pay the bills is not my game of chance. Now, I was looking for a “mommy camera” (what I called the camera that sat on the kitchen table when my son was growing up). You know the type, the convenient small pocket camera for cat shots, family visits, and stuff I find more important than simply using my phone’s camera.
I heard many good things about the Fujifilm X100 series cameras and rented the current model, the X100T. I had the NEX-7 and the X100T simultaneously for comparison. Even though the NEX-7 could hold its image quality, I donated it to a local arts organization as I wanted to pass it on instead of selling it. The NEX-7 is an incredible little camera that can deliver beautiful images, but I saw no future for me using two different APS-C systems.
The conveniences of having the X-Pro2 and the X100T are they use the same batteries and have the same sensor. I used the X100T for quick web shots to sell stuff online. I liked that because minimizing the work it takes me to produce decent product shots for private sales makes it easier to move the stuff out. One of the disadvantages (if I can call it that) of being a commercial photographer is knowing I will cut corners on personal shooting. I am like the plumber that only sometimes feels like fixing the leaky faucets in my home.
***
X100 SERIES CONVERSION LENSES
I have had the two available conversion lenses since owning the X100T and use them on the X100V when needed. They are the WCL-X100, which changes the original lens’s field of view by 0.8x to offer a wider 28mm equivalent focal length, and the TCL-X100, which narrows the original lens’s field of view by 1.4x to offer a tighter, 50mm equivalent focal length.
Mine are the previous version but have the same glass as version II. The difference between the original lenses and version II is that a magnet has been placed inside the housing of version II, enabling the X100F and later X100 series cameras to recognize the TCL/WCL automatically. Some photographers successfully converted their original versions by placing magnets in the housing.
I do not want to spend extra money on a feature I seldom use. Simply placing the TCL/WCL selection button in the ‘Q’ menu lets you quickly set the camera for the TCL/WCL lenses. If you need to remember to do this and plan on using the TCL/WCL a lot, then version II should be on your radar.
I am not too impressed with these screw-on lenses and try not to use them as they can be soft. This is common among ‘conversion-type’ lenses that screw on like a filter. When the TCL-X100 lens is mounted on the camera, it makes the aesthetics of the X100T/X100V into a front-heavy camera, which I do not like as the beauty of the X100 series cameras is their small, lightweight footprint.
Nonetheless, these are available to stash in the camera bag if you need a smidgen, more or less from the shooting perspective. Buying the newest model conversion lenses if money is tight is a mistake, as nothing can go wrong unless the glass or the threading has been damaged. Both versions work on all X100 series cameras.
***
FUJIFILM X100V CAMERA

[ X100 SERIES CONVERSION LENSES + X100V + RRS X100V HAND GRIP ]
After I owned the X-Pro3, I knew I would eventually upgrade to the X100V. The reason, besides sharing the same battery, was the sensor. New to the X-Pro3 and X100V is the beautiful 26.1MP APS-C X-Trans BSI CMOS 4 Sensor. Once, I shot an image that showcased what the back-illuminated sensor design could produce; I was hooked. There are many other wonderful specs about the X100V, which you can read about here.
I have had the X100V for over a year and enjoy creating images and graphics in the studio. Most X100V shooters may find this odd as they probably use the camera for candid or street shooting photography. I have used it around the house for cat photos and more, but it fills a niche in my studio work alongside the X-Pro3 and my medium format technical cameras and digital backs. It does well on a copy stand with the rear screen flipped up for help with composing and focusing, and I use it to make contact sheets of my 4×5 and 120 film filed in Print File sheets on top of a Kaiser lightbox. The X100V makes a full 4×5″ negative well, but I use the X-Pro3 with the Zeiss Touit 50 M macro lens to digitize my 120 negatives. If the X100V had a model with a macro lens, I would certainly buy it.
***
X100V GRIP: REALLY RIGHT STUFF
I have always preferred Really Right Stuff (RRS) camera grips over Fujifilm’s offerings. I had never experienced problems with RRS products until I purchased the RRS BX100V-B & RRS BX100V-G parts to make the camera grip pictured in the above graphic. After contacting RRS and explaining the baseplate was not matching up correctly on my camera, they requested I send it to them, which I did. After the baseplate was returned to me, it would not allow the grip to be attached, as it appeared to be made for a different camera. Feeling frustrated, I told them I would return both pieces and hoped they could fix the problem.
This is not rocket science on my end, as every camera I have had has a quick-release plate, L bracket, or a hand grip that RRS made. After two weeks, I received an assembled RRS L-bracket w/grip that fits my camera correctly. B&H Photo (from whom I originally purchased it) needs help keeping the RRS X100V’s L-bracket w/grip in stock. Supply chain issues? I do not know, as I thought RRS made their offerings in-house, but some of the parts are sourced from elsewhere. It is a well-engineered product, as are all the RRS products I have used and owned, and I recommend it if you can find one.
***
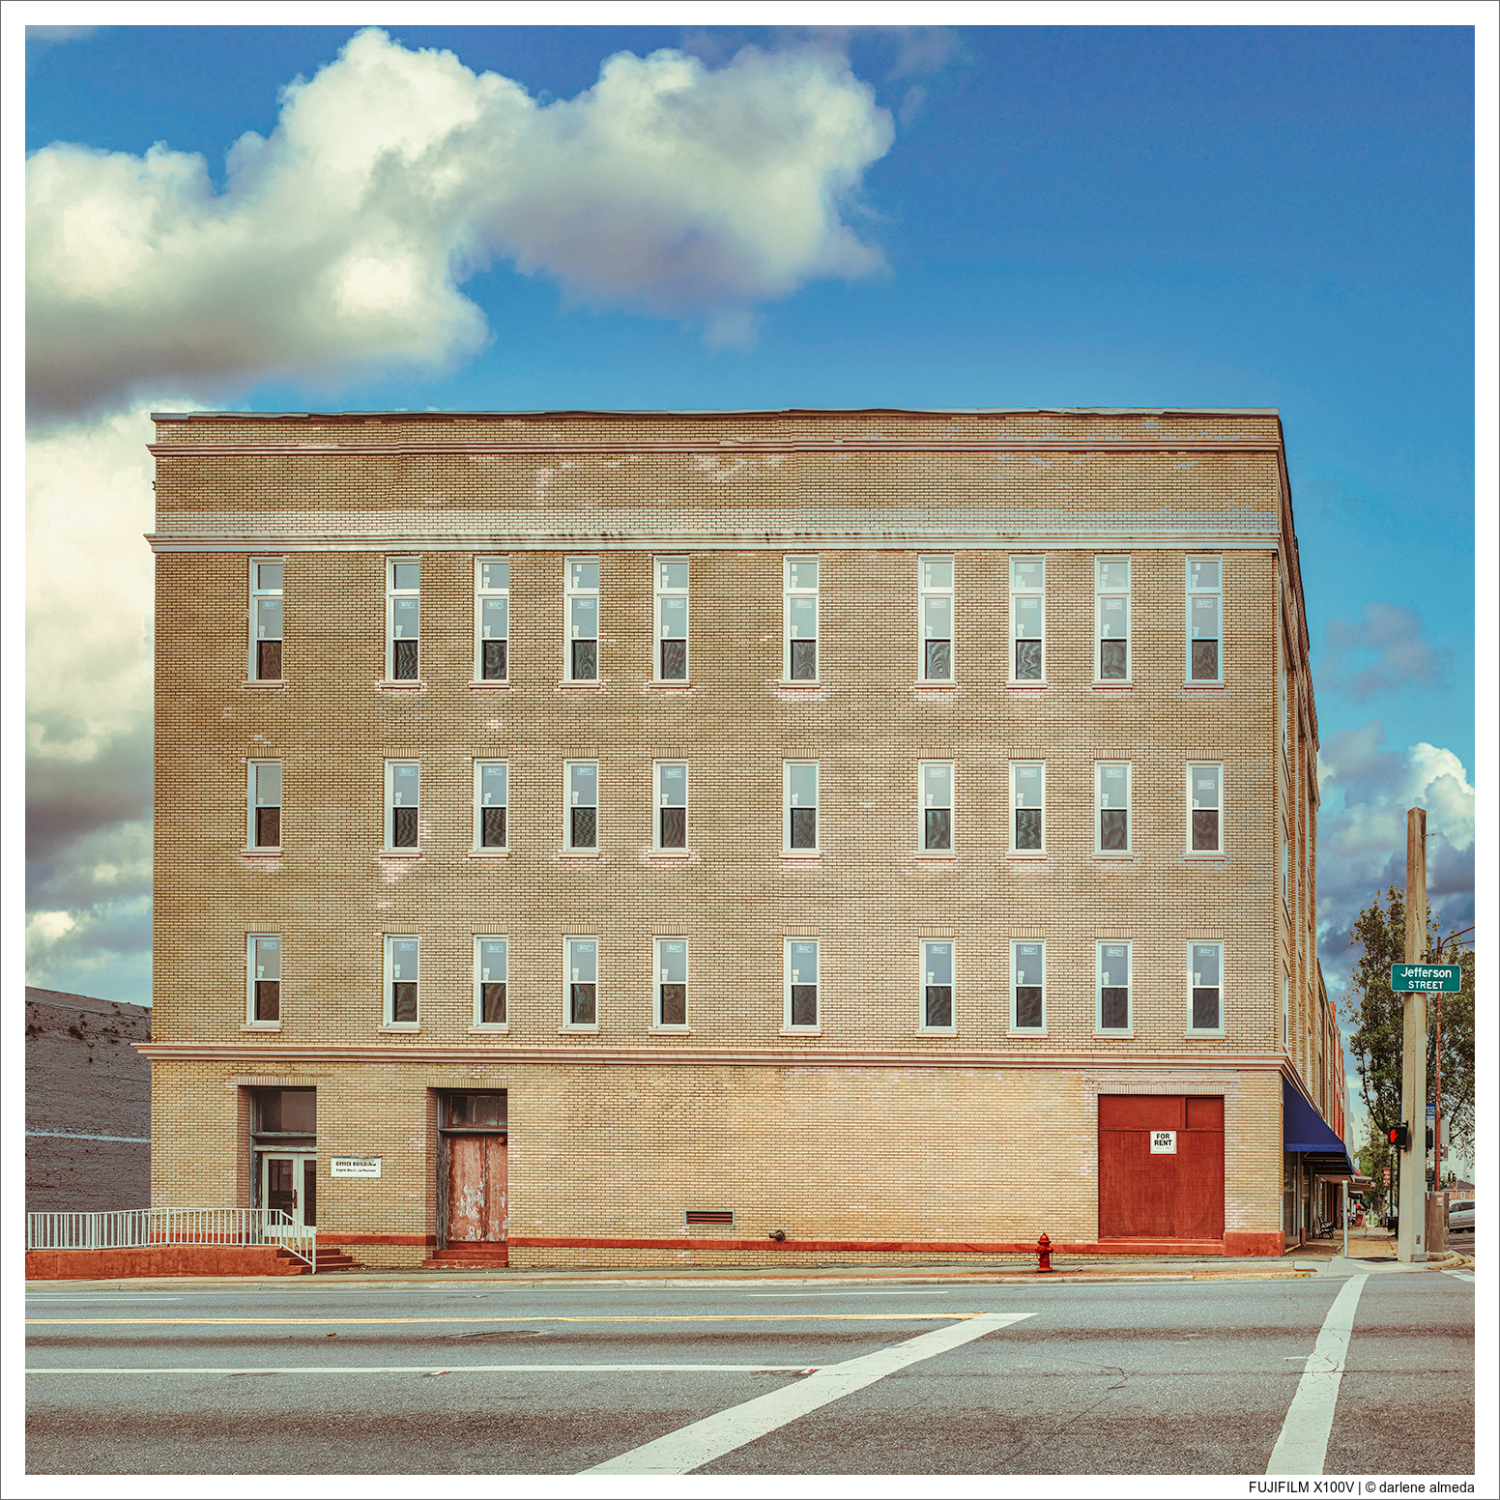
GALLERY #2: X100 IMAGES


FUJIFILM X-E2 IR (590nm)

[ MY FUJIFILM X-E2 IR KIT ]
X-E2 CAMERA CHOICE
Before entering the Fujifilm system, I had been experimenting with a Sigma SD1 camera for infrared (IR) photography. The advantage of the SD1 is its IR cut filter, which is user-removable and can be easily put back on the sensor for full spectrum shooting. The disadvantage of shooting the SD1 for IR photography is its optical viewfinder. When shooting IR with the SD1, I had to place a Hoya IR 72 filter on the lens so it passes only infrared rays above 720nm. The problem with using an optical viewfinder over an EVF is when using the filter, which is about 11-14 stops darker than the scene. Try looking through that to focus!
IT WAS TIME TO CHANGE THE GEAR once I realized a mirrorless camera’s EVF would fix my biggest issue, the optical viewfinder. I knew I would be looking for a Fujifilm APS-C camera for replacement, and I did not want to cannibalize an X-Pro2, so I looked at what else might fit my needs. I discovered the X-E2 is a smaller version of the X-Pro2 without the optical viewfinder, and I was interested in getting my hands on one to shoot before the conversion.
After shooting with an X-E2, I quickly saw it was what I wanted. I found a used one in excellent condition and shipped it to LifePixel for my chosen conversion, the IR 590nm. After shooting with the converted X-E2, I could not be happier as it is more about black & white photography for me than IR. When the time came to sell the X100T, I had to contemplate if I should send the X100T in for conversion and sell the X-E2 instead. However, after careful consideration, I decided not to take the chance since the X-E2 IR (590nm) delivers what I want.
***
IR LENS CHOICE
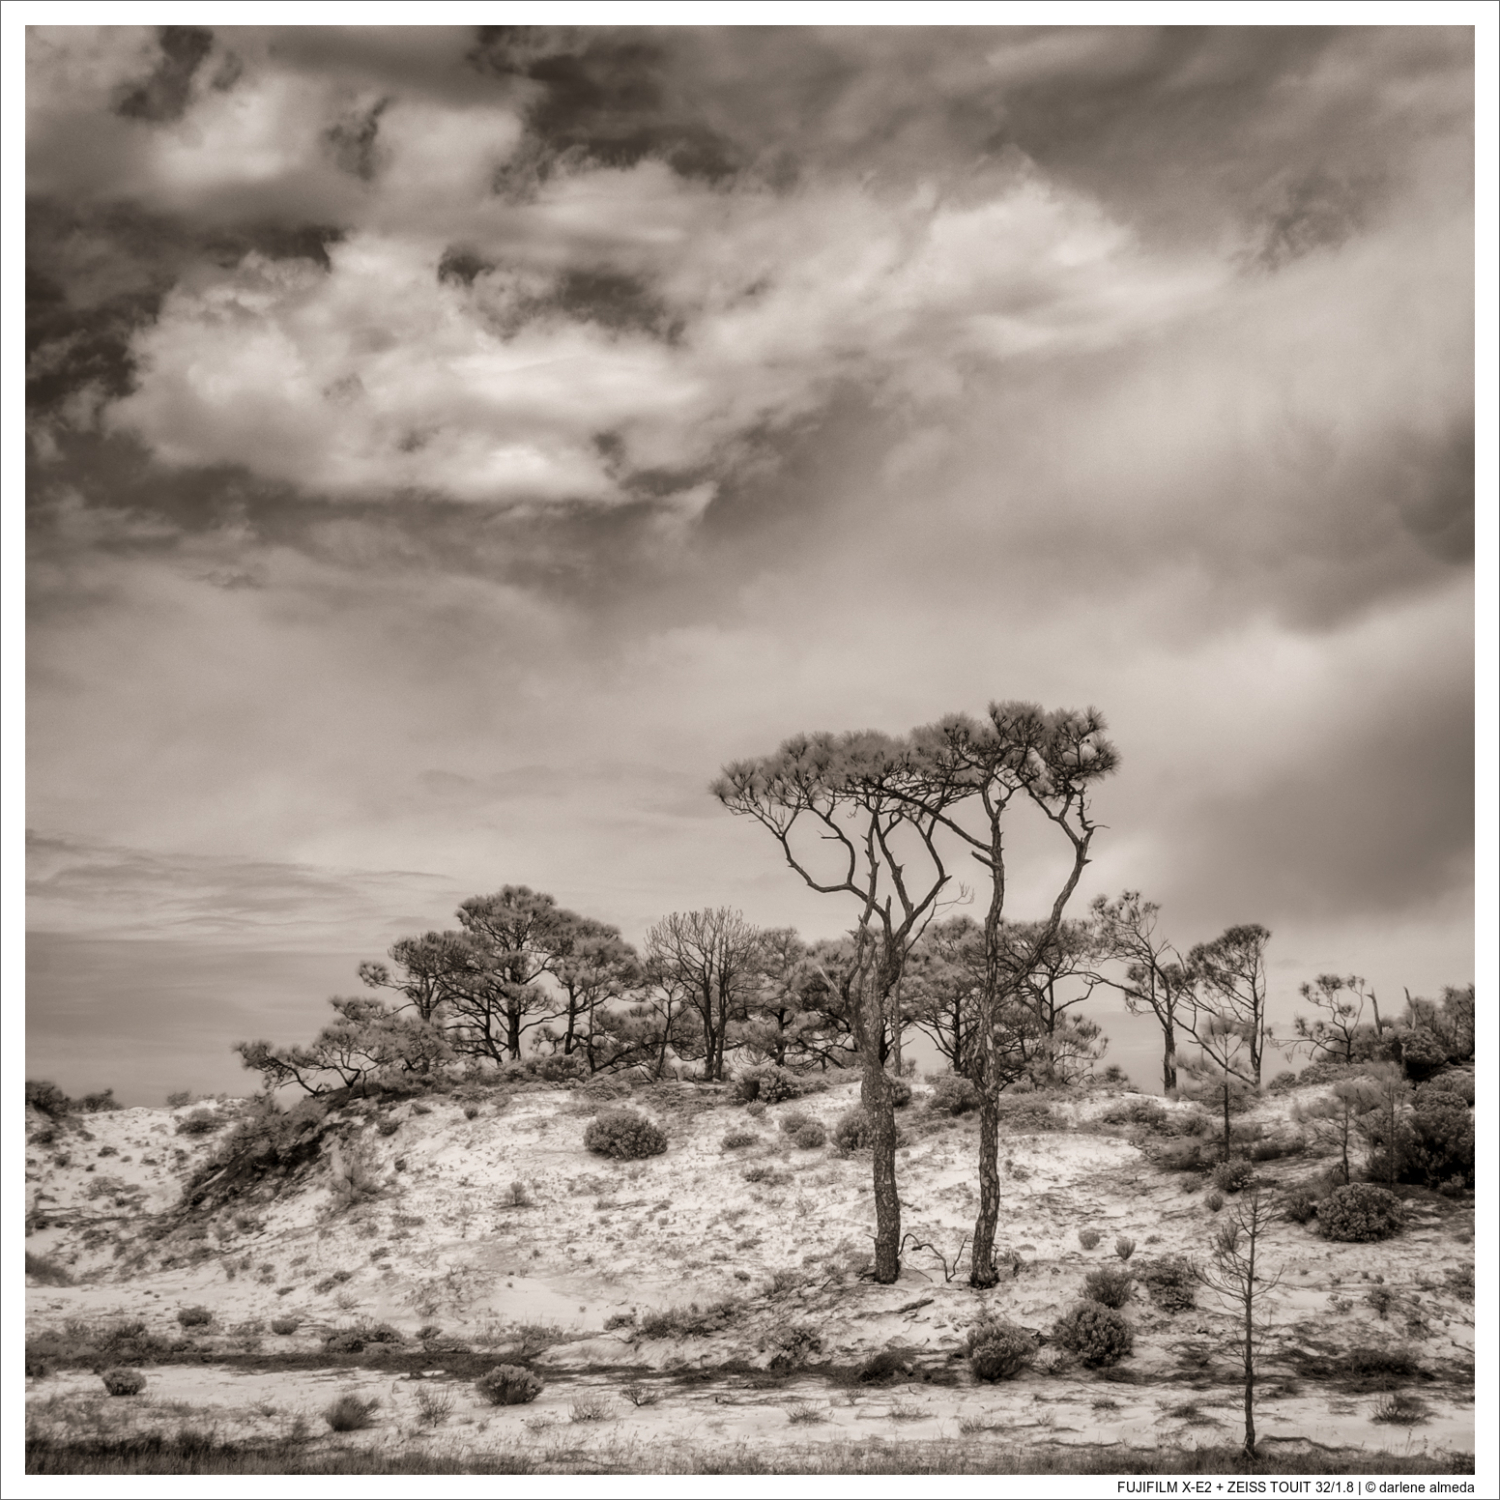
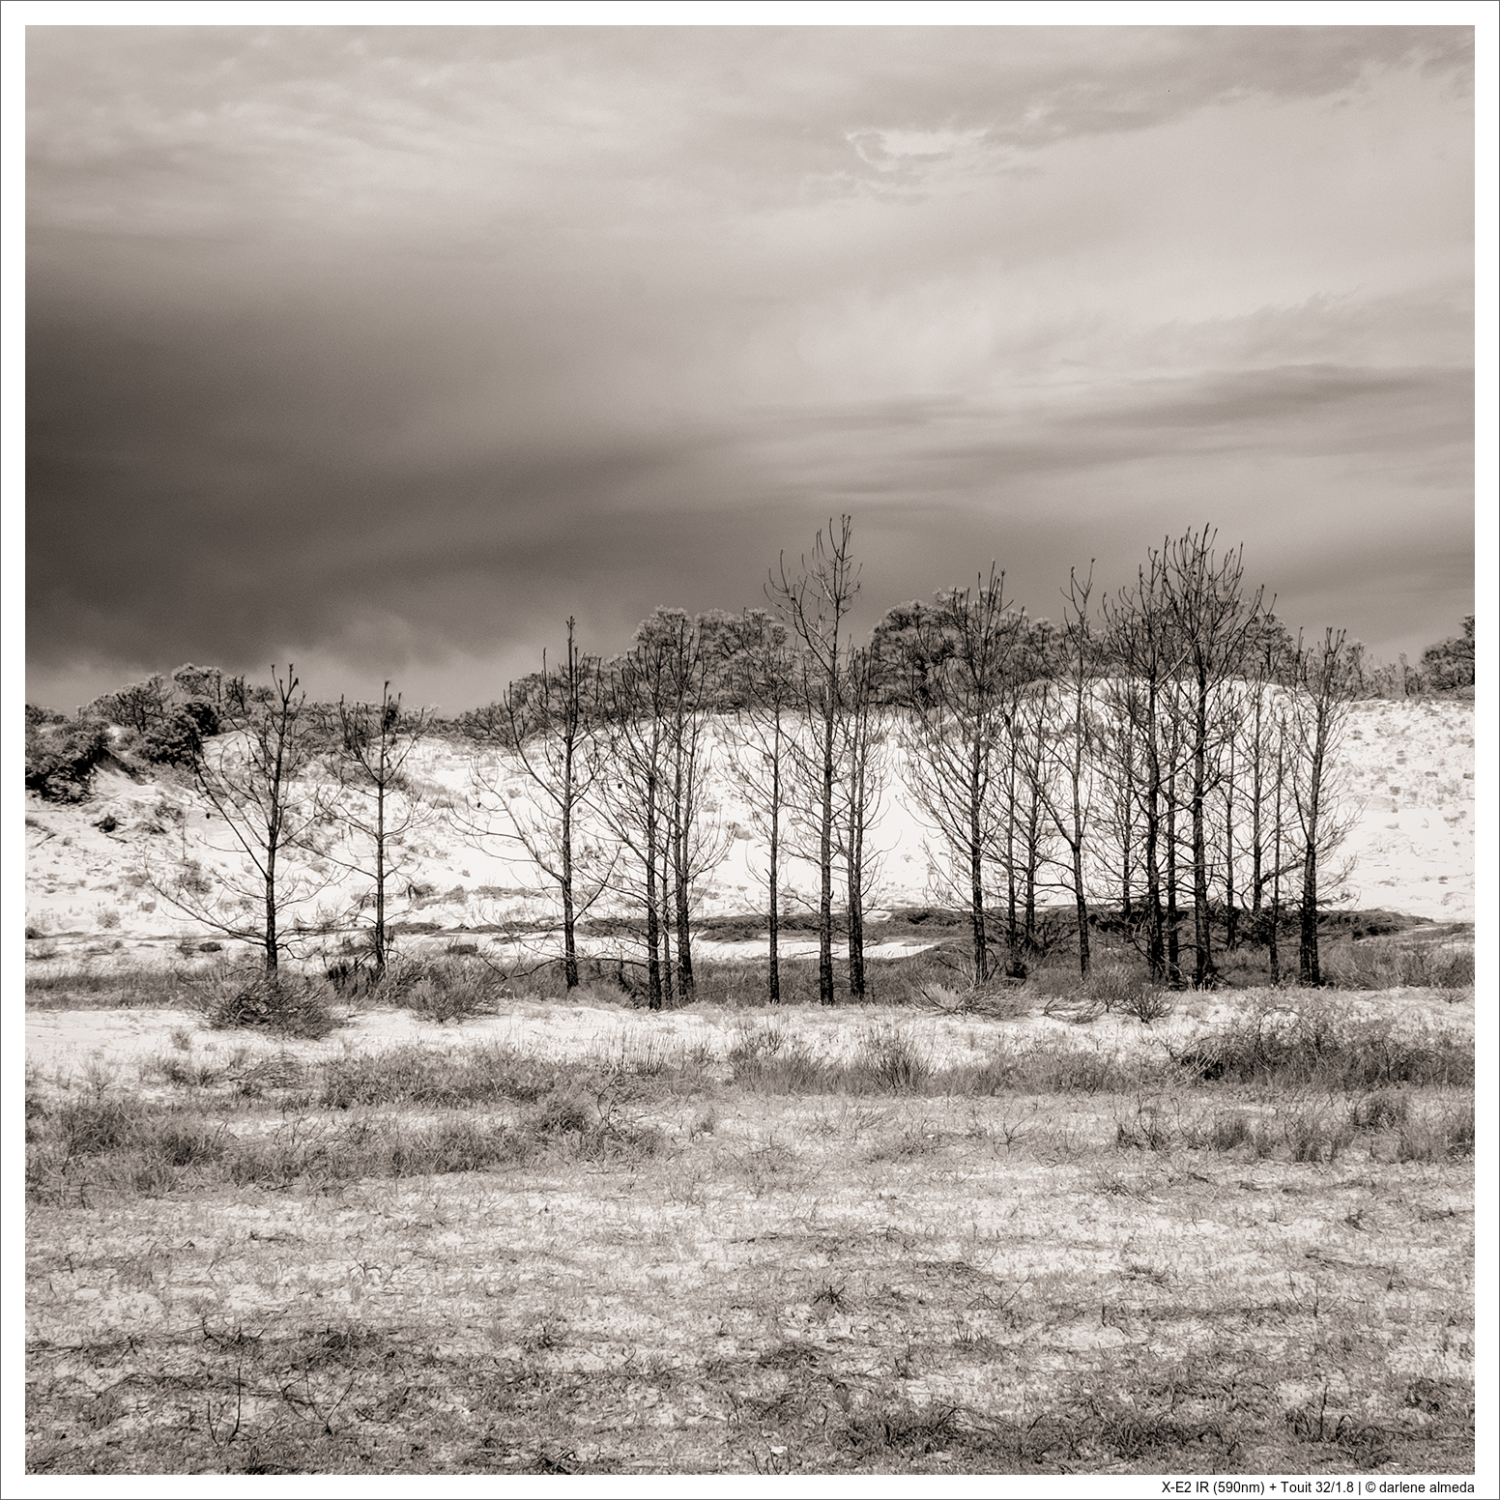
Indeed, all lenses are not created equal, especially when using them for IR photography. Before choosing lenses for your IR photography, here is a list and another list to look at regarding how some lenses behave with an IR sensor. Do testing with your lenses before you strike them out entirely if they are found on a not-recommended list. From my experience, the Zeiss Touit 32/1.8 is on a not-recommended list, but if you look at the middle picture of Two Pines below, it has no visible hot spots and was shot with the Touit 32/1.8. Also, from my experience, zoom lenses do not play well with IR, and all my zooms produce hot spots in my images.
***
WHY I SHOOT IR PHOTOGRAPHY
I shoot IR photography because of my love for black & white (B&W) imagery. I have seen many images created with sensors modified or designed to shoot monochrome imagery exclusively. From Phase One’s specialized digital backs to Leica Monochroms to APS-C cameras modified for monochrome output. I have not seen one image from any of these cameras that would compare to B&W film imagery. There is something different about how light diffuses through the film that a digital sensor cannot replicate. If you are familiar with both processes, you know the physical differences. With film, light passes through the lens and hits a piece of sensitized plastic that can have a slight diffusion effect. With digital, there is no piece of film from which the light can hit and spread but a sensor. You may or may not see a difference, but some photographers do and choose black-and-white films over B&W digital. My eyes see how incredibly sharp digital images can be, and if that is what I am after, then I reach for a digital camera, but when it comes to straight black-and-white images, my preference continues to be film. The B&W images I produce with my X-E2 satisfy my digital B&W itch without costing much money. I continue to shoot 4×5 and 120 B&W films because I enjoy the process and the look when I can get it right.
***
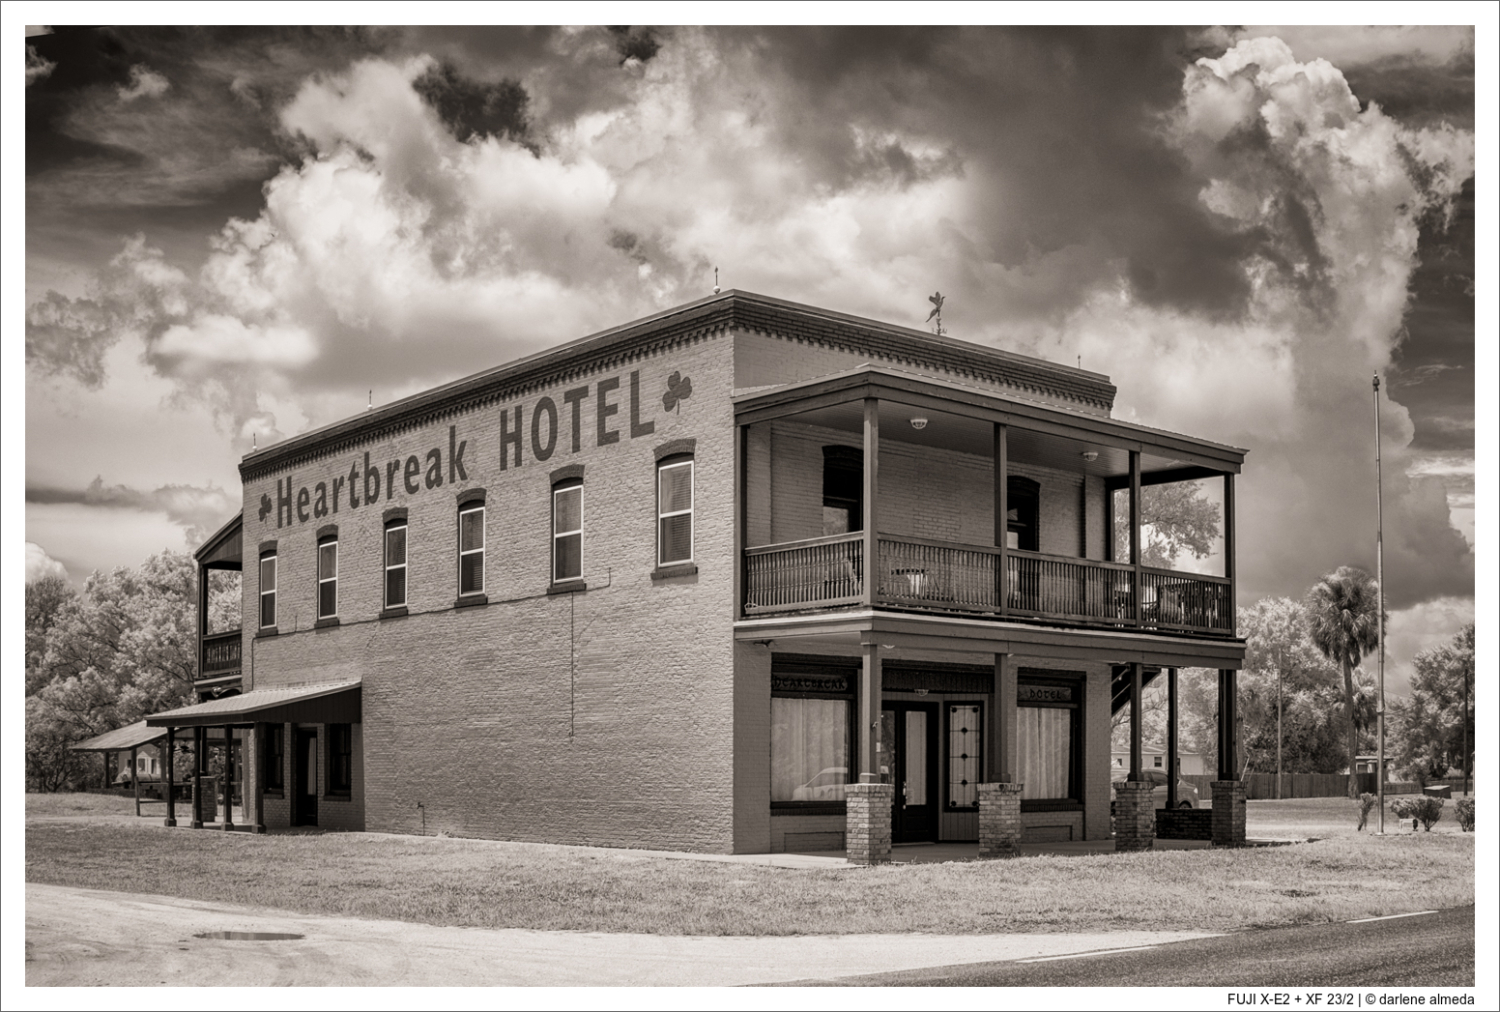
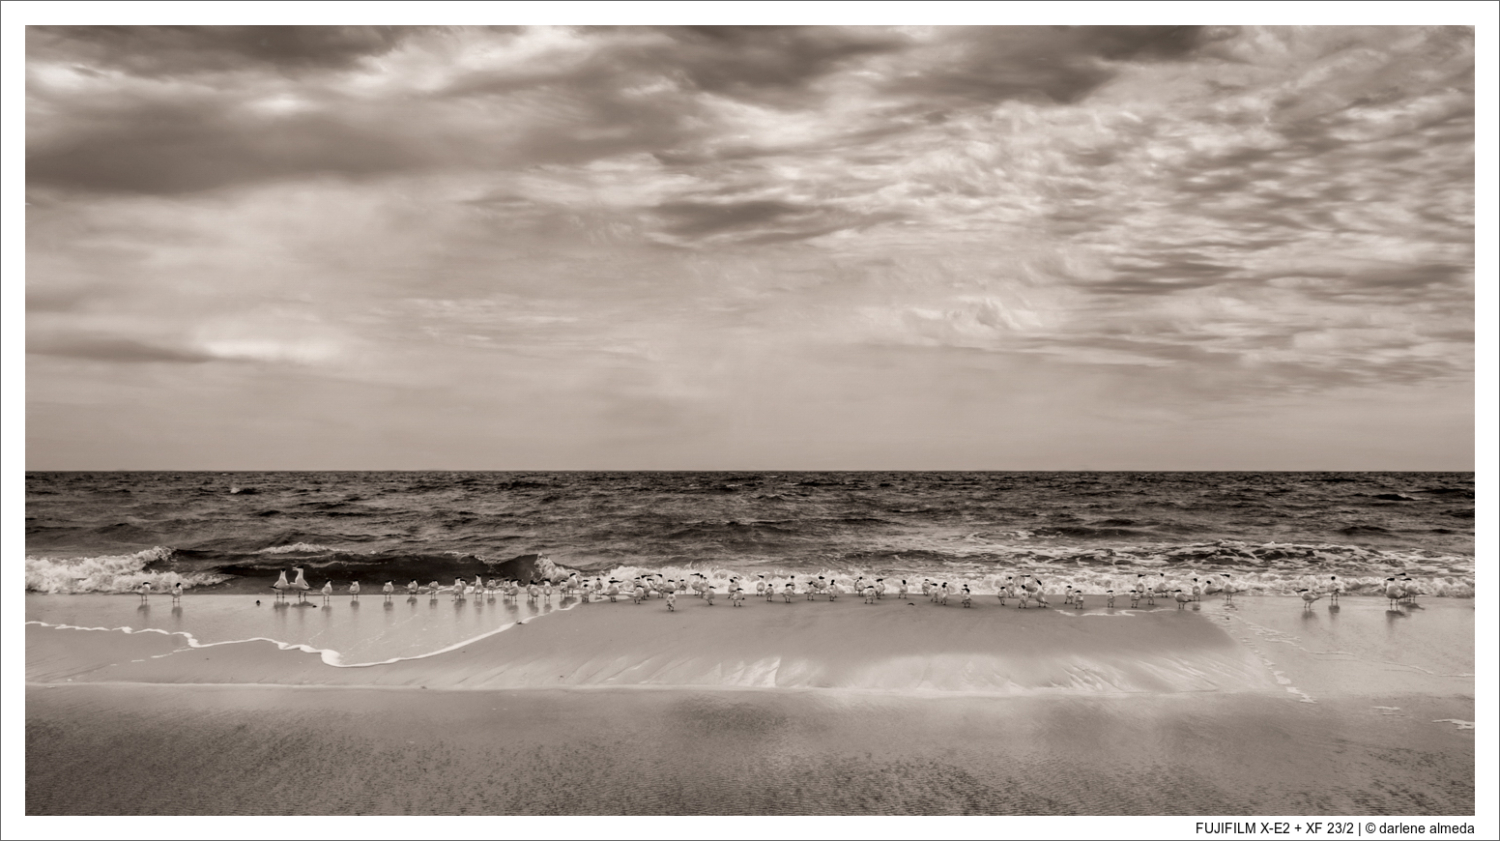
GALLERY #3: X-E2 IR IMAGES
MY FUJIFILM X-SERIES TRAVEL KIT

[ MY FUJIFILM X-SERIES TRAVEL KIT ]
I often travel around my home state of Florida and southern Georgia for adventure, camping, and image-making, and my Fujifilm APS-C Travel Kit travels with me. Nothing is missing from my APS-C travel kit that could make it any easier to travel light and get the shot. The important considerations that went into my APS-C Travel Kit were weight, IR-capable lenses, and versatility.
***
TRAVEL LENSES
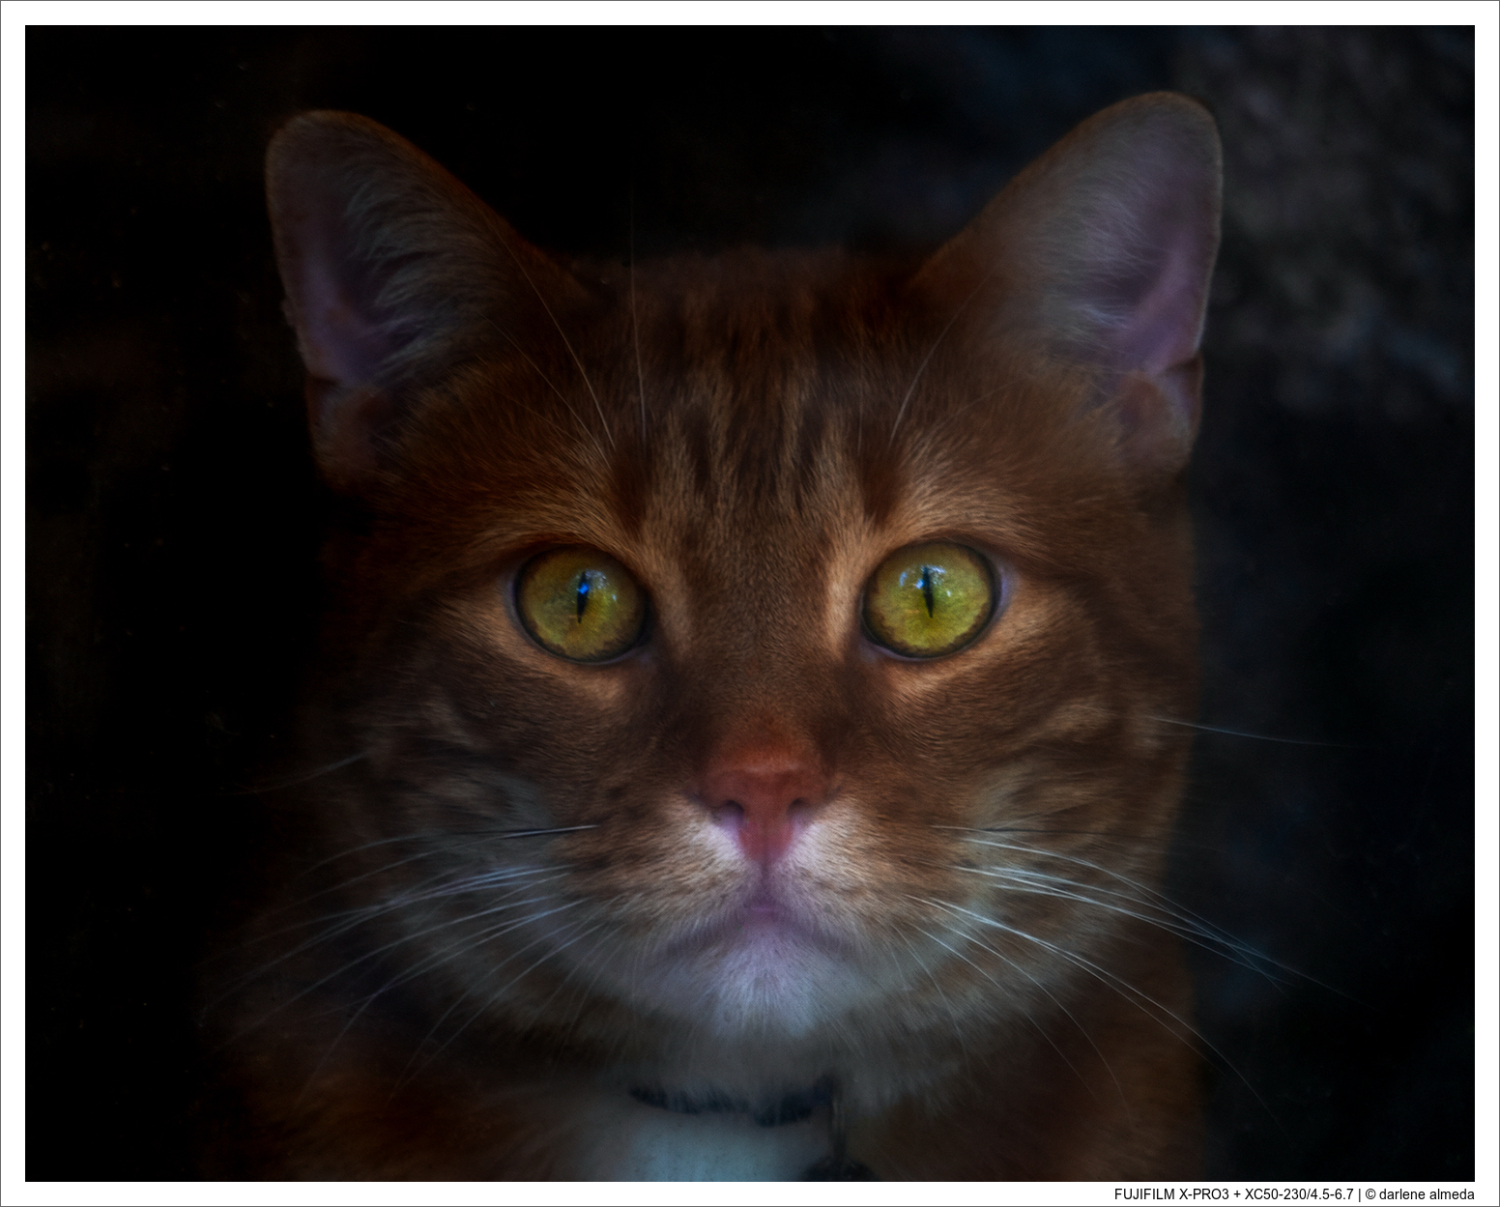
I found the X-Series of zoom lenses beautiful (I rented a small fortune of their zoom lenses to test them out), but too heavy for my travel pack. Then I took a chance on a very affordable used XC 50-230/4.5-6.7 lens because I wanted a zoom with reach but as lightweight as possible. I read a few reviews on the lens and decided to try it, and it performs flawlessly for what I shoot with it, mostly birds, landscapes, and small-town relics. I already had the 18-55 kit lens, so the 50-230 filled the spot I sought to fill.
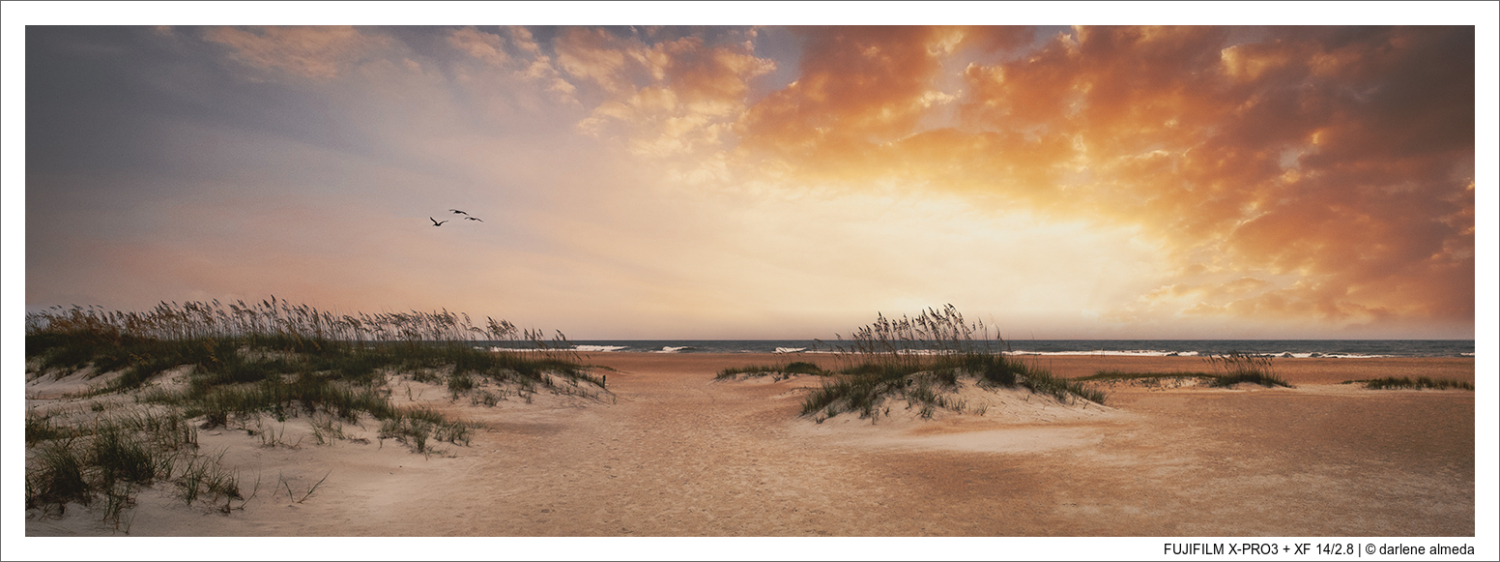
The IR lenses I travel with are two of my favorite XF lenses: the 14/2.8 and 35/2. Because the 23/2 and 35/2 were too close in field-of-view (FOV), I decided to sell the 23/2, but I often regret it. Even though they were too close in FOV for my traveling two-lens pack, I miss the 23/2 every time I see images from that beautiful lens in my portfolio. All three of these lenses work well with my X-E2 IR camera, and I will not be surprised if another 23/2 enters my pack someday.
***
TRAVEL PACK
As you can see, my APS-C Travel Pack is very manageable. I usually pack one of the APS-C cameras with their two chosen lenses in a Think Tank Retrospective 7 bag and walk around an area looking for places and things that catch my eye. When I come across something I want to photograph with my bigger camera, usually a medium format digital (MFD) or a 4×5 film camera, after I return to my campervan, I will grab the bigger camera and go back. I always travel with two systems: either my 4×5 and APS-C or my MFD and APS-C.
***
GALLERY #4: X-SERIES TRAVEL KIT IMAGES


FUJIFILM NEOPAN 100 ACROS I & II

[ FUJIFILM QUICKLOAD NEOPAN 100 ACROS + 135-36 ACROS II + 120 SPENT ROLLS ]
FUJIFILM QUICKLOAD NEOPAN 100 ACROS & HOLDER
In the past, Fujifilm manufactured my favorite black & white film, ACROS Neopan 100, in 4×5 QuickLoads (image #1 above). It was the lightest way to carry 4×5 film into the landscape, as the need to bring a half dozen or more film holders was gone. Unfortunately, all that ended in 2010 when Fujifilm stopped production of Quickloads. I was able to buy a few boxes for the deep freezer, and just like my dwindling supply of Polaroid 55, I am down to one full box and a few sheets. Neopan 100 Acros was discontinued in late 2018 due to low sales and difficulties obtaining essential raw materials. Up next, Fujifilm began producing Acros II in 2019.
***
IMAGE: UNDERWATER WONDERS ON LAND / ACROS II

[ FOTOMAN 6×17 + FUJINON SW 90/8 + ACROS II/510 PYRO ]
Fujifilm Professional proudly introduced Neopan 100 Acros II in November 2019 as the latest member of its film lineup. It is currently available in 120 and 135 formats only. This medium-speed, ultra-high-image quality black-and-white negative film sets a new standard with its exceptionally fine grain quality, surpassing all ISO 100 films available worldwide. Acros II boasts the finest grain quality available. With exceptional processing characteristics, it delivers rich gradation and unparalleled sharpness, catering to a wide array of photographic needs. Acros II delivers outstanding sharpness, rich gradation, wide exposure latitude, and excellent reciprocity characteristics. It is ideal for all typical indoor and outdoor photography and long-exposure applications.
Acros II replaced Acros I which was a favorite black and white film available in 4×5, 120 and 135 film formats. Acros I was discontinued in late 2018 citing low sales volumes and difficulties in obtaining “raw materials essential for production” for the reasons why. The film photography community expressed outcry upon learning about another discontinued Fujifilm stock. Their plea was for the reinstatement of Acros, and it appears Fujifilm has heeded their call. A year later, Acros II emerged, born out of extensive research into alternative raw materials and a thorough reevaluation of the manufacturing process to align with these new materials.
In comparing Acros I and II, I’ve noticed that Acros II seems slightly thicker, which facilitates easier scanning. Additionally, Acros II exhibits a slightly more purplish hue and a touch more contrast. I’m delighted that Fujifilm has revived the Neopan Acros film, though I do wish it were available in 4×5 format as well.
FUJIFILM INSTAX FILM

[ FUJIFILM INSTAX SQUARE + INSTAX SP-3 PRINTER + LOMOGRAFLOK 4×5 INSTANT BACK ]
Fujifilm Instax film offers a range of sizes and flavors, including Square and Wide, which I use with different film backs and the SP-3 printer. Although capable of producing striking instant images, achieving optimal exposure may require fine-tuning, as is often the case with instant films. However, sharp images with vibrant colors are entirely achievable with careful adjustment.
***
FUJIFILM SHARE SP-3 PRINTER
I have an Instax Share SP-3 printer to make Instax Square prints from my iPhone images. It does a great job. They are easy to make and fun to share. Besides printing images created on your phone, you can also upload images to your phone and print them. So, if you have images in your Lightroom catalog that you want to make Instax Square prints of, send them to your phone and print.
***
LOMOGRAFLOK + INSTAX WIDE + SINAR NORMA

[ LOMOGRAFLOK & SINAR NORMA w/ HASSELBLAD CF 80/2.8 + INSTAX FILMS ]
I use a Lomograflok Fuji Instax Wide 4×5 back on my Sinar Norma, though it also fits my Linhof MT 3000. However, on the Linhof, the film exit door encounters resistance against the camera’s body, impeding the film’s smooth exit. To mitigate this, I remove the back before initiating the process, although it’s inconvenient. Consequently, I tend to opt for my Norma when shooting. Instax film works particularly well in the studio, where I can control the exposure consistently with strobes.
Compared to current Polaroid offerings, Fuji Instax offers superior consistency. Polaroid often suffers from reliability issues, which can be frustrating and costly. Having invested considerably in Polaroid films for lighting tests during my commercial career, I mourn the loss of Polaroid 55 P/N. I have paid my dues with Polaroid.
An advantage of Fujifilm Instax is its widespread availability. The growing popularity of Instax has prompted camera manufacturers and enthusiasts to create film backs for other cameras, like the Lomograflok and the NONS Instax Back for Hasselblad, broadening its accessibility and appeal.
NONS INSTAX BACK FOR HASSELBLAD

[ HASSELBLAD 501CM + CFE 80 + NONS INSTAX BACK w/WAISTE-LEVEL & PME 51 FINDERS ]
The NONS Instant Back is a plastic marvel with metal bits lighter than a feather and softer than my bunny slippers. They’ve coated it with some fancy rubberized texture to ensure it doesn’t slip through your fingers like a bar of soap in the shower.
This sweet little box is tailor-made for your Hasselblad, ready-to-rock Instax Square film like it’s nobody’s business. It’s like the yin to your camera’s yang, fitting snugly like a favorite pair of boots. And did I mention the sleek design? It’s so close to Hasselblad’s square format that you’ll get a full Instax frame with a small black border – because every picture needs a little black frame, right? [continue]
MORE TO EXPLORE
The related posts below are connected by camera, technique, topic, or the quiet pull of curiosity.