flexile-white-logo

FILTERS

SIGMA DP 1 MERRILL

[ FILTERS: NEUTRAL DENSITY, COLOR CORRECTION/CONTRAST, GELATIN BW ]

FILTERS [ YES ]

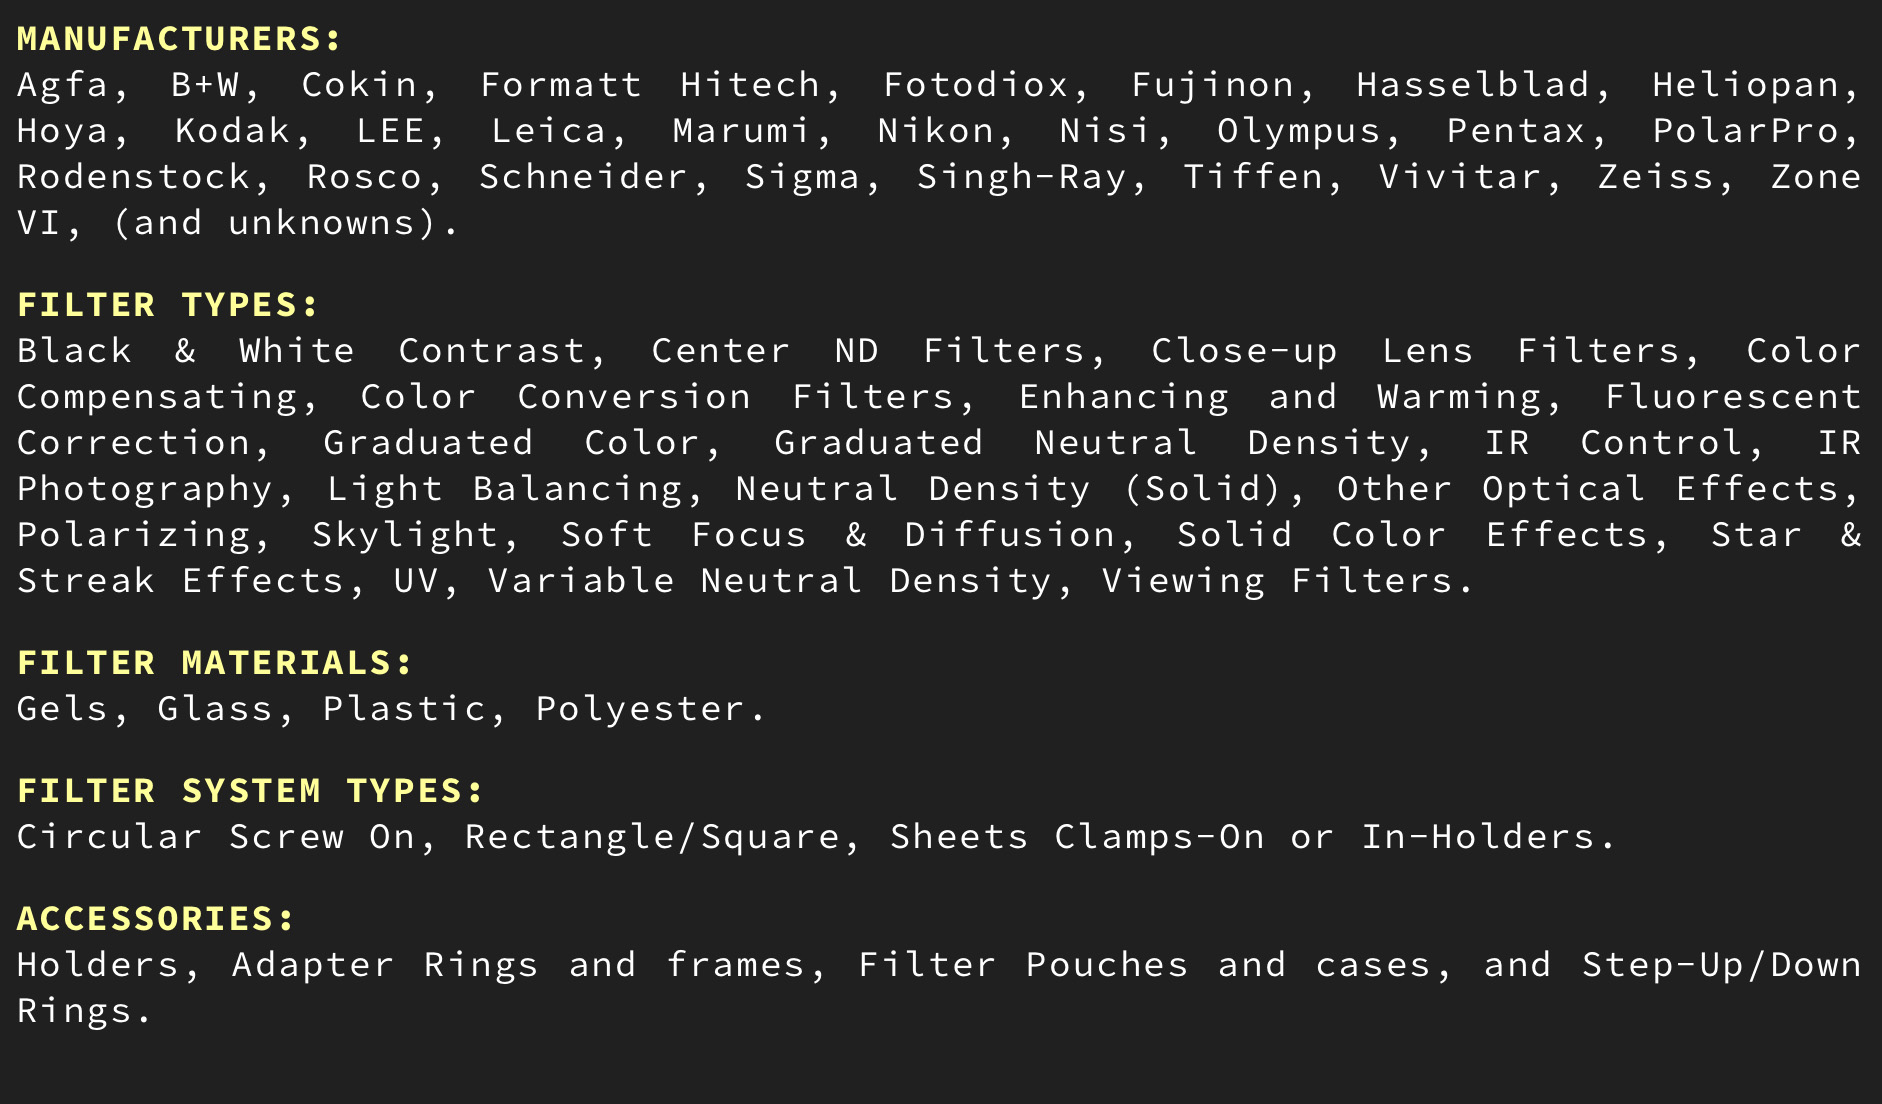
MANUFACTURERS: Agfa, B+W, Cokin, Formatt Hitech, Fotodiox, Fujinon, Hasselblad, Heliopan, Hoya, Kodak, LEE, Leica, Marumi, Nikon, Nisi, Olympus, Pentax, PolarPro, Rodenstock, Rosco, Schneider, Sigma, Singh-Ray, Tiffen, Vivitar, Zeiss, Zone VI, (and unknowns).

FILTER TYPES: Black & White Contrast, Center ND Filters, Close-up Lens Filters, Color Compensating, Color Conversion Filters, Enhancing and Warming, Fluorescent Correction, Graduated Color, Graduated Neutral Density, IR Control, IR Photography, Light Balancing, Neutral Density (Solid), Other Optical Effects, Polarizing, Skylight, Soft Focus & Diffusion, Solid Color Effects, Star & Streak Effects, UV, Variable Neutral Density, Viewing Filters.

CENTER FILTERS: Center Filters For Large Format Lenses by Daniel W. Fromm.

FILTER MATERIALS: Gels, Glass, Plastic, Polyester.
FILTER SYSTEM TYPES: Circular Screw On, Rectangle/Square, Sheets Clamps-On or In-Holders.
ACCESSORIES: Holders, Adapter Rings and frames, Filter Pouches and cases, and Step-Up/Down Rings.
MATTE BOX: SmallRig #2660 (see article here)

If you have experience in photography, whether you’ve been at it for a while or are a professional photographer proficient in film and digital formats, you’ve likely encountered filters. Filters serve various purposes, and there are multiple techniques for attaching them to a camera or a scene to achieve the desired effect. These filters encompass a range of types, such as:

1. Colored filters for Kelvin temperature adjustment, which helps balance color.
2. Neutral-density (ND) filters darken and balance the sky with the foreground.
3. Polarizers for eliminating or managing reflections on glass and shiny surfaces.
4. Diffusion or softness filters smooth skin textures or evokes specific moods in an environment.
5. Creative filters designed to produce unique artistic effects.
6. Graduated ND and color filters enhance skies and backgrounds or add new colors.

Filters are available in various materials, including glass, plastic, and gel sheets, to modify the light in front of the lens and alter the light source, whether artificial or natural daylight. Circular filters can be affixed to the lens’s front or rear thread (when available). Alternatively, a holder can be connected to the lens’s front thread, accommodating square or rectangular filters that can be slid into rails.

Opting for the holder method over screwing filters directly onto the lens offers advantages, such as the ability to purchase cost-effective holder adapter rings instead of individual filters with unique thread sizes for different lenses. Stepping rings allow the use of circular filters with various lens thread sizes. Another filter system employs magnets to attach filters to the lens. While I don’t have personal experience with the magnet system or systems designed to place filters directly over the digital sensor, they are accessible options.

Filter tools have evolved, but the necessity to adjust exposure and color temperature persists in specific scenarios.

While professional and amateur film photographers frequently rely on filters, digital photographers may have different approaches. Some opt to use filters while taking photos, while others prefer to create filter-like effects later in editing.

In my current digital photography practice, I usually choose a straightforward shooting method and reserve adjustments for post-processing. However, there are instances when specific filter effects, such as polarization or neutral density, are essential during the actual photo capture.

In film photography, I digitize my film and handle the images similarly to digital files. However, they differ because the files lack the same depth for digital manipulation. Nonetheless, the special effects achieved with filters like polarizers, ND filters, black and white contrast filters, and others that affect light and color during exposure cannot be replicated in post-processing. While we can adjust brightness and darkness during editing, the ability to manipulate light and create unique effects, as creative filters do during photography, remains a vital aspect of in-camera photography. Converting color film to black-and-white digital files may allow manipulation resembling black-and-white contrast filters; however, I no longer shoot color film, so I cannot say it is a technique to rely on.

Achieving a consistent look in your images, whether through controlling lighting or adhering to a specific color palette, is a crucial aspect of photography. Understanding the capabilities of filters plays a pivotal role in this pursuit. When we thoroughly explore all available tools to develop a consistent technique, we can determine which methods work effectively and which do not align with the desired aesthetic.

For instance, during my experiences photographing weddings, the couple invested in a beautiful storybook album that narrated their special day. The bridesmaids’ dresses needed to maintain consistent coloration throughout the multitude of photos. For example, if the bridesmaids’ dresses were teal, a common color for bridesmaids dresses, they needed to appear identical shades of teal in all the photos when displayed side by side within the wedding album. Any discrepancies in color consistency indicated a failure to fulfill our responsibilities as professional photographers. In this intricate process, color-balancing filters were indispensable tools that enabled me to accomplish this color-balancing task with precision and finesse.

In the era of film photography, we ensured color consistency starting with the film. We used film from the same color batch for the entire shoot, ensuring uniformity. Furthermore, we meticulously balanced the ambient light wherever we had to capture moments, whether within a church, an outdoor pavilion, or a hotel ballroom, among other locations. This balance was crucial for harmonizing the ambient light with the artificial lighting, be it studio strobes or on-camera flash, to achieve color-matching precision.

In summary, filters were an absolute necessity in my professional film shooting days. In the digital photography I perform today, while color balance and neutral densities are just as important, digital tools have replaced much of what the lens or light filters did. Using these tools correctly matters most, whether for film or digital shooting.


###

PROS & CONS OF USING FILTERS

PROS

If I had been asked about filters before the advent of digital capture, I would have said they could be a lifesaver in specific situations. Filters are a must if you are shooting the film in a mix-lighting situation and will not have digital tools to help with color correction or exposure differentials. I have used filters on lenses, lights, and other light sources, making the final image as perfect as possible. I knew architectural photographers that used sheets of filtration on windows to balance the window light with the ambient light. Even with digital capture today, I know landscape photographers who use neutral density filters like they are shooting transparency films, and I can understand why. Some things that need to be captured during shooting cannot be added or replicated later in post-processing. Balancing or adding control for color or density during shooting is a positive attribute filters can offer film shooters. When I shot Hasselblads for portraits, the expense of hiring a retouch artist for complexion enhancement was unnecessary because I could select from different degrees of softness that the Hasselblad Softars offered. What was unique about the Softars was their ability to add softness without blurring the catchlights in the eyes. They were an economic lifesaver in the portrait business during the film days.

CONS

Filters in the film days were necessary tools in a commercial photographer’s toolbox. I amassed a small fortune in filters during my film career. I honestly am happy I do not have to deal with most of them anymore because they are costly, need care, and, when used regularly, will need replacement eventually. Another issue with filters is the need to carry them on-location, install them correctly on the lens or matte box, add hoods or flags to prevent the sun or lights from hitting them, and, depending upon your shooting technique, make manual adjustments when necessary. If shooting digitally, we can use the camera’s Live View to determine what adjustments need to be made. Suppose you shoot a technical camera with a digital back. In that case, manual adjustments are the norm. With the advent of Live View, our job is made a little easier, as we do not need the expensive Polaroids of the past to see what effects using filters may have. Being able to shoot medium format digital for commercial work and having a good working knowledge of Photoshop is how commercial photographers work today. However, we still need to carry our favorite filters to the job.

FUTURE OF FILTERS

One of the nice things about my walkaround camera, the Fujifilm X100V, is its built-in three-stop ND filter, which is a very convenient option. Digital cameras can be superb computers, and I am sure built-in filters will be added more and more to future cameras as manufacturers figure out how to implement them. When I switched from shooting infrared film photography to digital IR, it became much more enjoyable after I sent off a mirrorless camera to LifePixel to remove its IR-blocking filter from the sensor and install an IR 590nm filter. Digital has given me greater control over my photography endeavors. A lot of that control has been through software like Photoshop, where I can spot-correct instead of placing an entire filter over the lens and then spending too much time cleaning it up later. We might see a Photoshop-type program built into cameras in the future.

###

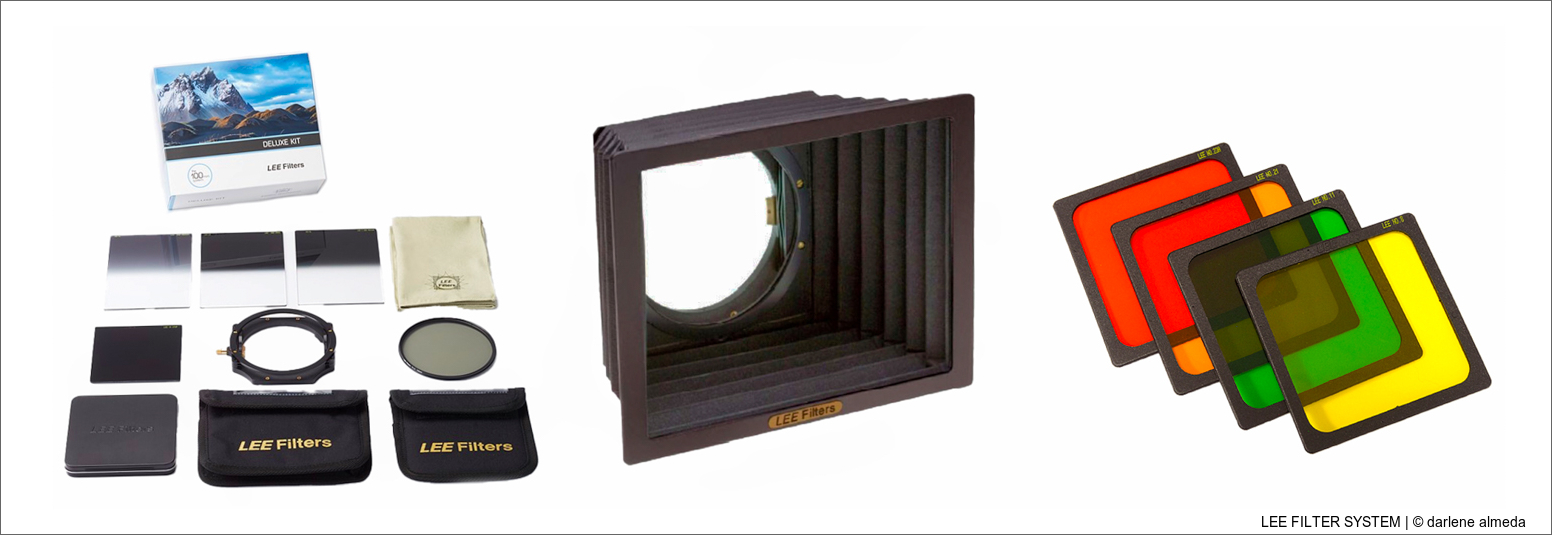
LEE FILTER SYSTEM

[ LEE FILTER SYSTEM ]

LEE FILTERS

LEE Filters has been my go-to choice for camera filters over the years. I relied on a LEE Filter Holder with an integrated shade for an extended period, as shown in the image above. This setup served me well for applying black & white (BW) contrast filters (primarily red, yellow, and orange, with less emphasis on green) and Neutral Density (ND) 4×4 inch polyester filter sets in my 4×5 photography configuration. Unfortunately, after years of occasional use with my 4×5 and medium format digital cameras, the LEE filter holder and hood eventually separated. Faced with this issue, I started searching for alternatives, as I couldn’t justify the overall expense of their newer, similar product.

In the interim, I returned to using a Sinar metal filter holder and hood until I added a 6×17 film camera to my collection. The Sinar holder and hood caused vignetting issues with this wider format, prompting me to explore the advantages of a matte box. You can read more about this in my Closing Comments at the end of this page.

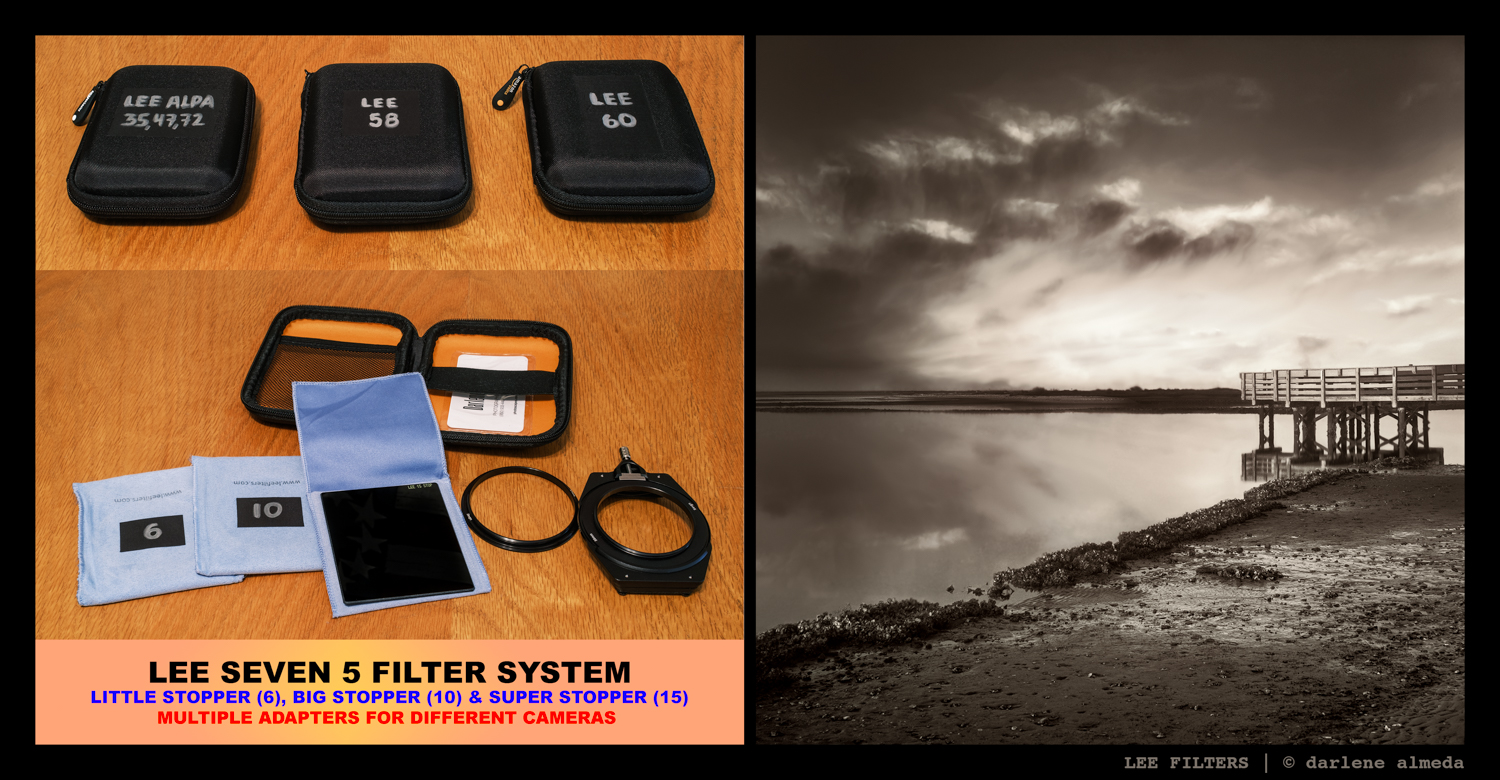
The LEE Seven 5 system (see below) is what I use for my medium format and APS-C systems today. Since I have settled on B & W film photography and left color film for digital, I use the Seven 5 system for the Stopper ND filters: Little, Big, and Super Stopper; 6, 10, and 15 stops, respectively. I use Amazon Basic cases for portable hard drives to stow and transport my LEE SEVEN 5 Filter kits. I like the SEVEN 5 system because it is small enough to carry but big enough to handle the lenses of my choice. The LEE Seven 5 filter sizes are 75 x 90mm.

###

LEE SEVEN 5 FILTER KITS

[ LEE SEVEN 5 FILTER KITS FOR TRAVEL ]

LEE BIG STOPPER + MAMIYA 6 + FUJIFILM ACROS

[ LEE BIG STOPPER + MAMIYA 6 + FUJIFILM ACROS ]

LITTLE, BIG & SUPER STOPPER ND FILTERS

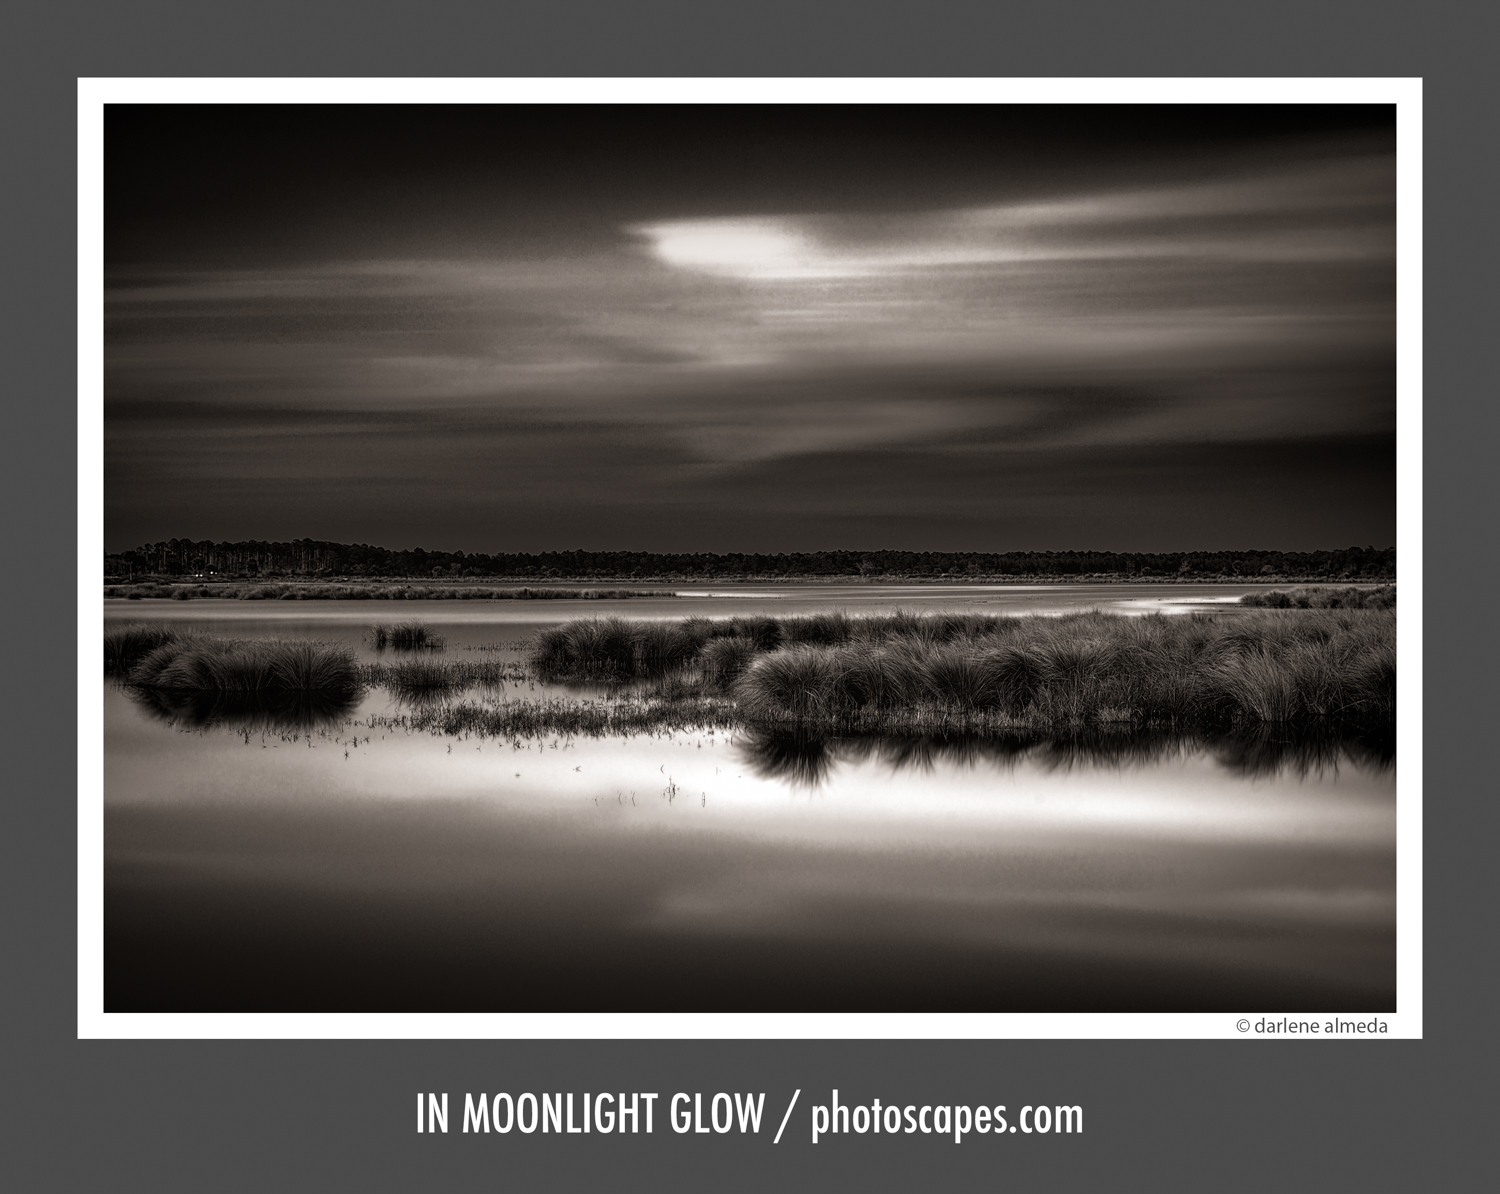
LEE ND STOPPER filters are what I occasionally use when shooting landscape photography. Long-exposure photography can create a mood, unlike short-exposure photography, but you do have to have the right conditions and subject for it all to work together. The different strengths of the ND STOPPERS produce various effects of what adjusting your exposure time for a longer capture can look like. You can also combine them for even more time if desired. I have not been able to find a location that will afford me the picture I want to create in my mind, but above right is an image that was made with a two-minute exposure on film. I think the water was too still to begin with, although it is an interesting shot if you read on to see what makes it interesting.

You would have to of been there to see what the long exposure added to the image beside a somewhat surreal look. After I pressed the shutter cable, a couple walked into the picture while the shutter was opened. They walked to the end of the pier, looked out over the water, and then walked out of the picture and off the pier. You can’t see them in the image, but believe me; they were there. Once they saw me down and away on the shore with a ‘big camera on a tripod,’ they probably thought they walked into my shot and, courteously, walked out of it. Not the best image, as I am still looking for an image in my mind that speaks of silence, but this is an example of using a Big Stopper ND. Also, the third image in the gallery below is a Super Stopper image. It was about an eight-minute exposure and was shot around 5 pm, even though it looks much later in the day.

LEE no longer makes the SEVEN 5 system. Instead, they make the LEE 85 System. I have found some LEE SEVEN 5 components on eBay for reasonable prices, and they fit all my medium format and APS-C camera systems. I recommend trying an ND STOPPER if you have not already!

###

TRI-CHROMATIC FILTER KIT

[ TIFFEN 67MM TRICHROMATIC FILTER KIT ]

TRICHROMATIC FILTERS

Recently I decided to play with turning BW film images into color using trichromatic filters during the film shooting. The three necessary filters (RED 25A, GREEN 58, BLUE 47) are built for the graphics arts industry and cost me $127.00! And that was just for playing around or my form of experimenting. It was not easy finding the BLUE 47, and I wanted them all in 67mm so I could use them with multiple cameras by employing step-up rings. I am still experimenting with using them, and the process fascinates me.

So here it is, for now, a small explanation about my experience with filters in glass, plastic, square, rectangle, or round, available in threaded frames, plastic frames, and sheets for camera and lighting holders—photographic tools of creative experimentation for some and necessities for others.

###

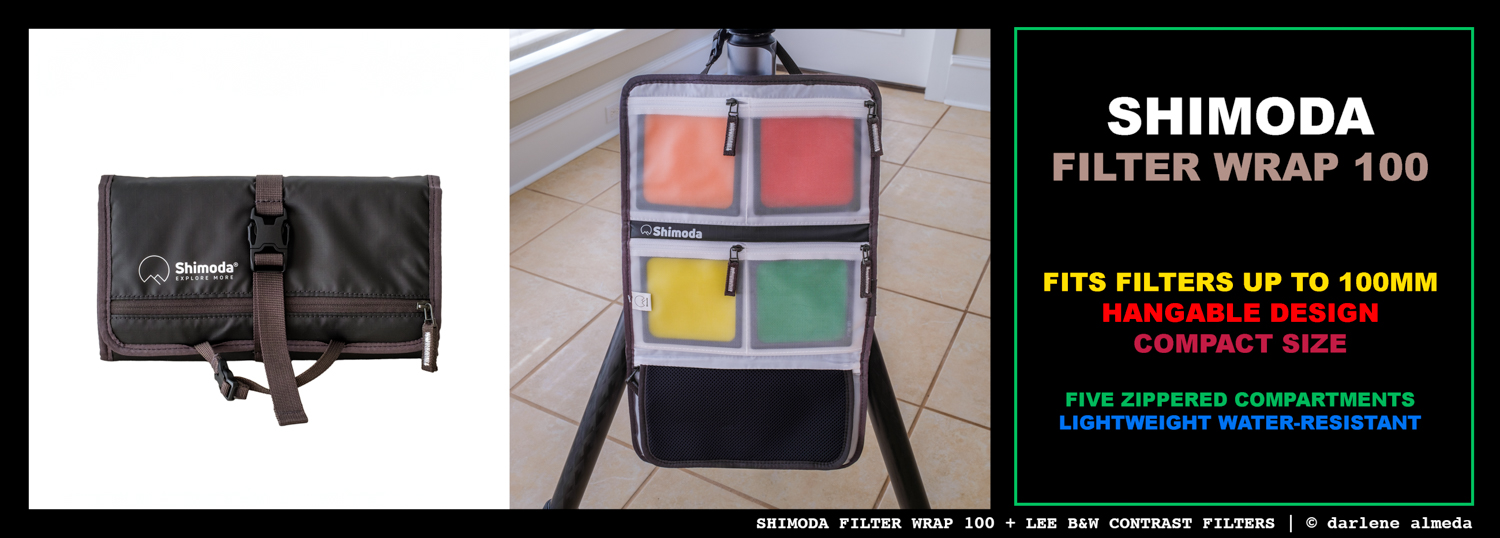
SHIMODA FILTER WRAP 100 + LEE B&W CONTRAST FILTERS

[ SHIMODA FILTER WRAP 100 + LEE B&W CONTRAST FILTERS ]

SHIMODA FILTER WRAP 100

Over the years, I’ve owned various filter carriers, holders, and wallets. Back in the days of film photography’s heyday, I even had custom-crafted wooden boxes for my glass filters, which I used for fine portraiture. These days, I rely on the Shimoda Filter Wrap 100 to protect my 4×4 (100 mm) black and white contrast filters. Whether I’m shooting in the studio or taking my 4×5 Ebony or 6×17 Fotoman out into the landscape for black and white film photography, this has become my filter carrier of choice.

The Shimoda Filter Wrap 100 is a fantastic solution for safeguarding my delicate LEE gel filters when I’m on the move. It’s ideal for travel and can easily attach to my tripod. It’s compact, weather-resistant, lightweight, and offers excellent protection for my filters. It also makes distinguishing between filters simple, and I appreciate the zippered pocket at the bottom for storing my lens cap.

Try if you’re in the market for such a product. Additionally, if you use filters larger than 4×4 (100 mm), they offer a 150 mm x 100 mm version, the Shimoda Wrap 150, that might suit your needs.

###

SHIMODA FILTER WRAP 100 + LEE B&W CONTRAST FILTERS

[ FOTOMAN 6×17 + FUJIFILM ACROS II + #11 YELLOW GREEN FILTER ]

CLOSING COMMENTS

In 2023, I switched from using the LEE Hood & Filter Holder to a SmallRig Matte Box for filter and shading. This matte box has proven to be a dependable choice for my 6×17 and 4×5 cameras. The reason behind this change was the durability issues I experienced with the LEE Filter Holder. Over time, the material on the hood started to disintegrate, leading to the Filter Holder detaching from it. I considered trying to fix it with glue or double-sided tape, but the material had degraded so much that it turned into a dusty mess, making it impossible to repair. Given the poor quality of the hood, I couldn’t justify spending over $400 on a similar replacement product. It seemed like an excessive cost for what it provided.

As for the filters I use today, I use the Shimoda Filter Wrap 100 alongside various black and white contrast filters like #8 Yellow, #11 Yellow Green, #21 Orange, and #23A Red when shooting with my 6×17, 4×5, and Hasselblad film cameras. Additionally, I incorporate the LEE Little, Big & Super Stopper ND filters for long exposure shots. Occasionally, I use the Hasselblad Pro Soft filters for a softer effect during long exposures.

When working with the orthopanchromatic film, Fuji Acros II, my go-to filters are the #8 Yellow and #11 Yellow Green. I noticed no significant advantages when experimenting with #21 Orange and #23A Red filters. There’s a lot of information available about orthopanchromatic film, both positive and negative, so I recommend doing a Google search for more insights. Acros remains my preferred black and white film, but not solely because of its orthopanchromatic properties.

In 2023, I started using Ilford’s panchromatic film, Kentmere 100. I chose contrast filters with this film based on the scene’s requirements. While I’ve only shot a few rolls of Kentmere 100, I have yet to use the few rolls of Kentmere 400 that I have. I’m looking forward to exploring this film further.

When working with color transparency films or digital photography, I occasionally use a polarizer, but that’s usually the extent of my filter usage when shooting color film and digital. I prefer applying digital filters during post-processing, as it gives me greater flexibility and control to achieve the desired effects when needed.

###