CIRCLE OF CONFUSION SCALE COMPARISONS
Introduction
When we talk about what’s “acceptably sharp” in a photograph, we’re talking about perception—what the human eye and brain accept as focused. Behind the curtain of lens apertures and hyperfocal distances lies a foundational principle: the circle of confusion (CoC). It’s not just a technical quirk—it’s the heart of depth of field and critical focus. And depending on your image format, it changes everything.
What Is the Circle of Confusion?
The circle of confusion is the smallest blur spot a lens projects onto a sensor or film that still appears to be in focus to the human eye when viewed at a standard size and distance.
In other words, even a slightly out-of-focus point can appear sharp if the resulting blur circle is small enough. That threshold is what we call the CoC. It’s a tool, not a rule, and it influences nearly every depth of field chart or focus calculator you’ve ever used.
Depth of Field Transitions Gradually

CIRCLE OF CONFUSION BLUR TRANSITION
Depth of field doesn’t immediately change from sharp to blurry—it transitions gradually. The circle of confusion defines how much a point can be blurred before it appears unsharp to the human eye. Areas where the blur circle is equal to or smaller than the acceptable circle of confusion are considered within the depth of field. Anything beyond that, where the blur exceeds the permissible size, is considered outside the depth of field.
Why Format Size Affects CoC
CoC values aren’t universal—they change based on:
- Format size (film or digital sensor)
- How large you plan to display or print the image
- Viewing distance
- Viewer’s eyesight (visual acuity)
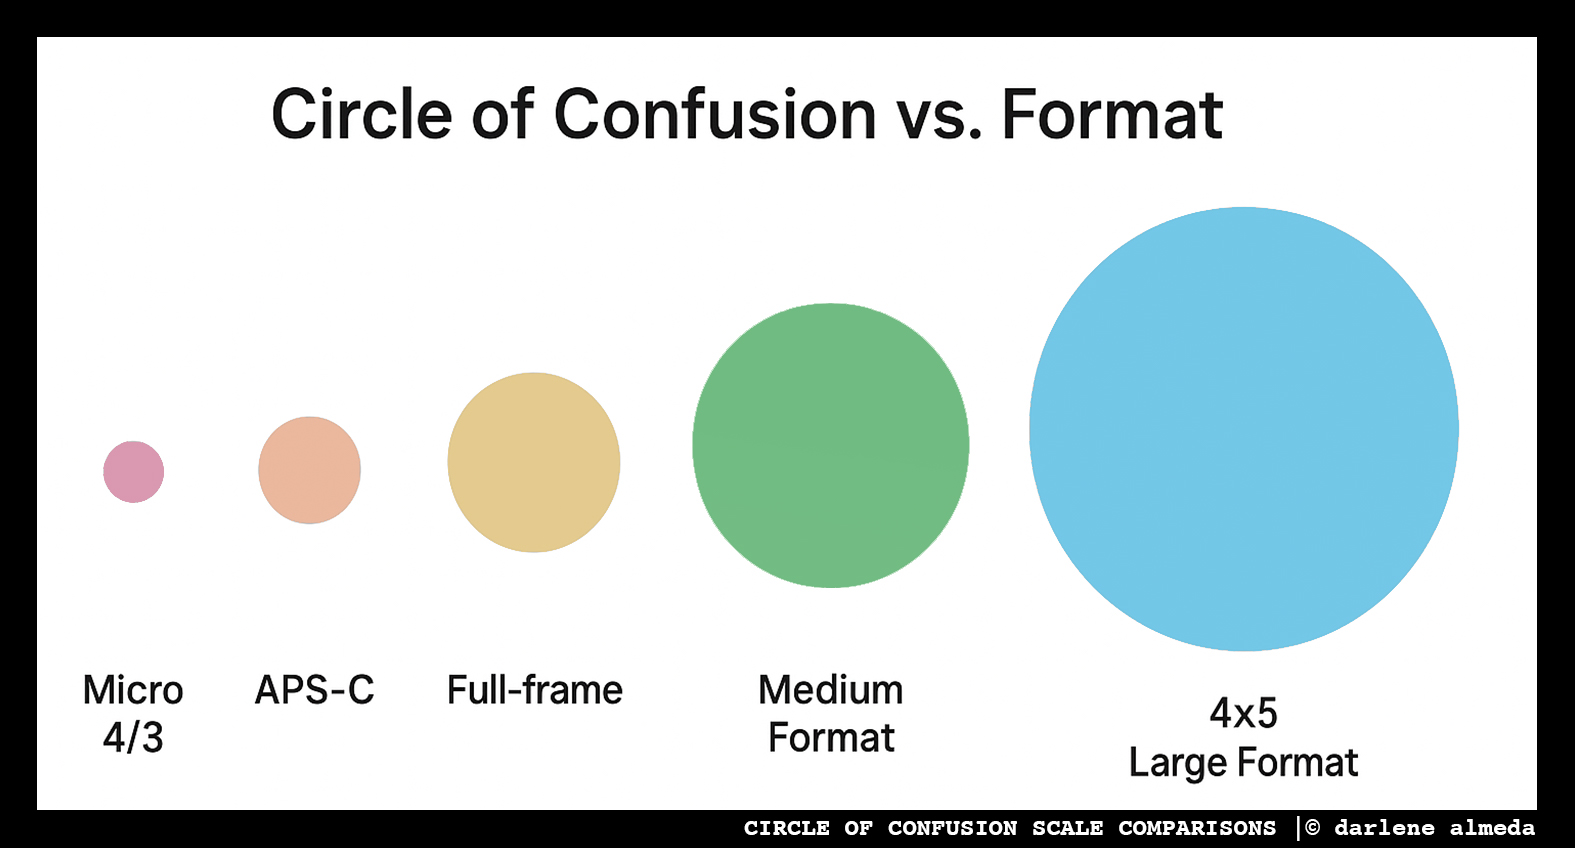
Larger formats require less enlargement to achieve a given print size. That means a larger blur circle (CoC) will still appear sharp when printed or viewed. Small formats, like APS-C or micro four thirds, require much higher enlargement to fill the same frame—and thus, need a smaller CoC for comparable sharpness.
Typical CoC Values by Format

CIRCLE OF CONFUSION VALUES BY FORMAT
Why It Matters
1. Depth of Field Changes by Format
The depth of field appears shallower in larger formats—even at the same f-stop and field of view—because the CoC is larger. This is why a portrait at f/8 on 4×5 can have the same shallow look as f/2.8 on full-frame.
2. Focus Precision in Large Format
With a 4×5 or 8×10 camera, exact focus becomes more sensitive. Even slight shifts in bellows or planes can reduce critical sharpness because the CoC threshold is higher.
3. Output Intentions Should Guide Your CoC
If your final image will be printed large and examined closely, use a smaller CoC. For casual prints or screen viewing, the standard CoC is likely sufficient.
4. Digitizing and Scanning Impact Perception
High-resolution scanning or digital capture changes how CoC is perceived. Viewers zooming in to 100% on a monitor are judging sharpness at a much finer level than most CoC values anticipate.
Customize the CoC to Fit Your Work
There’s no perfect CoC. Think of it as a guideline that can and should be adjusted depending on:
- Your output medium (print, screen, gallery, etc.)
- How the image will be viewed (close-up, across a room, online)
- How large you plan to enlarge the image from the original format
Many professionals working in large format or for high-end print publications use smaller-than-standard CoC values to ensure their images withstand scrutiny at large sizes. How a photographer might go about doing this is next.
How a 4×5 Photographer Can Choose a Smaller CoC
While the standard circle of confusion (CoC) for 4×5 format is typically around 0.1 mm, photographers working at a high level often demand more critical sharpness, especially when scanning film at high resolution or printing large sizes. Fortunately, the CoC is not fixed. It’s a variable you can adjust to suit your output and expectations.
1. Use a Custom CoC Value in Depth of Field Calculators
Most DOF calculators—whether online tools, apps, or spreadsheets—allow you to input a CoC value manually. Instead of using the default 0.1 mm for 4×5, you can enter:
0.05 mm for tighter precision (e.g., 2x enlargement factor)
0.03 mm for critical work (e.g., high-res scans or exhibition prints)
This adjustment will produce narrower depth of field zones, requiring more precise focus or smaller apertures.
2. Use DOF Apps with Manual CoC Control
Many modern photography apps allow full CoC customization. Some examples:
DOFMaster (desktop)
OptimumCS-Pro, View Camera DOF Calculator (mobile)
PhotoPills, The Photographer’s Ephemeris, and similar apps
These tools often let you base CoC on print size and viewing distance, aligning with how your image will be seen in the real world.
3. Adjust for Scanning and Digital Use
When digitizing large-format film at high resolution (e.g., 3200–6400 dpi), even tiny blur circles become visible. Because you’re effectively enlarging much more than a traditional darkroom print, it makes sense to use a smaller CoC—perhaps 0.02–0.03 mm—to ensure digital sharpness holds up under scrutiny.
4. Create or Use Conservative DOF Charts
If you prefer to work with printed reference materials or DOF cards inside your camera case, you can:
Recalculate depth of field tables using your desired CoC value
Print versions with multiple CoC values for different output needs
Use conservative charts for high-stakes or high-resolution projects
Final Thoughts
Understanding the circle of confusion allows you to make deliberate, format-specific choices about focus and depth of field. Whether working with a compact digital camera or composing under the dark cloth of a 4×5, CoC plays a key role in how sharp your image appears—not just to your eye, but to your viewer’s. By adapting your CoC to your format and output, you gain precision where it matters most.
