Shadows: The Silent Partner of Light
When photographers talk about lighting, we almost always talk about light. We talk about highlights, exposure, brightness, contrast, and how to make things look “well lit.”
But what actually gives a subject its shape, its depth, and its sense of physical presence isn’t the light itself.
It’s the shadow.

Image: Shaped by Shadow
In this still-life image, the subject is almost entirely described by shadow.
The light enters from the left, skims across the surface of the pitcher, and then gradually falls away into deeper value on the right. What gives this object its sense of volume isn’t the highlight — it’s the transition from light into shadow.
The rounded belly, the narrowing waist, the outward flare of the lip, and the curve of the handle are all revealed by how the light fades into darkness. If you were to eliminate those shadows, the pitcher would collapse into a flat, lifeless shape.
Form Is Revealed by Shadow, Not Light
Light tells us that something exists.
Shadow tells us what it is.
The three-dimensionality of this pitcher comes from the gentle roll of value across its surface. The highlight alone carries very little information. It’s the shadow that defines the curvature, the thickness of the lip, and the depth of the handle.
This is why shadows are not a mistake or a technical flaw.
They are the primary sculpting tool in photography.
Open Shadows vs. Dead Shadows
Notice that the shadow side of the pitcher is not black.
There is still texture in the glaze. The fine crackle pattern remains visible. The form feels dimensional and tactile rather than heavy or opaque.
This is what an open shadow looks like — a shadow that still holds information.
Shadows don’t have to be filled in to be useful.
They only have to be shaped with intention.

Behind the Scenes: Designing the Shadow
This image was made with a single light placed to the left of the subject and slightly above it. The light was diffused to soften the transition into shadow, but it was not positioned to eliminate shadow altogether.
The goal wasn’t to make the pitcher bright.
The goal was to make the shadow beautiful.
By controlling the height and angle of the light, I was able to decide where the shadow began, how gradually it deepened, and how it described the pitcher’s form.
This is the core idea behind shadow design: you don’t add shadows — you design them by how you place your light.
Why This Setup Works
The light is far enough to the side to create form shadows, but not so far that the subject collapses into silhouette.
The diffusion keeps the shadow edge soft and the tonal transition gentle.
The background falls darker toward the right side of the frame, which quietly reinforces the direction of the light and separates the silhouette of the pitcher.
Nothing here is complicated.
One subject.
One light.
One decision:
Where do I want the shadow to fall?
Learning to See Shadows
Before you worry about where to put a light, it helps to ask a different question:
Where do I want the shadow to be?
Because once you know that, the light placement becomes obvious.
In this lesson, we’re looking at shadows not as technical side effects, but as creative tools — tools that shape form, guide the eye, and carry emotional weight.
We’ll look at how shadows function as form shadows and cast shadows, how shadow density and direction affect the image, and how shadows can be used deliberately as compositional and narrative elements.
Because in the end, learning to see light is really just learning to see shadows.
Cast Shadows and Direction: Reading Light from Shadow
In the pitcher still life, most of what we saw were form shadows — shadows that roll across the surface of a three-dimensional object and reveal its shape.
In this still life, something new becomes the dominant visual element: the cast shadow.

Image: Stacked in Shadow
Here, the bowls are lit from camera right and slightly above. You can tell that immediately from the direction and length of the shadow, which falls leftward and slightly forward across the tabletop.
This is one of the most useful lighting skills a photographer can develop: learning to read where the light is by looking at the shadow.
Shadows always point away from the light source. The longer the shadow, the lower the light is relative to the subject. The sharper the edge, the smaller or harder the light source is.
Shadow Shape Is a Projection of Form
Notice that the shadow is not a generic oval.
Its shape mirrors the stacked geometry of the bowls, the tilt of the top bowl, and the uneven contours of the rims.
This is because a cast shadow is simply a drawing of the subject’s form, projected onto another surface by the angle of the light.

Behind the Scenes: Stacked in Shadow
This image was made with a single light fitted with a 10° grid, placed to the right of the subject and angled downward toward the bowls.
By adjusting the height and distance of the light, I could control how long the shadow became, where it landed on the table, and how graphic its shape appeared.
Nothing here was accidental.
Before placing the light, I decided where I wanted the shadow to fall. Then I placed the light to make that shadow appear.
Shadows in Natural Light
When the Sun Is Your Studio Light
Up to this point, we’ve been working with controlled light: a single lamp, a single subject, and a carefully chosen angle. But the same shadow principles apply when you step outside. The only real difference is that now your light source is ninety-three million miles away.
When the sun is low in the sky, it behaves like a small, hard light source. That’s when shadows become long, graphic, and deeply expressive, and when outdoor scenes start to look three-dimensional instead of flat.

Image: Fort Clinch Storehouse & Dispensary
This 6×17 panoramic image was made in late-day sun at Fort Clinch. The long foreground shadow isn’t an accident; it’s the visual anchor of the entire composition. Without it, the foreground would be a pale, empty expanse of ground. With it, the frame gains weight, balance, and a quiet sense of drama.
What matters here isn’t just that a shadow exists, but how it behaves. The angular roofline silhouette creates a stepped, geometric edge, and the shadow stretches horizontally across the frame, grounding the building and subtly leading the eye back into the scene.
You Can’t Move the Sun — But You Can Move Yourself
I couldn’t move the sun, but I could move myself. By choosing my position carefully, I was able to decide where the shadow entered the frame, how long it became, how much visual weight it carried, and how it balanced the building and cannons in the distance.
This is lighting design in its simplest and most universal form. Even when you can’t move the light, you are still designing with it.
Shadows as Compositional Structure
In this image, the shadow is doing real compositional work. It anchors the bottom of the frame, counterbalances the mass of the building, and prevents the wide panoramic foreground from collapsing into visual emptiness.
This is the same principle we saw earlier in the Stacked in Shadow still life, just at a much larger scale. The rules haven’t changed; only the size of the light source has.
Reading Time, Place, and Mood from Shadow
Long shadows immediately tell us something about time. We know the sun is low and the day is coming to a close. That single shadow quietly carries a sense of stillness, history, and quiet endurance.
This is one of the most subtle powers of shadows. They don’t just describe form. They describe time.
Designing with Shadows Outdoors
When you work outdoors, you aren’t just photographing what’s illuminated; you’re photographing what the light does. Very often, what it does most beautifully is draw with shadow.
This is why it pays to slow down when the sun is low. Walk around a scene. Watch how shadows stretch, rotate, and slide across the ground, because every step you take changes the design.
From Description to Expression
In the still lifes, we saw shadows describing form. At Fort Clinch, we saw shadows shaping composition and mood. But shadows can go even further than that.
They can replace literal description altogether. They can become the subject. They can carry narrative, ambiguity, and emotional weight.
And that’s where we’re going next.
When the Shadow Becomes the Subject
Shadows as Subject and Story
Up to this point, we’ve been using shadows to describe something else. We used them to reveal form, shape composition, and anchor the frame while suggesting time and mood.
But shadows don’t have to remain secondary to a subject.
They can become the subject.

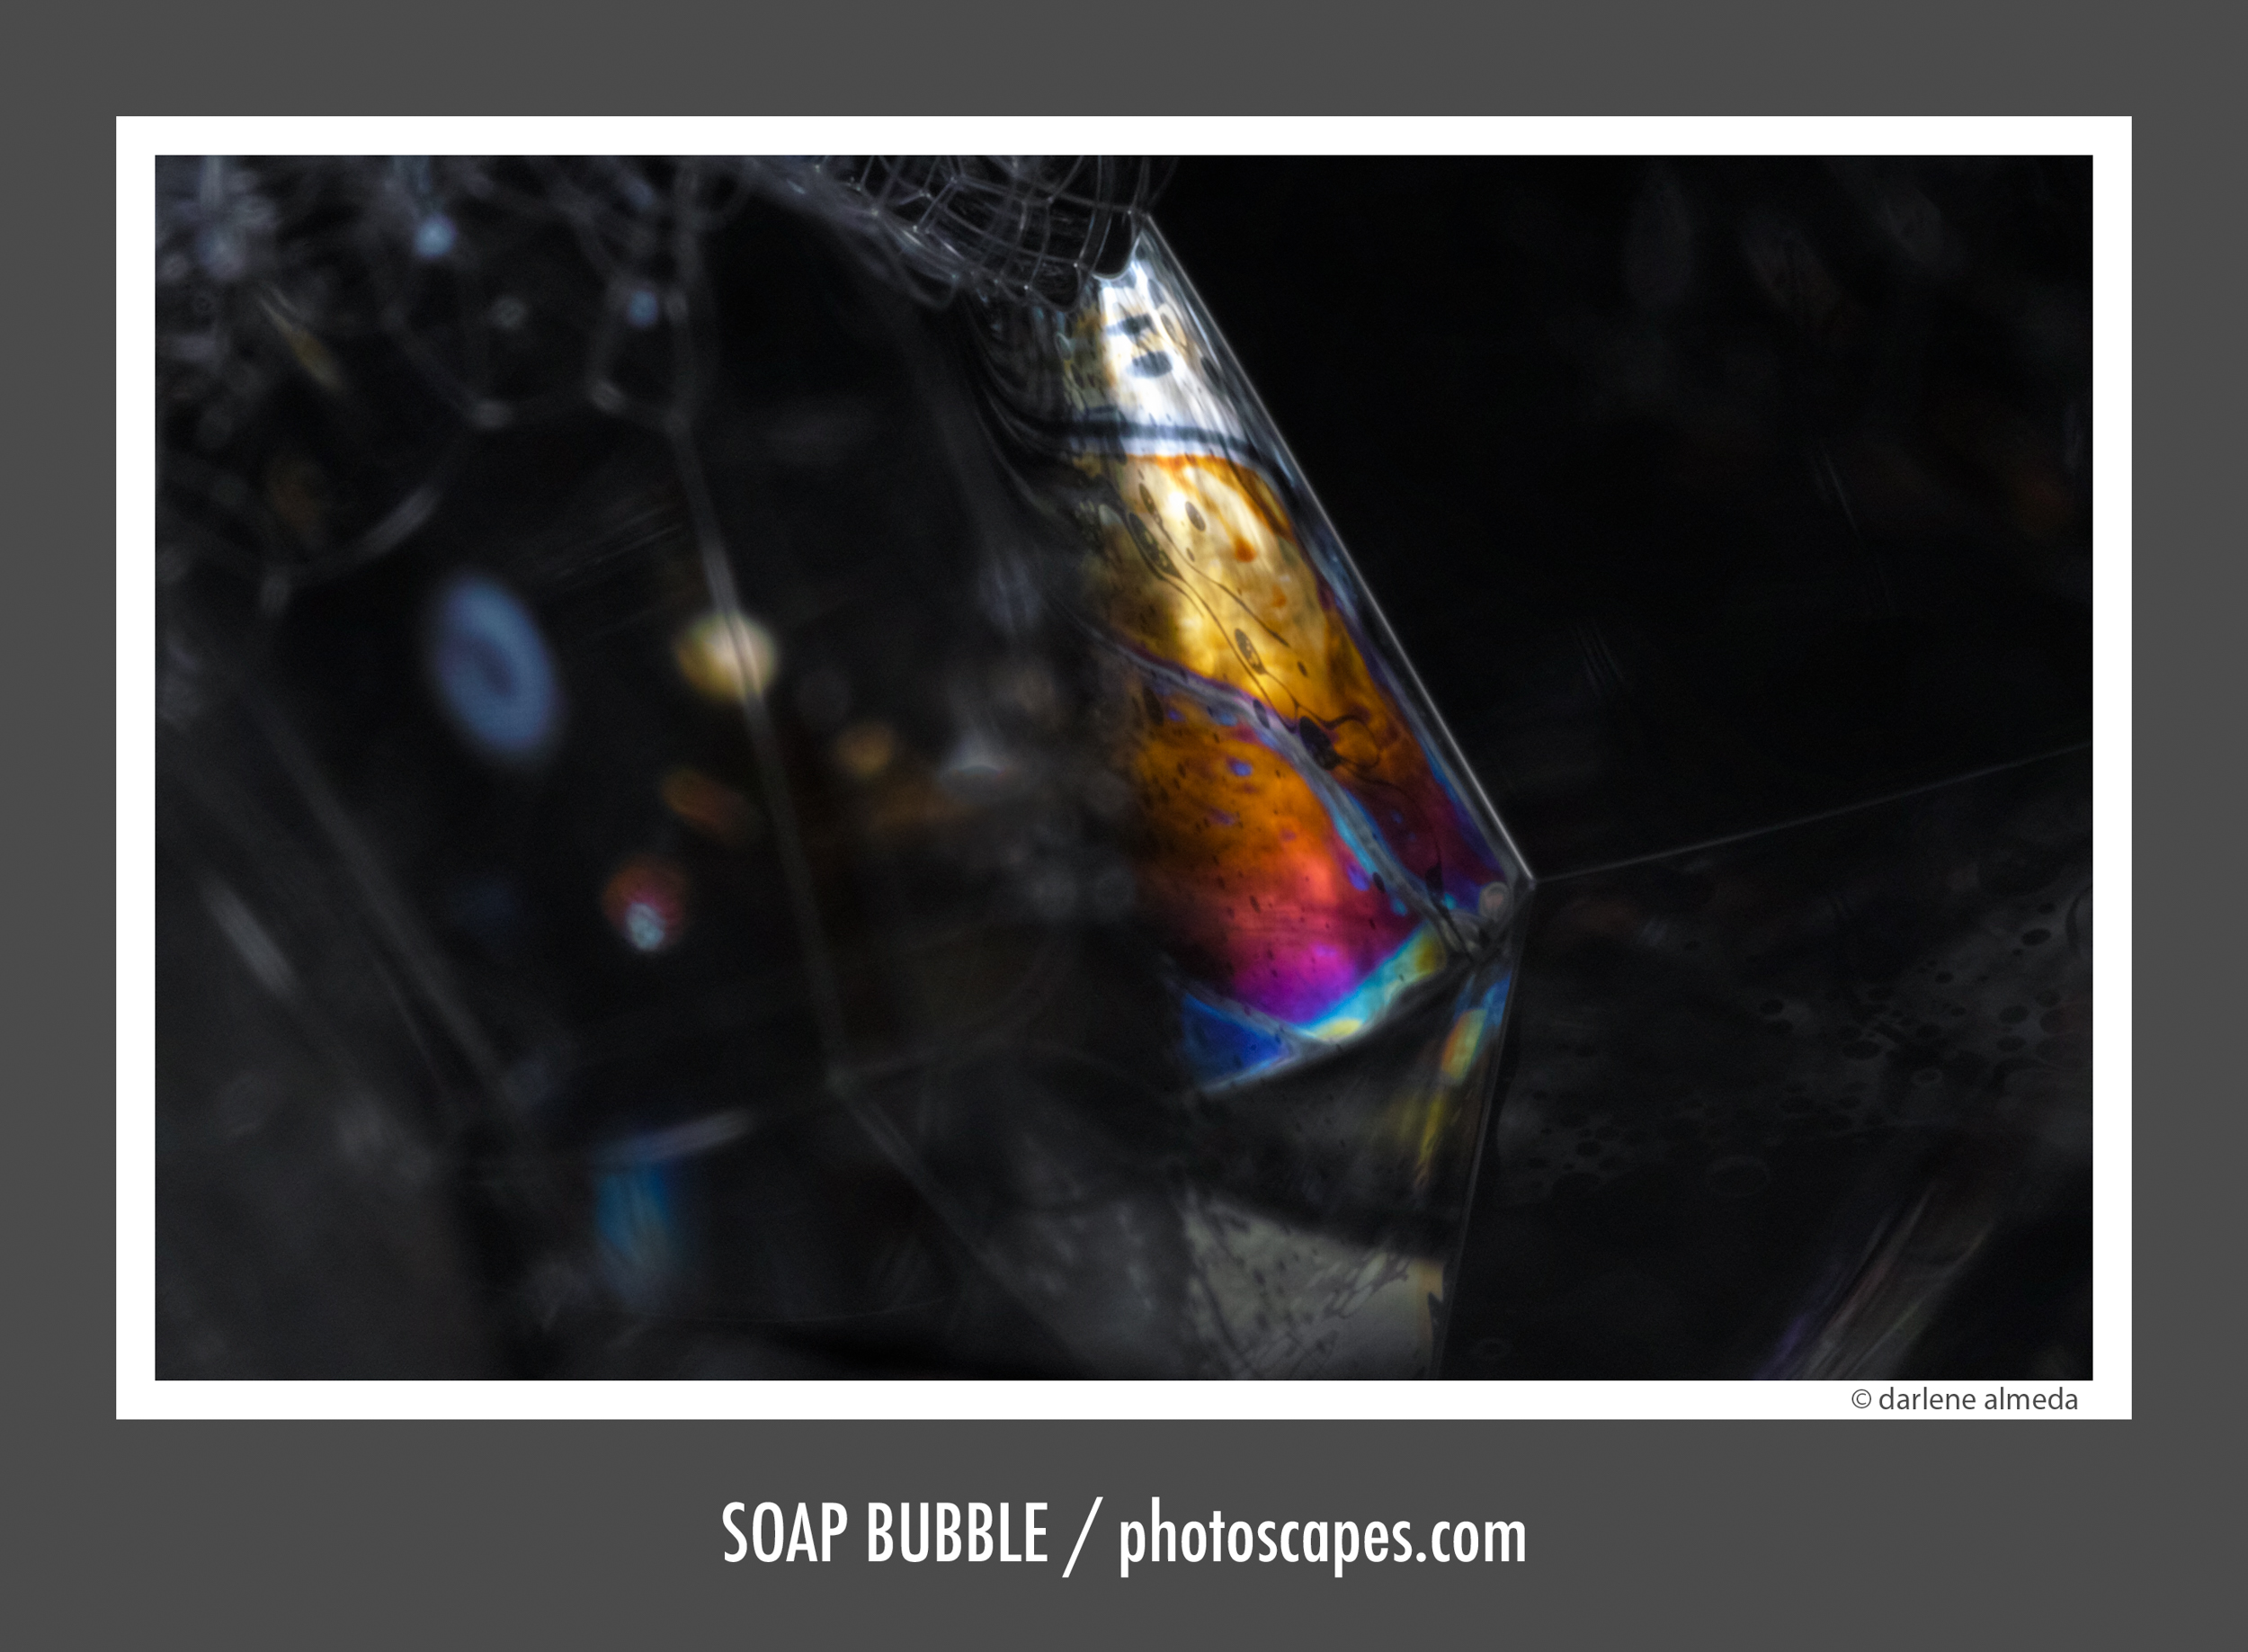
Image: Looking Glass
In Looking Glass, the literal description of the scene almost disappears.
The figure is reduced to a silhouette, the face dissolves into light, and the room itself becomes an abstract field of tone and shadow.
What remains is gesture, light shape, and ambiguity.
We are no longer looking at a person in a room. We are looking at a moment of introspection — a private, inward-turned act made visible only through shadow and silhouette.
Letting Go of Literal Description
Nothing in this image is fully explained.
We don’t know who this person is, where they are, or what they’re thinking. And that’s precisely why the image works.
Shadows allow you to withhold information. They allow you to replace description with suggestion. They allow the viewer to complete the story themselves.
When Design Becomes Expression
At this point, lighting stops being technical and becomes expressive.
The shadow isn’t here to describe a face. It’s here to carry mood, create mystery, and hold emotional space.
This is the deepest creative potential of shadows. They allow you to move away from showing everything and toward showing only what matters.
Shadow as Emotional Geometry
The composition of this image is almost entirely built from shadow shapes: the diagonal beam of light, the vertical edge of the wall, the dark mass of the lingerie, and the silhouette of the arm and mirror.
These shapes don’t just organize the frame. They organize the feeling.
This is shadow design at its most subtle and most powerful.
Learning to See Shadows Is Learning to See Light
Shadows Are Not the Enemy of Light
Most photographers spend years trying to get rid of shadows. They add fill, add another light, brighten everything, and flatten the scene.
And in doing so, they quietly erase the very thing that gives their images depth, shape, and emotional weight.
Shadows are not the absence of light. They are its voice.
Light Reveals. Shadow Defines.
Light tells us that something exists. Shadow tells us what it is.
It tells us how thick something is, how round it is, how far it recedes into space, how heavy it feels, and how much mystery it carries.
Designing with Shadows
Every lighting decision you make is also a shadow decision.
When you move a light, you move a shadow, reshape a form, change a mood, and alter a story.
When you step into a different position outdoors, you redesign the entire composition — even though the sun hasn’t moved at all.
You are always designing with shadows, whether you mean to or not.
A Quiet Permission Slip
It’s okay to let parts of your image fall into shadow. It’s okay not to show everything. It’s okay to leave space for ambiguity and to let darkness carry meaning.
In fact, that’s often where the most beautiful photographs live.
The Real Lesson of Shadows
Learning to see light is really just learning to see shadows. And learning to see shadows is learning to see the world in three dimensions instead of two.
That’s when lighting stops being technical. That’s when it becomes art.
Up Ahead: Lighting Ratios
So far, we’ve been working by eye—learning how shadows shape form, composition, and mood. But once you start designing shadows intentionally, a new question naturally arises: How dark should they be?
That question leads to lighting ratios—a simple way of describing the relationship between light and shadow.
In the next lesson, we’ll explore what lighting ratios really mean, how to calculate them, and how a flash meter can help you measure and repeat lighting decisions with confidence.
This isn’t about being technical. It’s about being intentional.