
From Seeing Light to Measuring It
So far in this Lighting 101 series, we’ve been working mostly by eye.
We learned how shadows shape form.
How light direction creates mood.
How contrast can be gentle or dramatic.
How subtle changes in placement can transform an ordinary subject into something sculptural.
At some point, though, a natural question arises:
How dark should the shadows be?
That question leads us into lighting ratios.
Not because photography needs to be technical.
But because consistency, control, and repeatability matter—especially when you’re designing light intentionally rather than chasing it.
This is where a flash meter becomes not a crutch…
but a translator between what your eye sees and what your camera records.
What a Lighting Ratio Actually Is (Demystified)
What Do We Mean by “Lighting Ratio”?
A lighting ratio simply describes the brightness relationship between the highlight side of your subject and the shadow side.
That’s it.
It doesn’t describe mood.
It doesn’t dictate style.
It doesn’t make a photograph “good” or “bad.”
It only tells you how much contrast exists between light and shadow.
If the highlight side of your subject measures f/8
and the shadow side measures f/4
That’s a 2-stop difference.
In lighting terms, that’s a 4:1 ratio.
Why 4:1?
Because every stop represents a doubling of light.
So:
- f/8 → f/5.6 = half the light
- f/5.6 → f/4 = half again
That means the highlight side is receiving four times more light than the shadow side.
That relationship—highlight vs. shadow—is the lighting ratio.
Why Ratios Matter (But Aren’t Rules)
Why Bother With Ratios at All?
Lighting ratios don’t exist to box you in.
They exist to:
- Help you repeat a look later
- Help you fine-tune contrast deliberately
- Help you communicate lighting setups to others
- Help you avoid guessing when something feels “off”
Once you know what a 2:1, 4:1, or 8:1 ratio looks like, you stop lighting blindly.
You start lighting intentionally.
Not technically.
Not rigidly.
Intentionally.
Common Portrait & Still-Life Ratios (Reference Table)
Another Way To Understand Lighting Ratios
The numbers don’t create the lighting—they simply describe what you already see.
Lighting Ratio Examples
Click the first image, then click through the sequence to see how lighting ratios create meaningful changes in how an image appears.
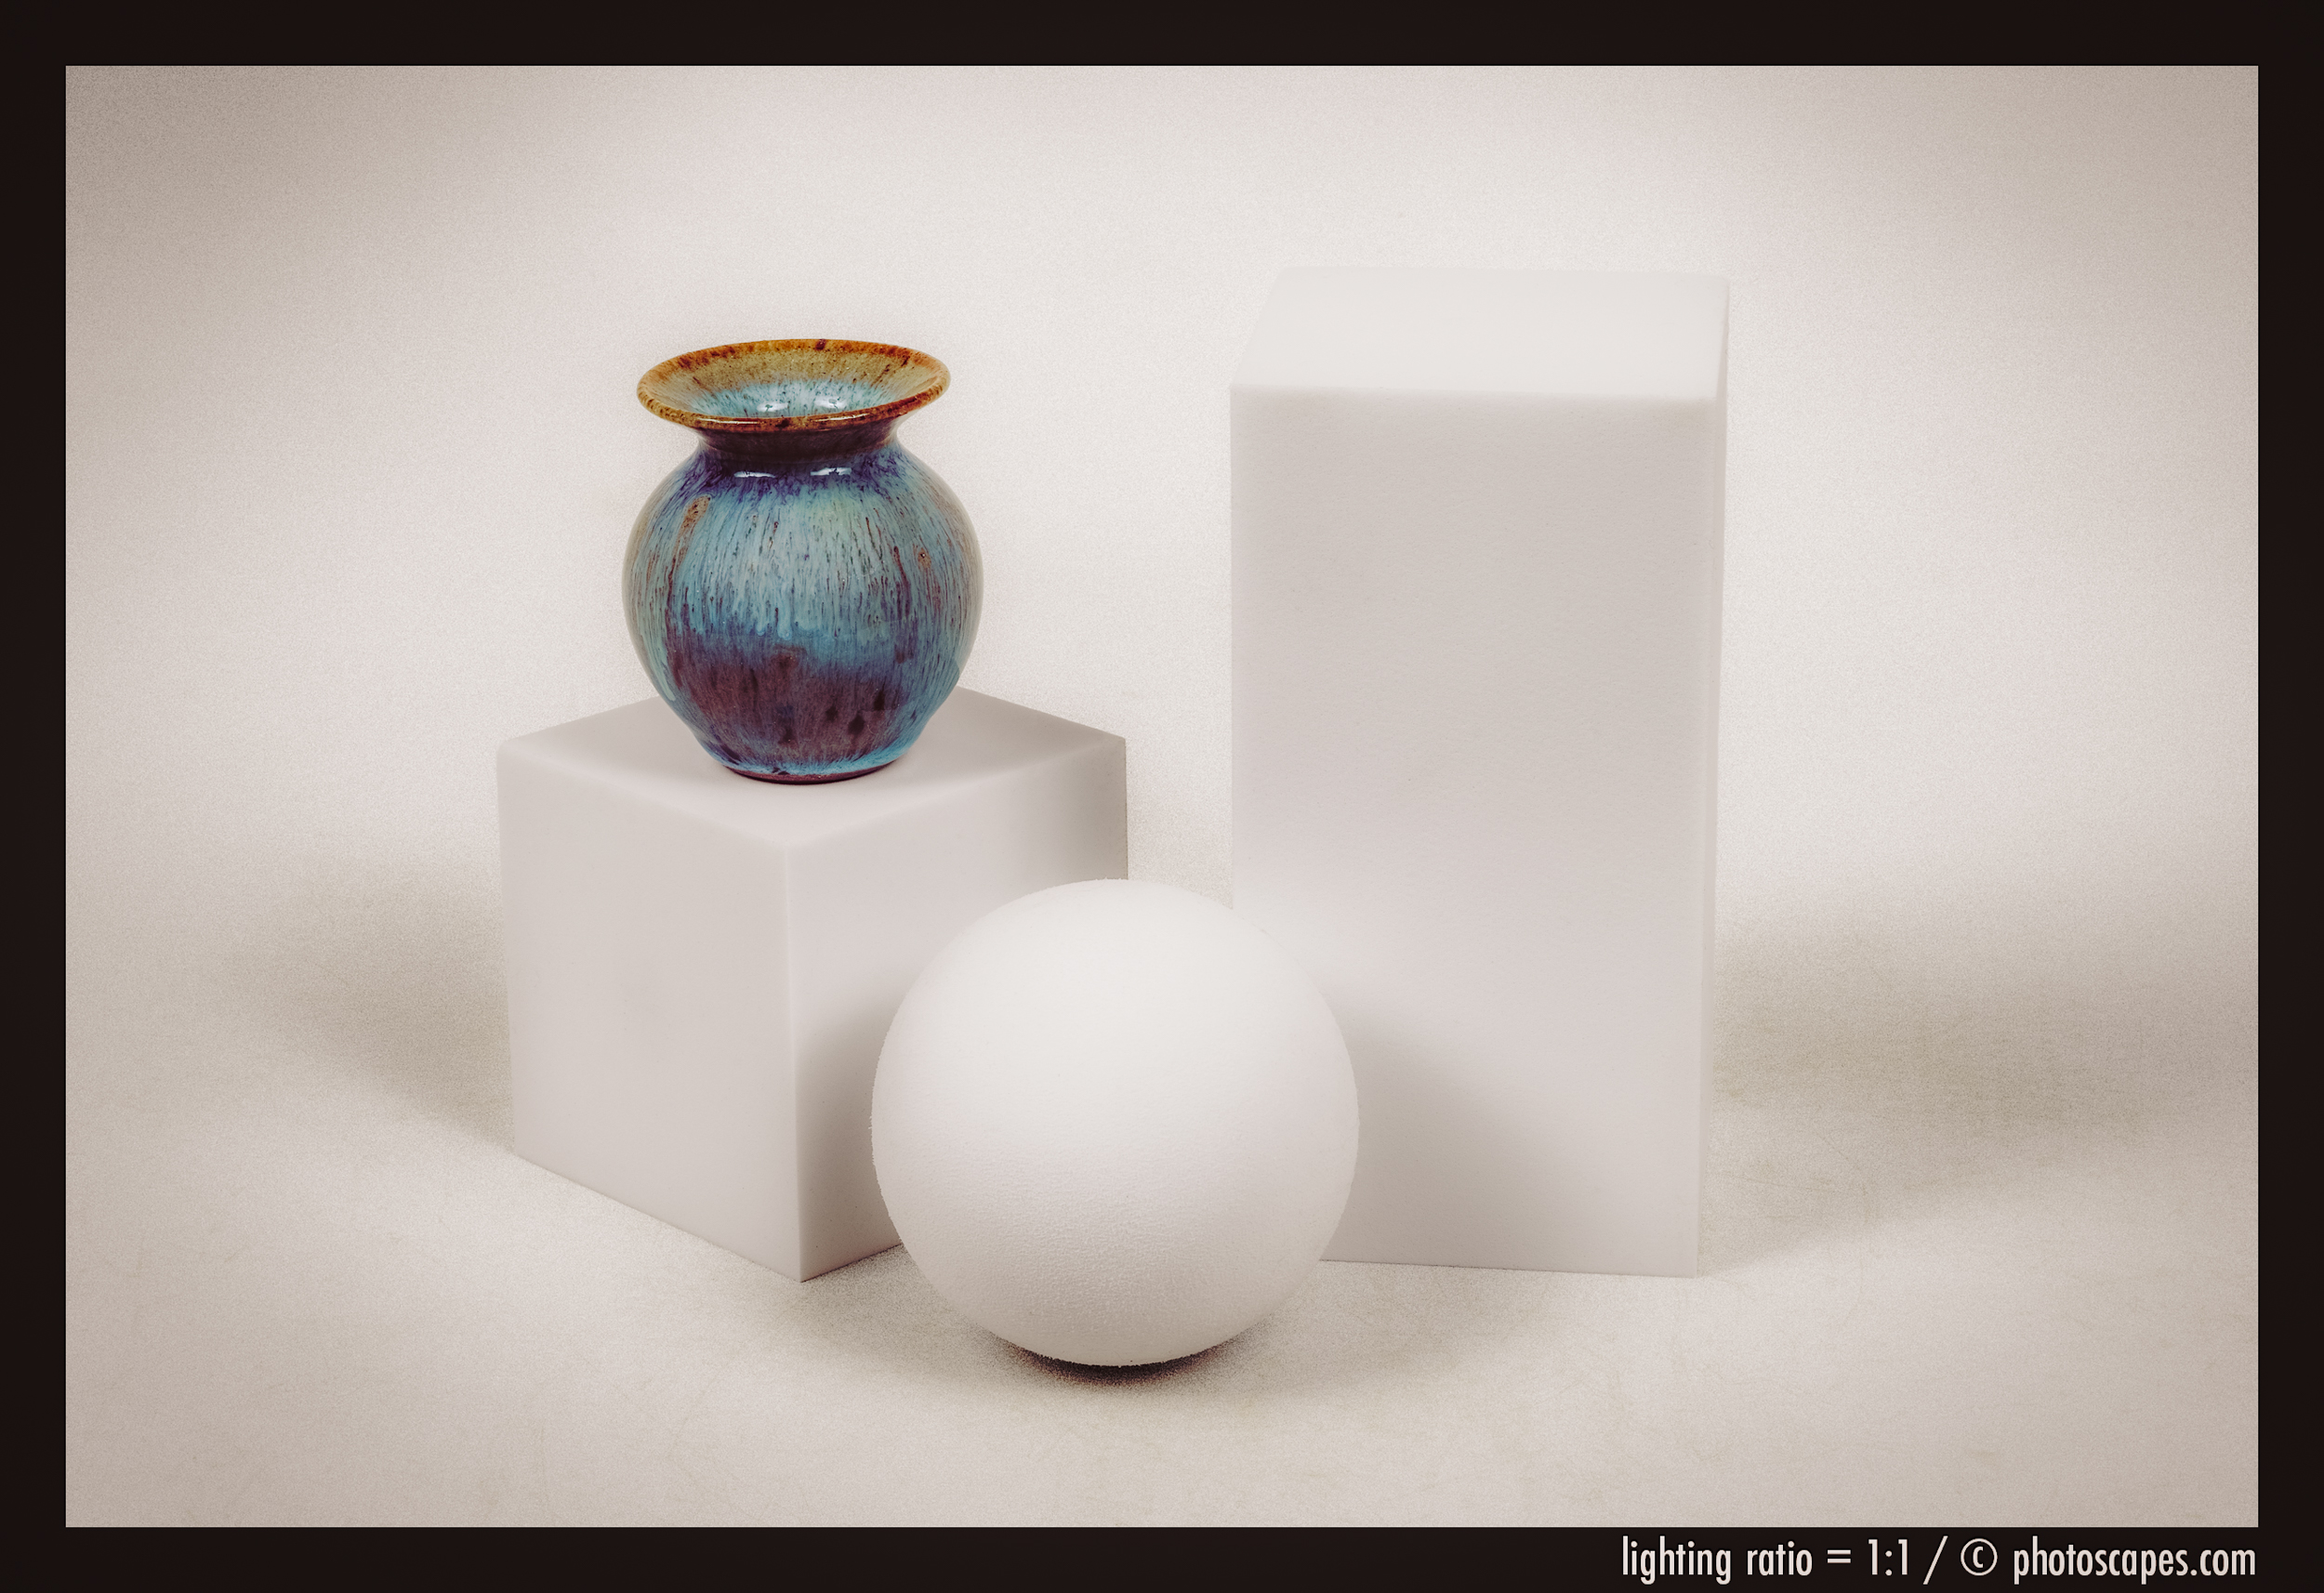
Key-to-Fill Ratio: 1:1
Key-to-Fill Ratio: 2:1
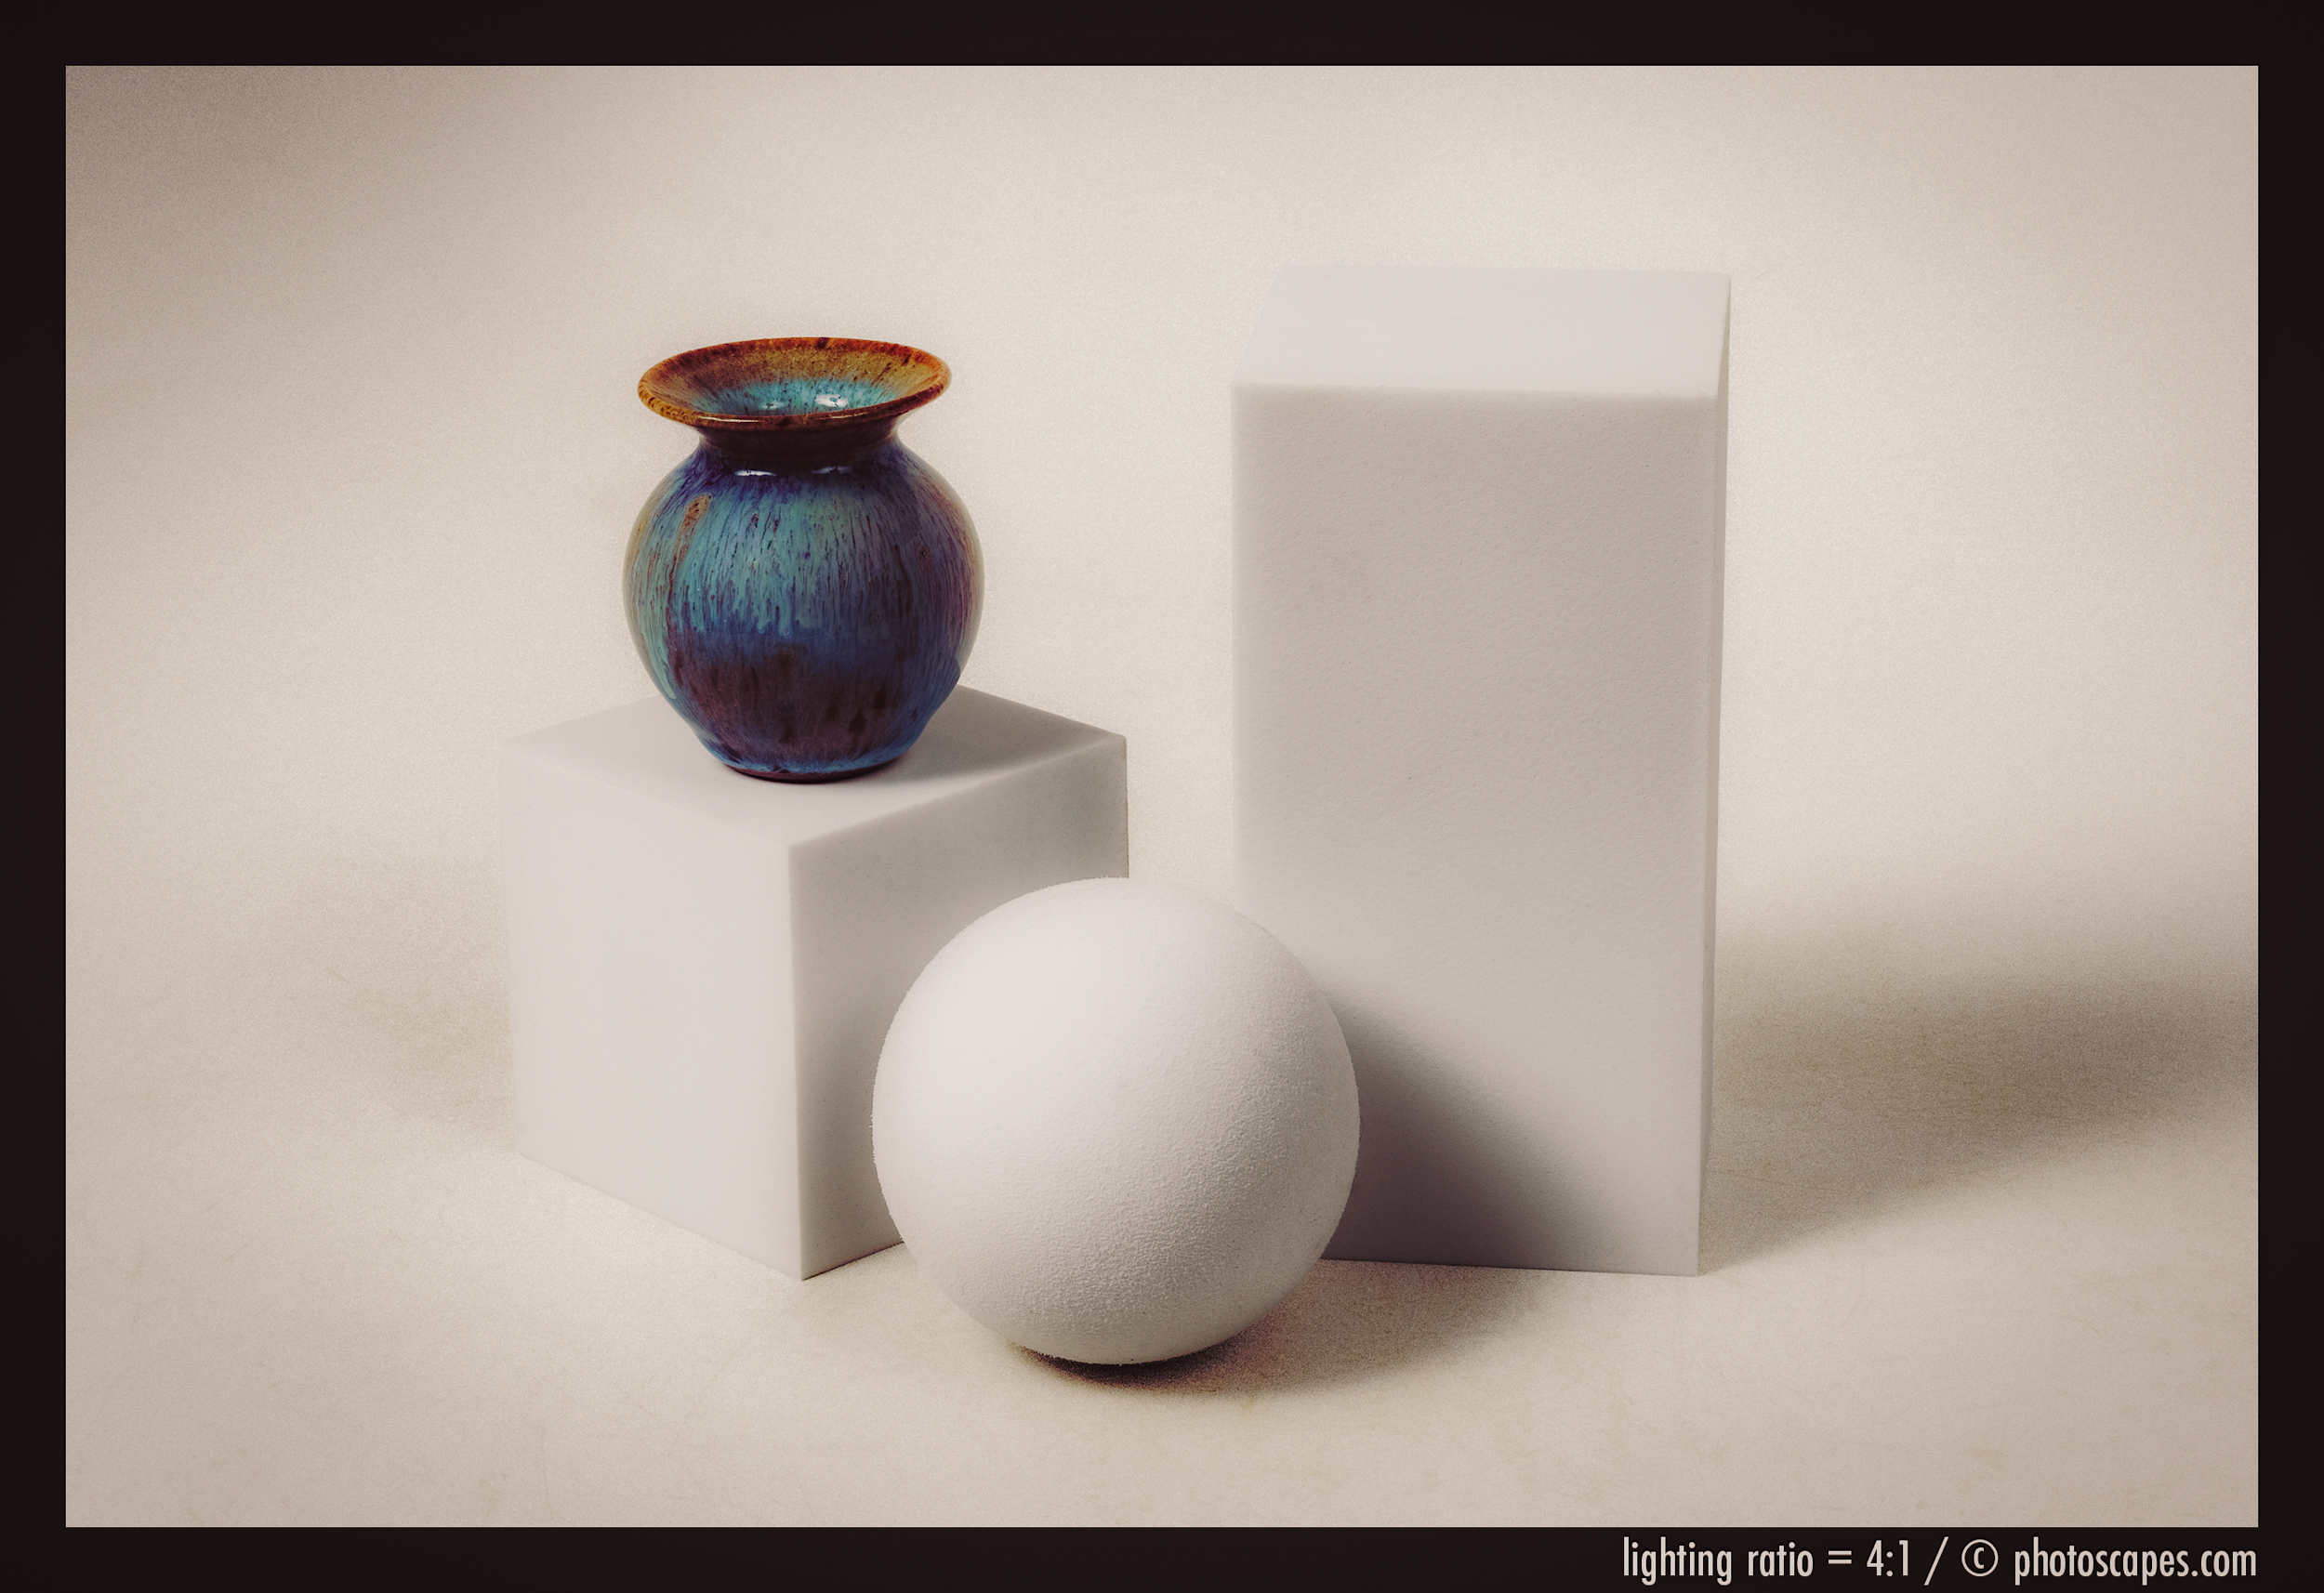
Key-to-Fill Ratio: 4:1
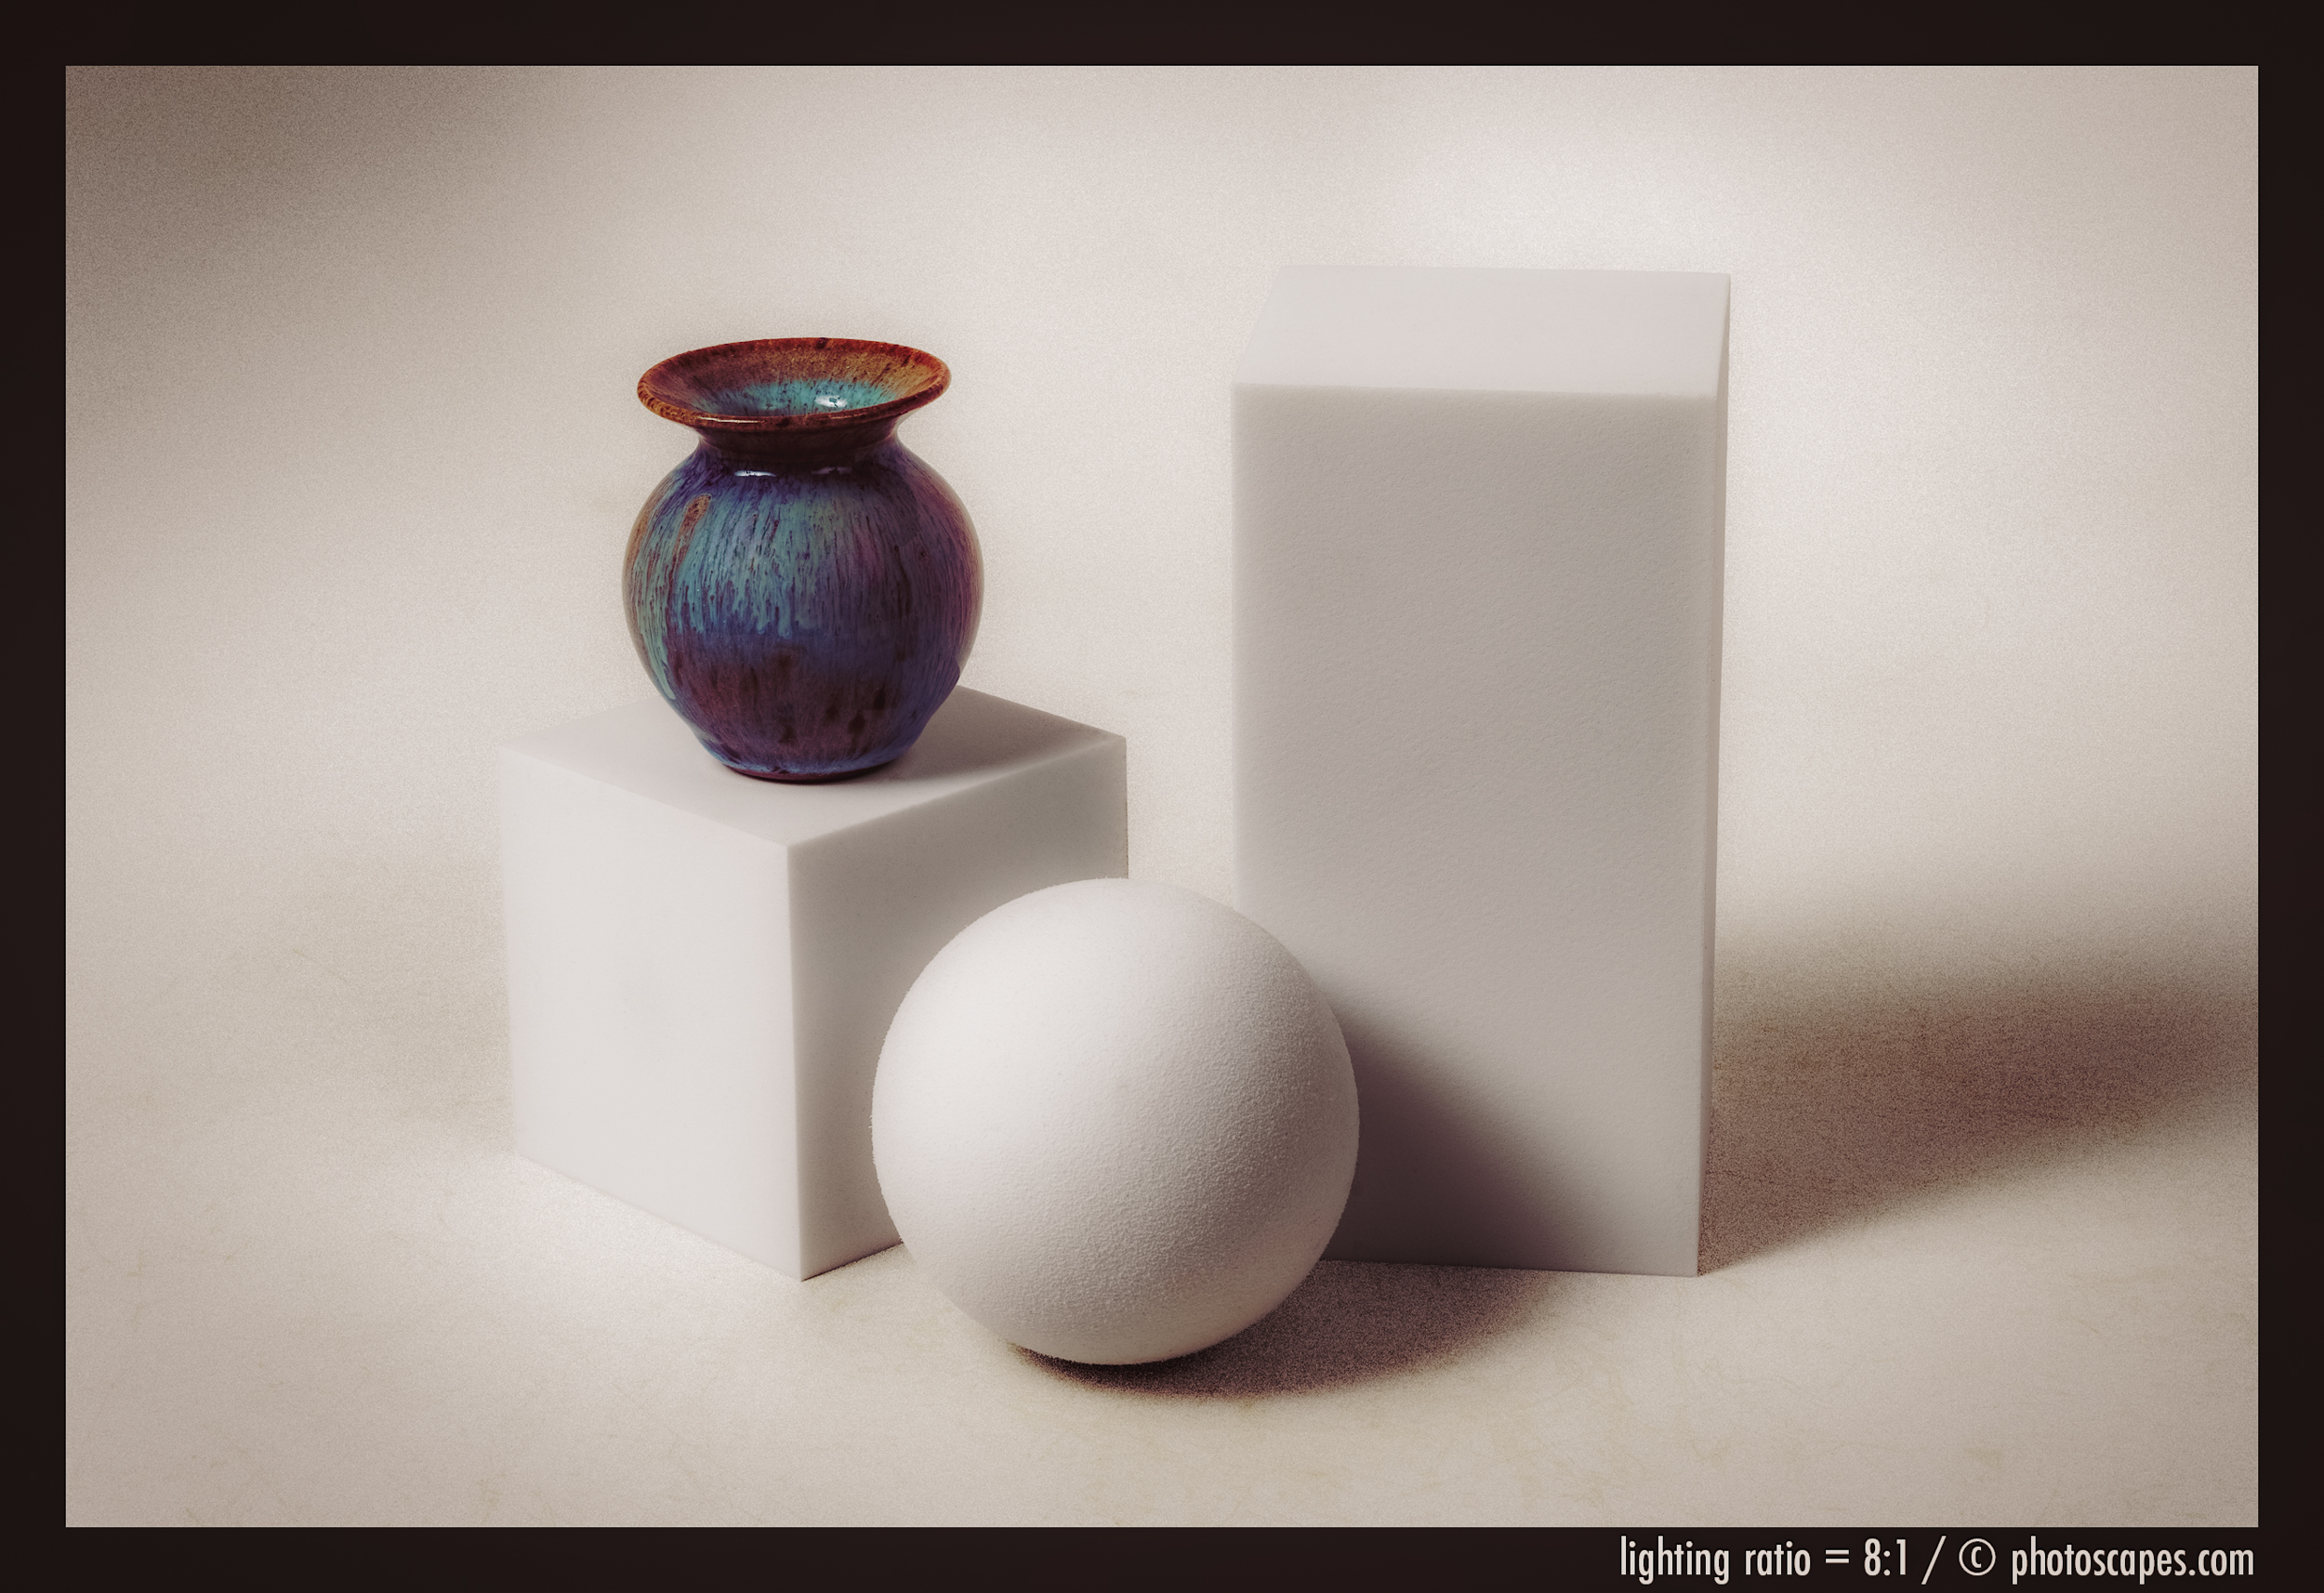
Key-to-Fill Ratio: 8:1
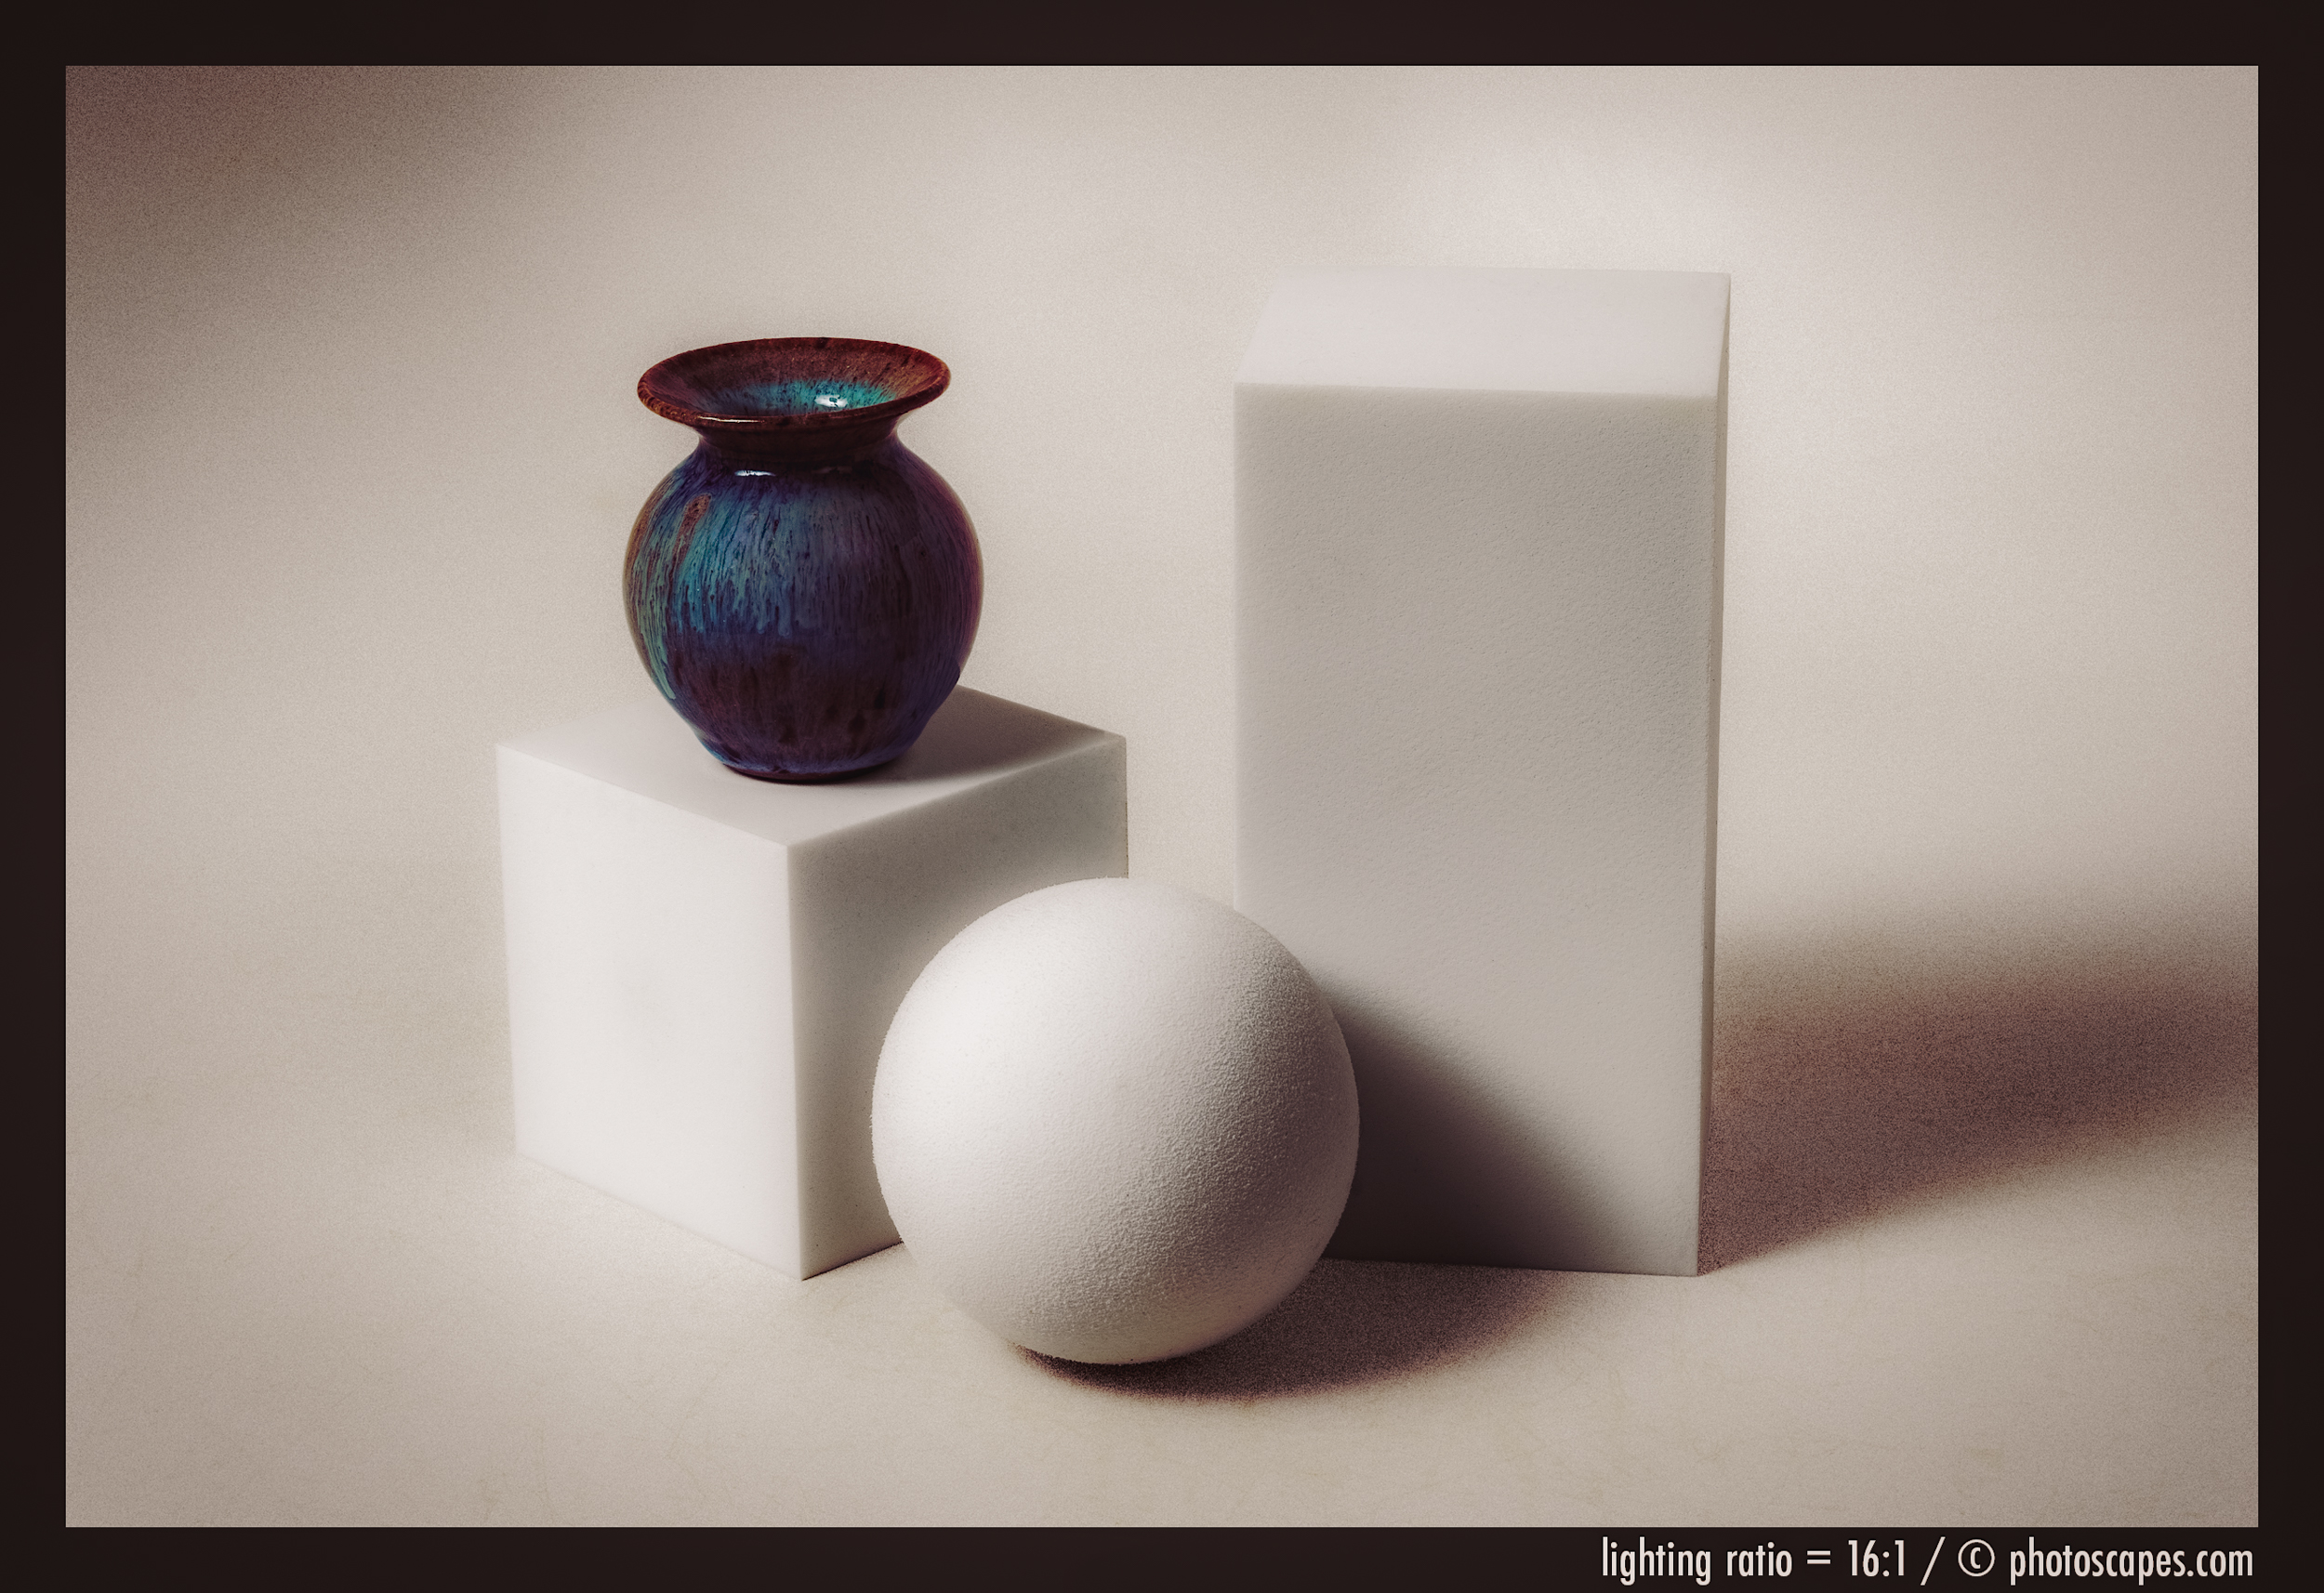
Key-to-Fill Ratio: 16:1
Enter the Flash Meter
What a Flash Meter Really Does
A flash meter doesn’t make your lighting better.
It only tells you what your lighting is already doing.
It measures how much light is falling on a specific point in your scene and translates that into an f-stop.
That’s all.
No magic.
No voodoo.
No mystery.
It’s simply a light ruler.
How You Actually Use It (Step-by-Step)

Step 1 — Meter the Highlight Side
- Place the meter at your subject’s face or object surface
- Point the white dome toward the main light
- Trigger the flash
- Note the reading (e.g., f/8)
Step 2 — Meter the Shadow Side
- Move the meter to the shadow side of the subject
- Point the dome toward the camera (or fill direction)
- Trigger again
- Note the reading (e.g., f/4)
Step 3 — Compare the Two Readings
- f/8 vs f/4 = 2 stops difference
- That equals a 4:1 lighting ratio
Congratulations.
You now know exactly how contrasty your lighting really is.
Why This Frees You (Not Traps You)
The Real Gift of a Flash Meter
Once you understand lighting ratios:
You stop chasing mystery.
You stop wondering why something worked yesterday but not today.
You stop endlessly nudging lights around.
Instead, you:
- Set a mood by eye
- Measure what you created
- Adjust intentionally
- Lock it in
- Repeat it whenever you want
That’s not technical photography.
That’s creative freedom.
Up Ahead: Designing Contrast Intentionally
Now that you understand:
- What lighting ratios are
- How to measure them
- How to repeat them
The next step is learning how to design contrast on purpose.
Not just accept whatever shadows happen to fall.
In the next lesson, we’ll explore:
- How reflector placement changes ratios
- How fill light alters mood
- How distance affects contrast
- How small changes create big emotional shifts
This isn’t about numbers.
It’s about control.