
There is a certain kind of light that doesn’t just illuminate a face — it creates a legend.
When I first encountered the work of photographers like George Hurrell, Clarence Sinclair Bull, and Ruth Harriet Louise (and others), I realized I wasn’t simply looking at portraits. I was looking at myth-making. Light sculpted cheekbones. Shadows carved jawlines. A simple face became timeless.
Hurrell was known for his dramatic key-to-fill ratios, deep shadows, and sharply defined highlights — lighting that emphasized bone structure and strength. Bull, working at MGM, often leaned toward a slightly softer glamour, using luminous highlights and controlled fill to flatter and idealize his subjects. Ruth Harriet Louise, one of the few women working as a studio portrait photographer in Hollywood at the time, brought a graceful sensitivity to her lighting, often balancing glamour with a natural elegance that made her subjects feel both luminous and approachable.
All three understood something essential: light is not passive. It is design.
Once I discovered the artistry of the great Hollywood portrait photographers, it stayed with me.

Back in 1997, while deeply immersed in my commercial photography career, I was also attending the university part-time, pursuing my undergraduate degree in education. For one elective, I chose Film—assuming it might be less demanding than other options. I was wrong. It turned out to be fascinating, and that alone made it worthwhile for this hardworking mother, wife, and busy businesswoman.
For the final assignment—a paper limited to five pages—I submitted a topic for approval and was delighted when it was accepted. I titled it Shooting Stars: In Remembrance of the Great Hollywood Portrait Photographers.
Fast Forward to Today
Fast-forward to today. I recommend that every photographer—portrait or still life—spend time studying portrait books from this era. There is a distinct and unmistakable look to those photographs, shaped by the lighting tools of the time and by the photographers who made their studios legendary through their artistry.
You can purchase hot lights similar to those used during the golden age of Hollywood, or you can do what I do and recreate the aesthetic using modern tools. The equipment has changed. The principles have not.
What matters most is not the temperature of the light source, but the control of it.
The classic Hollywood photographers worked primarily with 8×10 view cameras and hot lights—Fresnels, spotlights, and hard reflectors—tools that produced crisp shadows and deliberate falloff. But we are not limited to those lighting tools today. I use modern strobes fitted with grids and add flags when necessary to achieve the same precision, separation, and sculpting of form—often with greater flexibility and consistency.
A grid does what those early spotlights did so beautifully: it narrows the beam, controls spill, and allows light to be placed exactly where it belongs—and nowhere else. The drama comes not from the age of the equipment, but from restraint, direction, and contrast.
Grids and Honeycombs
To recreate the sculpted look of classic Hollywood lighting with modern strobes, one of the most useful tools is the grid, sometimes called a honeycomb grid.
A grid is a light modifier that fits onto the front of a strobe, reflector, or softbox. It contains a series of small tubes or cells that restrict the spread of light. Instead of allowing the light to scatter broadly across the scene, the grid channels the light forward into a more controlled beam.
This control is what makes grids so valuable. They allow the photographer to place light exactly where it is needed, while preventing unwanted spill from illuminating other parts of the set. In portrait work, this often means highlighting the face while keeping the background darker. In still life photography, it allows the photographer to sculpt specific areas of the subject while maintaining contrast and separation.
The tighter the grid, the narrower the beam of light.
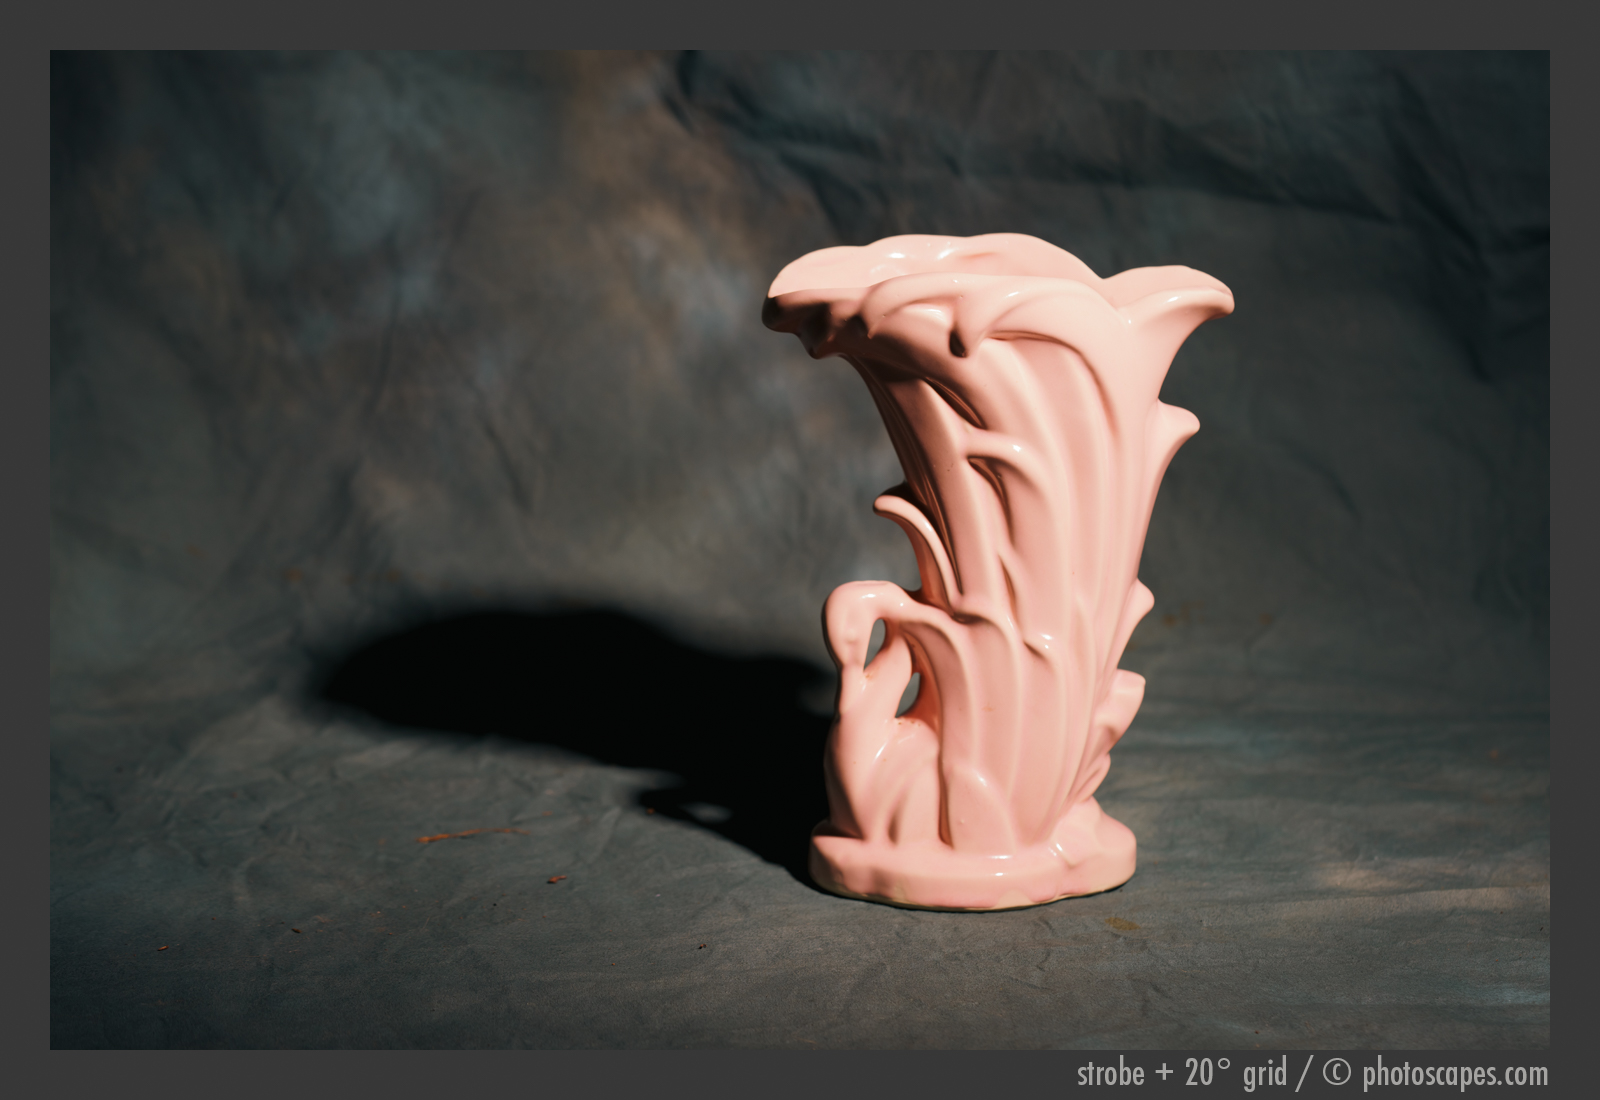
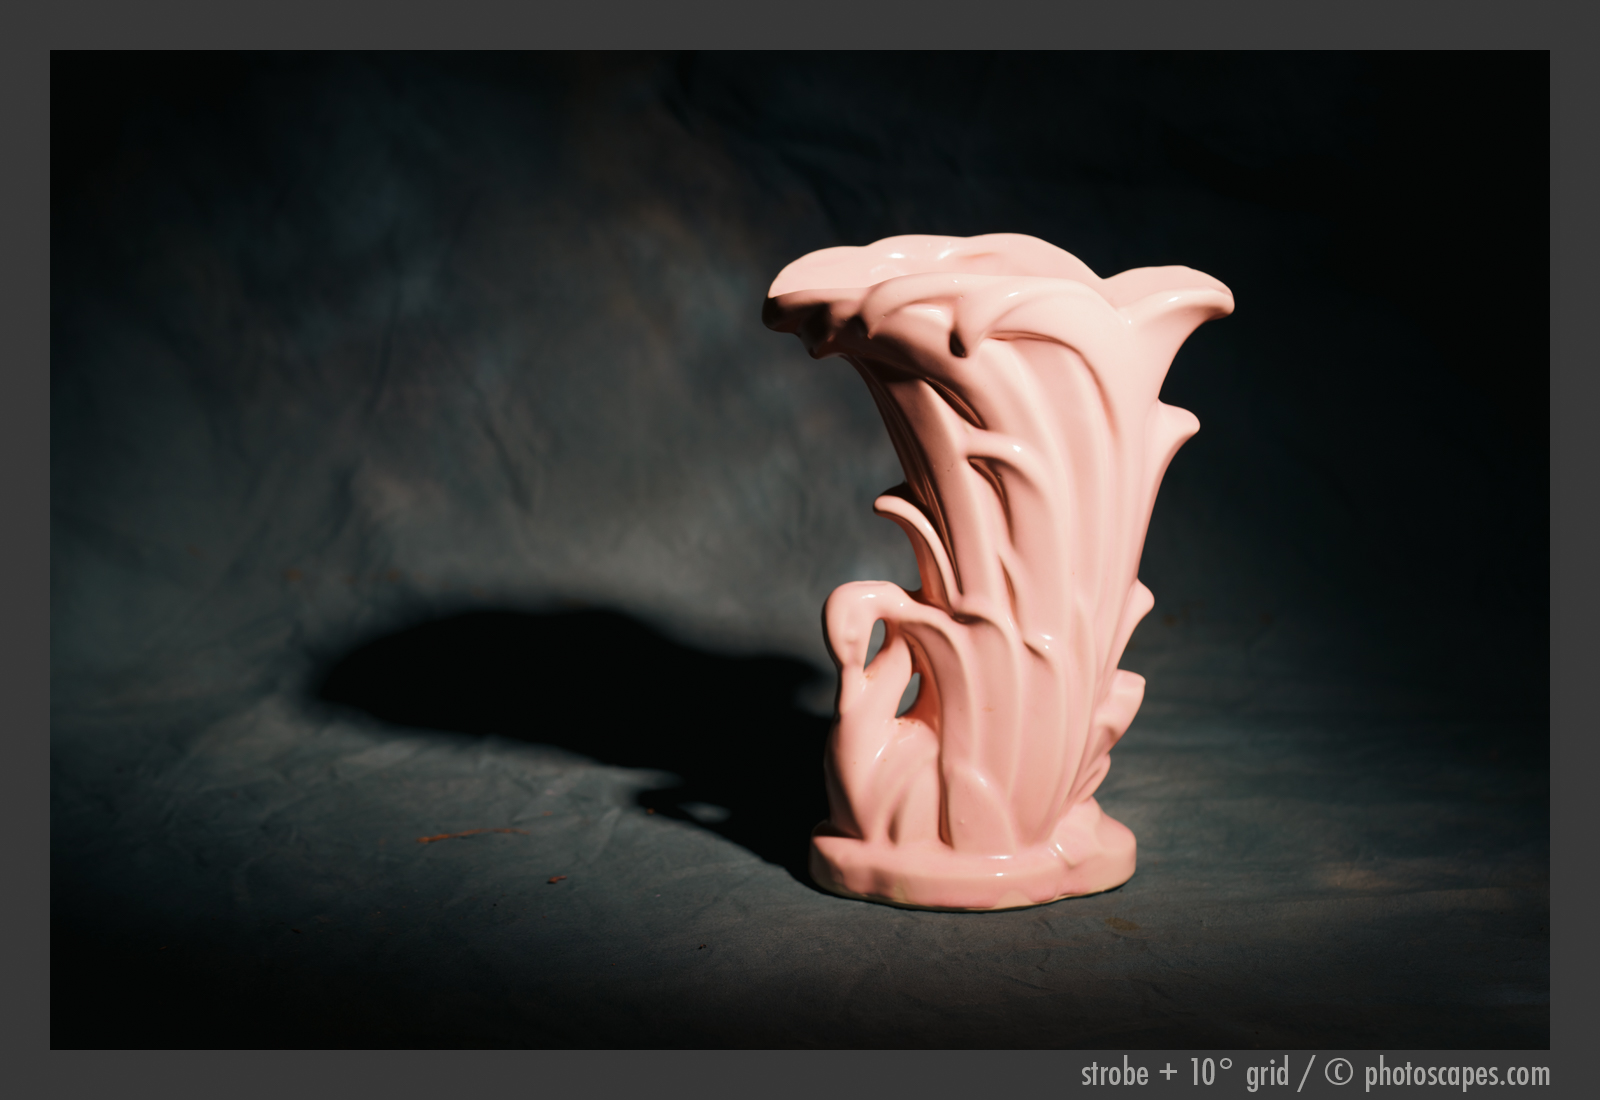
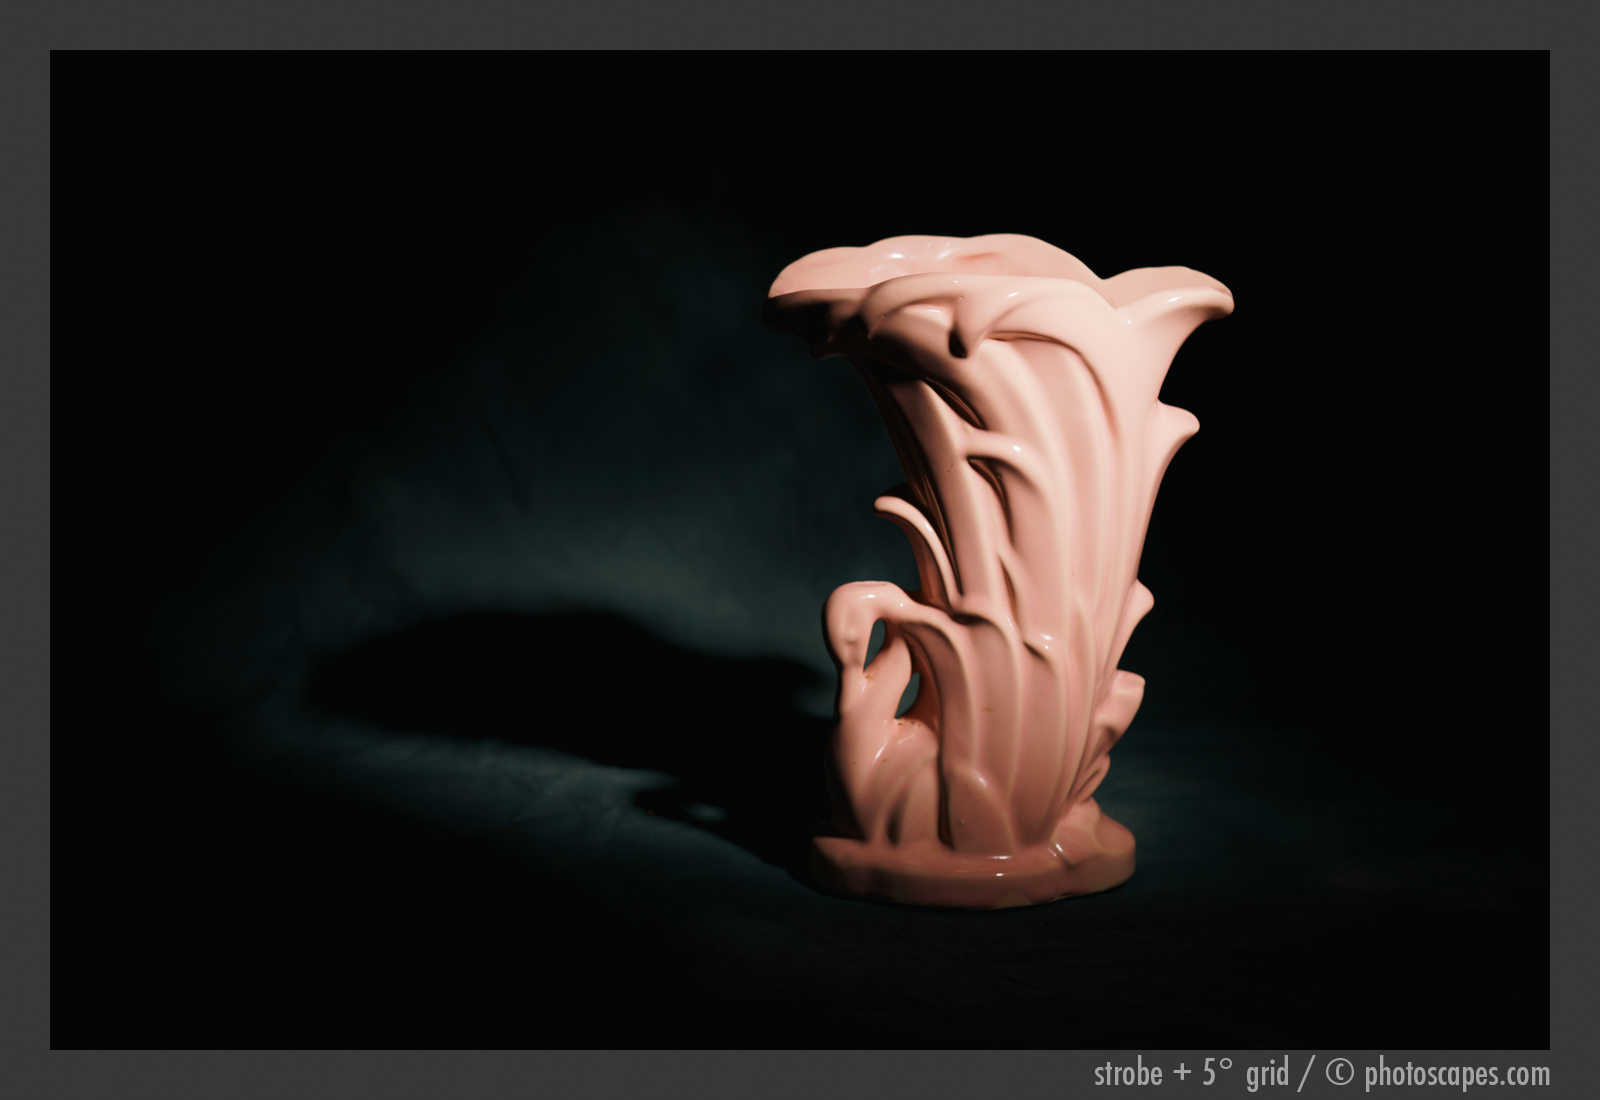
Grids are typically described by beam angles, which indicate how widely the light spreads as it leaves the modifier. In this lesson I am using three common grid angles:
• 5° grid — produces a very narrow, concentrated beam of light
• 10° grid — a moderately tight beam with slightly more spread
• 20° grid — a wider beam that still maintains strong directional control
Each of these grids creates a different degree of precision, allowing the photographer to choose how tightly the light should be focused on the subject.
Light control—not equipment—is what defines the look.
The series of images below demonstrates how different grid angles—20°, 10°, and 5°—change the spread and control of light.
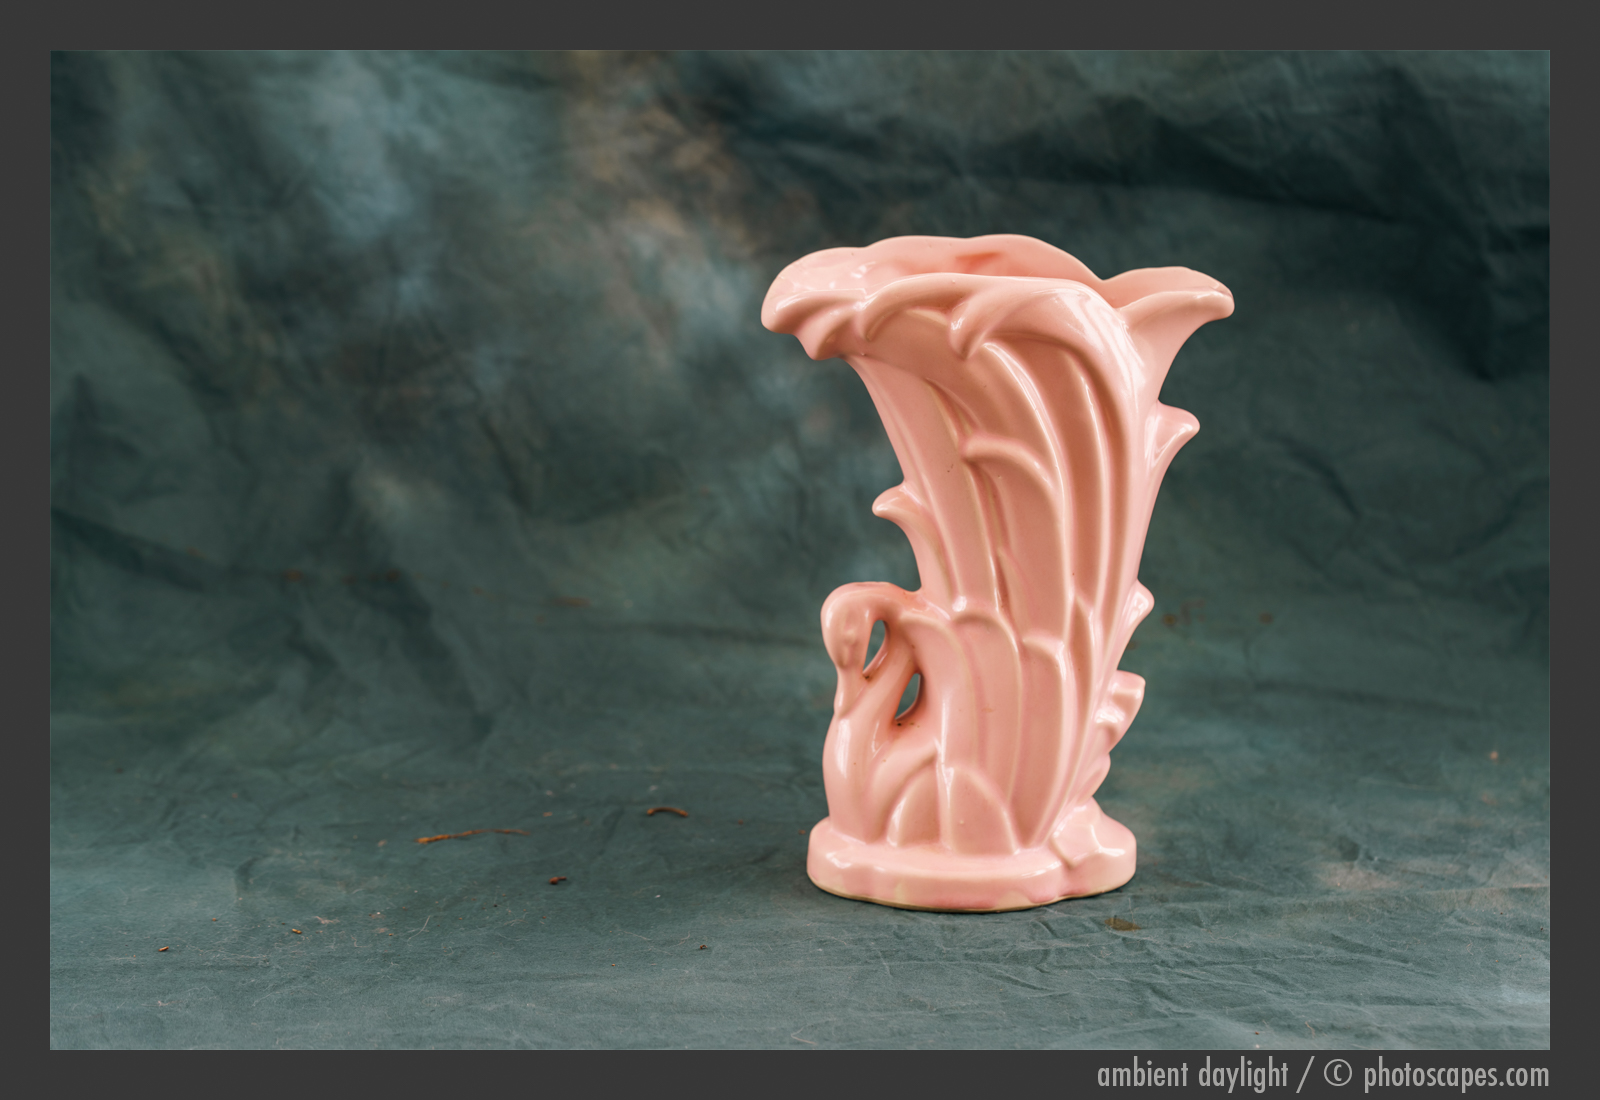
Recreating Hollywood Lighting with Strobes & Grids
Although I no longer photograph portraits, still life provides an excellent way to demonstrate how strobes fitted with grids can recreate the dramatic lighting associated with glamour portraiture of the 1920s–1940s.
For this example, I chose a prop I have held onto for many years—an old Victrola from that same era. It is easy to imagine an object like this being photographed for an advertisement during its day. The vines are real and came from my backyard fence. Sometimes creativity means going on a small hunt for whatever materials are available. With careful framing, a bit of cropping, and subtle post-processing, the scene can be shaped into something that feels as though it belongs to another time.

The finished photograph shows how controlled light can shape a subject and create a sense of atmosphere. While the scene may appear complex, the lighting setup itself is actually quite simple. In the section that follows, I’ll walk through how the image was constructed and how three strobes fitted with grids were used to create the sculpted highlights and shadows seen here.
As with many studio images, the key lies not in the number of lights but in how carefully the light is directed. By narrowing the beam with grids and controlling spill with flags, the illumination can be placed precisely where it is needed—much like the focused hot lights used by Hollywood portrait photographers during the early studio era.
Light control—not equipment—is what ultimately creates the look.
Behind the Scenes

Three Profoto D1 500 strobes and three grids (5°, 10°, and 20°) were used to create The Last Record. Not shown in the photos is the flag I added to block some of the light falling on the background to the right. It was nothing fancy—just a large piece of brown chipboard. Light and a bit flimsy, but easy to clamp to one of my mirror stands, and it did the job perfectly.
Because there was still a little daylight left in the room, I squinted my eyes to help identify the brightest beams streaming through the grids. Moments like that always make me wish for a proper dark studio—a little cave where every bit of light can be controlled.
From my experience, directing studio lighting is always easier in a cave-like environment. When I built my studio as an extension of my home, however, I had to think practically about the future. One day the house may go up for sale, and there aren’t many photographers out there looking for a windowless cave in a residential neighborhood! So I make the best of what I have. For anyone considering building a studio addition on a budget, my advice is simple: build something practical and adaptable—and keep photographing.
Winter has Left North Florida

I hope you’ve enjoyed the Lighting 101 series, as this is where I’ll leave it for now. Here in North Florida, warm weather has already settled in, with temperatures in the low 80s for the past week. Winter is behind us, which means I’m wearing shorts again and starting to get my camper van ready for another trip around the sun. The outdoors calls to me as much as the studio does. I get cabin fever if I can’t spend time in the marshes and the small towns my cameras like to visit.
So long for now—but do come back. I post something new each week about photography, usually images and stories gathered along the way.