DIY: ON-LOCATION DIGITAL BACK CASE
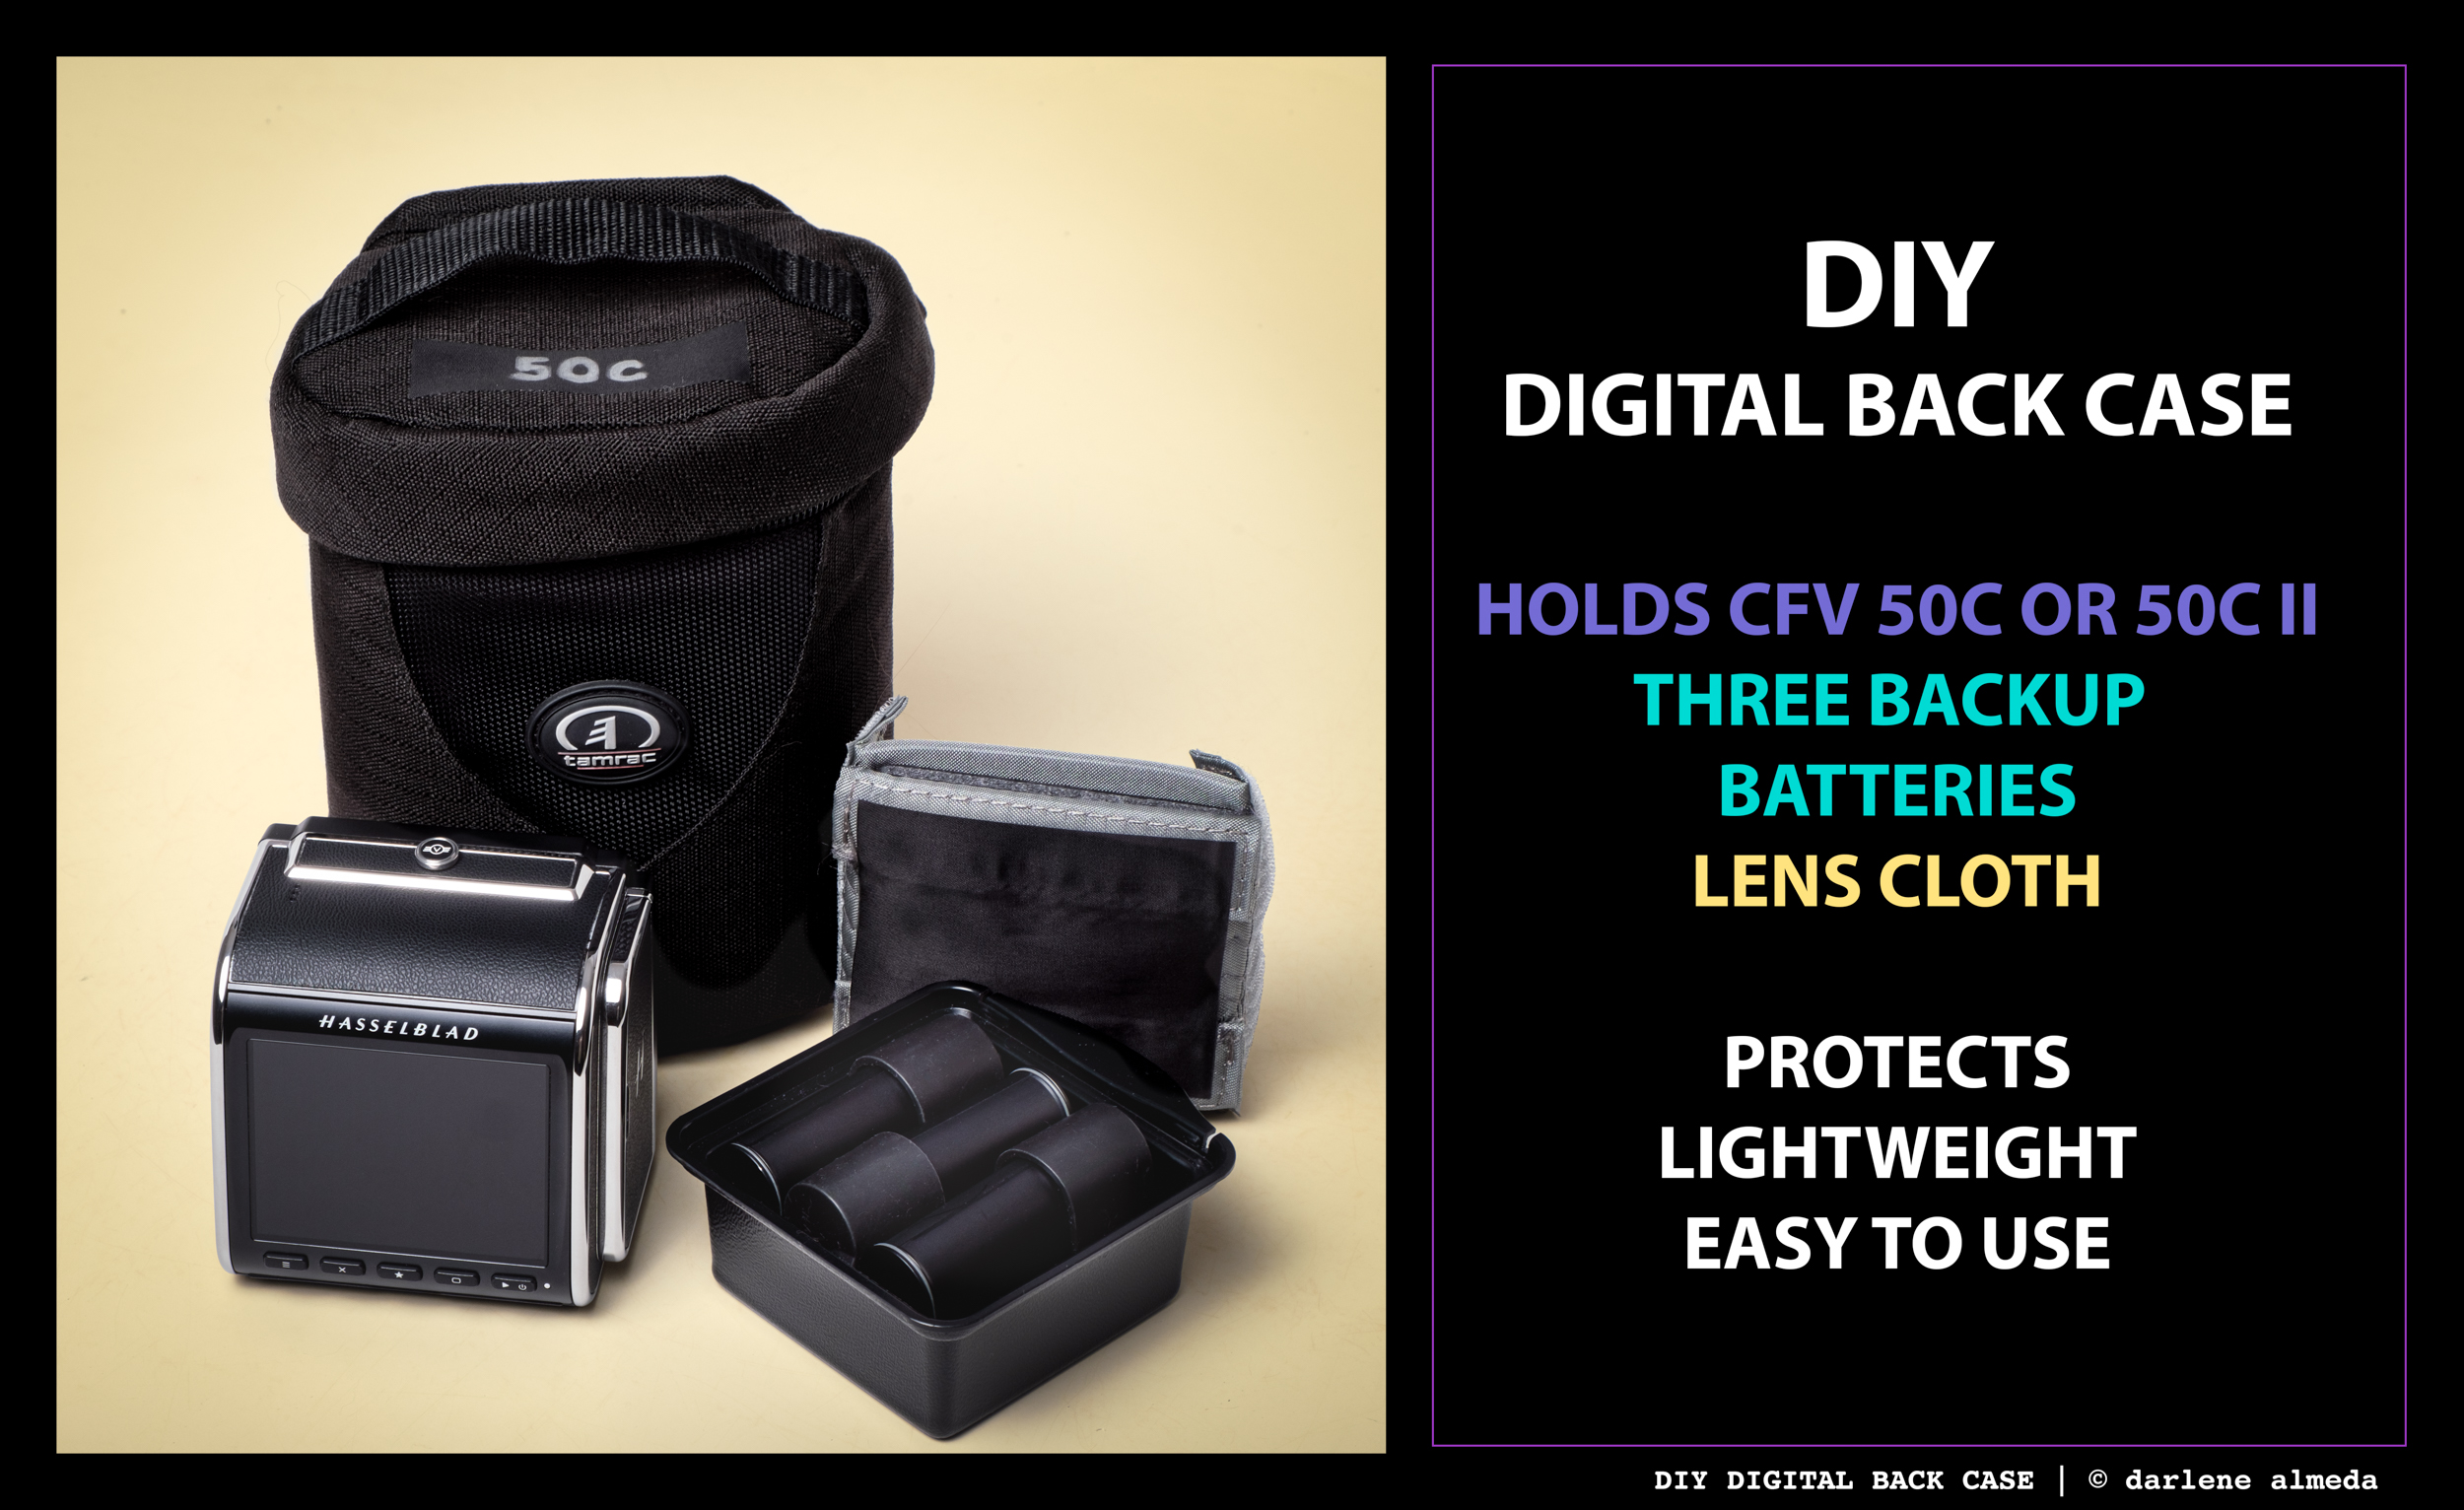
I’ve gathered a variety of photography gear over the years, including lens cases, equipment bags, and backpacks. While many have been passed along with cameras I’ve sold, I’ve held onto one particular Tamrac lens case for its durable yet lightweight build and its practical top handle. That centrally placed handle makes it especially handy when reaching into a backpack from above.
In this DIY article, I’ll show you how I converted that lens case into a custom carrier for my digital back and backup batteries—perfect for on-location work using simple, readily available materials. Usually, I store my digital back and batteries in a Pelican case when not shooting, but when I’m on the move, I often keep them safely tucked inside this DIY case within my camera bag. It’s lightweight, protective, and surprisingly easy to make.
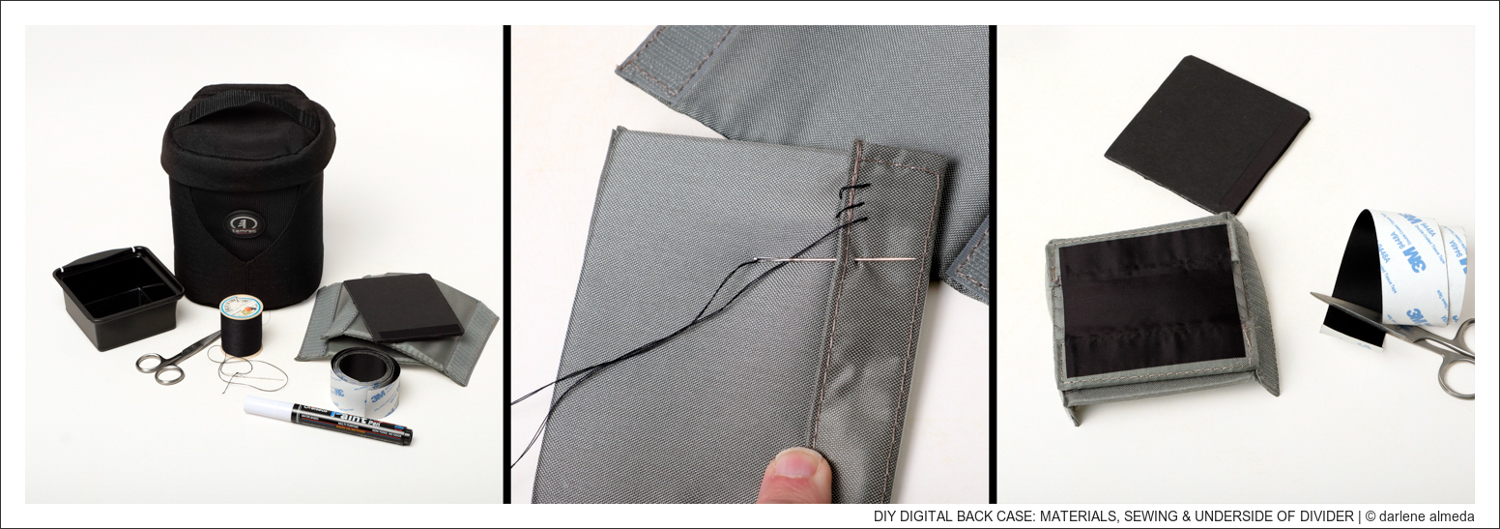
DIY DIGITAL BACK CASE: MATERIALS, SEWING & UNDERSIDE OF DIVIDER
Materials
Below is what I used, plus a thimble for pushing the needle through the dividers. A sewing machine would be quicker, so if you have access to one, it would be a simple job over in a few minutes. For small jobs, I tend to hand-stitch. Feel free to substitute with similar items:
Tamrac Lens Case #5341
ALPA protection cover #Mk II (a plastic/cardboard box would work too)
(2) identical small backpack dividers
(1) small piece of black Foamcore
sewing needle & thread
black cloth tape
scissors
white marker (if you choose to label it)
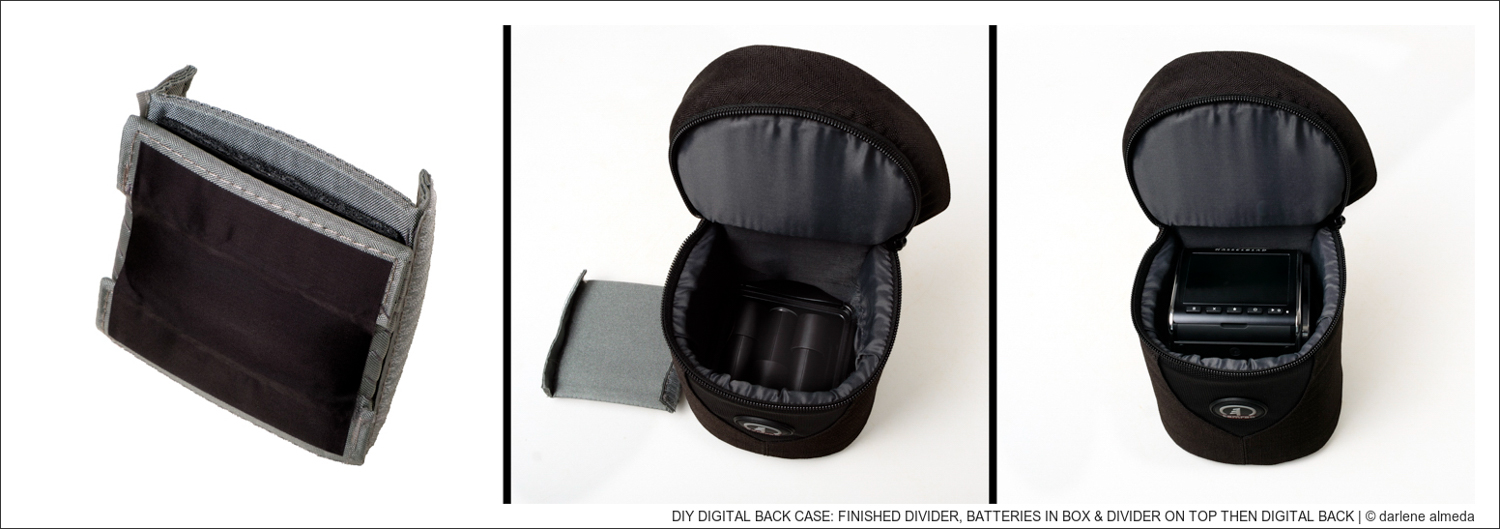
FINISHED DIVIDER, BATTERIES IN BOX & DIVIDER ON TOP THEN DIGITAL BACK
How Its Made
- Make sure the lens case size will hold the digital back and batteries securely.
- Measure area between folding flaps (usually has velcro) on the dividers.
- Cut a piece of Foamcore almost the same size, leaving about ¼” less all around.
- Divider #1 fold flaps down, secure with stitches, tape over with cloth tape.
- Divider #2, flaps down; Divider #1 on top flaps up and opposite #2 flap side.
- Sew Divider #1 on top of Divider #2’s flap side, creating a pass-through.
- Slide Foamcore into pass-through, now a cushion for batteries & digital back.
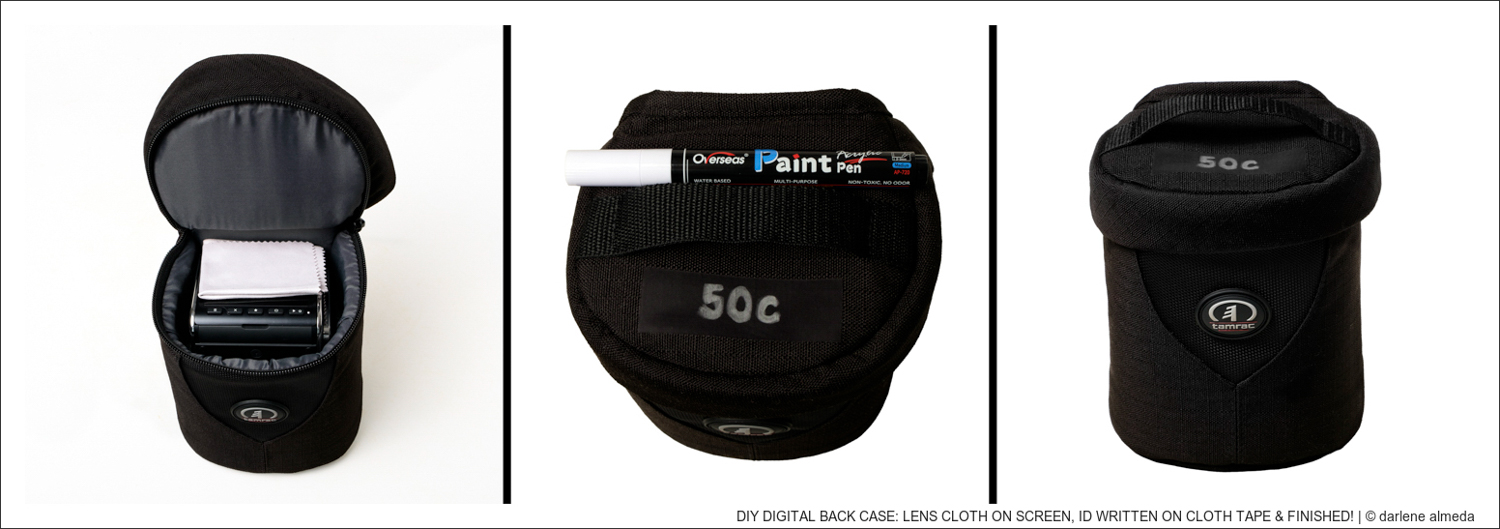
LENS CLOTH ON SCREEN, ID WRITTEN ON CLOTH TAPE & FINISHED!
Putting It Together
- Place backup batteries in box.
- Place battery box into bottom of lens case.
- Place divider cushion on top, black cloth tape side down on top of batteries.
- Place digital back on top of divider cushion.
- Place lens cloth on digital back screen, zip case up, and you’re ready to go.
- Optional: write on black cloth tape ID and place on top of case.
- Go shoot and have fun!


