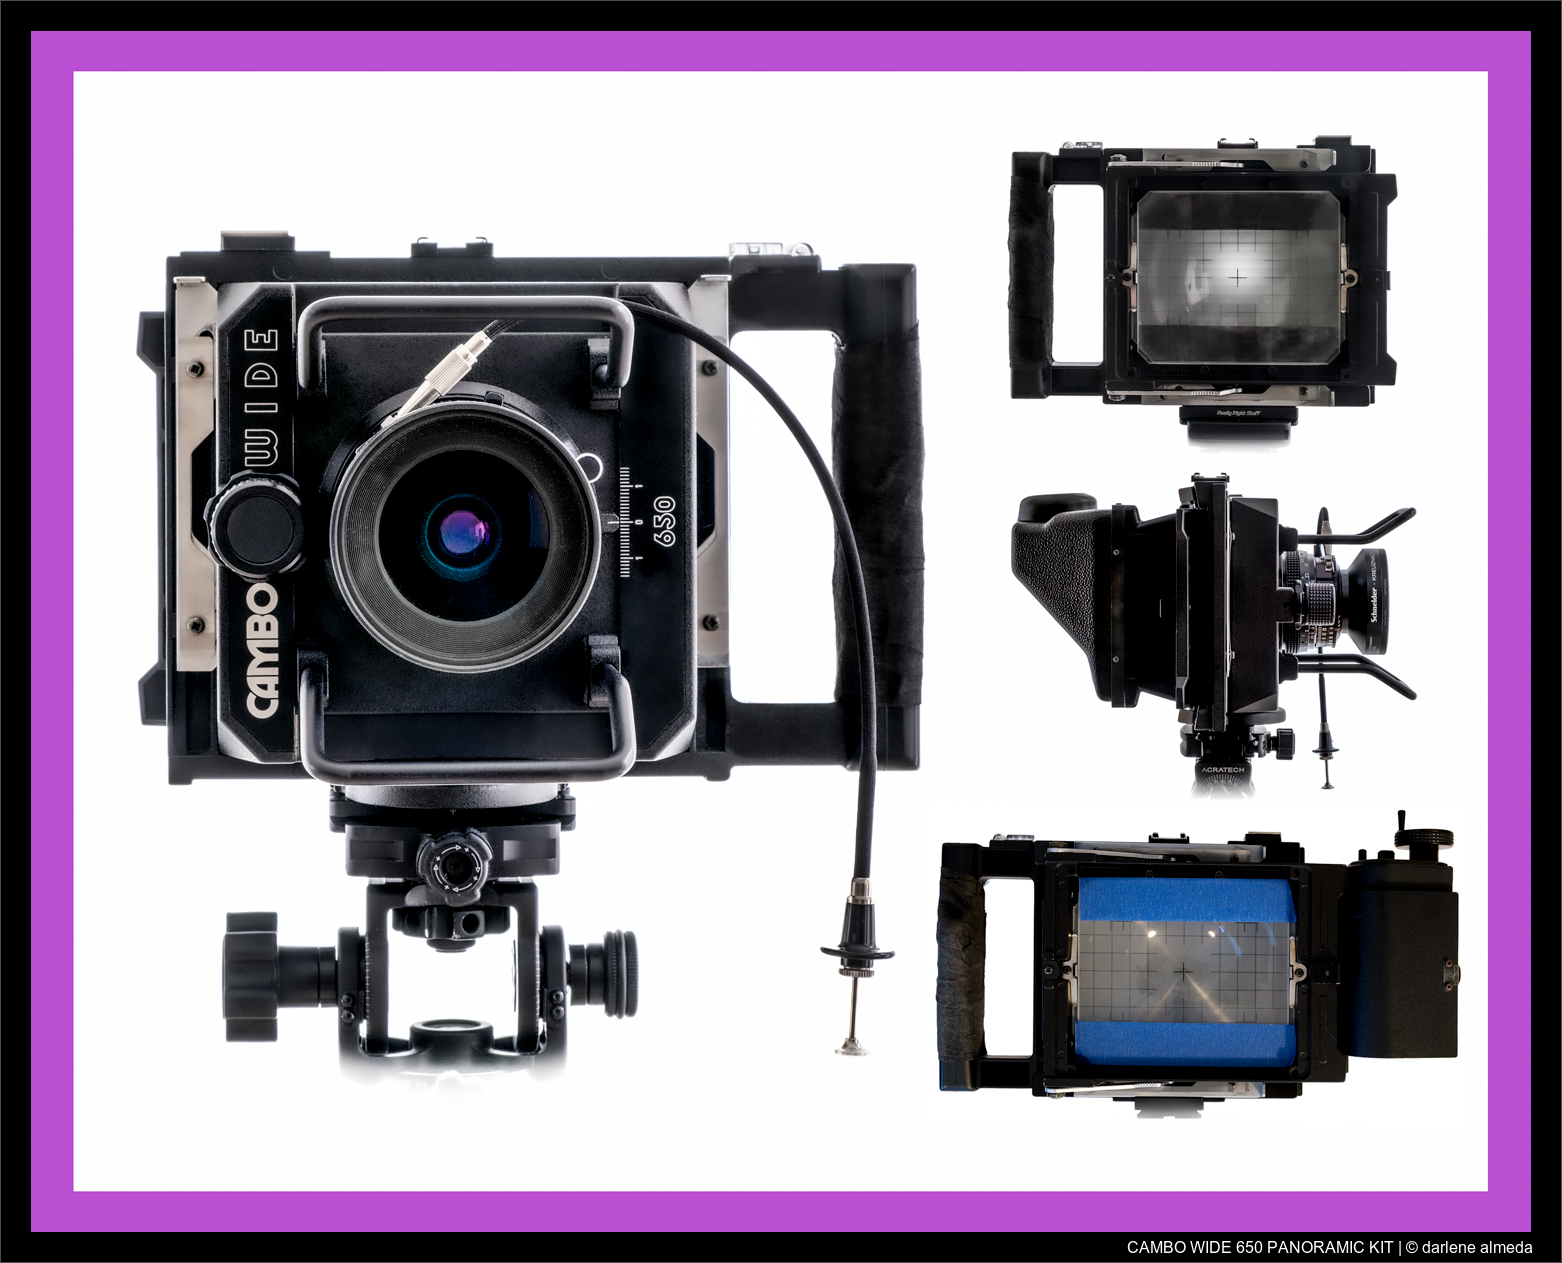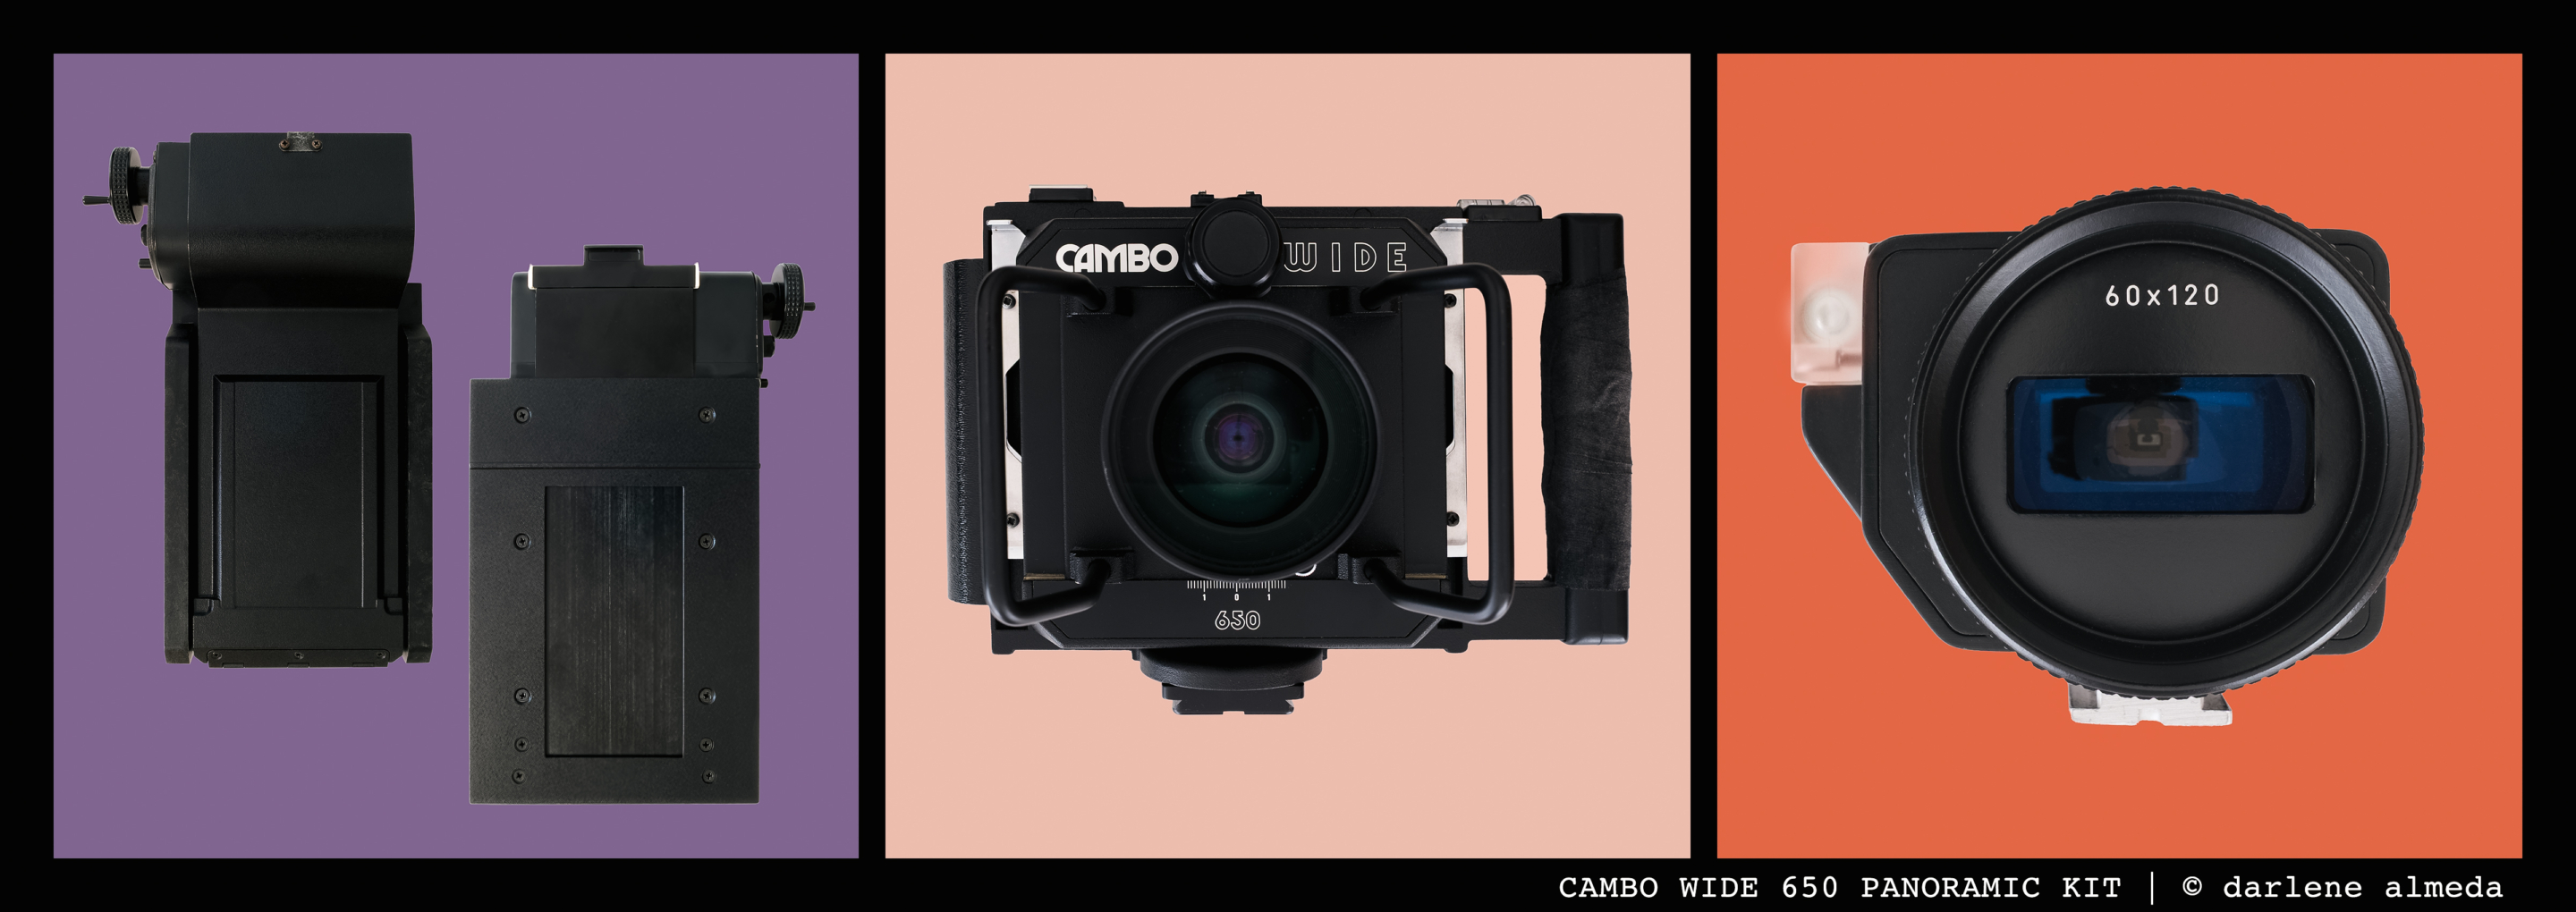
MY CAMBO WIDE 650 PANORAMIC KIT COMPONENTS
INTRO
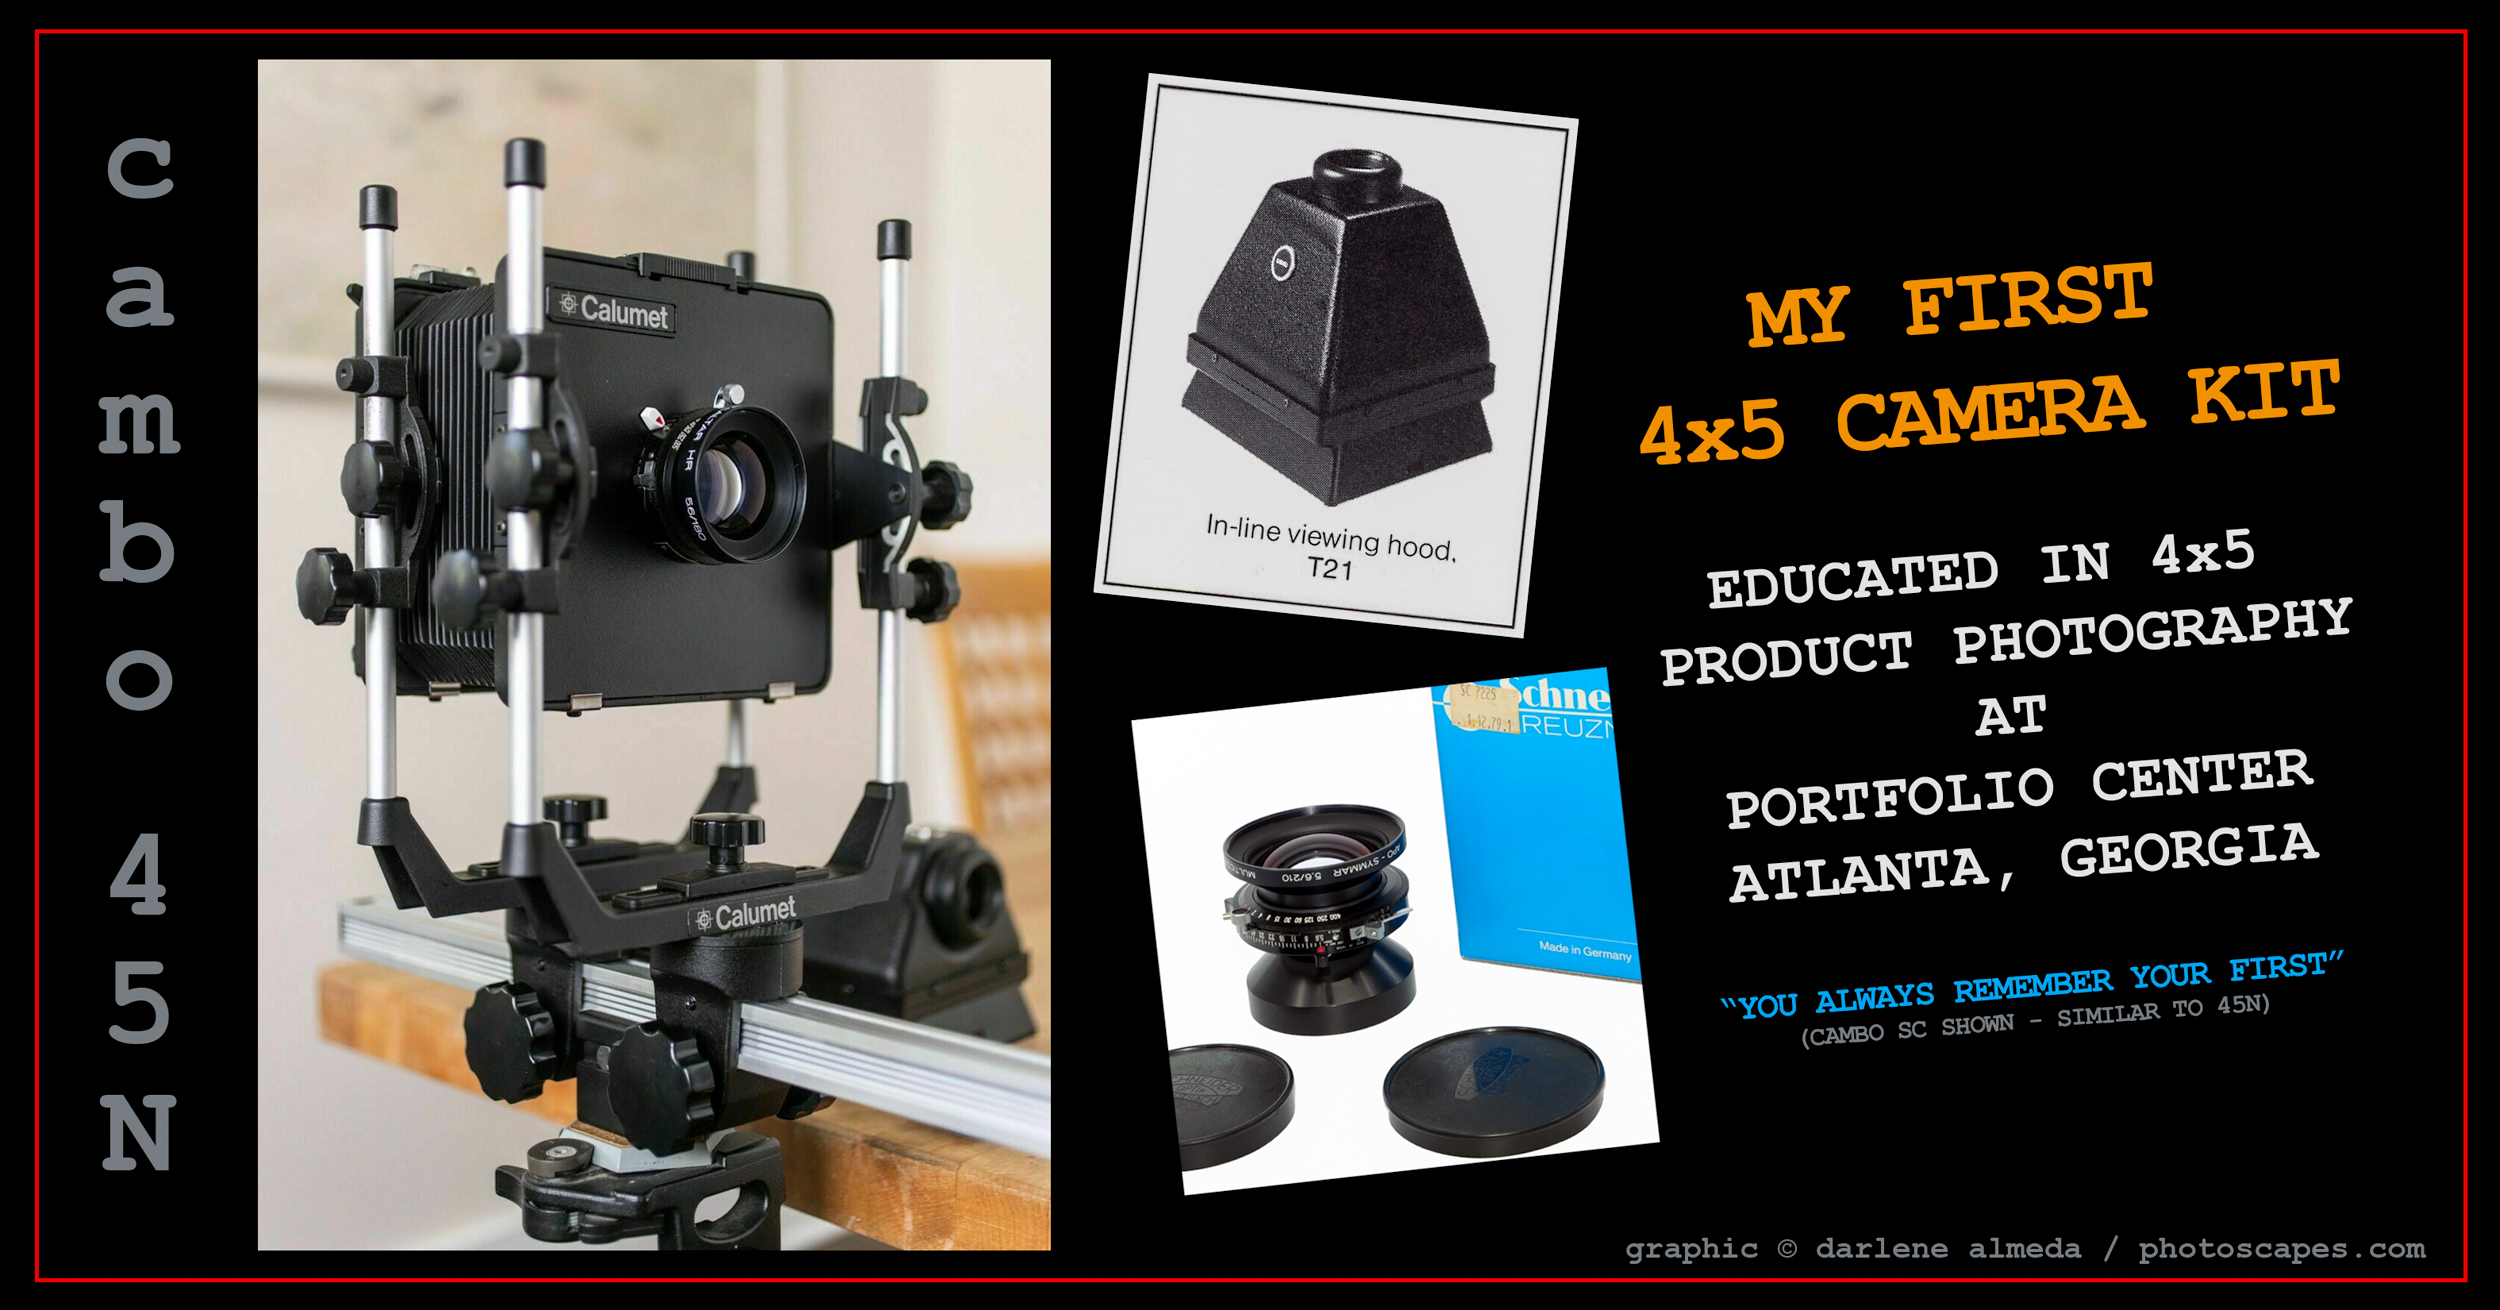
My first 4×5 film setup was a Calumet 45N (made by Cambo), paired with a Schneider 210mm f/5.6—a student kit from my early days studying product photography in advertising art school. That camera was my introduction to large format, and while it wasn’t glamorous, it got the job done and taught me the fundamentals. As I gained more experience with monorail cameras in the studio, I moved on to Linhof, Sinar, and Arca Swiss systems—mostly because I stumbled across good second-hand deals from local sellers. Still, I always had a soft spot for that early Cambo. I would lust after their Master model in the Calumet catalog, and if the chance had come up to own one back then, I wouldn’t have hesitated.
CALUMET (CAMBO SC) + SK 210/5.6 + CAMBO IN-LINE HOOD
Today, I’ve come full circle in a way. My current 6×12 panoramic film kit features the Cambo Wide 650—a camera I’ve grown to love for its simplicity and quality build. No bellows, no fuss—just a beautifully made tool that lets me shoot both 4×5 and 120 film. And if I feel like going digital, I can even stitch a panoramic image using my digital back.
This page is about my experiences with the Cambo Wide 650—how I carry it, how I use it, and why it’s earned a permanent place in my kit. Funny how some cameras just find their way back into your hands, and this time, I’m not letting go.
Below is a record of the Cambo cameras and accessories I have experience with. I can be contacted regarding questions about my experience with these items.
LITERATURE AVAILABLE:
CAMBO WIDE: Cambo Wide Manual (1995-2000), Cambo Wide Manual (1972-1995)
CAMBO WIDE DS: Analog Brochure (2000-2013)
CAMBO 6×12 FILM MAGAZINE C-243 (C2N): Film Loading, Component Diagram
Thank you to Richard Lotte of Cambo for featuring me in their blog!
THE CAMBO WIDE 580 & 650
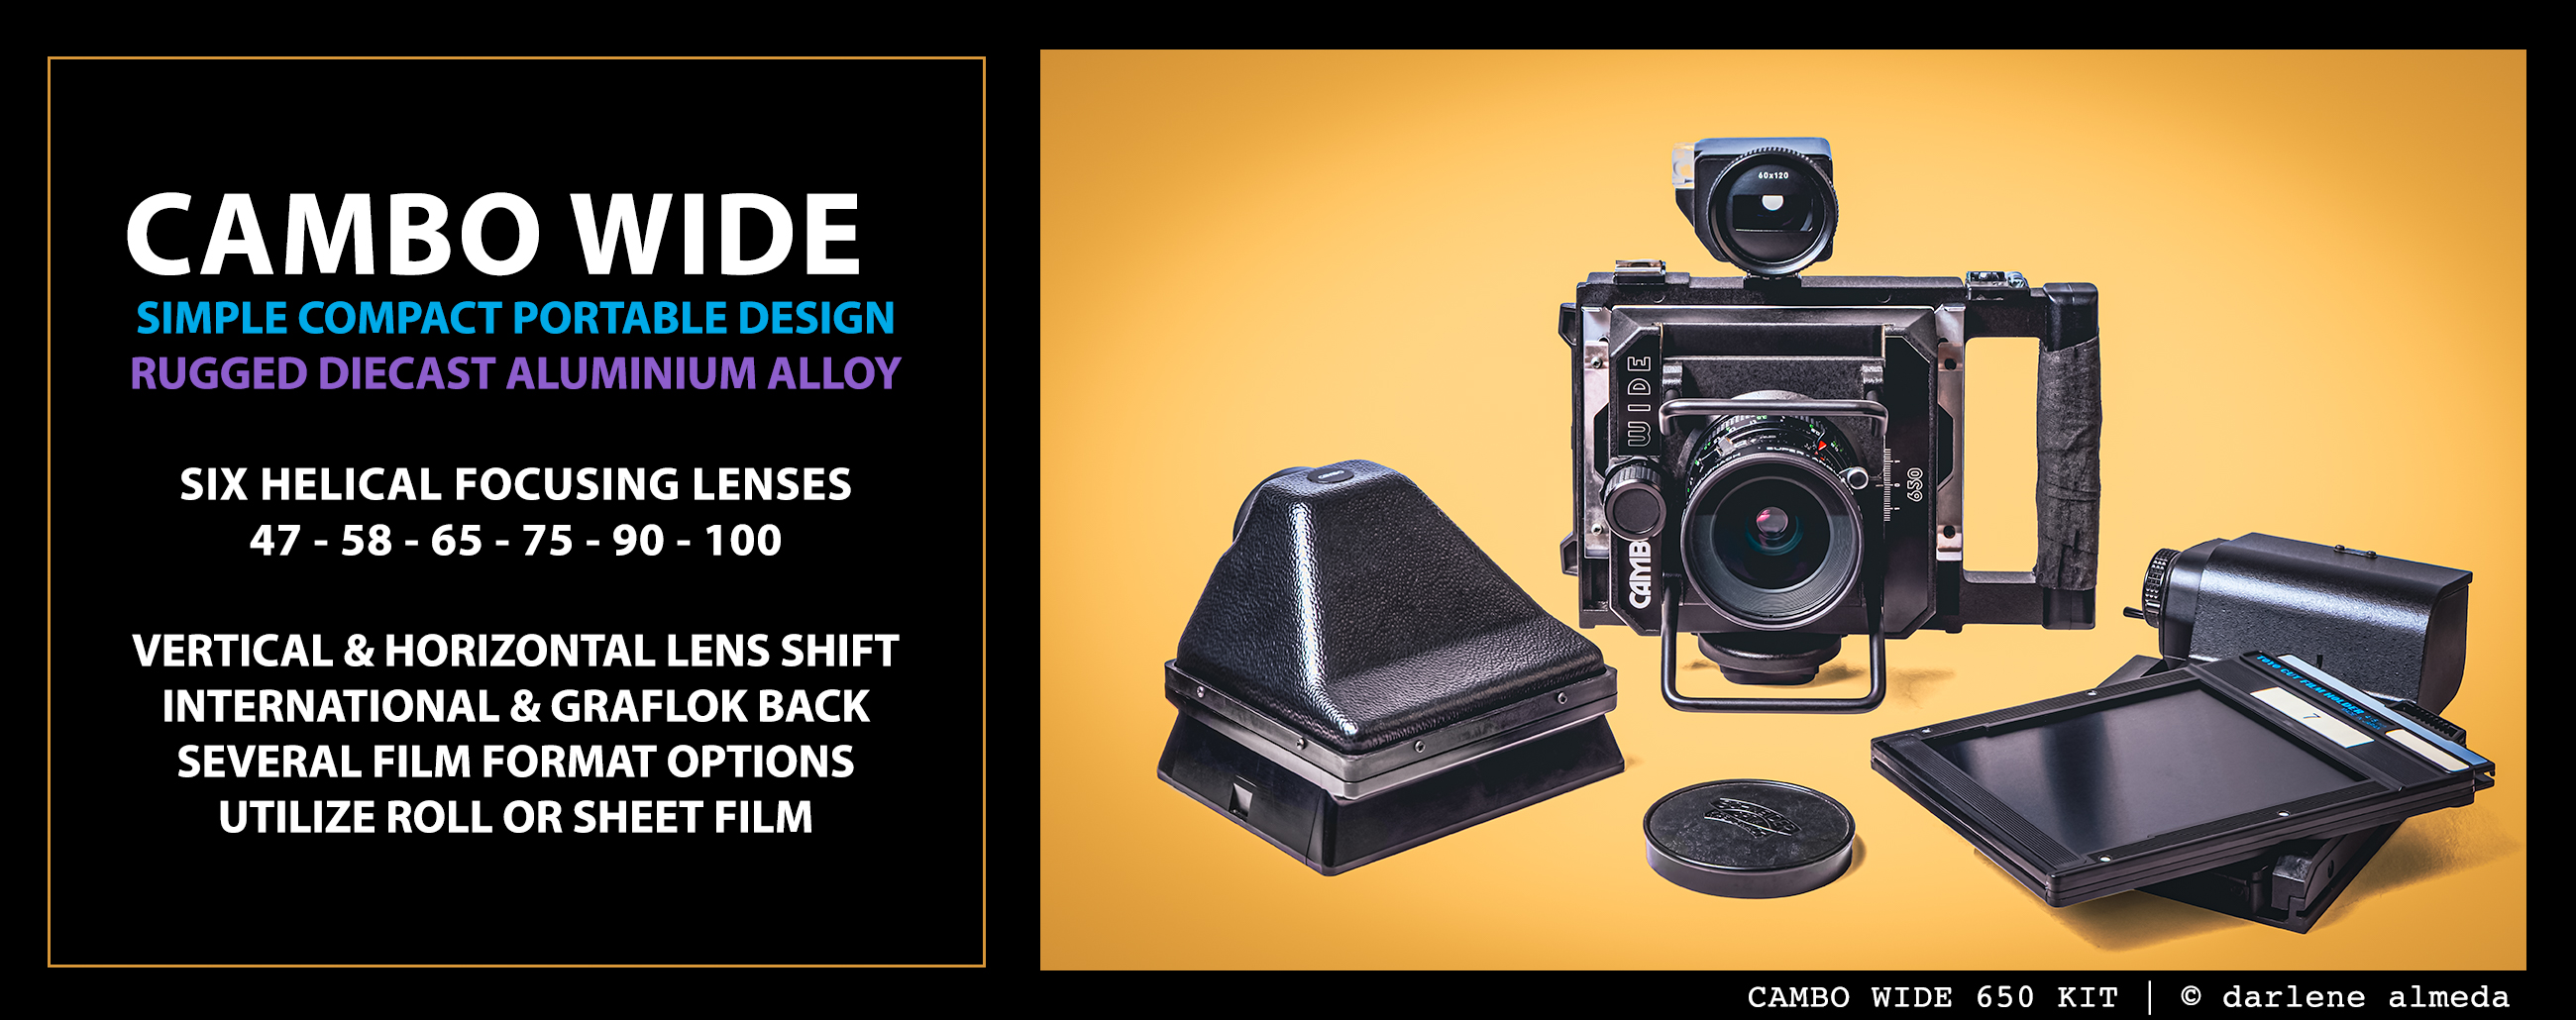
MY CAMBO WIDE 650 4×5 & 6×12 KIT
When I began exploring cameras for panoramic film photography, the Linhof 6×12 and 6×17 models caught my eye. However, they were too expensive for such a niche format. While I sometimes use my Ebony 4×5 for 6×12 shooting, I wanted a dedicated 6×12 camera with rise and fall that I could customize to my specific needs.
After some research, I discovered the older version of the Cambo Wide before it evolved into a digital model. It piqued my interest enough to start looking for one in great shape, and after a few months, I found the model I decided on: the 650 with its Schneider Super Angulon 65/5.6 lens, and acquired a beautiful 580, with the Schneider Super Angulon 58/5.6 lens, a few years later. You can read many of the Cambo Wide’s specs in the above graphic.
Suppose you are familiar with and enjoy pancake-style digital cameras such as ALPA, Arca Swiss, and Cambo. In that case, the Cambo Wide line of 4×5 cameras might interest you for shooting 4×5 and 120 films.
AN EARLY PANCAKE STYLE 4×5 CAMERA
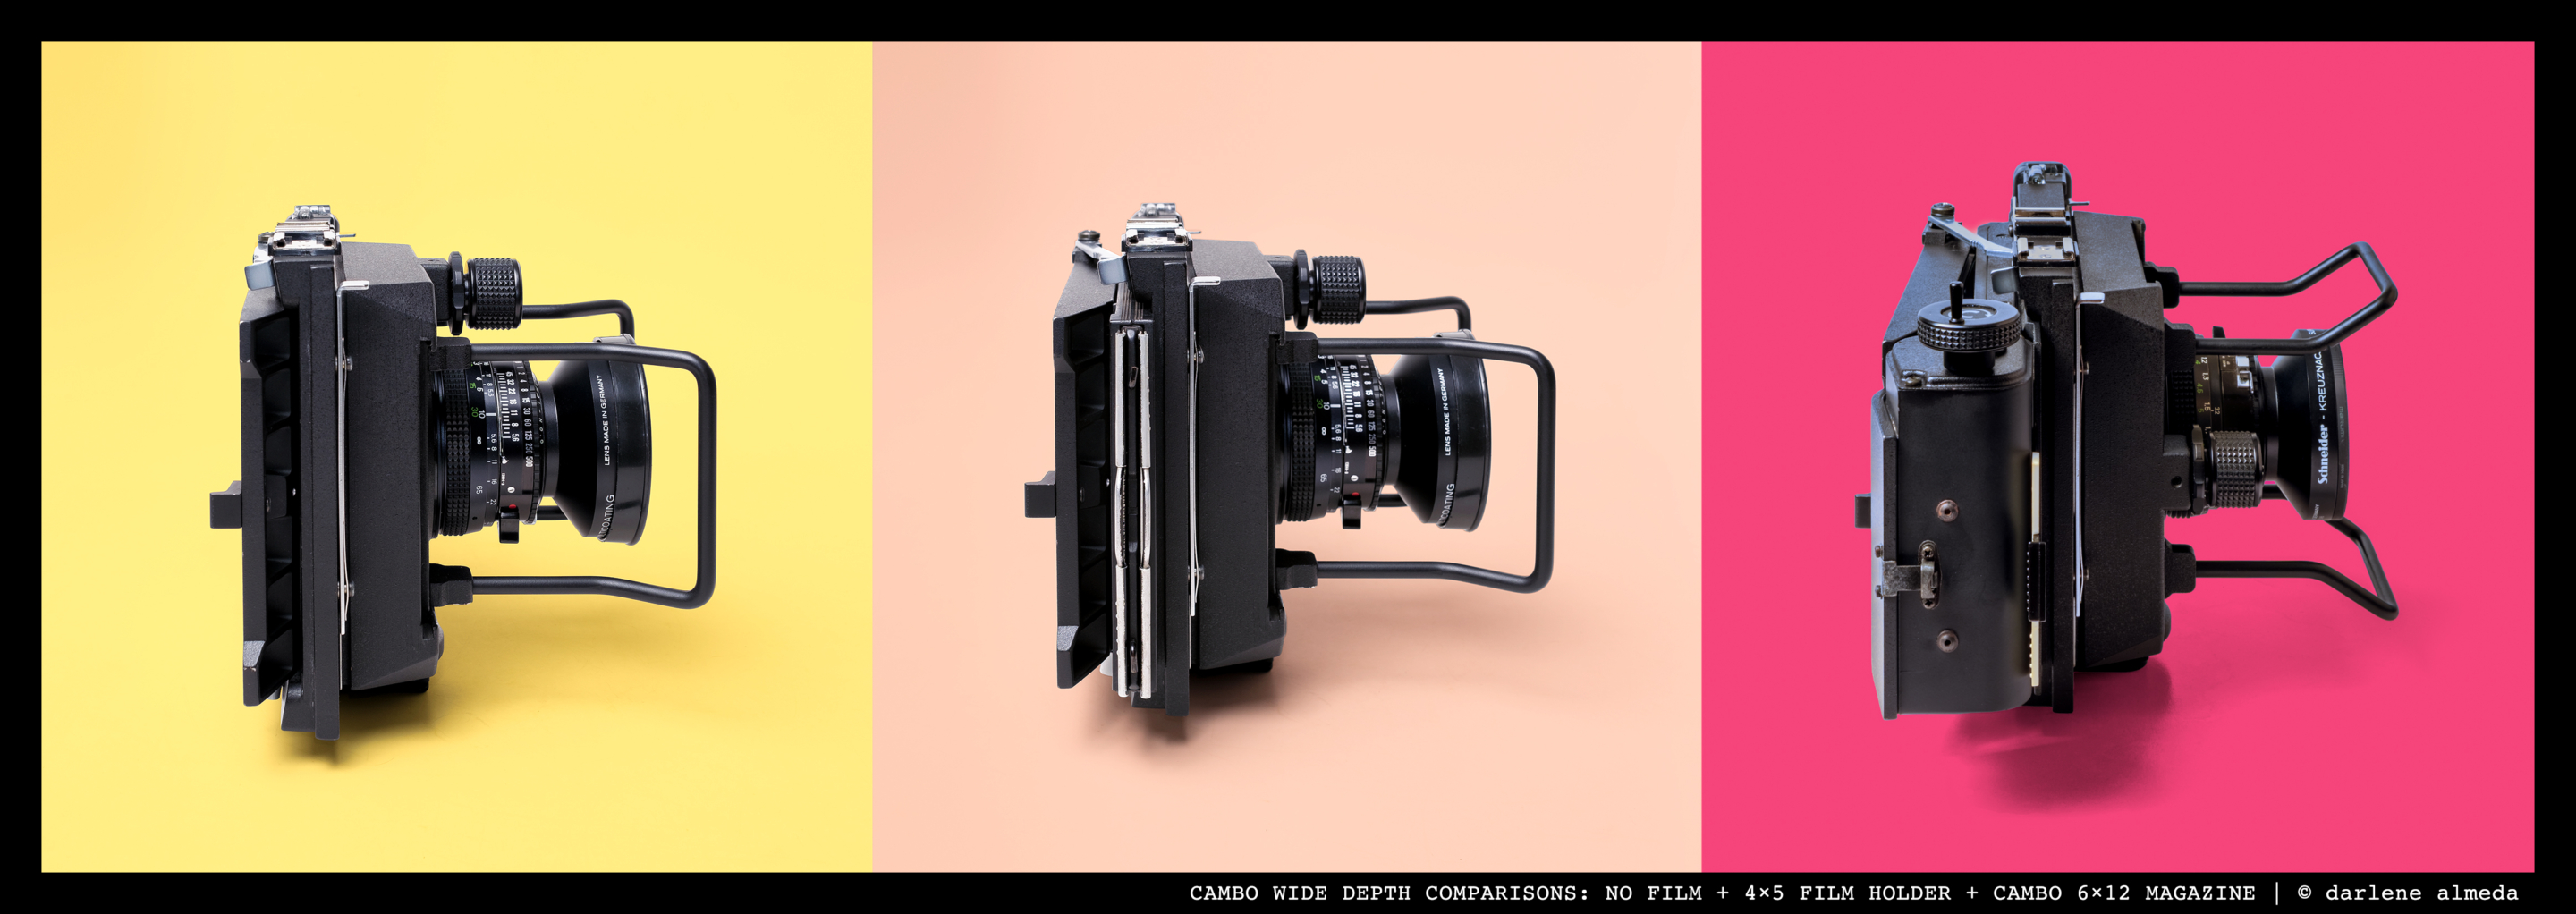
CAMBO WIDE DEPTH COMPARISONS: NO FILM + 4×5 FILM HOLDER + CAMBO 6×12 MAGAZINE
The graphic above shows side profiles of my Cambo Wide 650 (CW 650) in the various shooting configurations I’ve used. You can see how the camera’s depth changes with each setup. Image #1 shows the camera with the ground glass attached—minus the protective cover—to illustrate its minimal depth. Image #2 displays the camera with a standard 4×5 film holder, while image #3 features the Cambo C-243 6×12 magazine.
With the 6×12 magazine, that final configuration is now my go-to setup for shooting panoramics with the CW 650.
MY JOURNEY WITH THE CAMBO WIDE 650
CAMBO WIDE 650 – MY SETUP
Camera Movements: Know Before You Buy
The CW 650 I shoot with offers 15mm of shift left and right, and 15mm of rise and fall—when the lens is rotated 90 degrees. It’s essential to check the specs and photos of any Cambo Wide you’re considering, because not all models are built the same. For example, the brochure for my version claims all models have 20mm movements… but that’s simply not true. Some do. Mine doesn’t. So if camera movements matter to you, double-check before clicking “buy now.”
Why Rise and Fall Matter
I regularly use the rise and fall controls in my compositions, and it’s one of the reasons I’ve come to love the CW 650 for 6×12 panoramic work. You’ll notice in the image above that I keep the lens rotated to allow rise and fall—it’s my default setup. As a shorter photographer, I especially appreciate the large round turn knob. It makes adjusting the horizon from the ground glass quick and painless, no step stool required.
Service & Support: Precision Matters
After a few years of regular use, I sent my CW 650 to Precision Camera Works (PCW) for a CLA and tune-up—tightening the rails, checking the flash sync, and giving everything a good once-over. I made that investment because I genuinely enjoy using the camera and plan to keep it in my lineup. If your Cambo Wide ever needs servicing, look up Bob Watkins at PCW. He knows these cameras inside and out.
DIY Ground Glass Masking
I’ve used blue painter’s tape for years to mark off the 6×12 frame lines. It peels off clean, though the poor grid lines above and below the frame have long since vanished—casualties of my enthusiastic taping. Doesn’t bother me one bit when I’m shooting 4×5; I like having a clean window to frame the world. But 6×12, I need a little structure, and a few strips of blue tape do the trick.
The Perfect Focal Length
The 65mm lens hits the sweet spot for me. It delivers wide, dramatic views without the distorted “look-at-me” effect some ultra-wide lenses can produce. Back when I shot 6×12 on my 4×5, my go-to was the Rodenstock 65mm f/4.5. So, it’s no surprise the CW 650, paired with the same focal length, felt like home.
Performance in the Field
How well a camera performs outdoors is crucial. I use several systems for landscape photography—my 4×5 takes the longest to set up, while my Fotoman 617 is the quickest. If a camera slows me down or needs constant babying in the wild, I let it go. But after more than five years with the CW 650, I can say this one’s a keeper. Its simplicity, precision, and panoramic functionality make it a joy to use in the field.
Refining the Workflow
Over time, I’ve fine-tuned my setup for speed and ease. The combo of the custom 6×12 masking on the ground glass and the Linhof 6×12 viewfinder makes pre-visualization a breeze. It cuts down on setup time and helps me work faster when the light is fleeting.
Oh—and yes, that’s sports tape on the side handle. It’s one of my favorite little hacks. It gives me a solid grip for pulling the camera out of its case, with the 65mm lens already mounted and ready to roll.
My shooting flow now feels seamless:
Mount the camera → focus (ground glass or hyperfocal—I’ve tested mine for accuracy and recommend you do the same) → close the shutter → load the film back → cock the shutter → take the shot.
Simple. Reliable. Quick.
Exactly what I want when I’m standing in a field with the wind in my face and the light about to change.
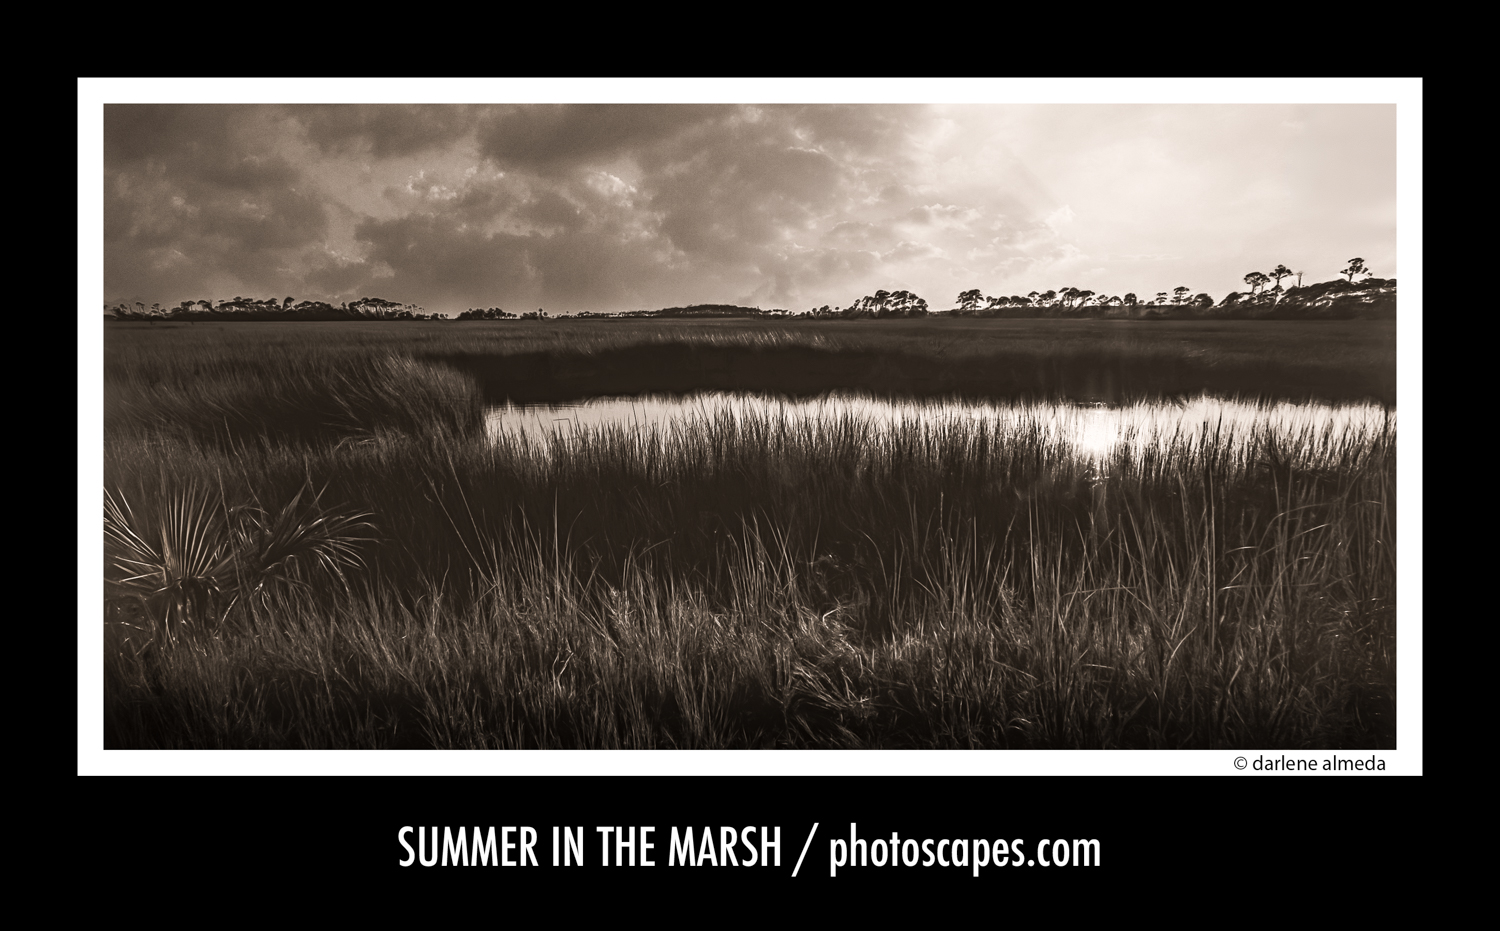
IMAGE: SUMMER MARSH
CW 650 + CAT LABS X 80 II + 510 PYRO
HOW I FEEL ABOUT THE CAMBO WIDE AFTER 5+ YEARS
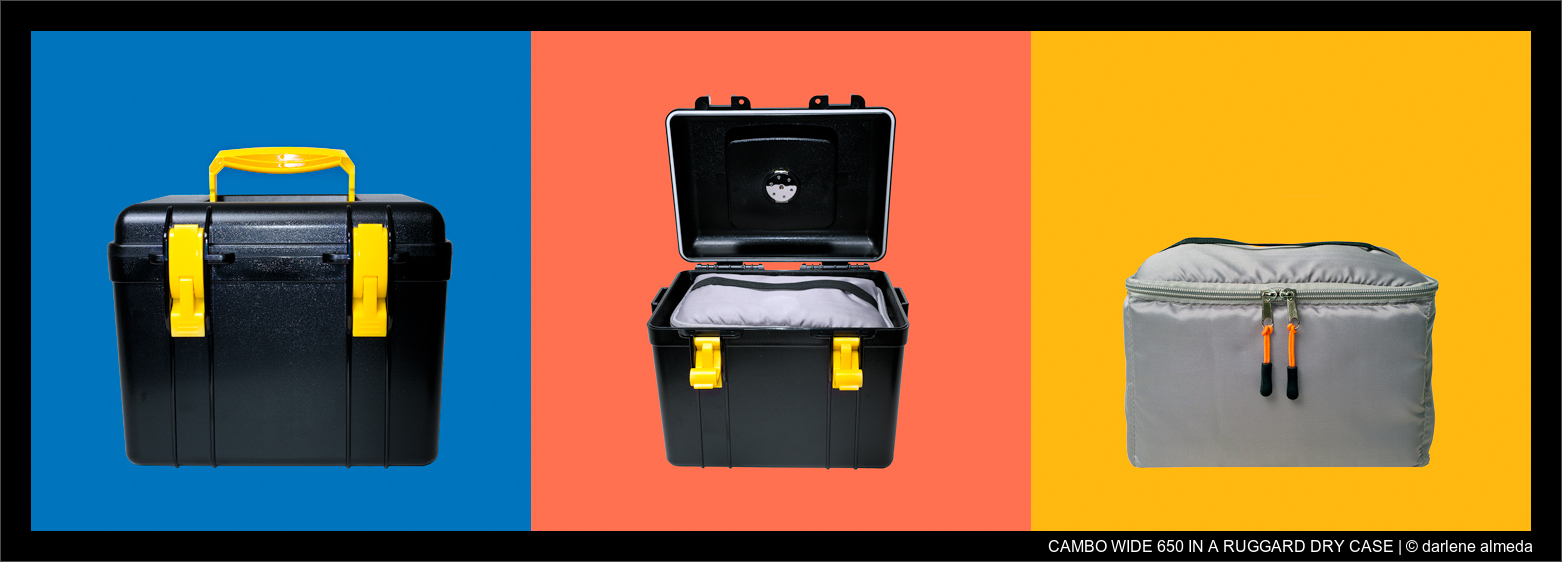
CAMBO WIDE 650 IN A RUGGARD DRY CASE
WHAT I LIKE MOST
(1) the rise and fall adjustments,
(2) its ease of customization, and
(3) the simplicity it brings back to the shooting experience.
A FEW THINGS TO CONSIDER
1. One lens only.
The lens cone system means adding focal lengths quickly bulks up your kit. While the 65mm is perfect for panoramas, I sometimes wish for a longer lens to compress space or get closer. Cambo once offered a rare 100mm version, but it’s hard to find and may vignette on 4×5. However, I found a nice little workaround here.
2. It’s not light.
Individually, the components aren’t bad, but together, the CW 650 kit adds up. I’ve worked to lighten the load over time, but weight is still something I keep revisiting. That said, if it weren’t built like a tank, I wouldn’t trust it in the field. Using my Easy Peasy Carry method makes the whole kit feel lighter, so only half a complaint. 🙂
3. No rotating back.
For 4×5 shooters, there’s no way to flip the orientation at the back—the ground glass is fixed horizontally. To shoot vertically, you’ll need to rotate the entire camera using your tripod head. It’s no trouble at all if your head has a drop notch. I’ve used this setup frequently, and you can find an example of a vertical composition made with the Cambo Wide in the gallery at the bottom of this page. Here is my setup.
CARRYING THE CAMBO WIDE
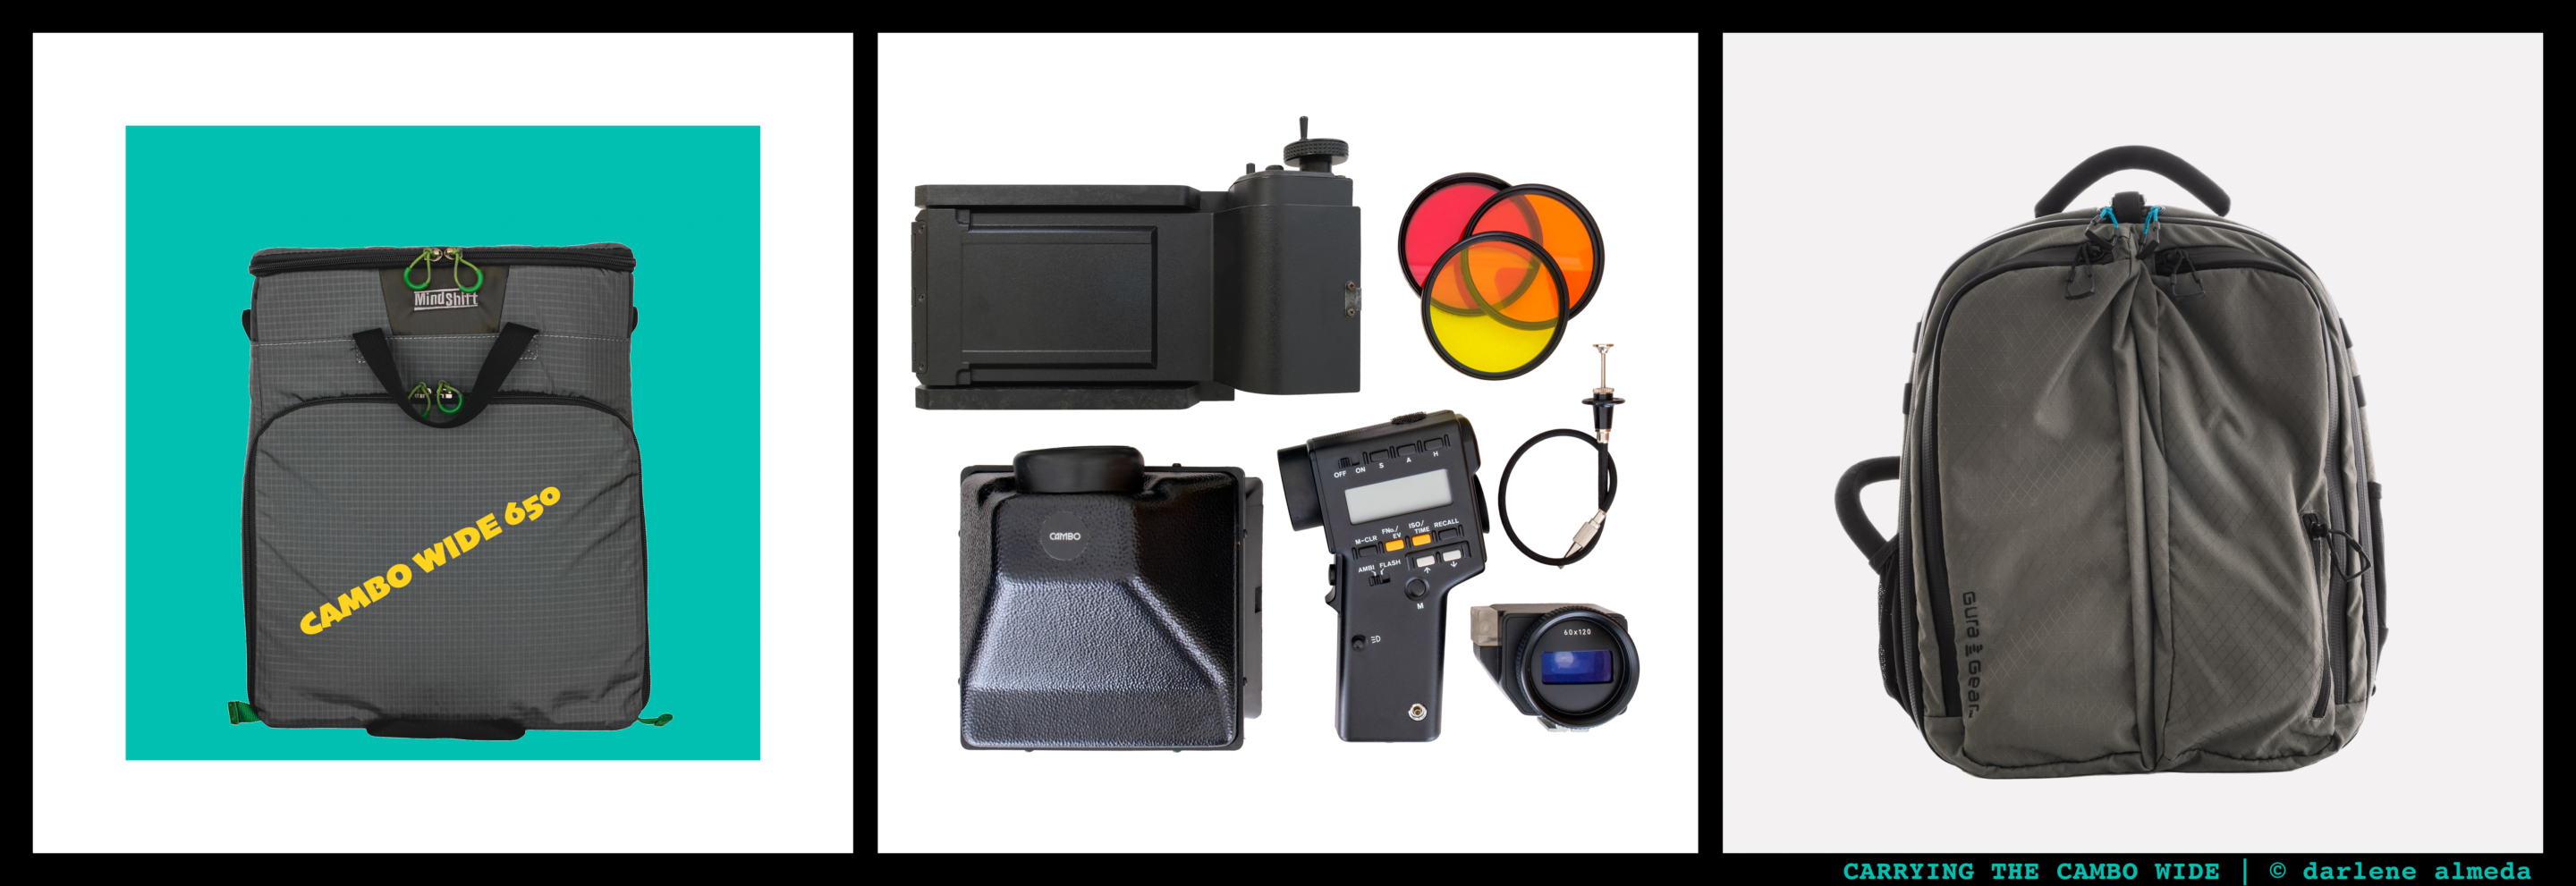
CAMBO WIDE KIT PACK: MINDSHIFT STASH MASTER + GURA GEAR BATAFLAE 26L
If one camera kit has made me rethink how I pack, it’s the Cambo Wide. The challenge? Its size. It’s not especially heavy, but its shape—well, let’s just say it’s not the most graceful guest in a camera bag. Still, it earns every bit of space by doing something remarkable: letting me shoot 4×5 and 6×12 film with a wide-angle lens in a helical mount. That’s no small thing.
Let me set the scene: I’m petite, and I’ve reached the age where I don’t exactly move like I’m training for Everest. But I’ve loved photography since before high school, and age, weight, or even gravity has never kept me from chasing the light.
These days, I travel in a professionally built van for photography trips. It’s not a “glamper” (I’m too practically minded for that), but it’s got everything I need: a cozy bed, a food prep area, secure gear storage, and space for all the essentials—plus a few non-essentials I just can’t leave behind.
One of the perks of this setup is organizing my camera kits in lightweight bags like the Think Tank Stash Master Pro and Top Loader. They tuck neatly into the secure gear box. When I’m ready to head out, I move whichever kit I’ll use into my Gura Gear Bataflae 26L backpack. There’s room left for multiple film holders, my Fuji X100V, and just-in-case items.
But if I’m not venturing far, I often leave the backpack behind and switch into Easy Peasy Carry mode—more on that next.
CAMBO WIDE 650: EASY PEASY CARRY

CAMBO WIDE KIT IN STASH MASTER PRO
Over time, I’ve learned that less is more, especially regarding weight. I’ve built a modular system around the Think Tank Stash Masters and my Gura Gear Bataflae backpack, but more often than not, I carry just the essentials: one camera kit in a Stash Master with an OP/TECH Envy strap. That’s it. And to be honest, it’s the most comfortable, lightweight setup I’ve ever used. I’m picky about straps, and the Envy delivers with its soft, spongy shoulder pad that makes a long day feel more like a nature walk than penance for loving big, beautiful analog cameras.
Now, if I were to trip and fall while carrying only the Stash Master (without the padded safety net of the Bataflae), the gear could take a hit. So, I’ve added extra foam padding between the top and bottom compartments to help ease some pain if gravity ever decides to take over creative control.
The Cambo Wide rests on its back inside the Stash Master—which is better for the lens—and that’s its usual position, whether slung over my shoulder or stored in the van. Above it, two layers of foam and a few dividers separate and protect the accessories. The top section holds the 6×12 film magazine, the Cambo T-20 viewfinder, a Linhof 6×12 finder, several rolls of 120 film, and a filter-hood combo. The light meter is stowed with the camera on the side of its handle.
If I head out with 4×5 film, the 6×12 magazine stays behind to make space for film holders, which I carry in a Stone Photo Gear 4×5 Triple Sleeve. It’s a bit of a shuffle, but it works.
This setup is perfect for someone like me who values traveling light, keeping gear safe, and—perhaps most importantly—preserving the energy to make photos once I reach my destination. After all, the goal isn’t just to get the camera there, but to still want to use it once you do.
CAMBO WIDE MEETS TABLETOP PHOTOGRAPHY
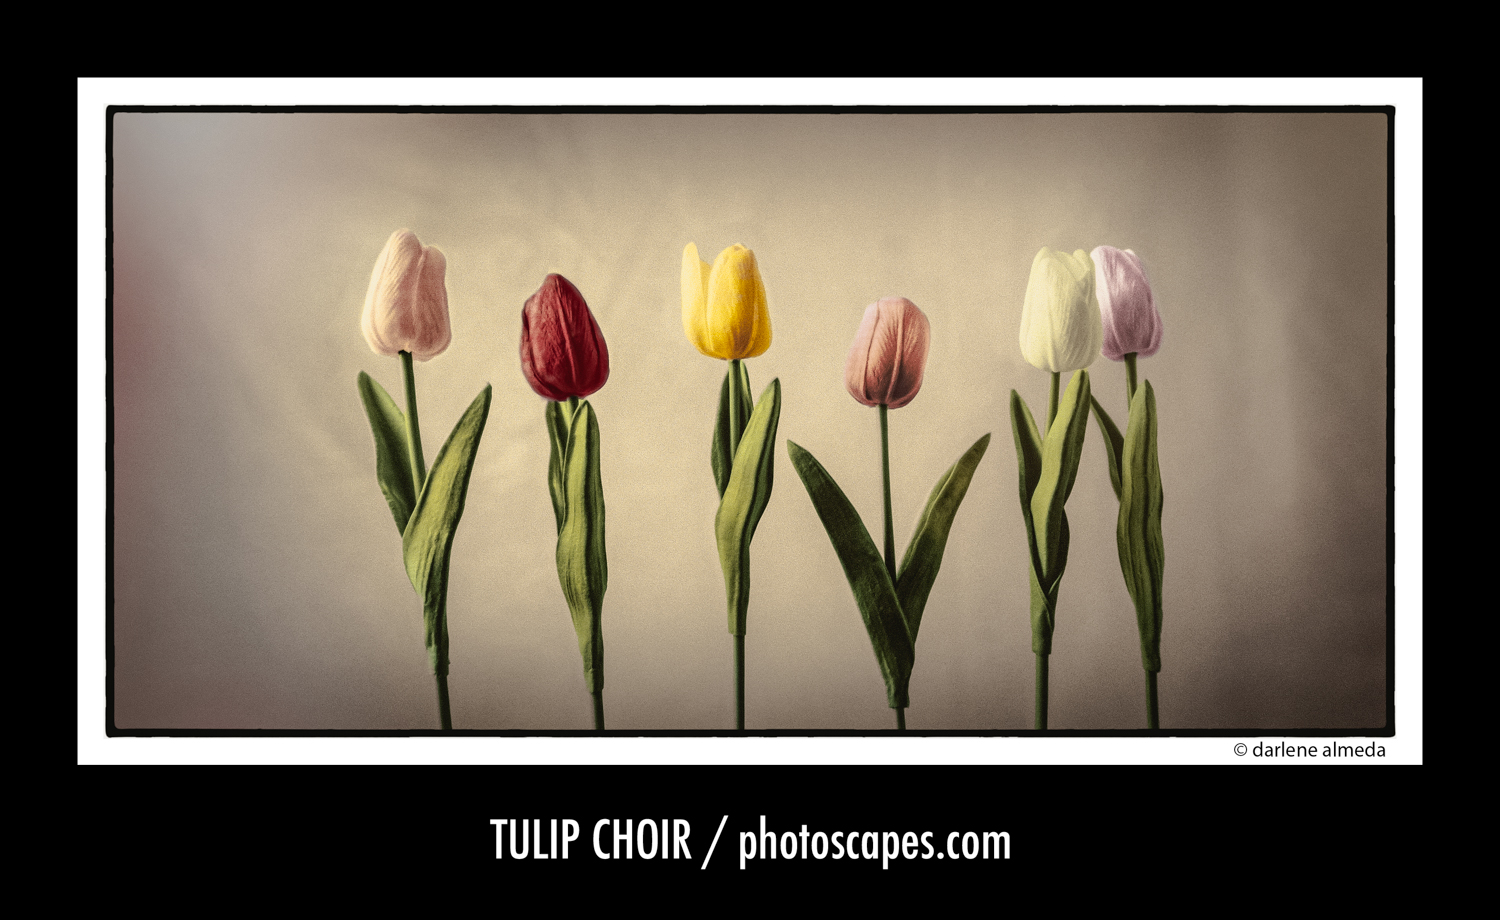
TULIP CHOIR / CAMBO WIDE 650 + CLOSE-UP LENS + TMAX 100 – HAND COLORED
Most photographers learn the rules. Fewer know when to break them.
This image began as an experiment—an urge to make something unexpected with a camera and lens combination never intended for still life. My Cambo Wide 650, a favorite 4×5 camera of mine, was built for sweeping landscapes, not tabletop compositions. That’s why I bought it, and that’s how I’ve always used it. But after a long, low simmer of curiosity and desire, I wondered: What if I could coax it into the studio? What if I could find a way to make it work for still life?
That spark of curiosity became the beginning of something new. [continue]
CAMBO WIDE VERTICAL SHOOTING
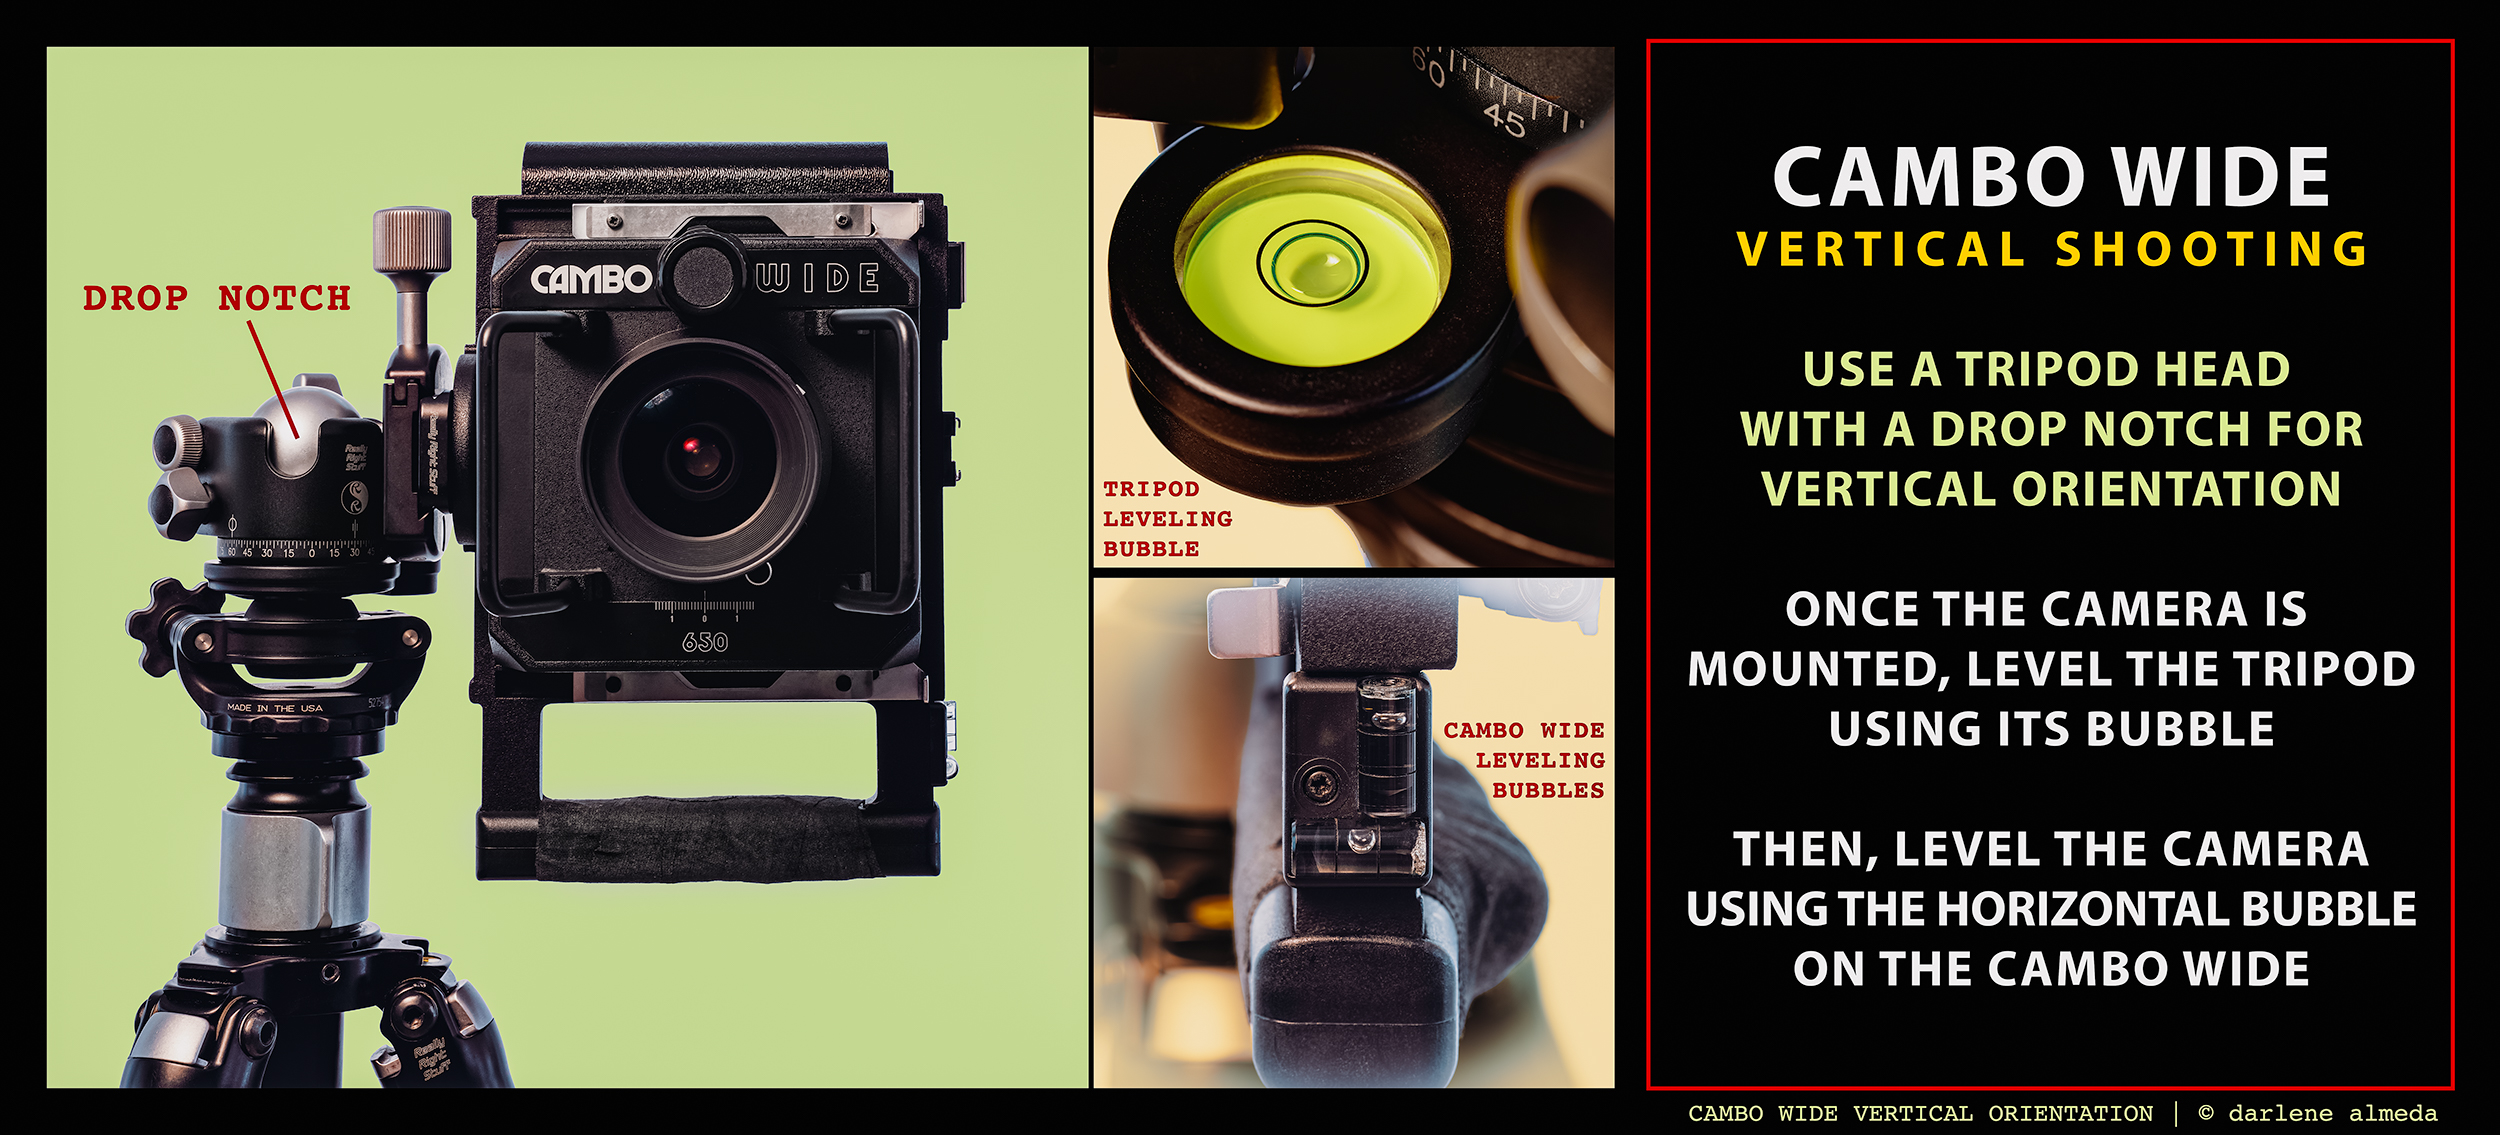
CAMBO WIDE VERTICAL SHOOTING
Because the Cambo Wide has a fixed horizontal (non-rotational) 4×5 ground glass, composing vertically requires a tripod with a drop notch and careful leveling of both tripod and camera.
In the graphic above, my Cambo Wide 650 is shown mounted in a vertical position. When I travel with this camera, I bring a specific tripod setup I’ve fine-tuned over time. While I’m not particularly fond of ball heads, I’ve held onto this one because it handles the weight of my heavier cameras with ease.
The setup consists of Really Right Stuff TVC-23 Series 2 legs, an Acratech leveling base, and an RRS BH-40 ball head. I use leveling bases on all my tripods, but with this particular setup, I simply add the BH-40 on top, and I’m ready to shoot the Cambo in any orientation I please. My BH-40 has two drop notches were as it looks like the newest model has only one.
If you haven’t heard it before: invest in the most robust tripod you can afford, and you’ll likely never need to replace it. Mine is an early Gitzo Pro Studex aluminum model with a Rational #4R three-way head. I bought it new as a photography student and used it on every location job during the first 18 years of my career. It’s still going strong—but these days, it stays in the studio, as carbon fiber legs and leveling bases have lightened the load for fieldwork.
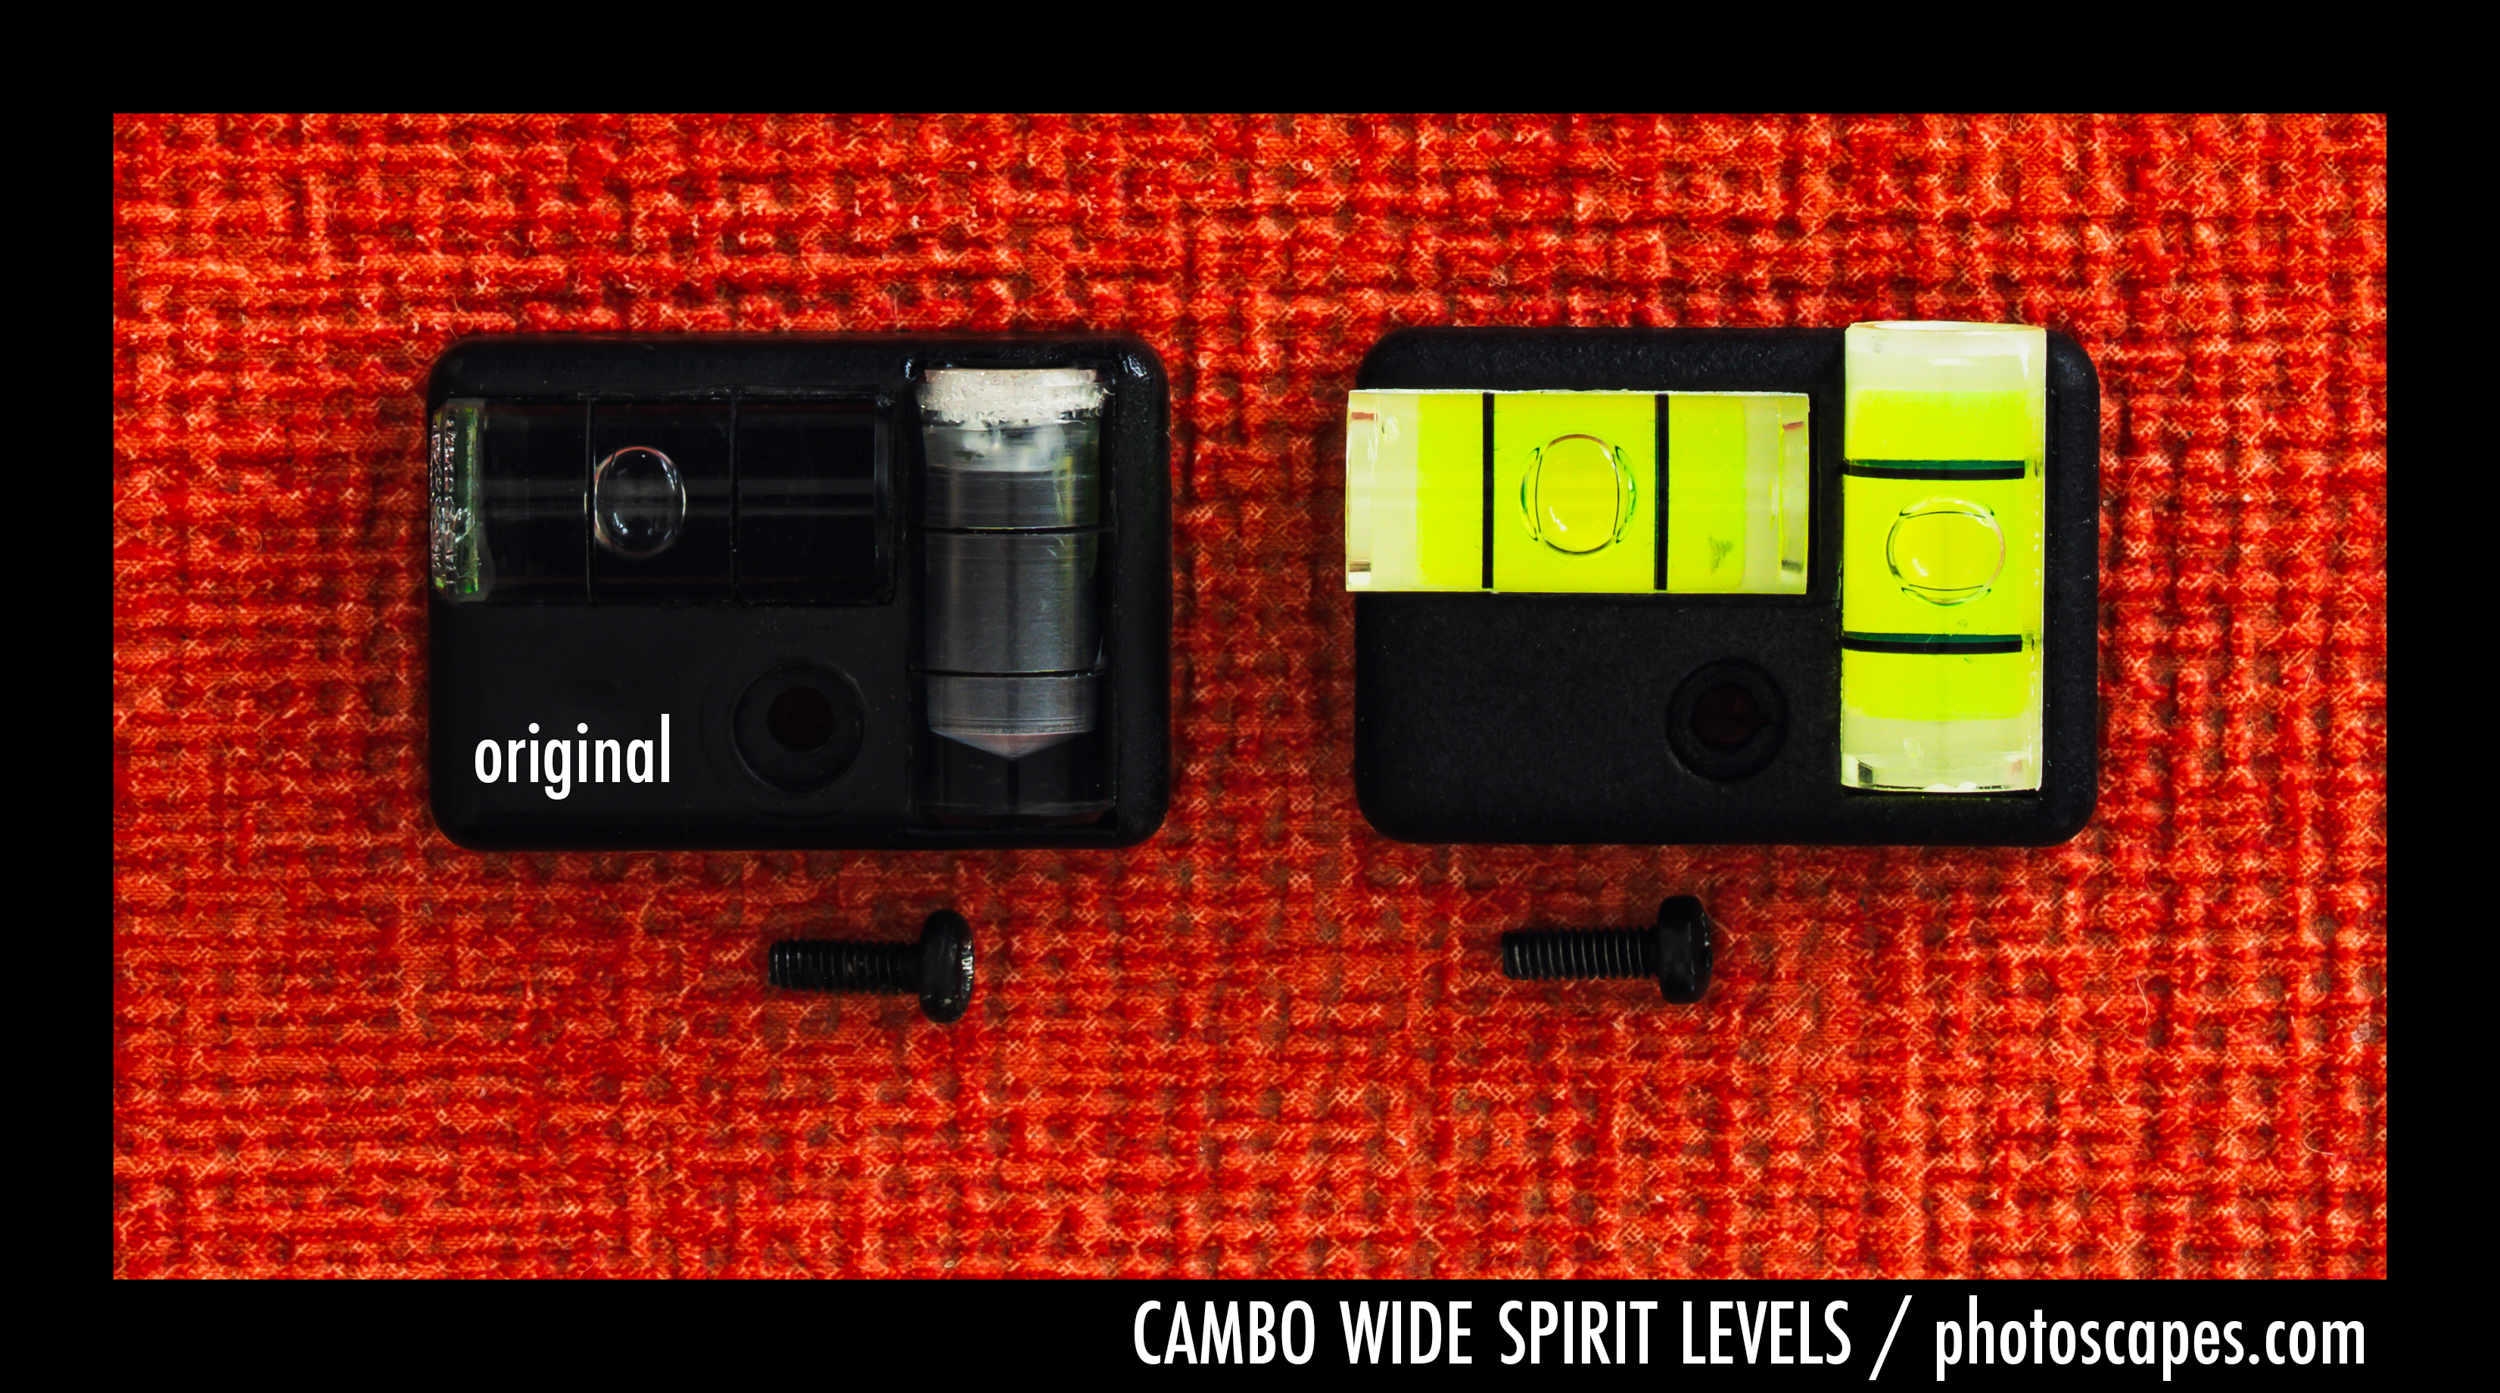
CAMBO WIDE SPIRIT LEVEL REPLACEMENT
CAMBO WIDE SPIRIT LEVEL REPLACEMENT
I recently found an excellent replacement that matches perfectly and is available through the Cambo website. These are updated versions—at least for the two Cambo Wide cameras I own.
In 2025, I was fortunate to find a beautiful Cambo Wide 580 that is, without question, the cleanest example I’ve ever handled for a camera of its age. I was initially interested in the Horseman 6×12 back that came with it, but the body itself turned out to be in better condition than the Cambo I’d been using for years. That made the decision easy.
The only thing I wanted to replace—if possible—was the spirit levels, as one had completely dried out. While using a standard cold-shoe bubble level works just fine, I decided to look for an OEM-style replacement and was happy to discover one still available.
Installation was simple, and the updated version is noticeably easier to see in use. A small upgrade, but a very satisfying one.
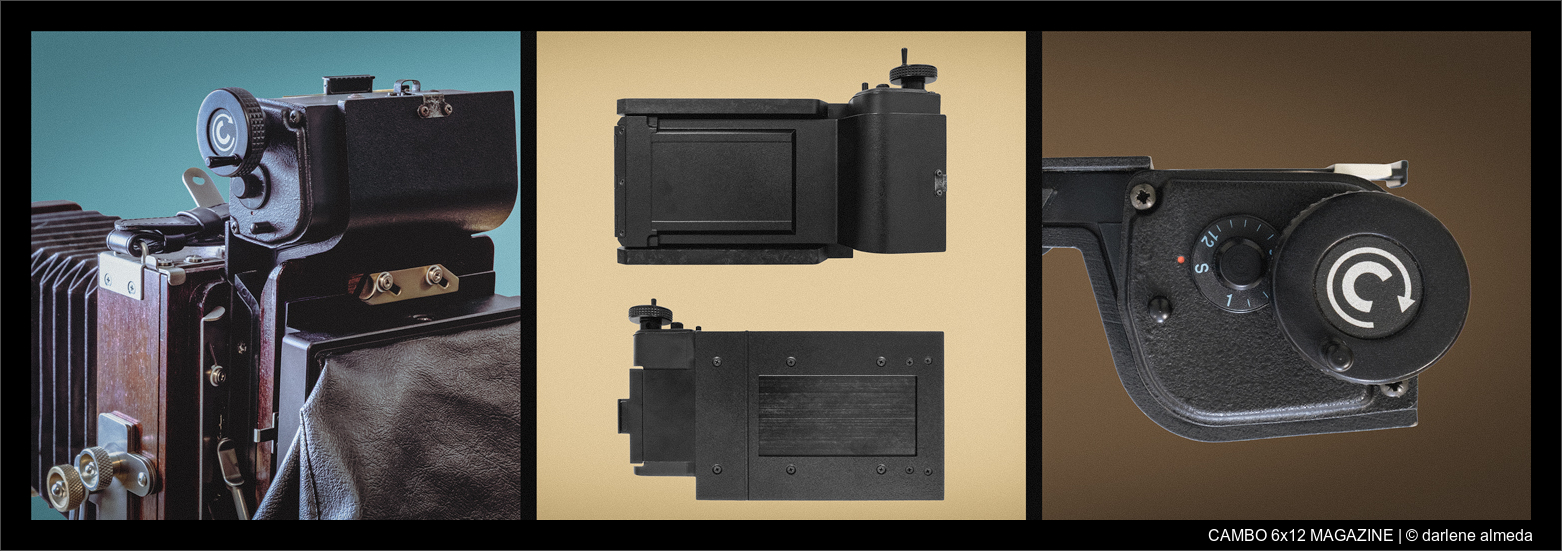
CAMBO 6×12 FILM MAGAZINE
CAMBO 6×12 FILM MAGAZINE
The Cambo 6×12 roll film holders are designed for creating panoramic photography on 4×5 large-format cameras using 120 or 220 film. These backs are favored for offering a wider aspect ratio without requiring larger film formats. In this post, I will discuss why I acquired one, my honest opinion on its operation and the results it has delivered, and show how to load it. [continue]
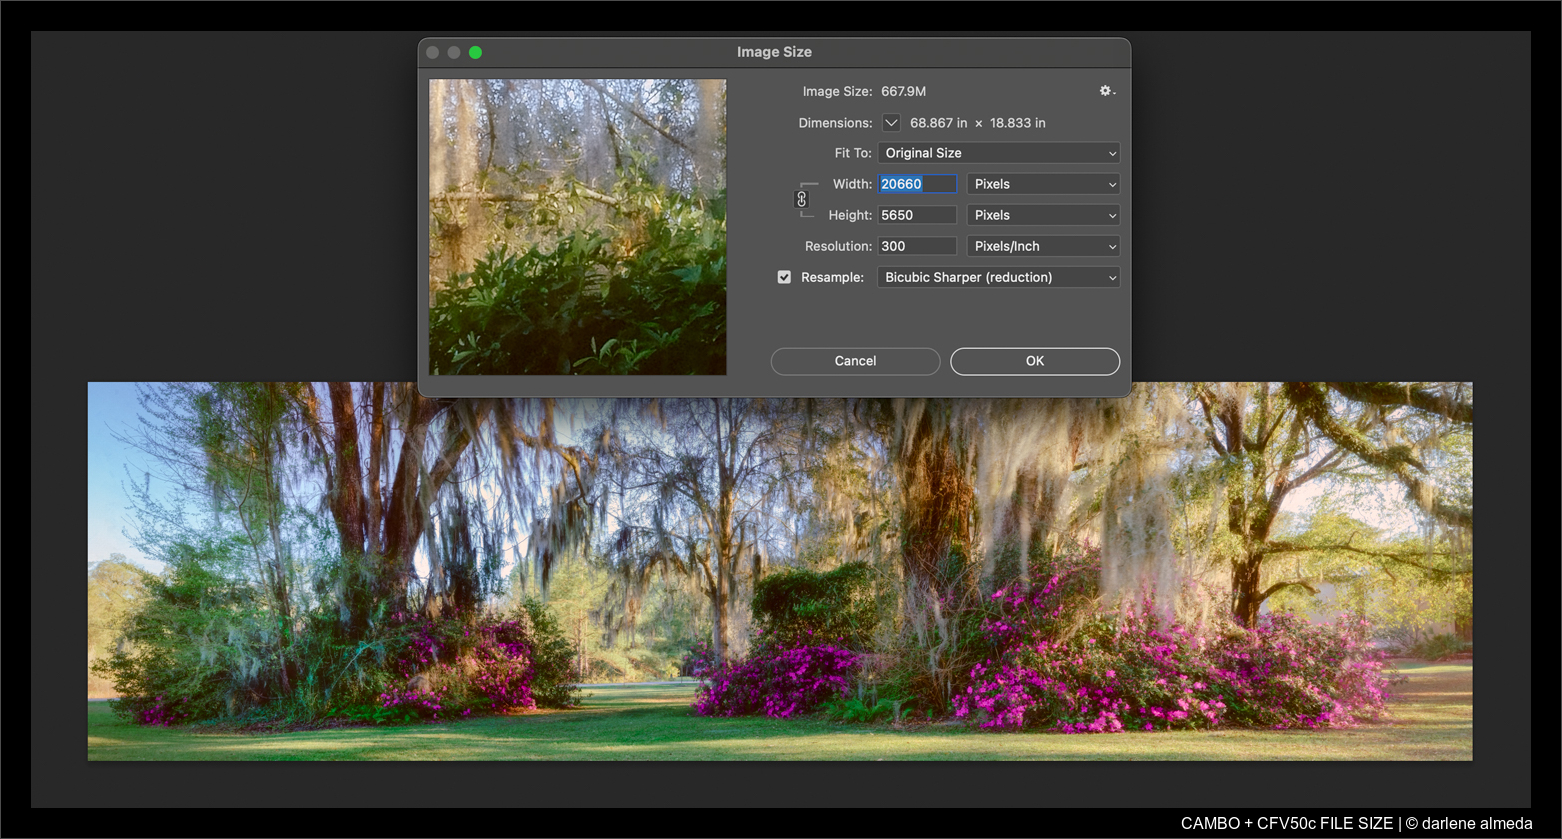
CAMBO WIDE 650 + DIGITAL BACK EXAMPLE
CAMBO WIDE + CFV50c FILE SIZE
The image above was created using a Hasselblad CFV 50c digital back mounted on my CW 650, employing a stitching technique to form a wide panoramic view. This particular outing was my initial digital test with the CW 650, aimed at checking whether the digital sensor’s plane aligned accurately with the camera’s film plane.
The final stitched file measures 68.867 x 18.833 inches, weighing in at 667.9 MB. Stitching requires each frame—or “slice”—to be free of movement within the composition. Even a slight breeze can ruin a sequence, which is why I often default to single-shot captures unless the conditions are perfectly still. But when the wind cooperates, the result is a beautifully detailed digital file made possible by my gear’s unique combination.
If I relied on digital stitching alone for my landscape work, I’d probably return home disappointed more than half the time. Many of the best landscape images are made in weather that’s less than ideal. As any landscape photographer knows, moody skies and shifting light tend to create far more compelling images than cloudless blue. And while I do appreciate good weather—especially after enduring more than my share of hurricanes—it’s the drama that gives landscapes their emotional impact. In that sense, I welcome a little unpredictability from Mother Nature.
Of course, when speed matters—like during those fleeting moments of shifting light—I can shoot quickly with the CW 650 using hyperfocal focusing. When I first received the camera, I ran a full set of tests to determine the lens’s hyperfocal limits at various apertures. That process helped me understand what the camera could do and how to get the most out of it in the field.
Testing is second nature to me, and it’s how I get comfortable with any camera, back, or lens I plan to use seriously. With the CW 650, I found the learning curve refreshingly short. It’s one of the most straightforward 4×5-format cameras I’ve ever used. Its slim, pancake-style body makes it a highly intuitive and field-friendly tool—whether I’m shooting film or stitching digital.
CAMBO WIDE 650 & DIGITAL BACK ADAPTER PLATES
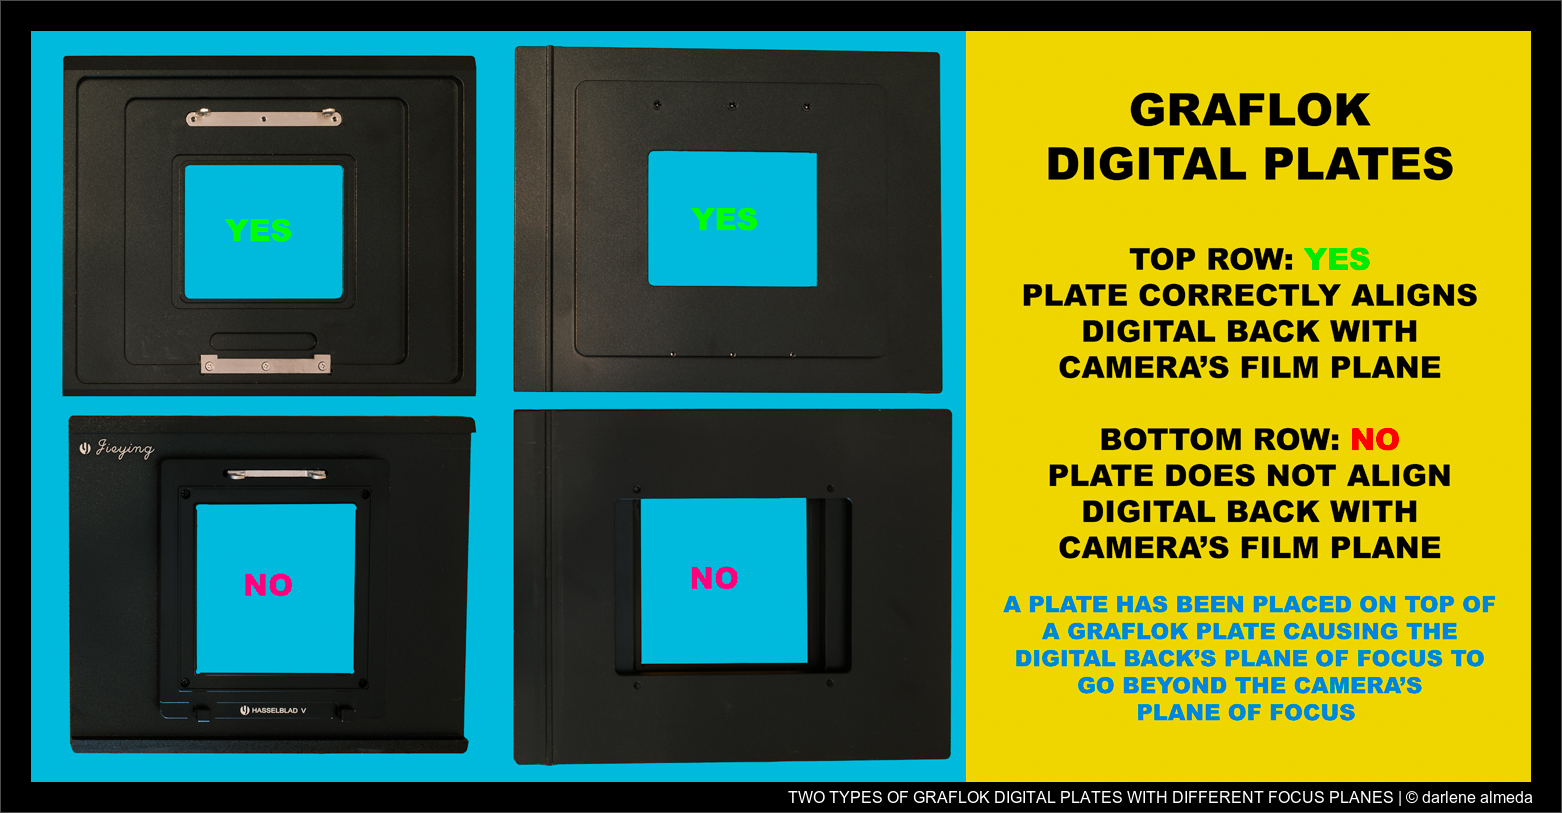
GRAFLOK DIGITAL PLATE ADAPTERS WITH DIFFERENT FOCAL PLANES
Thinking of adding a digital plate to your Cambo Wide? Check with Cambo first to be sure it fits.
The digital plate shown in the green box works perfectly with my CW 650 and was purchased on eBay for use with my Phase One P45. In contrast, the plate shown in the red box—made for my Hasselblad digital back—does not align with the lens’s film plane at infinity. While it works well on my Linhof and Sinar 4×5 view cameras (which allow bellows focusing), it fails on fixed film plane cameras like the CW 650.
I used my Hasselblad CFV-50c with the CW 650 to create the panoramic color image at the bottom of this page. Focus was spot-on, and all the slices stitched cleanly in Lightroom. Later, I decided to dedicate my older P45 digital back to landscape work since it rarely gets used in the studio anymore (which, honestly, is a good thing). The P45 doesn’t have Live View, but that’s fine—I often use hyperfocal or ground glass focusing on the CW 650 anyway.
When I upgraded to the newer CFV II 50c, things got tricky. Even with Live View, I couldn’t achieve sharp focus on the CW 650. The issue turned out to be the newer Graflok-style adapter plate I had purchased for the II 50c. My original Linhof plate didn’t fit the updated prong configuration of the II 50c, so I bought a more affordable plate online—and that’s where the trouble began.
The problematic plate is actually two stacked plates, and this layered design throws off the flange-to-sensor distance. While it works fine on bellows cameras that can adjust focus at the front or rear standard, it fails on fixed-body cameras like the CW 650, where the sensor must align precisely with the film plane.
In contrast, the green-box plate is hollowed out more deeply, allowing the sensor to sit within proper tolerance of the CW 650’s film plane—resulting in correct infinity focus.
This is a cautionary tale: if your helical-mount lens won’t focus to infinity with a digital back or film magazine using a Graflok-style plate, the adapter is likely the issue—not the lens. With Live View becoming more common, some digital plate manufacturers have relaxed tolerances, assuming users will focus manually. But with fixed-body cameras, precision still matters.
If you’re shopping for a digital plate for your Cambo Wide, be wary of “stacked” adapters and always verify the design. I highly recommend contacting Cambo directly—they’ll likely have a plate that works without compromising your setup. And no, I would never modify a helicoid to make up for a plate that’s too thick.
Digital Plate Tips for the Cambo Wide
-
Check Plate Compatibility: Not all Graflok-style digital plates align with the CW 650’s fixed film plane.
-
Avoid Stacked Plates: If your adapter consists of two plates bolted together, it likely won’t allow proper infinity focus.
-
Bellows vs. Fixed-Body: Some plates work fine on bellows cameras, but fail on rigid-body designs.
-
Live View ≠ Flange Accuracy: Just because you can focus doesn’t mean the plate is optically aligned—especially for helical lenses.
-
Best Practice: Contact Cambo directly to source a properly matched digital plate. It’s worth the peace of mind.
CAMBO ACCESSORIES
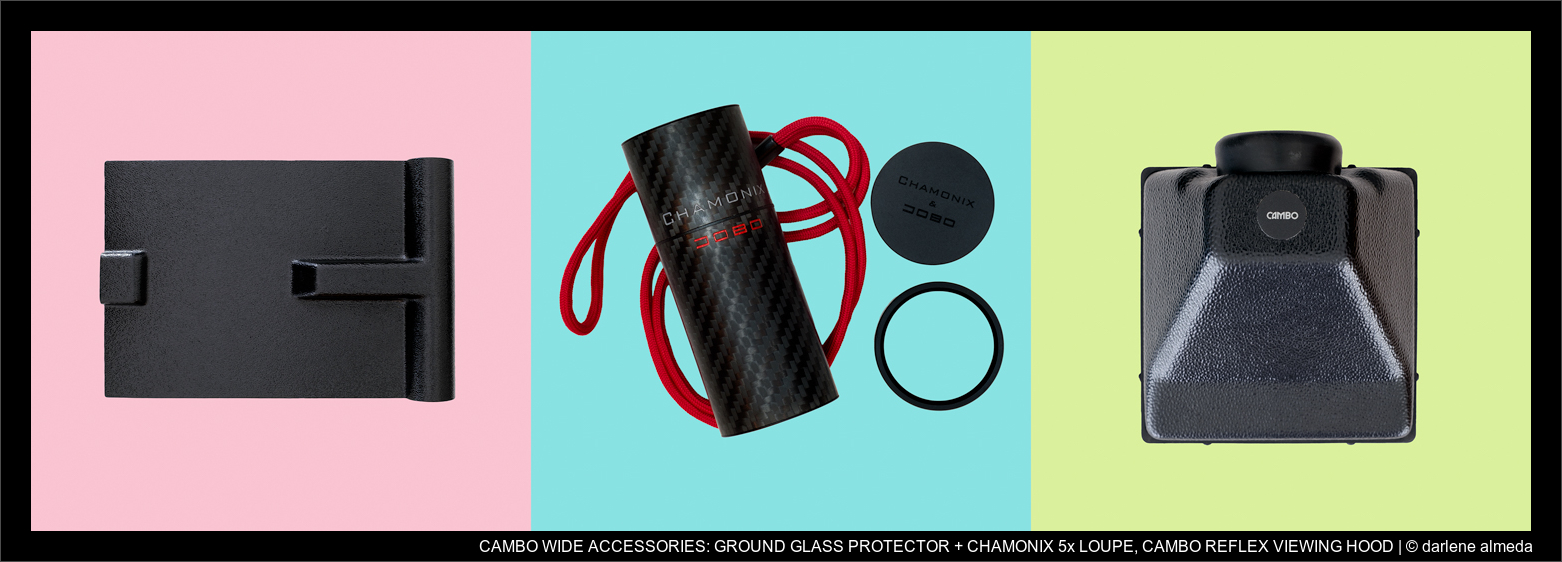
CAMBO GROUND GLASS PROTECTOR + CHAMONIX 5x LOUPE + CAMBO T-20 HOOD
In image #2, you see the Chamonix 5x ground glass viewing loupe. What 4×5″ camera owner doesn’t have a similar tool? It’s essential to have a loupe available, regardless of how many viewfinders you own. I use this loupe for critical focusing with all my 4×5 field cameras and 6×17 Fotoman. It stays in a small pack of tools I keep together and store under the floor of my camper van when traveling. To see the other loupes I use, [POST: Looking Through Loupes | Sep 10, 2024].
As a 4×5″ photographer, I dislike using a dark cloth to view the ground glass. My first experience with this was in photography school, where I learned how a dark cloth could mess up my hair, even when tied back. Later, as I dedicated my spare time to landscape photography, I found another reason it didn’t work. Because I usually shoot alone in the landscape, I must stay alert for potential dangers, whether wild animals, snakes, gators (Florida Girl), or others. With my head under a dark cloth, it feels like burying it in the sand—hardly ideal when you need to be vigilant.
My solution has always been a viewing hood of some type. If possible, I prefer seeing a right-side-up image, though my first viewing hood as a student was the Cambo In-Line Hood, T-21. These are hard to find today and do not provide a right-side-up image, but I would use one if I had it.
The Cambo Reflex Viewing Hood, T-20, shown in image #3, is an excellent option with a right-side-up but backward image. I first used this hood with my Ebony cameras after sending it to them to customize for use with their cameras. It’s lightweight and can rotate from horizontal to vertical. The only issue is that I am not always tall enough to be above the viewing window. I appreciate having the rise on the CW 650 because it allows me to set my tripod at my preferred height and adjust the horizon accordingly.
FOTOMAN 6×12 GRAFLOK VIEWFINDER
FOTOMAN 6X12 GRAFLOK VIEWFINDER
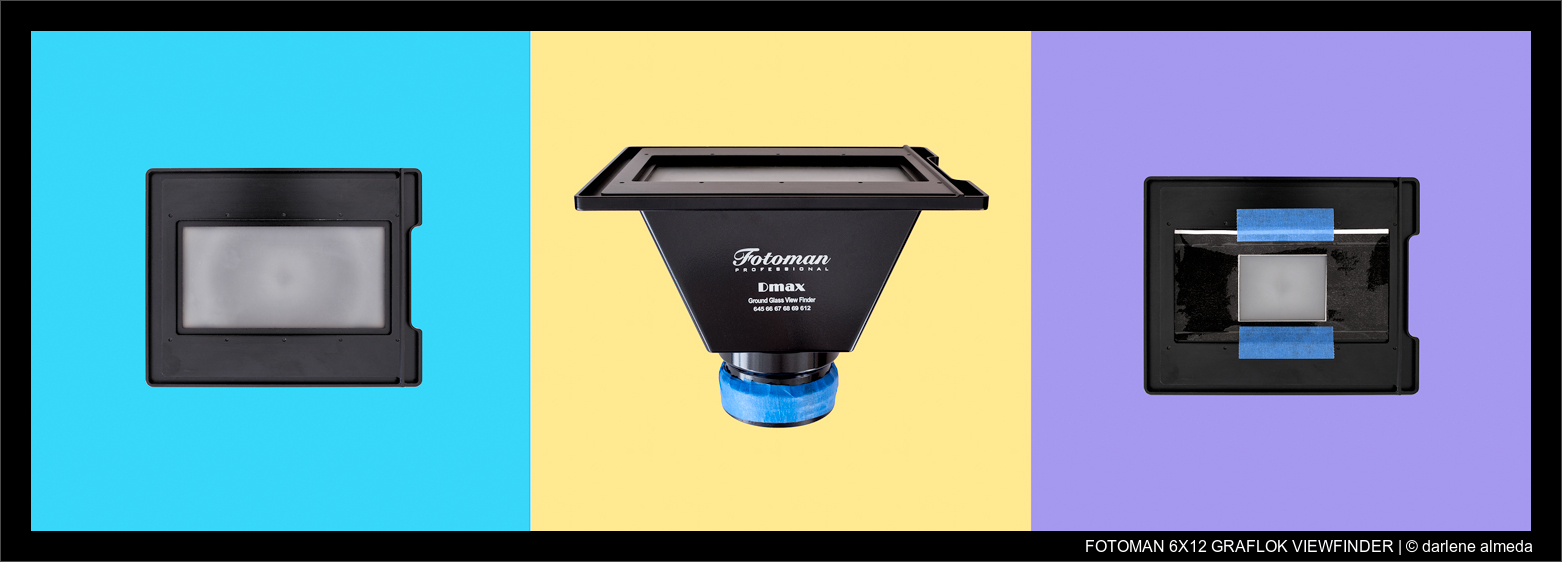
The Fotoman 6×12 Graflok Viewfinder with Ground Glass is marketed for creating 6×12 panoramas, but it has a slight issue: the entire 6×12 scene cannot be seen through the eyepiece. Despite this, its ground glass screen is the brightest I’ve ever used, making it ideal for focusing when using my digital back that lacks Live View. While it doesn’t provide a right-side-up image, it is lightweight and precise enough for my needs.
In image #1 above, you can see the ground glass of the viewfinder with its unique 6×12 window. Image #2 shows the viewfinder with Fotoman’s name, and you can also see where I’ve attached a close-up lens to the viewfinder using blue tape. I don’t know the exact diopter of the lens, but it works perfectly for my vision. Finally, image #3 shows the ground glass of the viewfinder with a mask for my P45 crop.
I made the mask by placing the digital back plate on my printer’s copy glass area and created a copy. After cutting out the mask, I reinforced it with clear packing tape for added strength and durability. Then, I used an X-Acto knife and metal ruler to cut out the window from the mask. This setup works like a charm when I want to shoot with the P45 and the Cambo Wide.
I bought it for US $99 on eBay, and while I do use it, I wish I could see the entire 6×12 view. That would make it an incredible tool!
CAMBO WIDE USERS: DAYI 6×12 FILM MAGAZINE – AVOID
DA YI 6×12 FILM MAGAZINE + MASKS
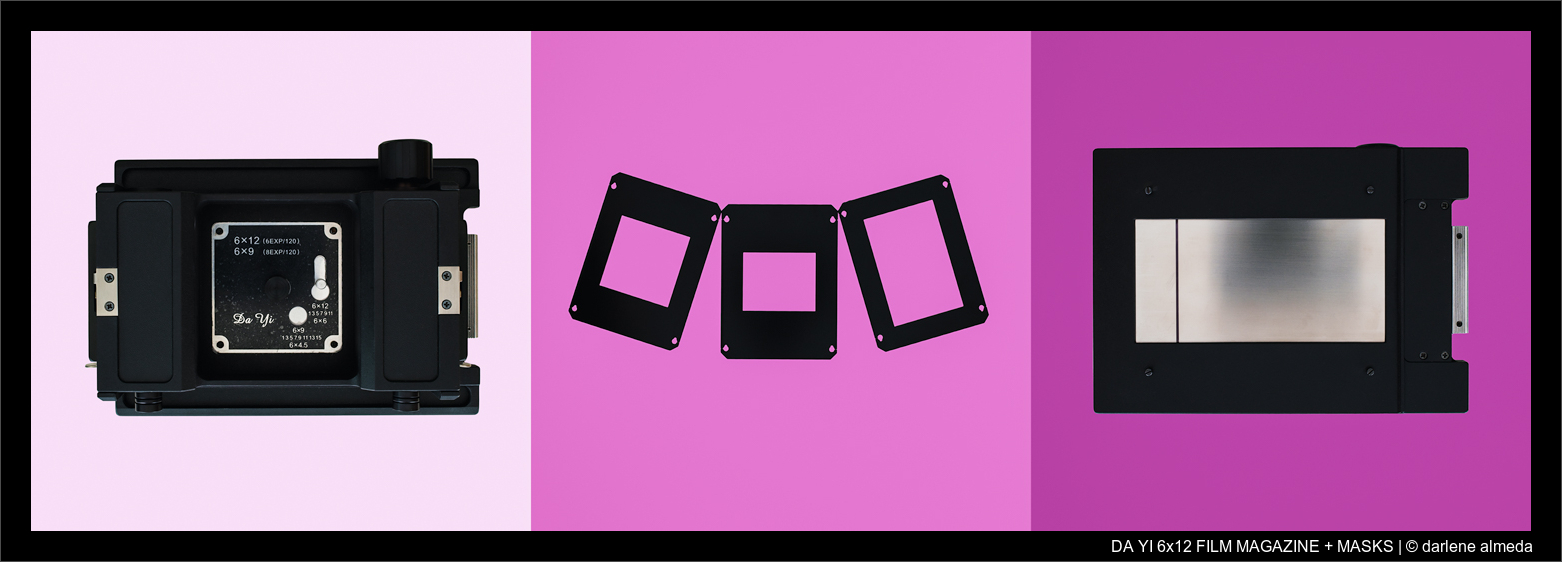
I then acquired a used Da Yi 6×12 film magazine from a seller in the USA. While the Da Yi film magazine produces sharp images, it has been the most challenging film magazine I have ever loaded and unloaded—and I’ve handled many. Despite contacting the manufacturer for loading instructions, I never heard back. I consider this purchase a $450 loss, and I will not resell it because the next owner will have the same problems.
Another issue with this model for Cambo Wide users is that the top right-side winding knob does not clear the Graflok lever. Although I can lock it by pushing the knob out slightly, this is not a permanent solution.
I advise Cambo Wide users looking for a 6×12 magazine to avoid the Da Yi model pictured above. Although it did produce sharp images, it is a headache to load, and its top winding knob will not clear the Graflok lever on your camera.

