PATERSON & JOBO TANKS + VARIOUS FILM SIZES + FILM REELS
TLDR:
This article is about how I process black-and-white (B&W) films. I choose to hand process my 4×5, 120, and the occasional 135 films. Here I will share the processing equipment I have used and what I have been using for the past decade. The following information is not a deep dive into B&W processing, as there is a wealth of information available elsewhere. It is simply a sharing of information on what works for me after I have spent a considerable amount of time polishing my different techniques. Please keep in mind some film processing chemicals can harm humans and the environment, and always educate yourself about the chemicals you will be using before you begin the process. I do not advocate for any particular chemical, process, or equipment; I share how I do it. Let’s get started.
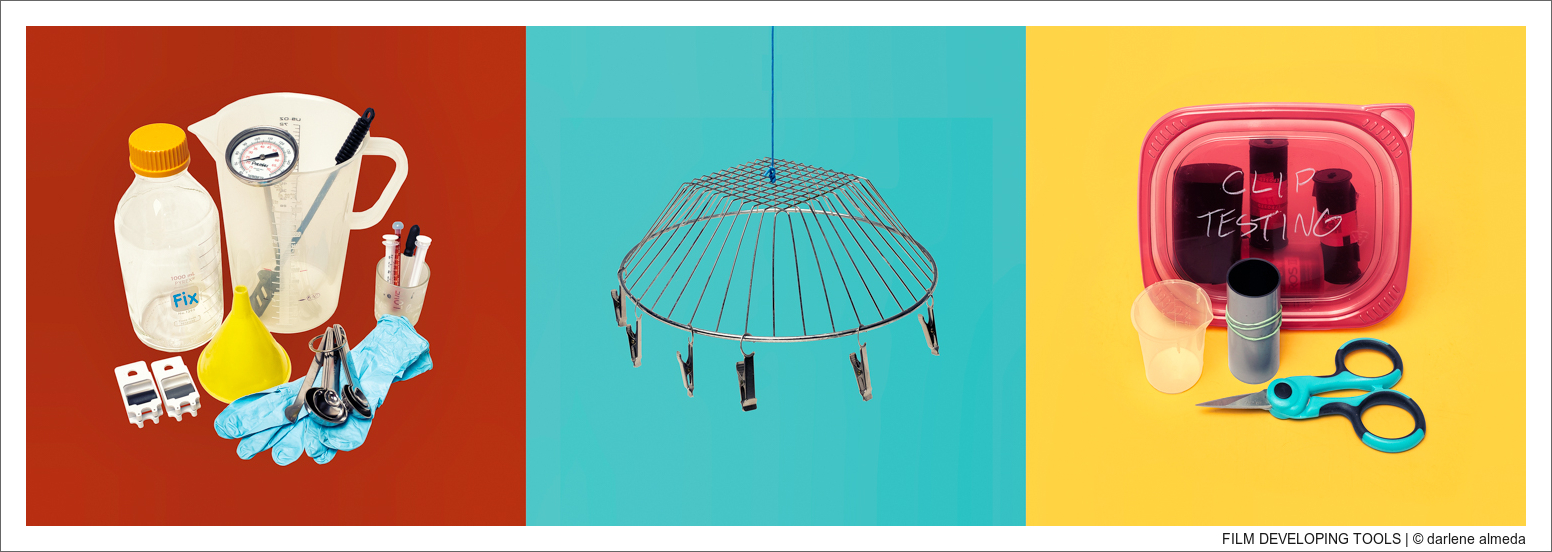
CHEMISTRY TOOLS + FILM HANGER + CLIP TEST FILM
FILM DEVELOPING EQUIPMENT & TOOLS
Developing equipment ranges depending upon your chosen technique, budget, and material preferences. In the distant past, I had a JOBO ATL 1000 automatic film processing unit for my studio business. I processed E-6 (slide film) & C-41 (color print) in it 95% of the time. The other 5% was for B&W 4×5 & 120 films. An occasional client would request B&W prints for corporate portraiture, or an artsy bride requested an additional portrait shoot with a roll or two of B&W. Even though you could have a pro lab make B&W prints from C-41 negatives, I always enjoyed shooting B&W films. After I retired to product photography and digital became good enough, I sold off the ATL 1000 after deciding my color work would be dedicated to digital. I had processed B&W film with the ATL 1000, but I wanted to be more of a craftsperson with B&W and decided to sell the ATL 1000 to a photographer that would use it for more than B&W alone, and glad I did.
Temperature control is vital in color film processing, but not so much in B&W as long as we stay away from extreme temperatures outside of a range that I use of 60°-75°F, and we use a stand or semi-stand method. For the ‘standard methods’ of an 8-12 minute process, try to stay as close to 68°F/20°C as possible. We adjust for temperatures outside the ideal temperature by the adding or subtracting of development times. See what the manufacturer of individual developers recommend for adjustments. The water I use for B&W processing comes from my room-temperature Berkey tank and is usually between 65°-70°F. Depending on the temperature in your living space, it can naturally help or hinder the temperature control for B&W film processing when wanting to develop with room-temperature water.
Read on to learn what tools I use in B&W (and color) film processing. Before you try the B&W film processing methods I outline below, please become familiar with the tools because there is a reason for their purpose. When you can substitute a tool for something you already have, that is cool by me. Remember, we cannot reuse any tool in the film process that comes in contact with chemicals again for anything else. Film processing chemicals can be as dangerous as rat poison, depending on what you decide to use. Read all chemical warning labels and safety sheets, as there is a reason they are supplied. Be smart and dedicate your film processing tools to only film processing and stow them away from items in your kitchen, bathroom, and areas where children and unaware others may come in contact with them.
Being able to process your own film makes for smart financial sense, and having a craft you will learn to enjoy. Just like photography, it has been a lifelong endeavor for me that I love more and more as I grow older. Best of luck to you, and I hope this long article inspires you to continue your film journey.
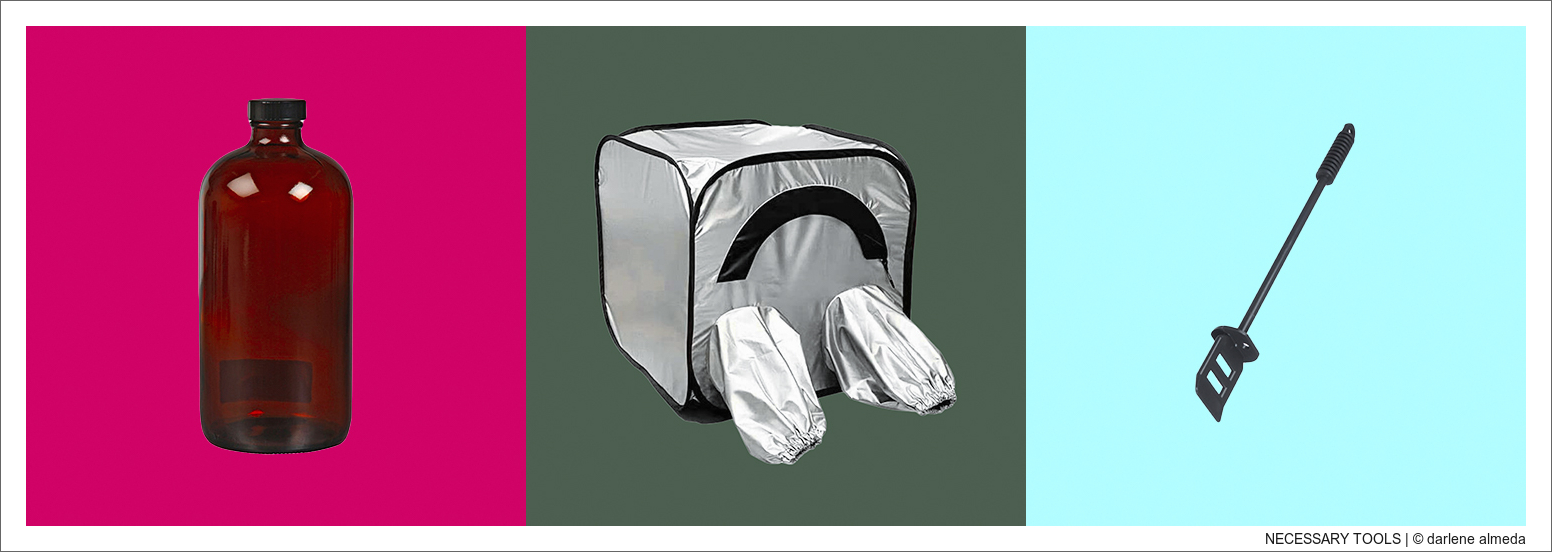
STORAGE BOTTLE + CHANGING TENT + STIRRING PADDLE
TOOLS
- Tanks & Reels
- Mixing Pitchers
- Mixing Stirring Paddles
- Gloves: Nitrile, Vinyl & Anti-Static
- Pyrex 1000 ml Bottle for Fixer
- Thermometer
- Temperature Control
- Film For Clip Tests
- Small Gradient Cups
- Micro-Measuring Syringes
- Funnels
- Coffee Filters
- Measuring Spoons
- Gram Measuring Scale for Dry Chemicals
- Film Clips + Hanger
- Scissors
- Apron
- Timer
- Film Changing Tents, Bags & Spaces
- Safety Goggles
- Darkroom Diary
(1) TANKS & REELS
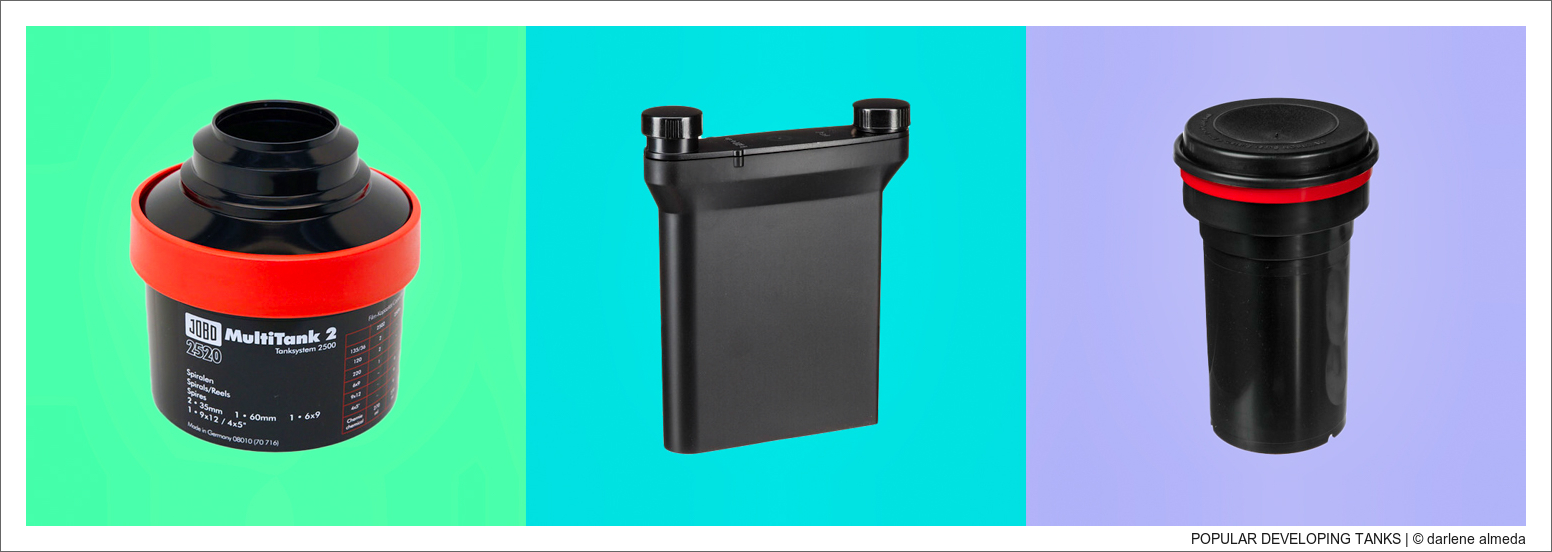
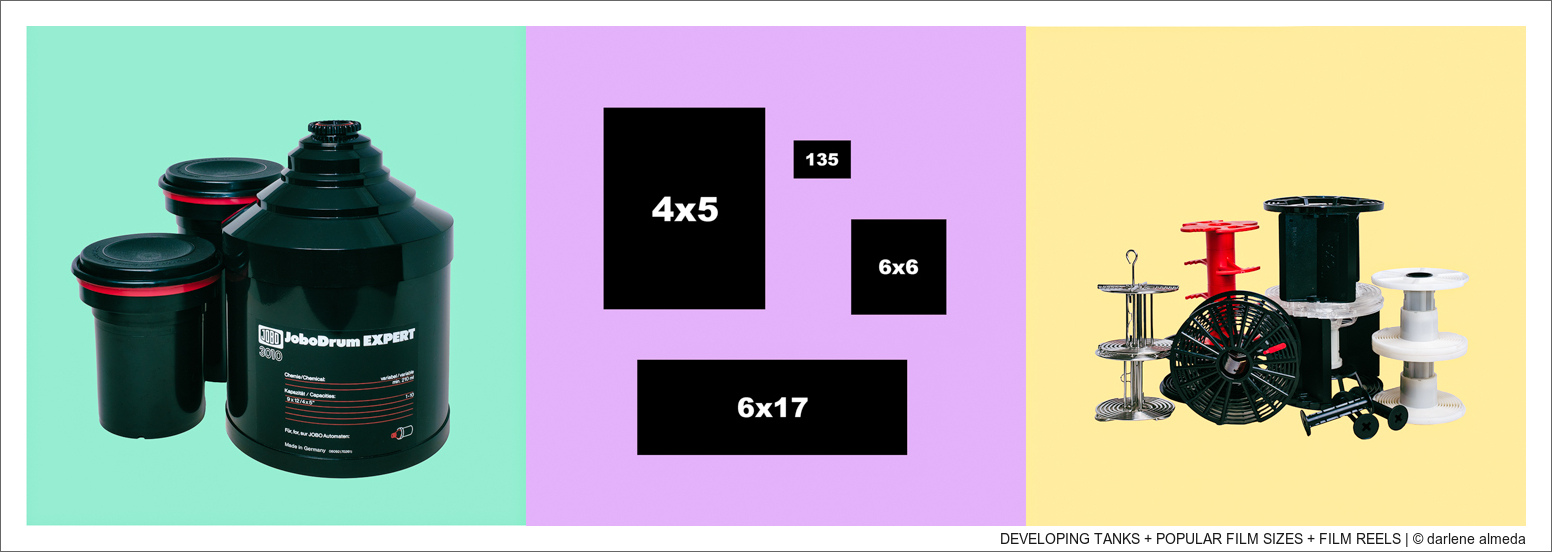
There are various types of tank systems for hand processing made by JOBO, Paterson, and others. I initially tried Hewes metal reels and Samigon metal tanks but eventually settled on plastic reels and tanks made by Paterson. In the Intro graphic, we can see my Paterson tanks (black with red stripe) and my JOBO 3010 tank.
It takes me little time to roll 120/135 films onto plastic reels or 4×5 sheet film in a MOD 54 spindle for 4×5 processing in a Paterson tank. It would be optimal if you could try both metal and plastic. But whatever you try, stay with it until you master it. Most photographers struggle with the first 10 to 20 rolls of film loading onto reels. The most difficult I used in the past was when I processed 4×5 with the JOBO ATL 1000 and this reel system. It encouraged me to proceed with hand processing, but some photographers will praise it.
(2) MIXING PITCHERS
Mixing Pitchers and Graduated Cylinders come in various sizes. I recommend starting with three plastic 1000ml pitchers like the model I use. It is small enough that it does not take up a lot of storage space and allows me to mix up just enough Developer and Fixer for either my larger 1000ml tank or my smaller 500ml tank. One pitcher for the Developer, one for the Fixer, and one for water or resting your stirring paddle. I have also used this 2000ml pitcher for water, but it stays in the cupboard nowadays as I have perfected my technique down to using only the essentials, and the smaller pitchers work just fine for me. Start small and add more pitchers or graduated cylinders as you develop your technique. I prefer pitchers because they have handles.
(3) STIRRING PADDLES
These are the stirring paddles I have used for over a decade. I do not need two, but if I ever lose or damage one, it is good to have a backup. Between stirs, the paddle rests in its pitcher half full with water to prevent contamination between chemistry.
(4) GLOVES: NITRILE, VINYL & ANTI-STATIC
A lot can be said for safety in the darkroom for humans and the environment and the safe handling of film. Consider gloves to be the entry point for safety. Nitrile gloves are the best gloves to wear when handling dangerous film chemistry. Vinyl gloves offer protection, but not like Nitrile gloves can. Still, I have seen photo industry retailers removing Nitrile gloves from their shelves and replacing them with Vinyl; frankly, I do not understand why. Use Nitrile gloves if you choose to use a dangerous developer like Pyro or will handle other dangerous chemicals.
I do have Nitrile and Vinyl gloves available for my use. I only use Nitrile gloves when film developing and Vinyl for cleaning up around my home. When I handle developed film during filing, looking, or digitizing, I wear either white cotton gloves or these Anti-Static gloves. Probably a personal choice, but wear gloves when handling film, including loading 4×5 film holders. My film is clean without the oils from my fingertips, and I want to keep it that way.
(5) PYREX 1000 ML BOTTLE
Because I find the fixers I use to last for multiple developments, I mix a little over 1000 ml and store the solution in a Pyrex 1000 ml Bottle to use again and again. And here is where a coffee filter can come into play as well. When I use the same fixer multiple times alongside the Pyro 510 developer, the fixer accumulates floaties over time. A simple solution that works is running the fixer through a funnel with a coffee filter inserted. The coffee filter collects all the floaties, and the fixer is again clear. I found these Pyrex 1000 ml bottles do a great job storing my fixer safely.
(6) THERMOMETER
Using the correct temperature is vital for correct color film processing, but it can also be for B&W, depending on environmental conditions and the technique you will be using. If you decide to ‘semi-stand’ or ‘stand’ develop B&W film, the temperature may not be as important unless your environmental temperature conditions are extreme. For example, I live in Florida, where the temperature is warmer than it is cooler most of the year. I am conscious of energy spending, so I set my home thermostat on eco mode. That means my home can be down to 60° in colder months and up to 82° in warmer months.
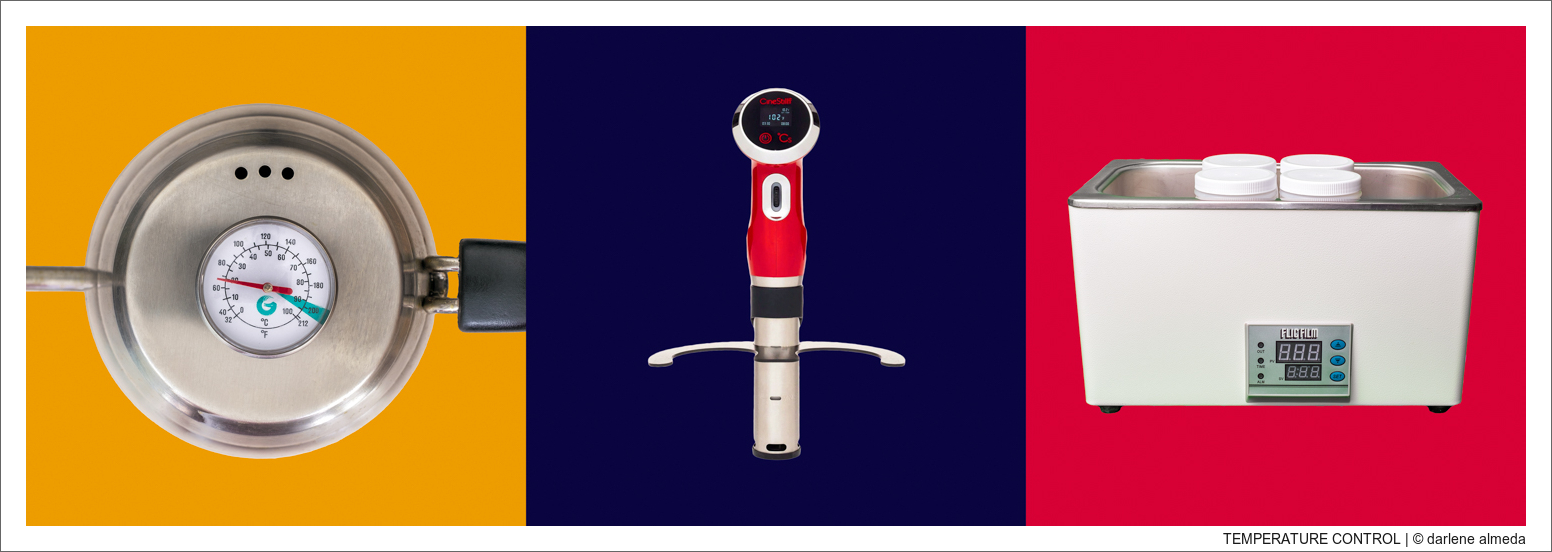
If I need to develop B&W film at 68°, and the water temp is higher, I will fill my pitcher with water, set it in the refrigerator with this thermometer, and wait until it drops to 68°. If my developer needs to be warmer than the current room temperature, I use my kettle with built-in thermometer to bring it up to temp.
My filtered water comes from a Berkey, and at room temperature, I find it works just fine for most of my B&W film processing. I have never had an issue with my filtered water affecting my processing. Suppose I am semi-stand developing (my preferred method) or stand developing (my solution for questionable films). In that case, the temperature in my home is fine, and the developer and water used in the processing of the film do not need adjustment.
KETTLE w/THERMOMETER + CINESTILL TCS 1000 + FLIC FILM WATER BATH
(7) TEMPERATURE CONTROL
What do you do if you need to lower the temperature of your chemistry? As stated above, I place my mixed chemistry in the refrigerator with a thermometer, reading it every 15 minutes. I am sure other photographers may do something similar, like putting the chemistry in a closed bottle in a cool water bath or out in the snow on the balcony for a bit. When I lived in NYC, I did the balcony thing every so often.
What do you do if you need to raise the temperature of your chemistry? I have heard photographers say they microwave the water, but I have never liked the idea; instead, I will use my water kettle with thermometer on the stove, as shown in image #1 above. The temperature on the kettle shows my current room temperature of 68°. I use it to warm the water to mix the chemistry when necessary, not the chemistry itself.
What if you need to warm and hold the temperature of the chemistry for a bit of time? You could heat the water in a jug placed in a large plastic tub with the CineStill Film °Cs Temperature Control System TCS-1000 (image #2) or use the Flic Film Precision Temperature Water Bath (image #3) I have used when warming chemicals for E-6 processing. I have all of the above. My favorite is the water kettle for quick mixes and the Flic Film Precision Temperature Water Bath when I need to control multiple bottles of chemicals for E-6 processing.
(8) FILM FOR CLIP TESTS
Film clip tests aim to see if the developer and fixer are good to use. It is true; you can purchase and mix fresh developer correctly only to find it went bad before you ever received it. Rodinal staying in my cupboard for years, has yet to fail a test, but I know photographers that lost film to fresh Pyro developers. They would have known it was bad beforehand if they had done a clip test before the processing. I never process a film or reuse fixer without doing clip tests first. You can read my steps on how to do it here.
(9) SMALL GRADIENT CUPS
As mentioned in the Film For Clip Tests paragraph above, I use a small gradient cup with a small amount of developer to test a clip of film before the real film goes through the developing process. Measuring small amounts of chemistry before mixing is another purpose for these cups. At first look, I did not know I would find their best place in my film clip tests, but I have.
(10) MICRO-MEASURING SYRINGE
A good measuring device for a very small amount of chemistry is a micro-measuring syringe. You can find micro-measuring syringes in drug stores for measuring medicines or from photochemistry resellers, and they come in various sizes. I keep a few on hand because my chosen developers and preferred developing methods require a small amount of chemistry. You can clean them easily by intaking and releasing water through them a few times.
(11) FUNNELS
Funnels are a necessity for chemical use. Without them, we would have more fluids to clean up than we normally do. When I reuse my Fixer after use, I place the Pyrex storing bottle in the sink, add a funnel, then slowly pour the Fixer from the tank into the funnel, which goes smoothly back into the bottle without difficulty. I could not do that without the funnel. The best funnels for my use are the ones with a mesh screen installed in the spout like this one.
(12) COFFEE FILTERS
Coffee Filters held in a pour-over type of coffeemaker cone work well in cleaning out junk or floaties from your chemistry. I experience this only with fixers because I reuse them. When I need to clean up the fixer, I place a coffee filter in a funnel and pour the fixer from its storage bottle into a fresh storage bottle. I find doing this only once gets rid of the floaties. I need to do it after about three times using the fixer. It seems to be a byproduct of using Pyro 510, from my experience.
(13) MEASURING SPOONS
When we find things around the home we use for tools in film development, we need to keep them stored with our darkroom tools; they become unusable for normal use. If you use measuring spoons for cooking, you DO NOT use them as measuring tools in film development. Some toxins in photochemistry can make you and your loved ones very ill or worse if you are not careful. The easiest way to handle all of this film development business is to handle it like a business expenditure; do not mix personal monies with business spending. The measuring spoons I use for dry chemical measurements were purchased for photochemistry only and stored in my darkroom cabinet.
(14) GRAM MEASURING SCALE FOR DRY CHEMICALS
At some point in your B&W development journey, you may decide to give dry chemicals a try. When you do, measuring spoons and a gram scale will be necessary if you purchase dry chemicals in bulk from Photoformulary, Artcraft, or other vendors. I started down that path only to find I prefer wet chemistry, but I have a dry chemical setup if I return to dry chemistry.
(15) FILM CLIPS + HANGER
After we develop our film, it is wet and delicate to scratching and other types of damage. We will need to hang it to dry in a clean, safe environment. I have never needed a drying cabinet. I find a spare bathroom with a tub and shower is my best drying area, especially since it has a door to keep my two wandering ninja kitties out. After installing this retractable clothesline above the bathtub, I attach roll film using this Paterson Film Clip Set that bites into the film. I prefer them for my heavier roll film as these clips keep them from slipping out of the clip’s grip. They come in two parts: (1) lightweight for the top and (2) weighted for the bottom which keeps the film taut.
For my 4×5 film, I use an old fruit basket made of wire upside down, and these clips as shown in image #2 of this graphic. For photographing purposes, I used a blue cord to hang it; normally, it hangs on the clothesline from a J-shaped hook. If you cannot find a fruit basket as I did at my local Children’s Home Charity Shop (I shop for props at used items stores), then take a look at this film hanger with clips.
(16) SCISSORS
If you need to cut small items with precision, use small precision scissors like these. Never try to cut your film with large scissors, and expect to be precise. That is unless you enjoy the challenge!
(17) APRON
One of the things about working with photochemistry I disliked early on, besides the odors, was how some of the chemistry could stain my clothing. And since I prefer staining developers for my B&W film, I have to wear an apron. The one-size-fits-all aprons are too large for me, but I think having a larger one is better at protecting my clothing than a smaller one. The one I use has a front pocket where I stash my gloves between developing duties.
(18) TIMER
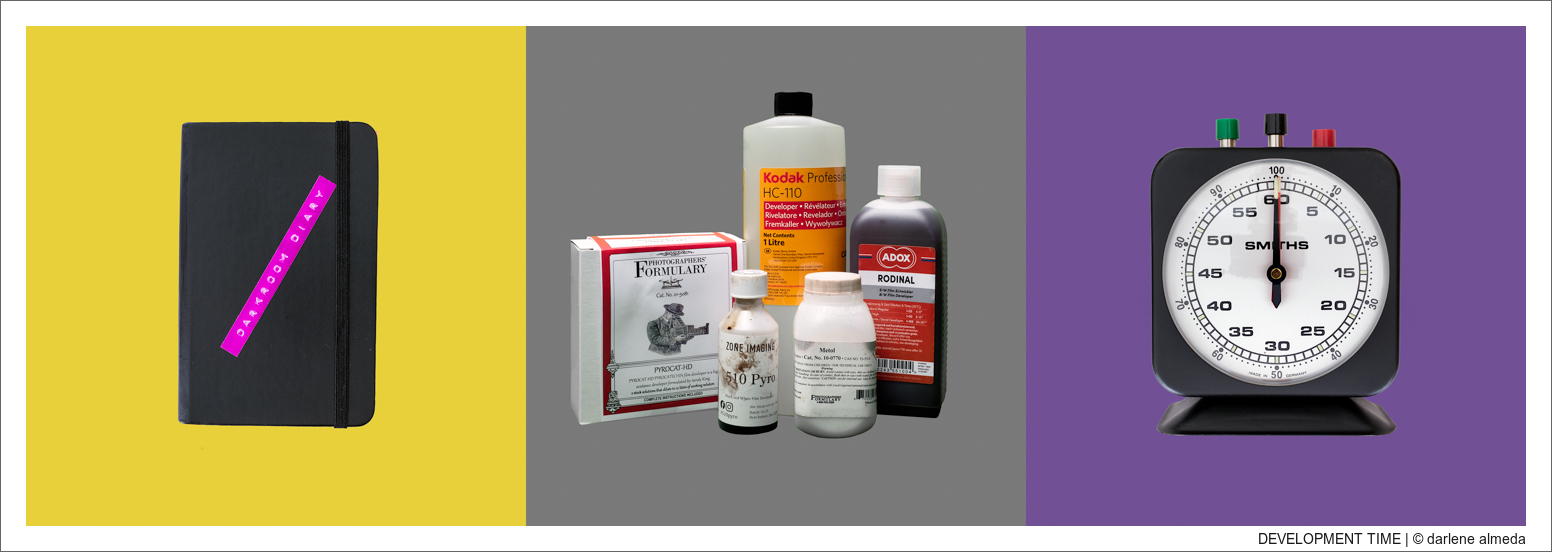
We need to keep track of specific segments of time. I have used an old Smiths timer (image #3) for decades, but after the Amazon Echo device appeared in my home, I will ask ‘Alexa” to set timers, which is very convenient. There are a few phone apps available for darkroom timing as well. Whatever you decide to use, use it.
(19) FILM CHANGING TENTS, BAGS & SPACES
We must find a dark, safe place to remove sheet film from holders and load all film onto reels and inside tanks. I have used more than one changing bag over the years and recommend getting the largest one you can afford if that is your route. My current changing bag is really big. When I use it, I place a box inside the bag holding the tank and components, with the open end facing out. It is easier for my hands to move around and keeps all the items organized, thus the reason for wanting a really big bag.
I also have an Adorama Changing Tent that looks very similar to the Photoflex Film Changing Room, and I like it as long as the environment I am using it in is not too hot, as my hands will sweat under the changing tent in no time. My changing tent breaks down like a large pancake and fits into its case, making it easy to store and carry.
My best changing room is my laundry room. It is small, without windows, and adjacent to the garage, so it is naturally dark. I lay my film holders, reels, and tanks across my washer and dryer and get to work. If you can find a bathroom or room in your home that you can modify as a changing room, it will benefit you. Loading film reels and tanks at night when a room is darkest is also worth considering. Changing tents and bags are good alternatives when we do not have a room option and for loading film holders on the road.
(20) SAFETY GOGGLES
Sometimes I need to wear safety goggles because of the threat of toxic chemicals splashing into my face. If you are using chemistry that suggests you wear eye protection, get yourself a set of safety goggles. They are inexpensive and good to have in your darkroom toolbox.
(21) DARKROOM DIARY
Start writing your steps and experiences down in a small notebook, which will help you concisely learn film development. I have been able to tweak my recipes to the minimum and get consistent results only because of my notebooks. Even though I have been at this for a long time, I still have my Darkroom Diary (#1 image) opened with my steps available for reading as I go through the steps of film development. I have gone through many darkroom diaries over the years, misplacing some, throwing out others, and starting new ones. I included a concise darkroom diary with the sale of my ATL 1000 for the new owner. The ATL 1000 diary was full of recipes for various films and chemicals, a treasure trove of experience documented and passed on. Start writing yours now.
DARKROOM DIARY + DEVELOPERS + DARKROOM TIMER
DEVELOPMENT METHODS
It is my objective to keep all the steps clearly outlined. After a few times of going through a particular development mentally, you should begin to understand the sequence of steps and feel more confident with each new development. You will know when you are ready to start.
I practice three methods of B&W film processing; stand development, semi-stand development, and what I call “the standard way” of developing, which is close to what the manufacturers of developing chemistry recommend for their products. Each method offers something I need or like, so I use each for different reasons.
When students ask me to teach them how to develop B&W films, I usually say, “Let’s do stand development first.” Why stand development? Because, in my opinion, it is a gentler entryway into processing your first few rolls without too much room for error. I hope you choose this method for your first few developments while you develop muscle memory for the entire process.
Rodinal is the developer I choose to use when teaching an introduction to B&W Film Developing. Rodinal is a popular high-acutance B&W developer and is one of the oldest developers used today, being patented on January 27, 1891. It will stay good for years when stored properly. I understand why it has stayed on the popular list because I can depend on Rodinal when another developer can let me down. Rodinal diluted for stand and standard developments is about as inexpensive as we can get for developer costs.
B&W processing will always have the following three chemicals:
- Developer
- Stop Bath
- Fixer
A fourth chemical I use, but not required, is Kodak Photo-Flo. It’s a wetting agent that helps eliminate water spots and streaking on film. I add a few drops in the final rinse. A bottle of Photo-Flo will last a long time as we only need a tiny amount.
There are many ways and many different chemicals for processing B&W film. Once you become proficient with developing, you may want to experiment with what else you can do with B&W processing. A few books I have enjoyed over the years include The Film Developing Cookbook (link is for a newer edition) and Historic Photographic Processes: A Guide to Creating Handmade Photographic Images. Looking through the book, Historic Photographic Processes can shed light on the handmade image processes of the past that continue to be popular today and all that is involved in creating them. The journey into B&W processing is an art and craft; enjoy it!
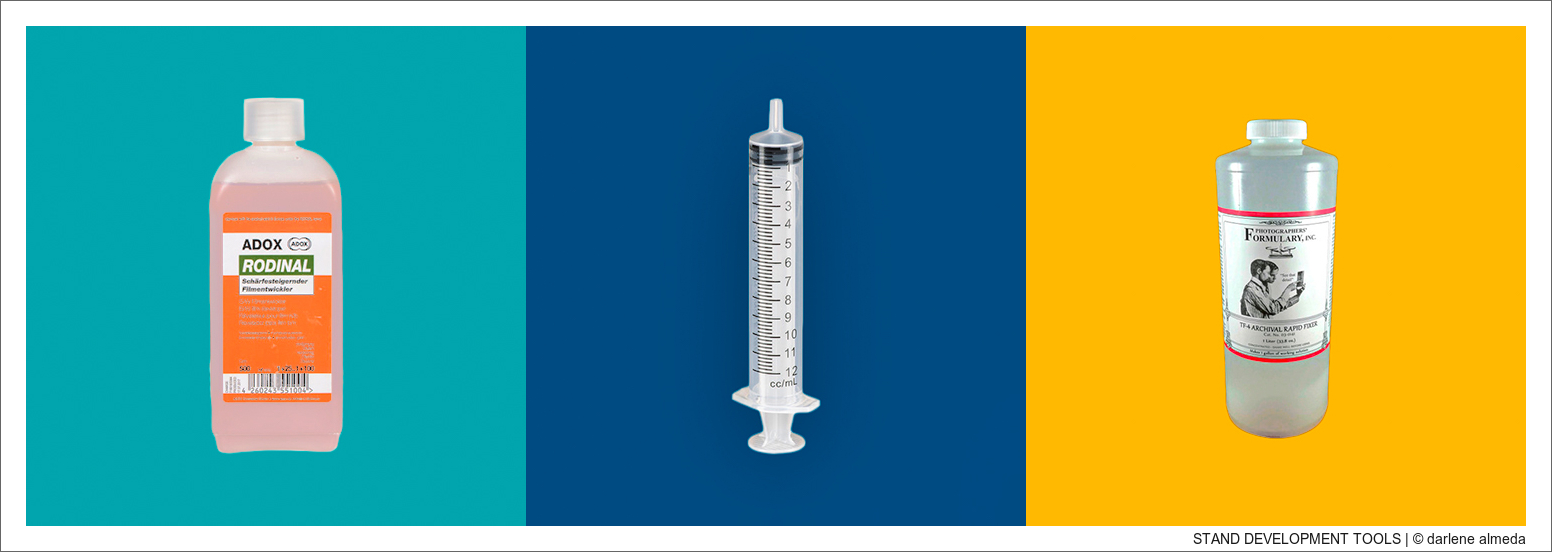
RODINAL + MEASURING SYRINGE + TF-4 ARCHIVAL FIXER
STAND DEVELOPMENT
>>> See the tool list above; most items or a workable substitute will be needed.
For our first stand development, we will use the developer Rodinal. I find stand developing with Rodinal a good choice for films that may have been used in a difficult metering scene or when simultaneously developing various film types with different speeds in the same tank.
Here is a comprehensive list of films with developed times using Rodinal. I highly recommend the various programs from Digital Truth, the company behind The Massive Dev Chart. I have their ‘Massive Dev Chart’ on my iPhone and use it regularly.
For stop bath, it will be water. For a fixer, I recommend TF5, TF4, or Kodakfix. TF4 is what I use most of the time. Water and fixer can be at room temperature as long as the temperature is not extreme. Otherwise, bring the temperatures from 64° to 72°. If you use tap water, fill a few jugs and set them out to reach room temperature.
We are mixing enough chemicals to develop two 120 rolls or two 135 rolls in a Paterson Super System 4 Tank. If you have the MOD 54 reel for 4×5, you could also try developing up to six 4×5 films. Remember, when loading the MOD 54 reel, the film notches should be on the left side and up (opposite from Film Holders) for the film to process properly. Most mistakes made with the MOD 54 are because the film was loaded incorrectly. Ask me how I know this. ????
—
Your Film Should Be Loaded In The Tank & Ready For Development
Step #1
Put on protective gloves. Mix your Fix solution per the label’s instructions for a 1-liter pitcher and set it aside. Next, mix the developer: get two 1-liter pitchers ready for use. Fill one pitcher with 750 ml water and the other with 300 ml. Add two teaspoons or 10 ml of Rodinal to the 750 ml pitcher and stir. Then slowly add water from the 300 ml water pitcher until equalling 1 liter, stirring slowly. Set aside with prepared fixer and a liter of fresh water close to a sink. Place your loaded film tank in the sink to begin the developing process.
—
Step #2
Pre-Wash. Not everyone does this, but I always pre-wash my film, and so should you get in the habit. Pre-washing helps the developer be more effective and ensures contamination on the film or in the tank gets washed out. Fill your tank with room-temperature water, hold for one minute while doing a 30-second agitation within the minute, then dump, fill, and repeat. Do this for five minutes. The water may have a purple, blue, green, or magenta color, gradually looking weaker with each dump & fill. This is why we pre-wash, so these colored dyes don’t end up in the developer!
—
Step #3
Add Developer:
Pour the Rodinal mix into the tank
Agitate gently for 1 minute, and tap the tank three times (3x) to release air bubbles
Set a 30-minute timer and walk away
When the 30-minute timer goes off, gently agitate for 15-30 seconds, tap 3x
Set a 30-minute timer and walk away
When the 30-minute timer goes off: pour the developer down the drain
It is time for the water stop bath
—
Step #4
Stop Bath:
Fill the tank with water
Agitate for 20 seconds
Dump (do this 3x)
It takes about 1 minute to complete the stop bath
Time for Fixer!
—
Step #5
Fix:
Set a 5-minute timer, and when ready, begin:
Pour the Fixer into the tank, constantly agitate for 1 minute, tap the tank three times to release air bubbles, and wait …
At 2 minutes, agitate for 10 secs, tap 3x, set down
At 3 minutes, agitate for 10 secs, tap 3x, set down
At 4 minutes, agitate for 10 secs, tap 3x, set down
At 5 minutes, time for the final wash
NOTE: If you plan to reuse the fixer, place a funnel and storage bottle in the sink and dump the fixer from the tank into the bottle. Tighten the bottle cap and store it. Do a film clip test on the fixer just before using it.
—
Step #6
Final Wash:
Fill tank, dump
Fill tank + 5 inversions, dump
Fill tank + 10 inversions, dump
Fill tank + 20 inversions, dump
Finished: Open the tank, look at the film & hang it to dry!
JOBO 2520 + STEARMAN PRESS SP-445 + PATERSON SUPER SYSTEM
SEMI-STAND DEVELOPMENT
>>> See the tool list above; most items or a workable substitute will be needed.
Semi-stand is my usual development method with a Pyro developer. For our first semi-stand development, we will use Rodinal.
For stop bath, it will be water. For a fixer, I recommend TF5, TF4, or Kodakfix. TF4 is what I use most of the time. Water and fixer can be at room temperature as long as the temperature is not extreme. Otherwise, bring the temperatures from 64° to 72°. If you use tap water, fill a few jugs and set them out to obtain room temperature.
We are mixing enough chemicals to develop two 120 rolls or two 135 rolls in a Paterson Super System 4 Tank. If you have the MOD 54 reel for 4×5, you could also try developing up to six 4×5 films. Remember, when loading the MOD 54 reel, the film notches should be on the left side and up (opposite from Film Holders) for the film to process properly. Most mistakes made with the MOD 54 are because the film was loaded incorrectly. Ask me how I know this. ????
—
Your Film Should Be Loaded In The Tank & Ready For Development
Step #1
Put on protective gloves. Mix your Fix solution per the label’s instructions for a 1-liter pitcher and set it aside. Next, mix the developer: get two 1-liter pitchers ready for use. Fill one pitcher with 750 ml water and the other with 300 ml. Add two teaspoons or 10 ml of Rodinal to the 750 ml pitcher and stir. Then slowly add water from the 300 ml water pitcher until equalling 1 liter, stirring slowly. Set aside with prepared fixer and a liter of fresh water close to a sink. Place your loaded film tank in the sink to begin the developing process.
—
Step #2
Pre-Wash. Not everyone does this, but I always pre-wash my film, and so should you get in the habit. Pre-washing helps the developer be more effective and ensures contamination on the film or in the tank gets washed out. Fill your tank with room-temperature water, hold for one minute while doing a 30-second agitation within the minute, then dump, fill, and repeat. Do this for five minutes. The water may have a purple, blue, green, or magenta color, gradually looking weaker with each dump & fill. This is why we pre-wash, so these colored dyes don’t end up in the developer!
—
Step #3
Add Developer:
Pour the Rodinal mix into the tank
Agitate constantly for 2 minutes, then tap tank three times (3x) to release air bubbles
Set a 7.5-minute timer and walk away
When timer goes off, agitate for 20 seconds, tap 3x
Set a 7.5-minute timer and walk away
When timer goes off, agitate for 20 seconds, tap 3x
Set a 7.5-minute timer and walk away
When timer goes off: pour the developer down the drain
Time for the Stop Bath
—
Step #4
Stop Bath:
Fill the tank with water
Agitate for 20 seconds
Dump (do this 3x)
It takes about 1 minute to complete the stop bath
Time to fix!
—
Step #5
Fix:
Set a 5-minute timer, and when ready, begin:
Pour the Fixer into the tank, constantly agitate for 1 minute, tap the tank three times (3x) to release air bubbles, and wait …
At 2 minutes, agitate for 10 secs, tap 3x, set down
At 3 minutes, agitate for 10 secs, tap 3x, set down
At 4 minutes, agitate for 10 secs, tap 3x, set down
At 5 minutes, time for the final wash
NOTE: If you plan to reuse the fixer, place a funnel and storage bottle in the sink and dump the fixer from the tank into the bottle. Tighten the bottle cap and store it. Do a film clip test on the fixer just before using it.
—
Step #6
Final Wash:
Fill tank, dump
Fill tank + 5 inversions, dump
Fill tank + 10 inversions, dump
Fill tank + 20 inversions, dump
Finished: Open the tank, look at the film & hang it to dry!
PATERSON PLASTIC REEL + MOD54 4×5 REEL + METAL 120 REEL
STANDARD DEVELOPMENT
>>> See the tool list above; most items or a workable substitute will be needed.
We will use Rodinal for this standard (aka normal) way of developing B&W film. Here is a comprehensive list of films with developed times using Rodinal.
An example of using Rodinal for a standard development of 120 Tri-X 400 film is as follows:
I rate my Tri-X 400 at ISO 200. The chart I linked above shows that the dilution will be 1 + 50. This means 1 part Rodinal (R) per 50 parts of water (W) or 10 ml (R) + 490 ml (W) = 500 ml of developer, enough for one roll of 120/135. But, we will be doing two rolls of 120, so the recipe doubles to 20 ml (R) + 980 ml (w).
For stop bath, it will be water. For a fixer, I recommend TF5, TF4, or Kodakfix. TF4 is what I use most of the time. Water and fixer can be at room temperature as long as the temperature is not extreme. Otherwise, bring the temperatures from 64° to 72°. If you use tap water, fill a few jugs and set them out to obtain room temperature.
We are mixing enough chemicals to develop two 120 rolls or two 135 rolls in a Paterson Super System 4 Tank. If you have the MOD 54 reel for 4×5, you could also try developing up to six 4×5 films. Remember, when loading the MOD 54 reel, the film notches should be on the left side and up (opposite from Film Holders) for the film to process properly. Most mistakes made with the MOD 54 are because the film was loaded incorrectly. Ask me how I know this. ????
—
Your Film Should Be Loaded In The Tank & Ready For Development
Step #1
Put on protective gloves. Mix your Fix solution per the label’s instructions for a 1-liter pitcher and set it aside. Next, mix the developer: get two 1-liter pitchers ready for use. Fill one pitcher with 750 ml water and the other with 300 ml. Add four teaspoons or 20 ml of Rodinal to the 750 ml pitcher and stir. Then slowly add water from the 300 ml water pitcher until equalling 1 liter, stirring slowly. Set aside with prepared fixer and a liter of fresh water close to a sink. Place your loaded film tank in the sink to begin the developing process.
—
Step #2
Pre-Wash. Not everyone does this, but I always pre-wash my film, and so should you get in the habit. Pre-washing helps the developer be more effective and ensures contamination on the film or in the tank gets washed out. Fill your tank with room-temperature water, hold for one minute while doing a 30-second agitation within the minute, then dump, fill, and repeat. Do this for five minutes. The water may have a purple, blue, green, or magenta color, gradually looking weaker with each dump & fill. This is why we pre-wash, so these colored dyes don’t end up in the developer!
—
Step #3
Add Developer:
Set a 9-minute timer, and when ready, begin:
Pour the Rodinal mix into the tank, constantly agitate for 1 minute, tap the tank three times (3x) to release air bubbles, and wait …
At 2 minutes, agitate for 10 secs, tap 3x, set down
At 3 minutes, agitate for 10 secs, tap 3x, set down
At 4 minutes, agitate for 10 secs, tap 3x, set down
At 5 minutes, agitate for 10 secs, tap 3x, set down
At 6 minutes, agitate for 10 secs, tap 3x, set down
At 7 minutes, agitate for 10 secs, tap 3x, set down
At 8 minutes, agitate for 10 secs, tap 3x, set down
At 9 minutes, time for the water stop bath, dump developer
—
Step #4
Stop Bath:
Fill the tank with water
Agitate for 20 seconds
Dump (do this 3x)
It takes about 1 minute to complete the stop bath.
Time for Fixer!
—
Step #5
Fix:
Set a 5-minute timer, and when ready, begin:
Pour the Fixer into the tank, constantly agitate for 1 minute, tap the tank three times (3x) to release air bubbles, and wait …
At 2 minutes, agitate for 10 secs, tap 3x, set down
At 3 minutes, agitate for 10 secs, tap 3x, set down
At 4 minutes, agitate for 10 secs, tap 3x, set down
At 5 minutes, time for the final wash
NOTE: If you plan to reuse the fixer, place a funnel and storage bottle in the sink and dump the fixer from the tank into the bottle. Tighten the bottle cap and store it. Do a film clip test on the fixer just before using it.
—
Step #6
Final Wash:
Fill tank, dump
Fill tank + 5 inversions, dump
Fill tank + 10 inversions, dump
Fill tank + 20 inversions, dump
Finished: Open the tank, look at the film & hang it to dry!

