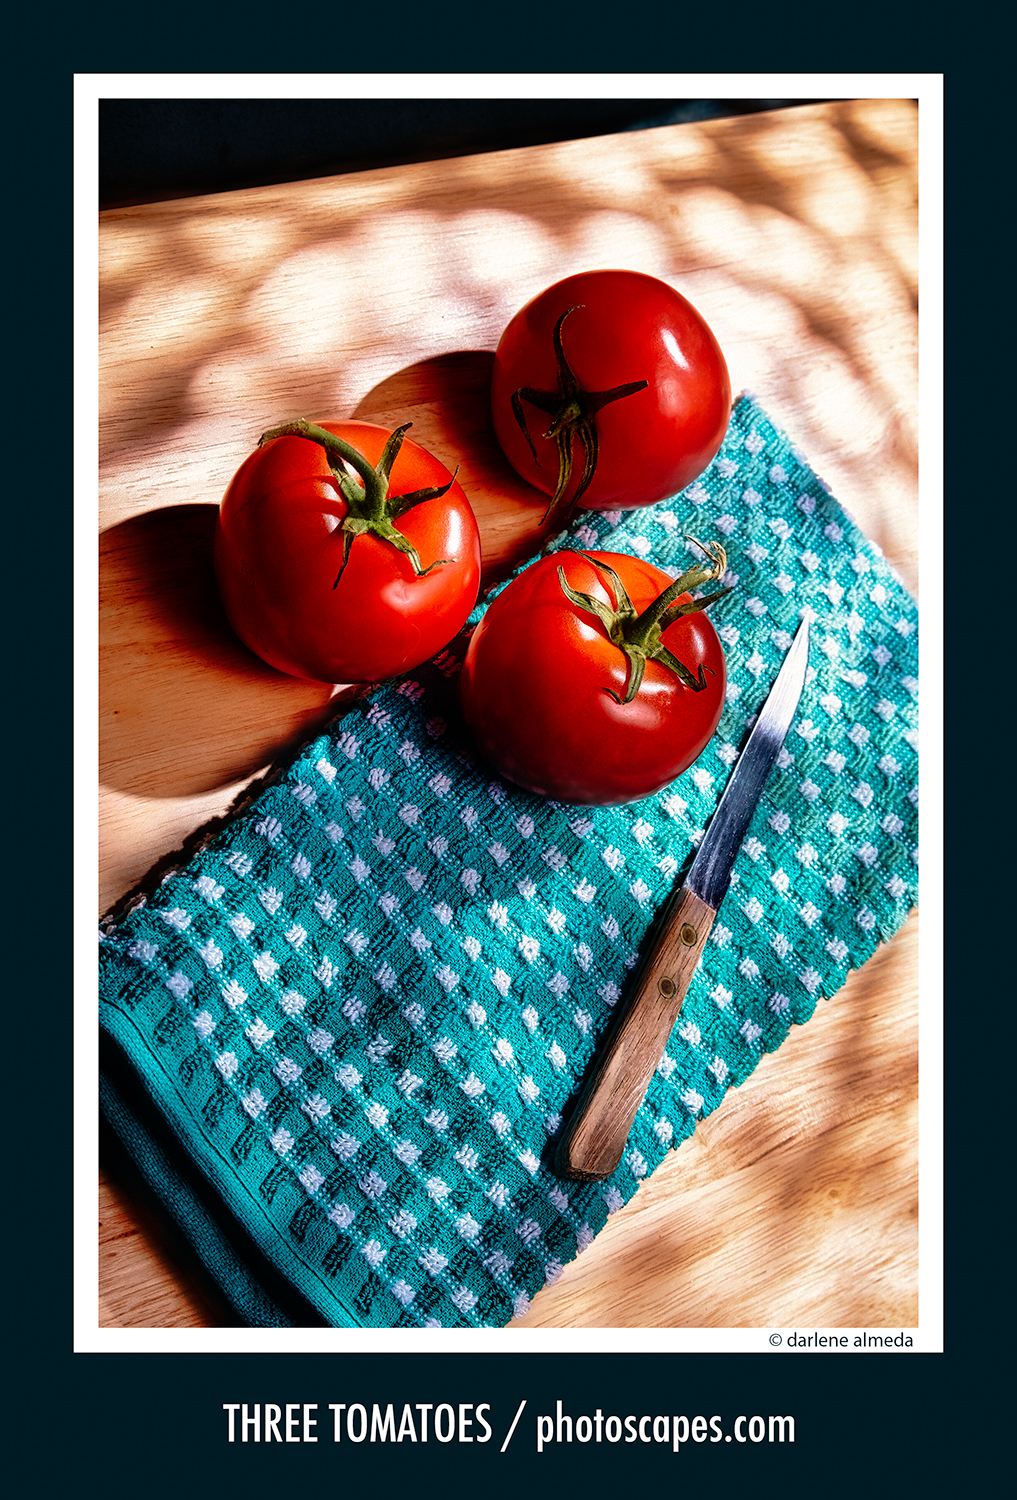
In this Behind the Lens post, I got a little creative with some tomatoes—three, to be exact. Using an optical snoot, I gave them the moody spotlight usually reserved for jazz singers or film noir detectives. Why? Because tomatoes deserve their time to shine. I grew up eating tomato sandwiches, and to this day, they’re still a favorite.
What’s an Optical Snoot (and why is it so cool)?
An optical snoot is basically a fancy flashlight for grown-up photographers. It’s a light modifier that I attach to my Profoto mono lights, and it lets me do something magical: control light with laser-like precision. Think of it as the stage spotlight of the photo world—only instead of shining on a Broadway star, it’s shining on three tomatoes.
The snoot works like a mini projector. It uses a lens—yes, an actual lens, just like on your camera—to focus the light into a tight, shapely beam. No more light spilling everywhere like a toddler with a juice box. With a snoot, I get to decide exactly where the light goes.
Now, about those shadows…
See that beautiful dappled pattern across the tomatoes and towel? That’s not a happy accident—or the ghost of a Venetian blind. It’s the result of placing a gobo (short for “GOes Before Optics”) into the snoot. A gobo is a metal or glass stencil that shapes the light before it hits the lens. This particular one mimics soft window shadows—like sunlight peeking through curtains or tree branches.
So, instead of waiting around for the perfect patch of natural light to wander by, I created it right in my studio. All hail the illusion of sunlight—brought to you by a snoot, a gobo, and a little photographic mischief.
Studio Setting
THREE TOMATOES LIGHTING DIAGRAM
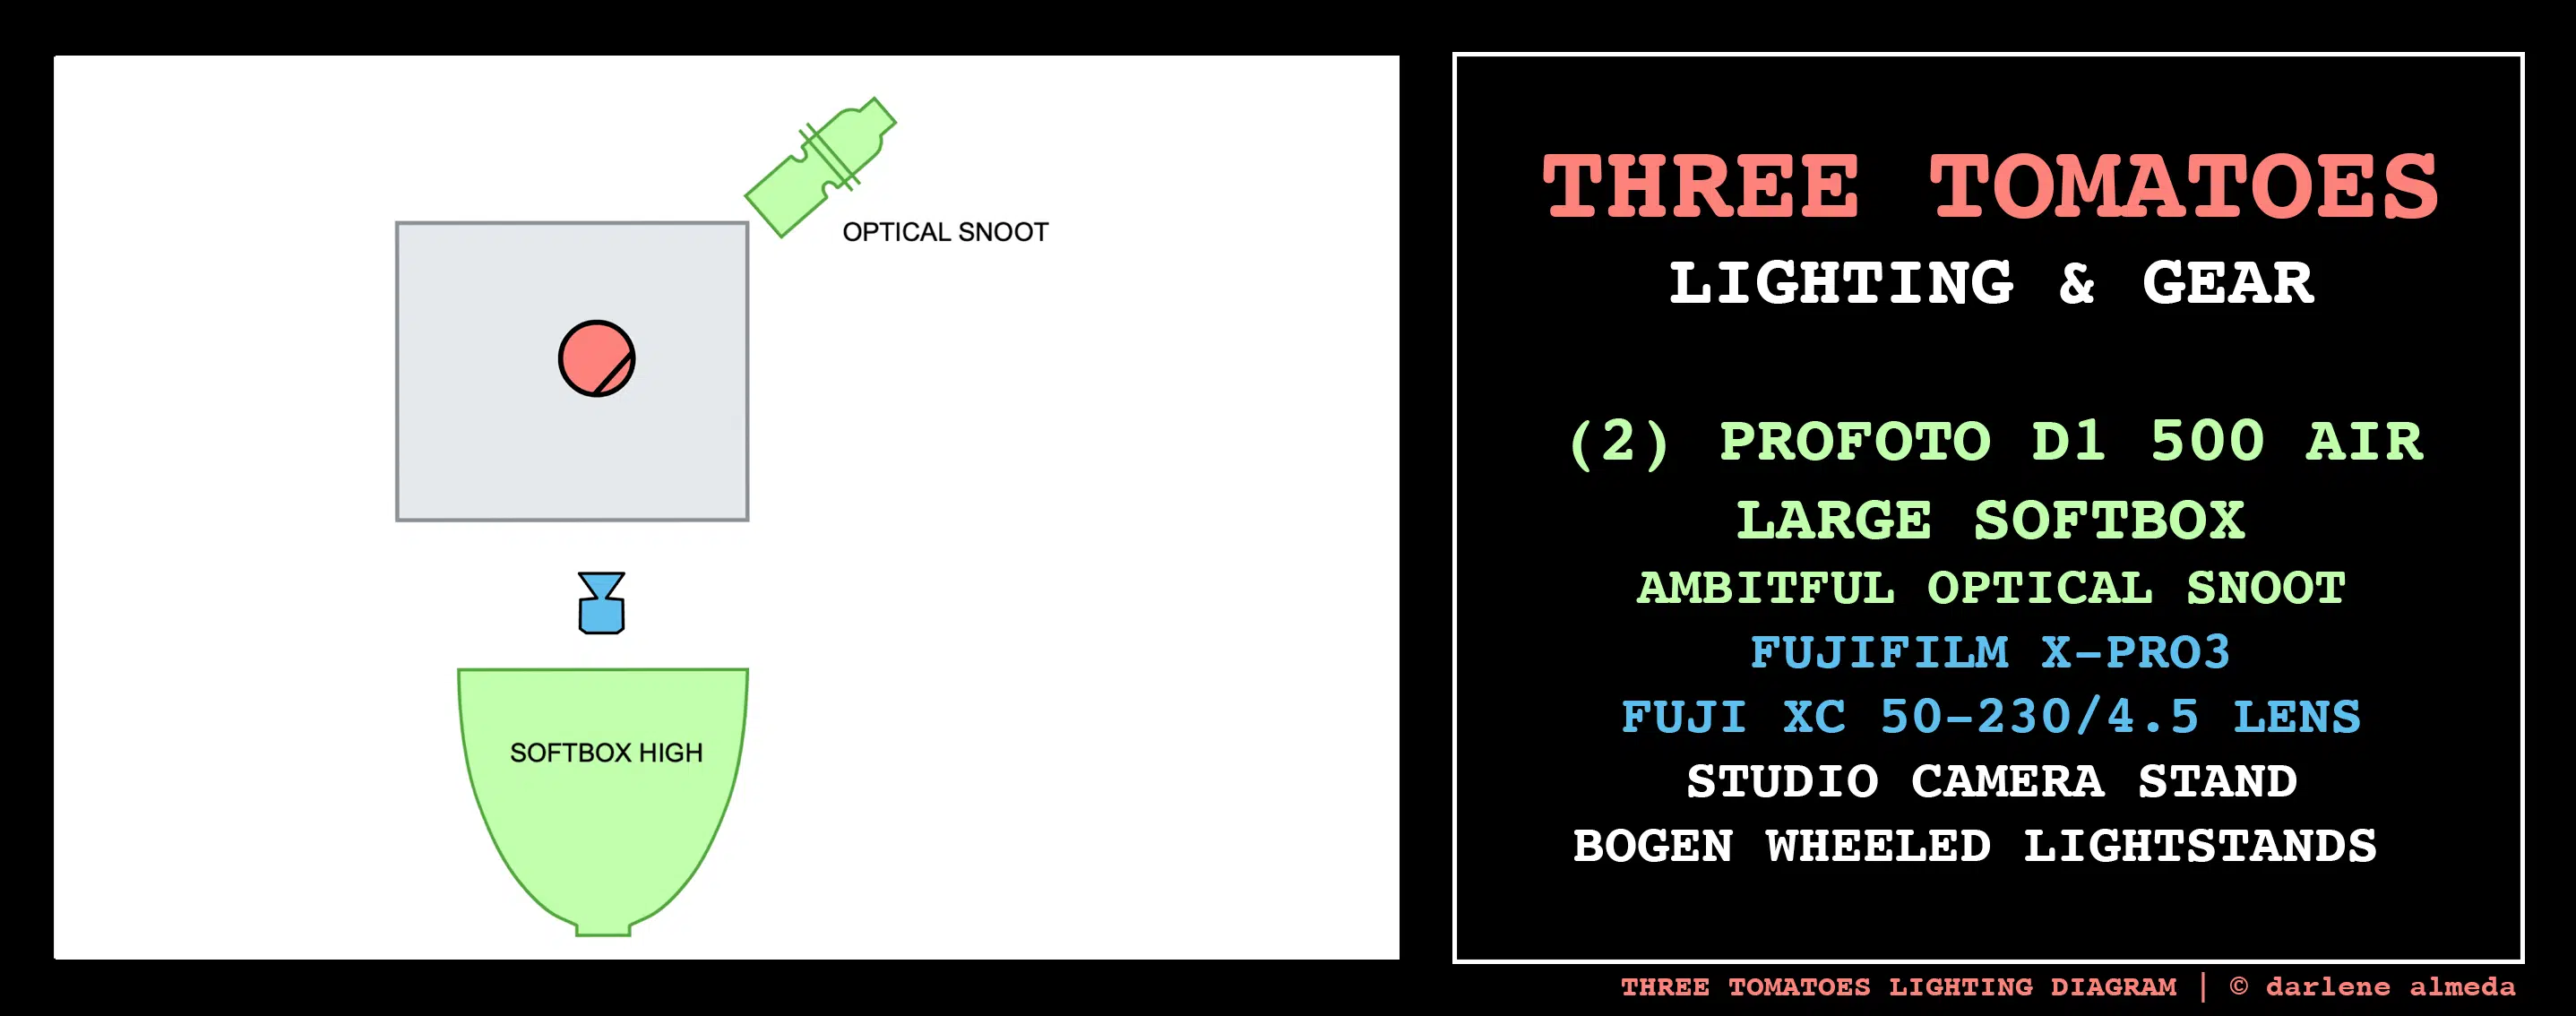
Above is a lighting diagram for this set of images. In this diagram, you’ll see two lights at play:
(1) The main light, or key light, is the optical snoot. It’s doing the heavy lifting here—delivering the full output needed to shoot at f/8. Just a reminder: the optical snoot is a specialized attachment that mounts onto one of my Profoto D1 500 Air mono lights. It doesn’t come with a light of its own—it’s simply a projection system with a lens and gobo stencils (templates) that help shape the beam and add drama to your scene.
(2) The second light is another D1 500 Air inside a large softbox, positioned high above and aimed toward the front of the set, basically right behind me. Honestly, if I could wear it like a hat to avoid dancing around a stand, I would. (Though I doubt it’d be a hit on the runway.)
Why this second light?
It’s just as important as the main light. Set about 1.5 stops dimmer, it bathes the entire composition in soft fill, just enough to lift the shadows without stealing the show. From the camera’s perspective (and the viewer’s), this light controls the overall shadow density, helping maintain texture and detail while the snoot stays in the spotlight.
Think of it as the supporting actor who knows how to deliver the perfect line, without upstaging the lead.
Shooting Notes
OPTICAL SNOOT GOBO EXAMPLES
Once I had my composition laid out on the table, I picked up my Fuji X-Pro3 and the least expensive lens I own: the XC 50–230mm f/4.5–6.7. I bought it for just $100—with free shipping! Originally intended for wandering the dunes and shoreline near home, I quickly discovered it also works surprisingly well for quick tabletop compositions in the studio.
The takeaway? Don’t dismiss a bargain lens until you’ve actually shot with it and reviewed the results. Some sleepers turn out to be studio gems.
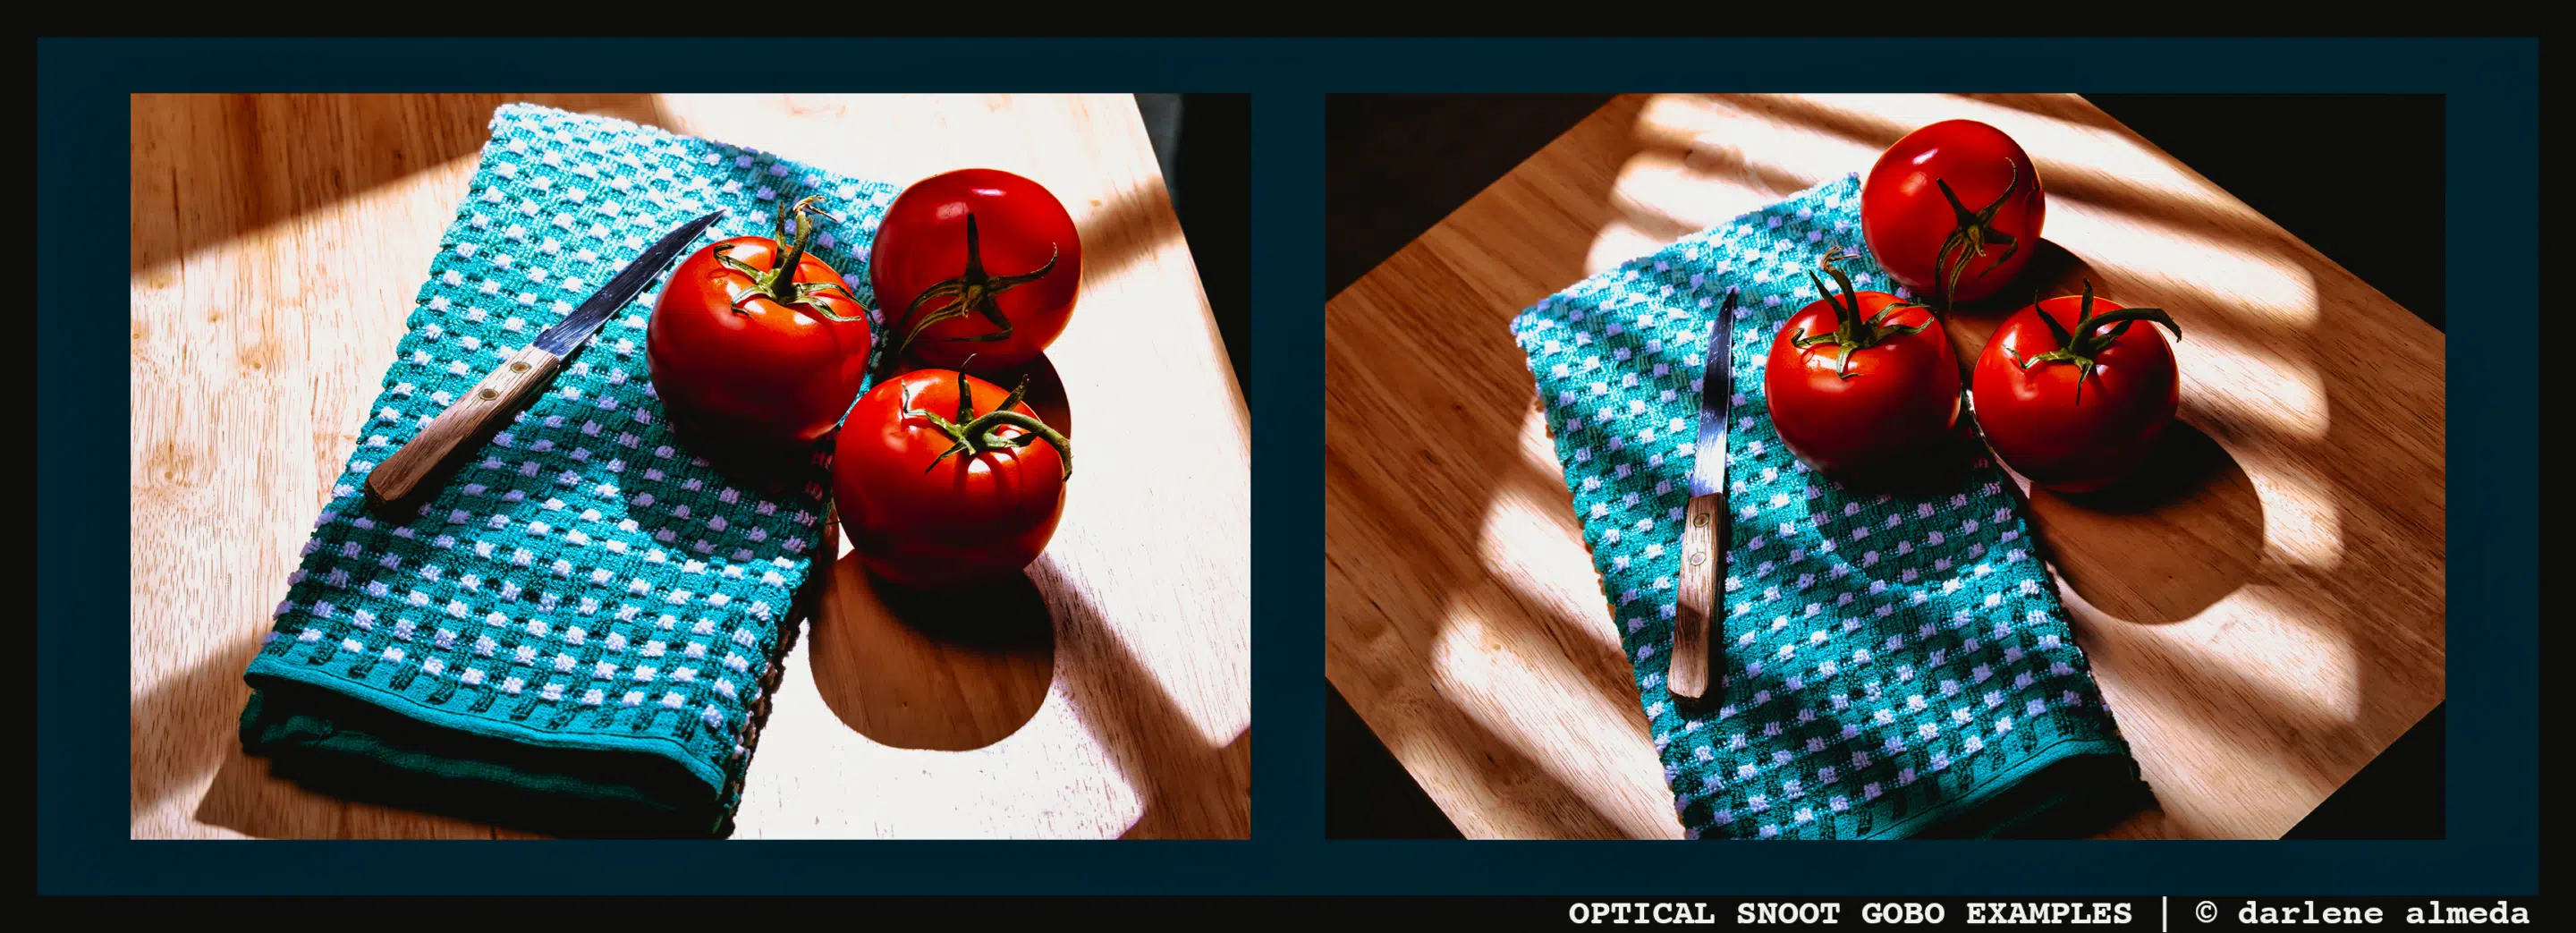
Above are two examples of different gobos used with the snoot. As you move the snoot’s optical lens in and out, the light pattern transforms—bringing out larger shapes or more intricate details in both highlights and shadows. It’s all about finding that sweet spot between focus and diffusion.
This isn’t meant to be an exhaustive course on optical snoots—just a light dusting of cinnamon to spark your curiosity. These days, snoot kits are far more affordable than they used to be. In fact, the one I use now costs half of what I paid years ago. (Timing is everything, right?)
I hope this little dive into light shaping was helpful—or at least got your creative gears turning. And yes, after the shoot, I made a couple of tomato sandwiches and sat out on the porch. One of them even went to a couple of deer who wandered by. What can I say? Around here, even the wildlife knows a good tomato when they see one.


