This article explores the rationale behind utilizing high-megapixel cameras or merging multiple images of a scene to produce a high-megapixel composite. Through an illustrative example, I’ll demonstrate a scenario where this technique proves invaluable in revealing an image within an image, narrating a tale of creative exploration. Let’s begin our journey.
THE EXAMPLE IMAGE FILE
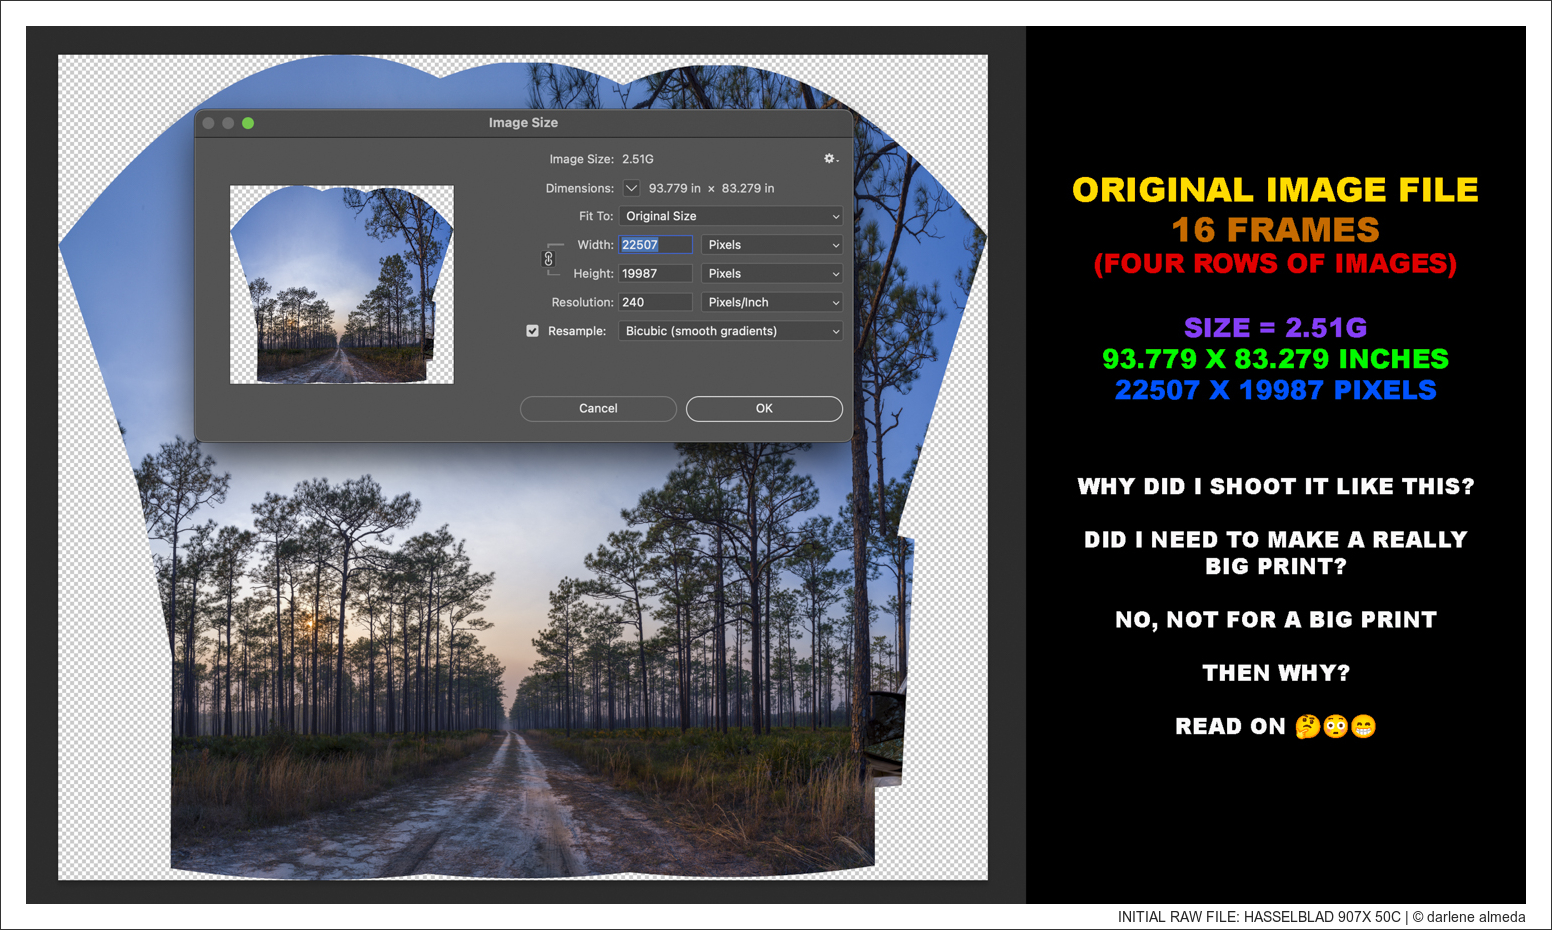
Throughout this article, we’ll focus on the example image file below. We’ll explore the remarkable versatility of this image file, attributable to its high pixel count.
INITIAL RAW FILE: 2.51G – WHY CREATE SUCH A LARGE FILE?
ADVANTAGES OF HIGH MEGA-PIXEL IMAGE FILES
A higher-megapixel image file is often desired for several reasons:
(1) Increased Detail: Higher resolution images contain more pixels, which means they can capture finer details. This is particularly important in scenarios where intricate details, such as landscape or architectural photography, must be preserved.
(2) Greater Flexibility in Post-Processing: Higher-resolution images provide more flexibility regarding cropping and editing. You can crop a smaller portion of the image while maintaining good quality or resize the image without losing as much detail.
(3) Printing Enlargements: If you plan to print your images at larger sizes, a higher-megapixel image will result in better quality prints with sharper details and less pixelation.
(4) Future-Proofing: As display technologies continue to improve, having higher-resolution images ensures they remain relevant and usable on newer, higher-resolution screens and devices.
(5) Professional Requirements: Some professional applications, such as commercial photography or large-scale advertising, demand high-resolution images to meet industry standards and client expectations.
In summary, a higher-megapixel image file provides better detail, flexibility in post-processing, superior print quality, and future-proofing, and meets the demands of certain professional applications.
HOW & WHY IT WAS MADE
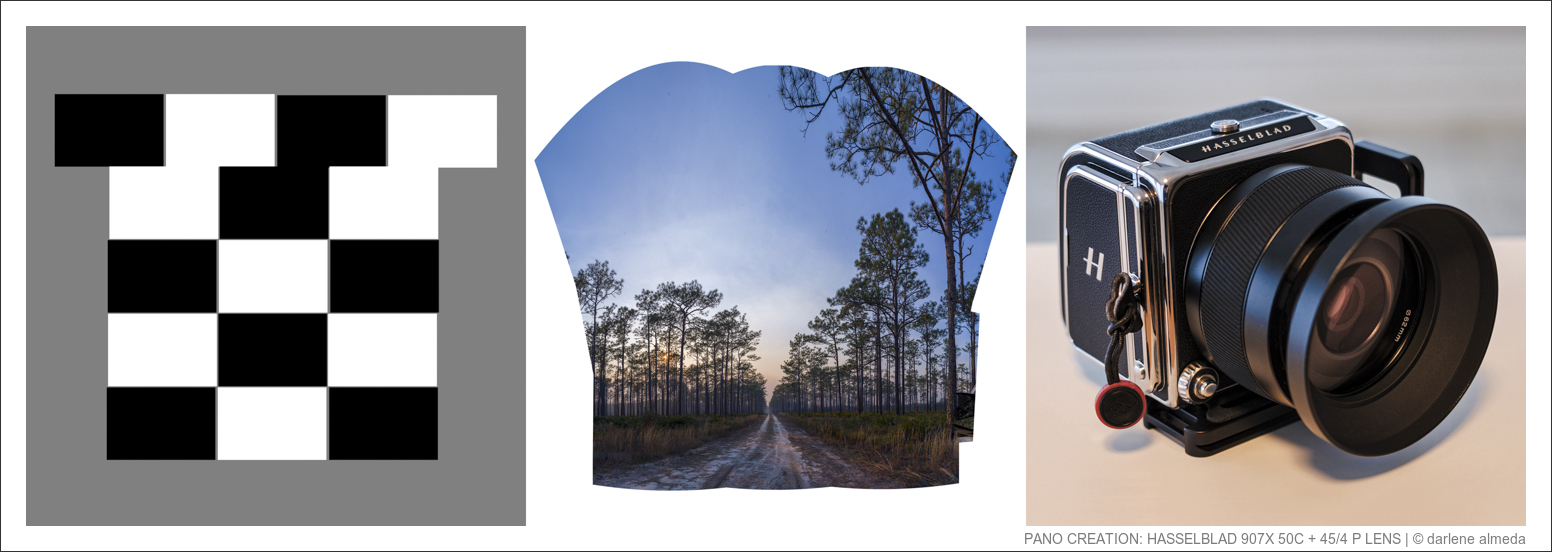
PANO CREATION: HASSELBLAD 907X 50C + 45/4 P LENS
Above-middle is what the RAW file resulting from stitching 16 individual images arranged in a grid pattern of four rows looks like. The grid shows the top row contains four horizontal images, while the lower three rows each contain three horizontal images.
The decision against shooting vertically was deliberate due to time constraints. As the sun descended and smoke from a controlled burn nearby thickened, the need to swiftly capture the scene became more urgent.
Shooting with the Hasselblad 907x 50c and the 45P lens facilitated most necessary functions automatically, except for the challenge of orienting the camera’s digital back vertically for stitching—a task more cumbersome with the 907x than when using my technical camera with the same digital back. However, using the latter would mean sacrificing automation.
Faced with time sensitivity, I captured an additional top row to mitigate any shortcomings due to shooting segments in the horizontal format. I aimed to provide the stitching software with ample sky to ensure the trees appeared straight, seeking as many options as possible as I sensed something special unfolding before my eyes.
POST-PROCESSING: THE CUTTING ROOM FLOOR
Now that the image files have been successfully stitched, my favorite part of the process begins. At this post-processing stage, I utilize Lightroom’s cropping window as my personal “cutting room floor.” Viewing images has always been a favorite pastime of mine, beginning with Disney books and Van Gogh paintings in my childhood. I’ll start with the square format, which requires the least cropping for this specific image, and then gradually work inward.
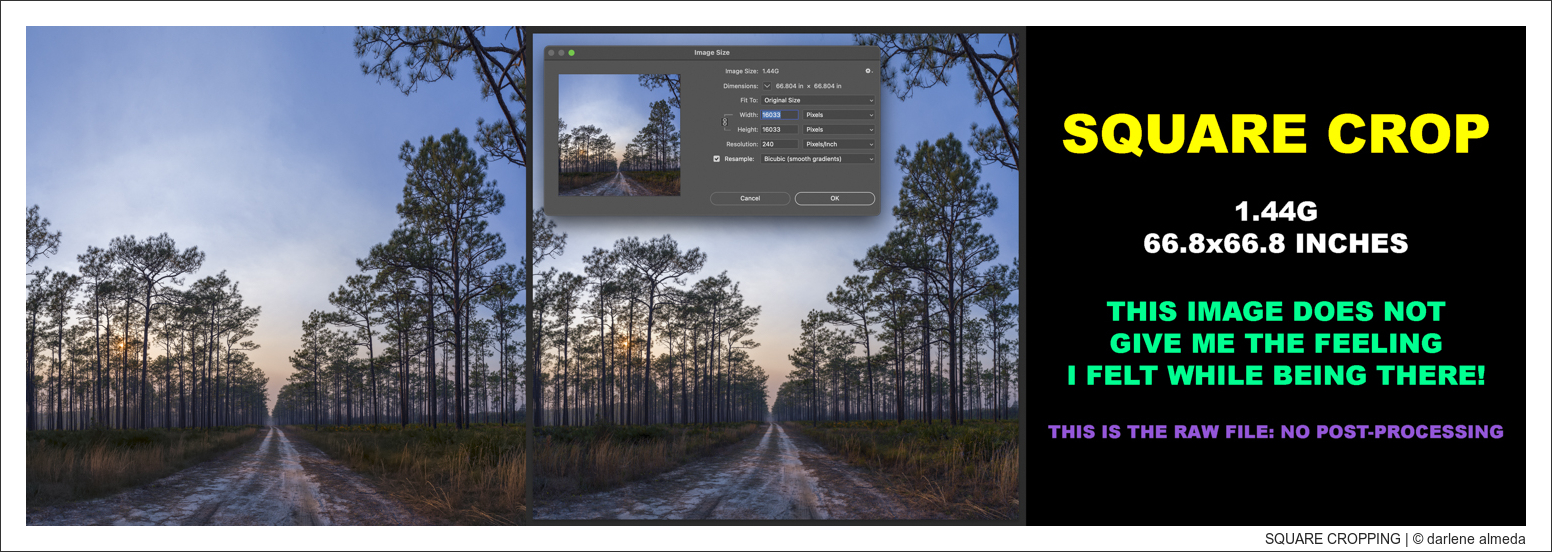
SQUARE CROPPING: LEAST AMOUNT OF PIXEL LOSS
The square crop isn’t quite right for this image. Don’t get me wrong, I’ve always enjoyed shooting in squares, a practice I’ve maintained for decades with my Hasselblad film cameras. However, I feel the need to delve deeper into this particular image because I’m aware that the action lies deeper within the woodland.
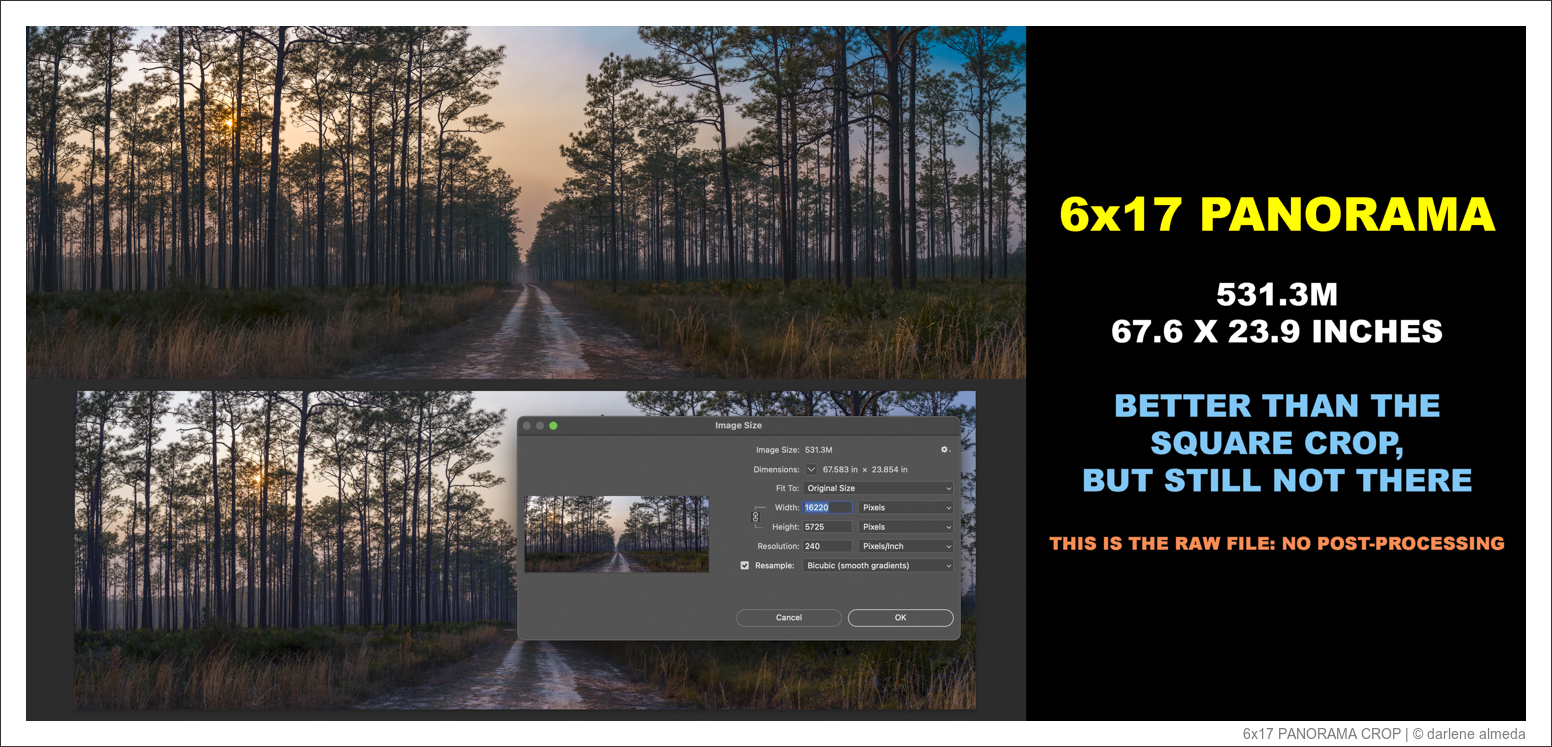
6×17 PANORAMA CROP
The 6×17 panorama crop is a favorite of mine, and I have a 6×17 Fotoman film camera I enjoy shooting. This image may work in 6×17 format, but I feel the need to go in closer, much closer.
TIME TO GO HUNTING
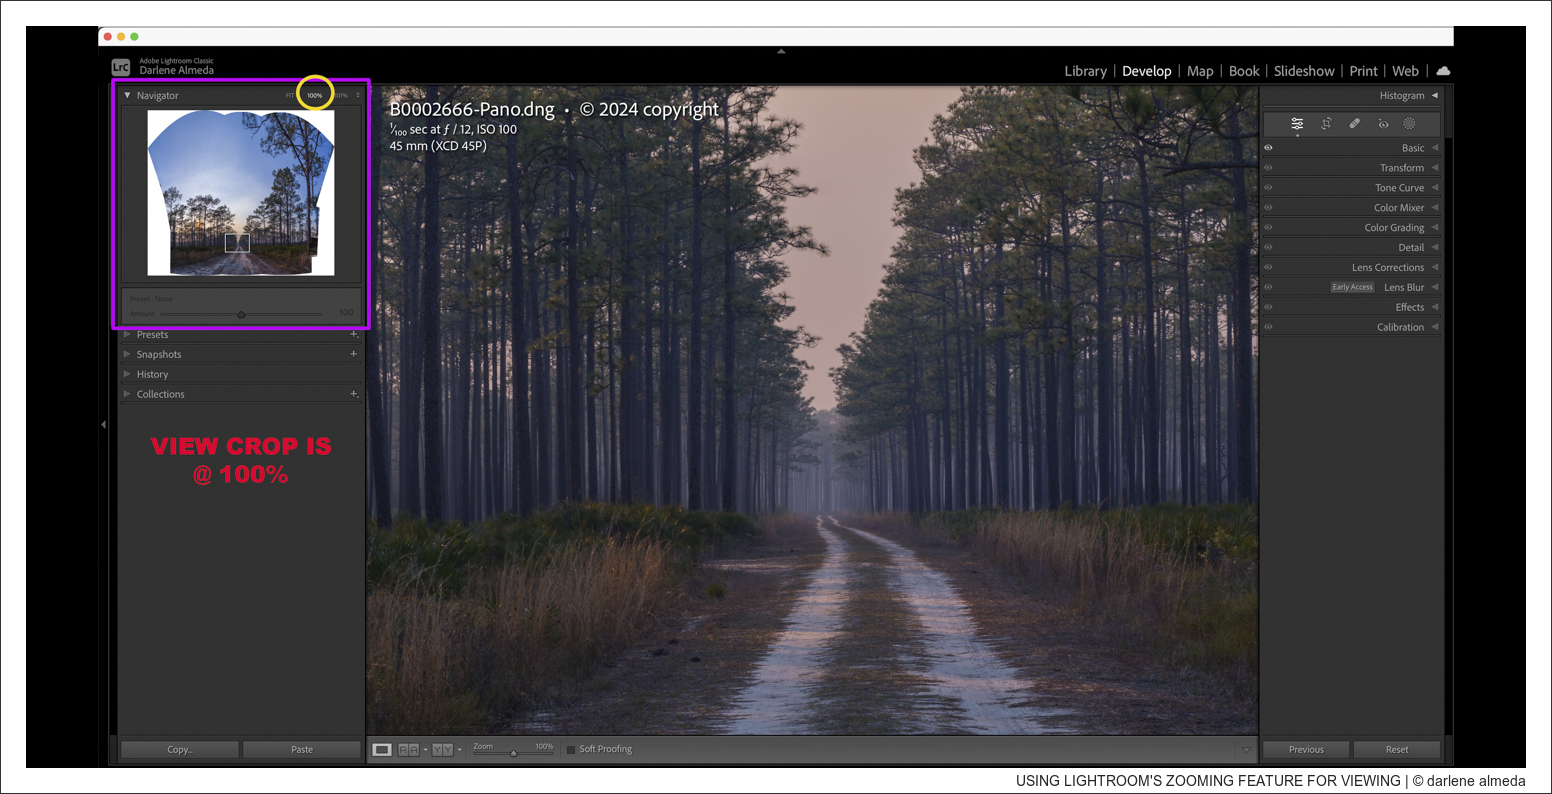
So far, I have learned that the square and the 6×17 panorama composition are not working for me with this image. I sense the need to delve much deeper into the woodland, where I can immerse myself in the scene amidst the trees and within the atmosphere of the smoke from the controlled burn. Fortunately, Lightroom’s zooming feature allows me to do this effortlessly, similar to having a zoom lens on my camera. And there it is: I’ve found what I’ve been searching for.
USING LIGHTROOM’S ZOOMING FEATURE FOR VIEWING
This composition would most accurately convey the emotions I felt during the shoot if rendered in black and white. Although the colors in the image are pleasing, they diminish the emotional impact I experienced while capturing the moment. As an artist, the ability to evoke and convey emotions is paramount. I am eager to share these profound moments in my work when the opportunity arises.
SENSOR FORMAT + EXTREME CROPPING
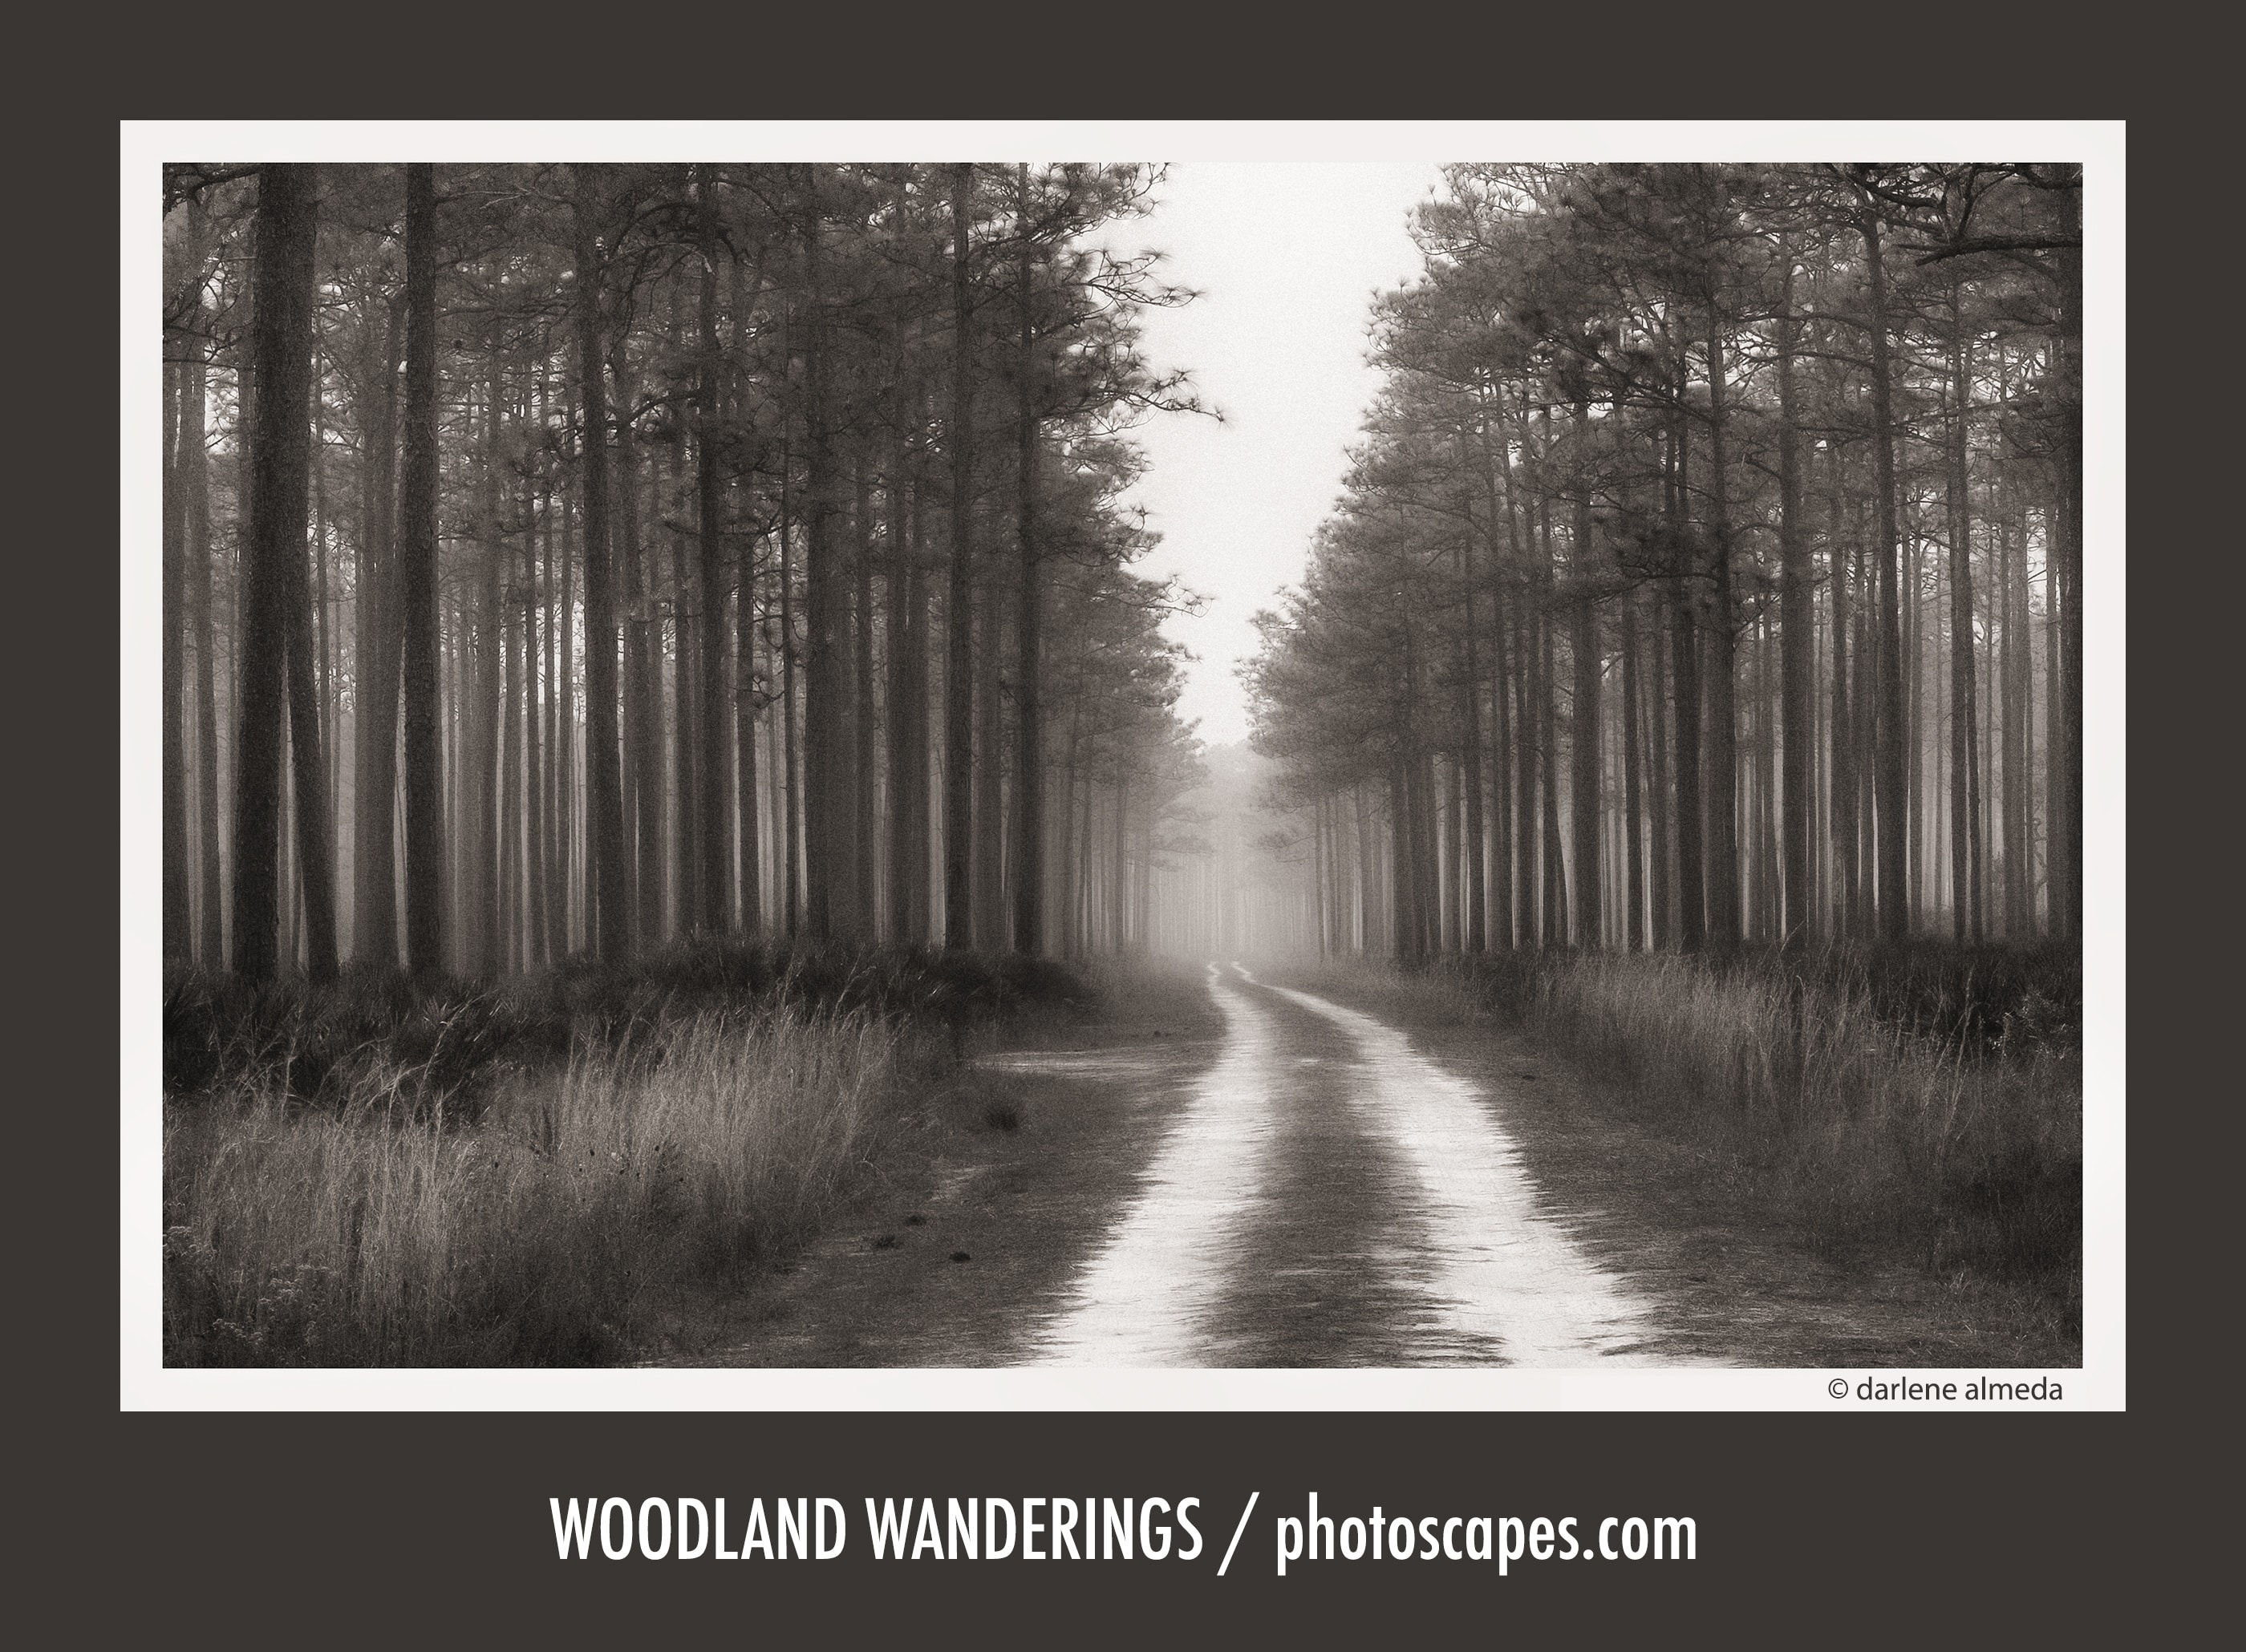
Below is the final image, a product of an extreme crop with a small amount of post-processing. It exemplifies reason #2 mentioned earlier: Greater Flexibility in Post-Processing. This underscores the purpose behind generating such a large file: It provided an additional avenue for creativity in post-processing. Given the time-sensitive nature of the scene, I chose to capture the maximum number of pixels initially and refine the composition later. This flexibility is a photographic approach that wasn’t always accessible in the past. Therefore, I embraced the opportunity, utilizing my skills and trusting the best outcome would be found on the cutting room floor.
FINAL IMAGE
WOODLAND WANDERINGS
CLOSING COMMENTS
I have only one lens for my 907x, the 45P. Having heard about the advantages of sticking to a single lens for an extended period, I’ve adopted this approach with my 907x. Should the need arise for a different lens, I turn to my ALPA kit or my Hasselblad V system, both utilizing the 907x’s digital back. However, now that I’m retired, I occasionally ponder the idea of parting ways with my made-for-digital technical cameras and replacing them with a newer Hasselblad model. While the 907x is exceptional, the X2D may offer even greater appeal for a more automated shooting style.
When I visited the woodland, I couldn’t venture into it because of the heavy smoke. The smoke became thicker over the approximately twenty minutes I spent there. Nevertheless, it was a perfect end to a day of shooting, and the woodland was my final destination on the way home from a brief excursion. I hope you enjoyed following my journey in creating Woodland Wanderings. If you haven’t already, I encourage you to experiment with your photography techniques and post-processing software. These two tools work seamlessly together and offer limitless avenues for creative exploration. Happy shooting!

