TULIP CHOIR
TLDR:
Most photographers learn the rules. Fewer know when to break them.
This image began as an experiment—an urge to make something unexpected with a camera and lens combination never intended for still life. My Cambo Wide 650, a favorite 4×5 camera of mine, was built for sweeping landscapes, not tabletop compositions. That’s why I bought it, and that’s how I’ve always used it. But after a long, low simmer of curiosity and desire, I wondered: What if I could coax it into the studio? What if I could find a way to make it work for still life?
That spark of curiosity became the beginning of something new.
HOW I TALKED MY CAMBO WIDE INTO DOING STILL LIFE
THE MAKING OF TULIP CHOIR
The Cambo Wide 650 wasn’t designed for studio still life. Its fixed wide-angle lens and rugged panoramic soul make it more at home chasing horizons than posing for a floral arrangement. But that didn’t stop me.
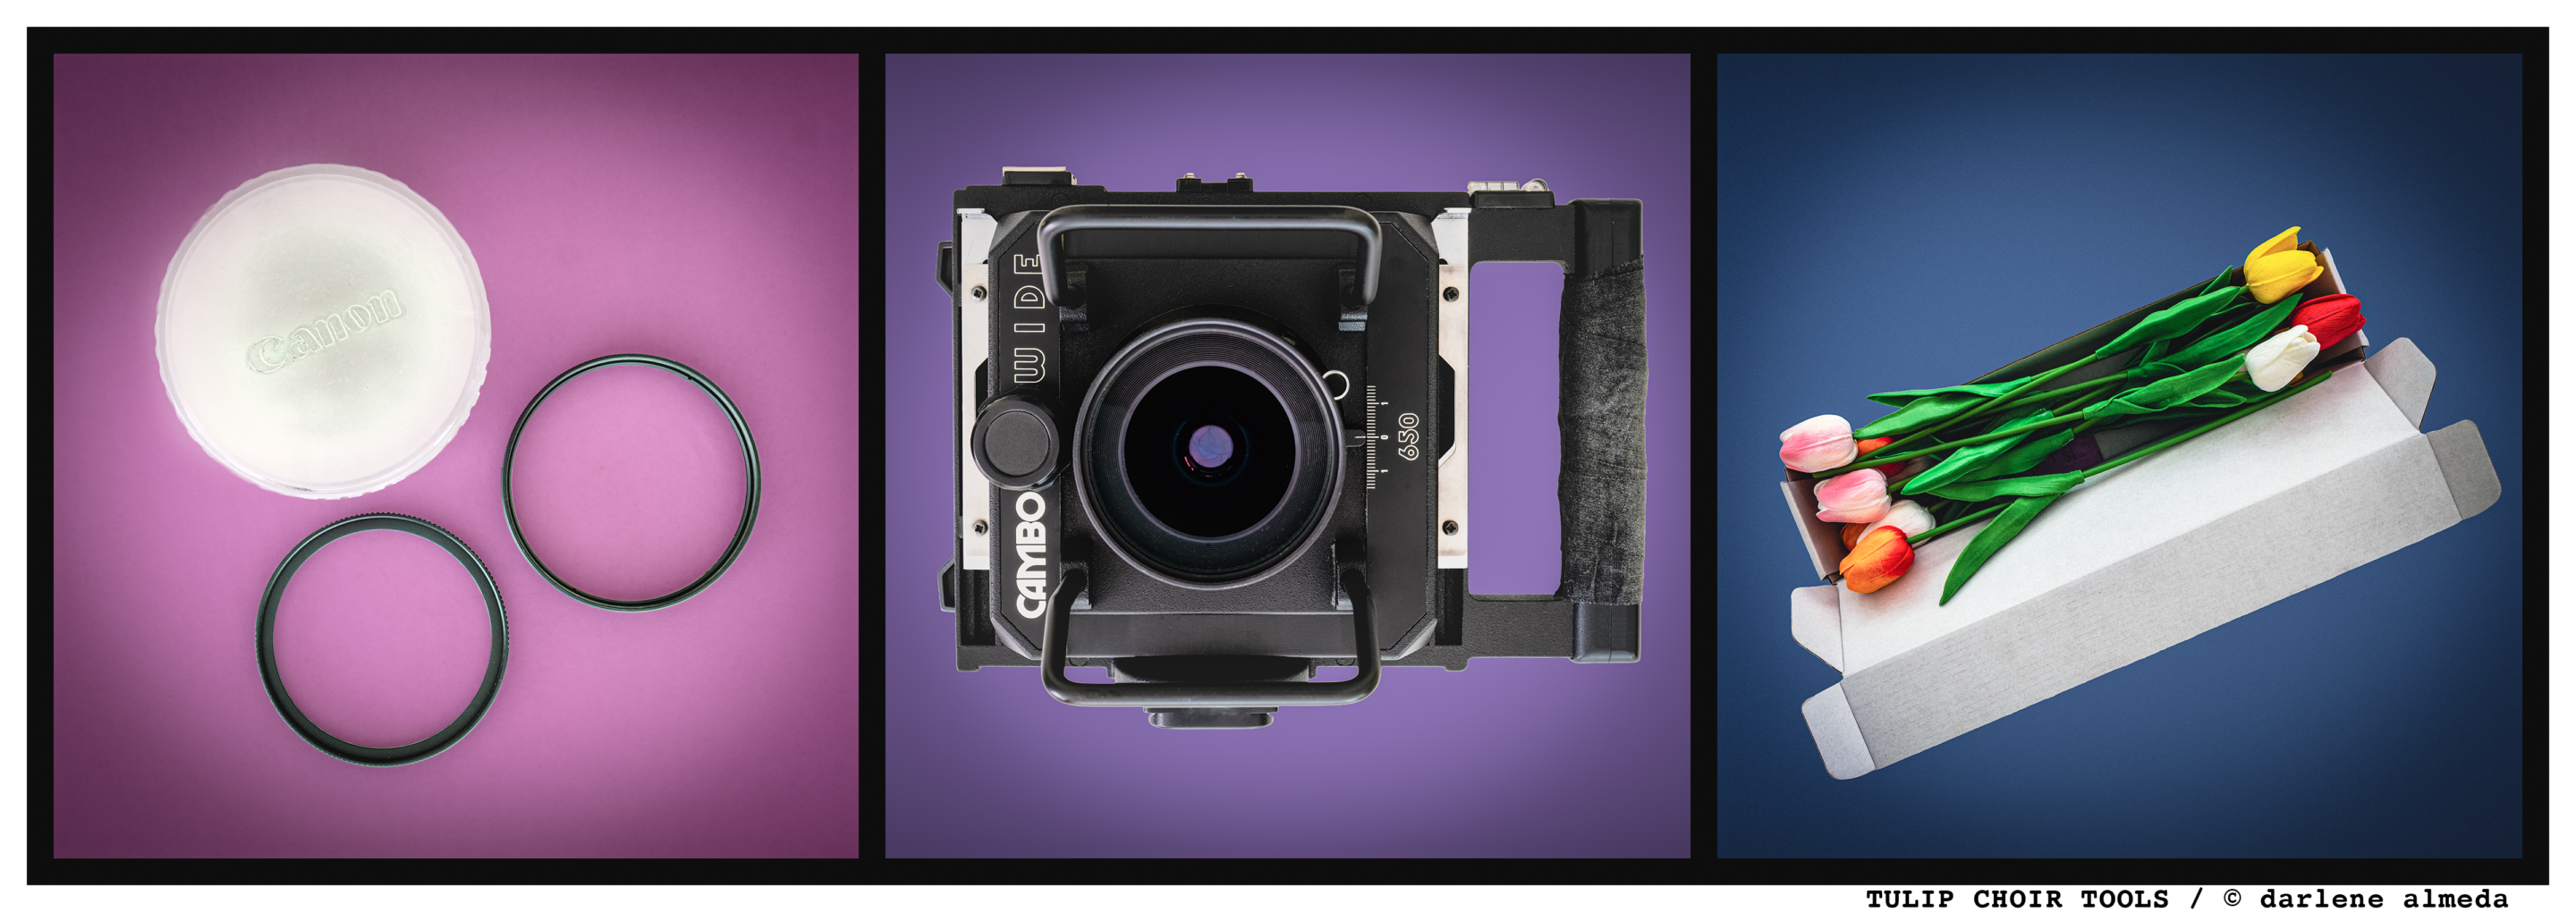
I’d been quietly stewing that one of my favorite 4×5 cameras didn’t play well with tabletop work. I wasn’t about to buy a rare, overpriced lens to “fix” that. Instead, I reached for something completely wrong: a Canon 500D close-up lens. Made for DSLRs. Not large-format glass. But with a step-up ring and a dash of stubborn curiosity, it screwed right onto my Schneider 65mm—and to my surprise, it worked.
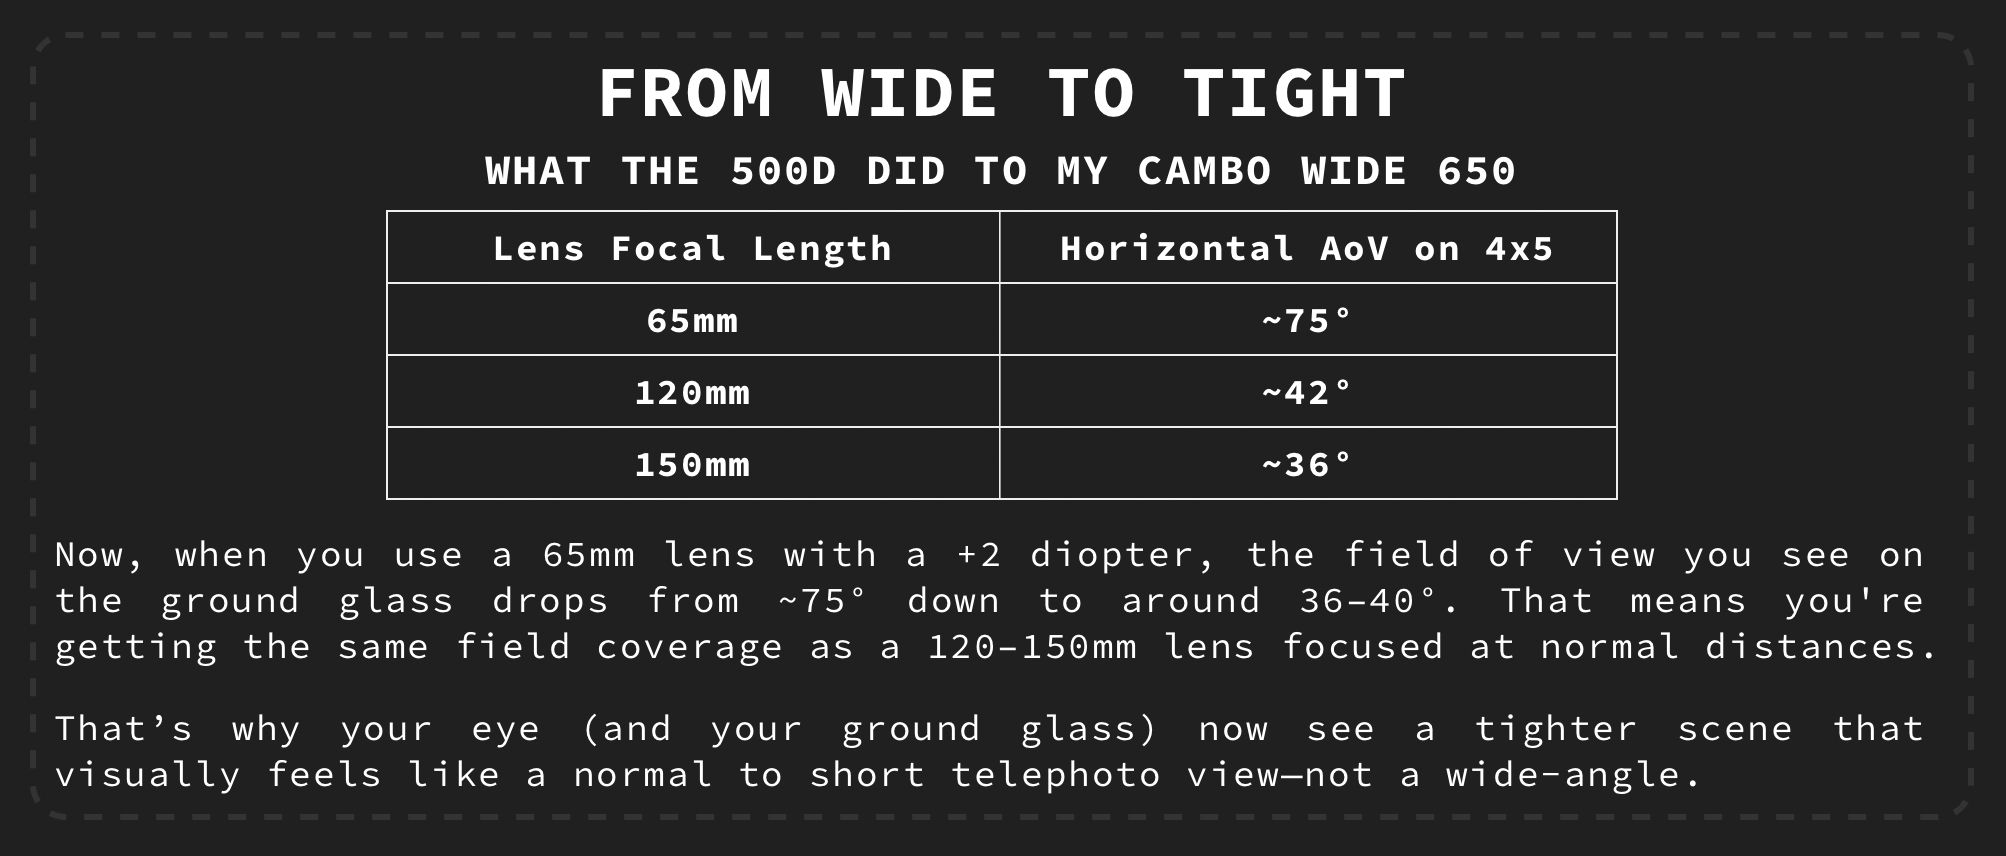
On the Cambo Wide 650, the Canon 500D turns the 65mm ultra-wide into a fixed-focus close-up lens with a field of view like a 120–150mm lens on 4×5.
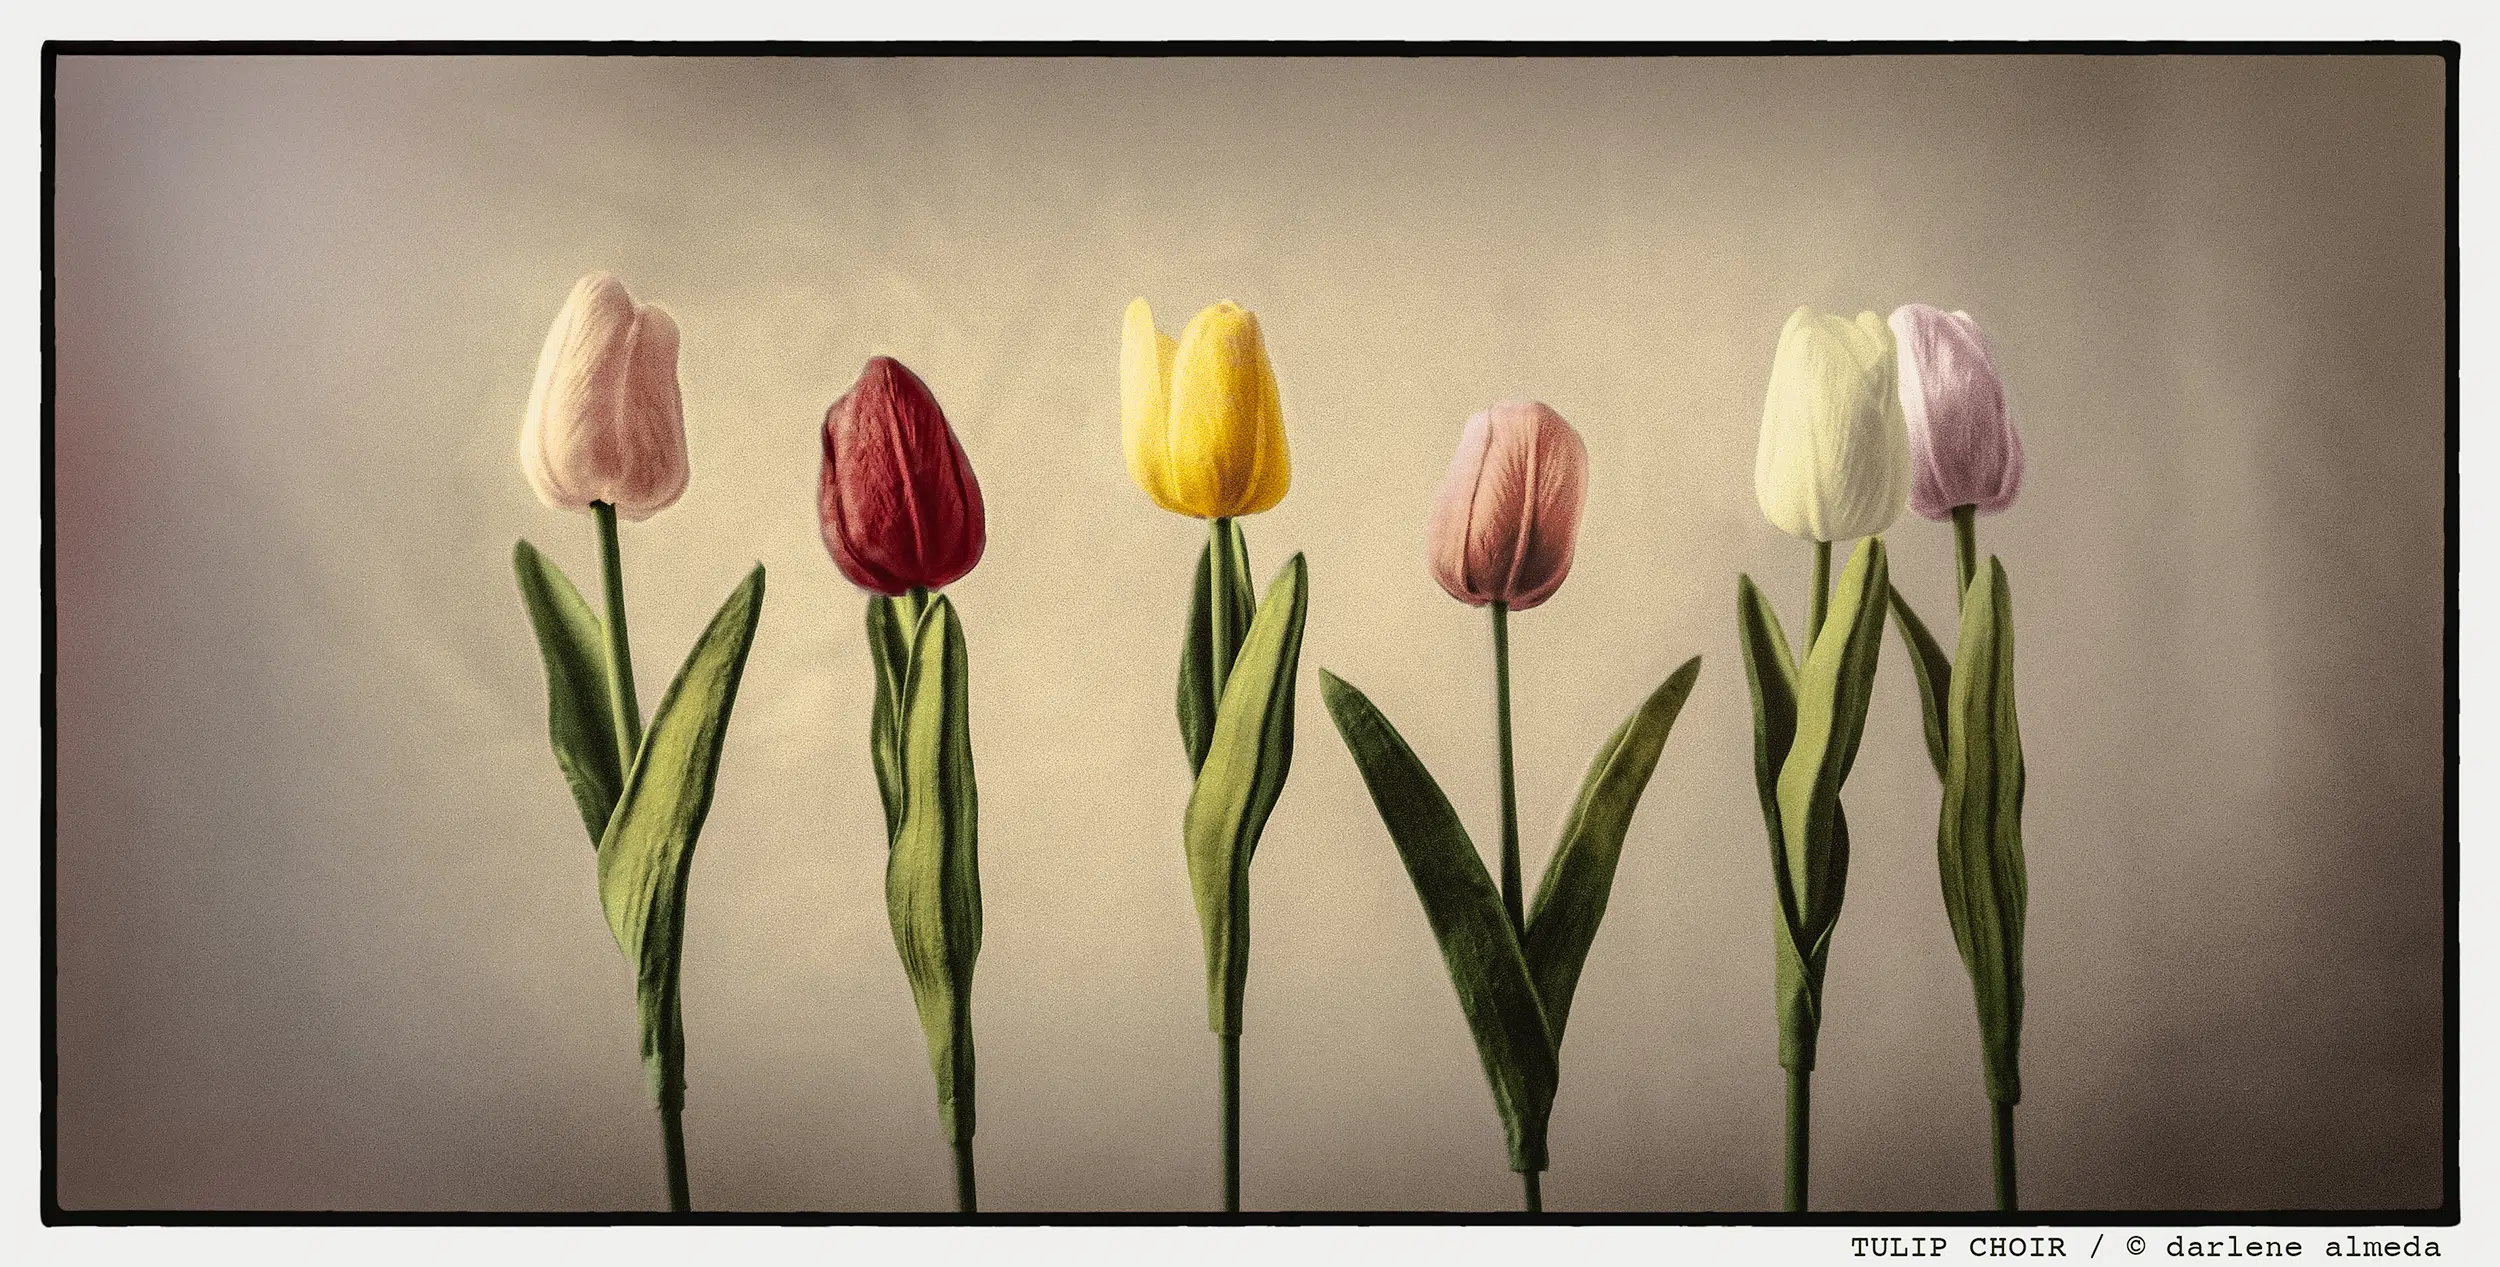
With cautious optimism (and the firm belief that weird ideas deserve a chance), I set up a still life using artificial tulips I’d bought on Amazon. Yes, they’re fake. But they had fantastic posture, good color, and wouldn’t wilt under pressure—ideal collaborators for this photographic experiment.
Focus hinged more on precise camera placement than on the focus ring. Once the camera was aligned with the correct plane, lens focusing was fine-tuned to reveal the details and nudged everything into alignment.
The only hiccup when using my Profoto strobes with the Cambo Wide is the cold shoes. The Profoto Air trigger doesn’t quite fit—its foot is too thick for Cambo’s slots. My workaround? A cold shoe adapter that slides right in and plays nice. It’s just one of the many gadgets in my studio toolbox, full of little fixes for unexpected surprises. Just don’t ask me about cords, filters, or mystery screws.
Exposure became a tale of two apertures: f/16 and f/8. I started with f/16, thinking I’d need that deep focus look, and planned three careful frames with tiny tweaks. But then I thought maybe a little background blur could be nicer, so I gave the last three shots (six frames total on this 6×12 back) to f/8, each with its own little adjustment.
The backdrop? Carpenters left behind a giant plastic sheet after storm repairs to my studio. It was supposed to be tossed, but I loved it. It diffuses light beautifully, adds the faintest trace of texture, and makes an oddly perfect stage for tulips, real or otherwise. I’ve been using it ever since.
Moral of the story? Sometimes the best tools are the ones you didn’t buy on purpose.
FILM, FIXER, AND A TOUCH OF VICTORIAN CHEMISTRY
TULIP CHOIR CONTACT SHEETS
For film, I went with Kodak TMAX 100. It’s sharp, clean, and unfailingly polite; the kind of partner you want when you ask your camera and lens to pull off something slightly unnatural. It’s also my go-to for experimental setups where I want the detail to shine without grain stealing the spotlight. If I need grain later, I can always add it—on my terms.
I developed the roll in 510 Pyro because if you’re already embracing a beautifully impractical workflow, why stop short of a staining developer with long tonal range, subtle highlight control, and deep, crisp shadows? The stain adds just enough extra dimension to make scanning less challenging.
For fixer, I mixed up a batch of single-use hypo using sodium thiosulfate—my standby formula, prepared with a little warm water, a little time, and a quiet nod to 19th-century chemistry. It pairs wonderfully with staining developers, preserving the image stain while letting me feel just a bit like a Victorian alchemist in sensible shoes.
The negatives came out clean, smooth, and perfectly restrained—just enough contrast to give those tulips a presence without tipping into drama. Which, for fake flowers and a panoramic camera made for sweeping landscapes, felt like a minor miracle worth celebrating.
HAND-COLORING IN THE DIGITAL AGE
TULIP CHOIR HAND-COLORING
Once the negatives were dry, I camera-scanned them and prepared the file for hand-coloring in Photoshop—something I’d been looking forward to. It gave me one more step to engage as a visual artist, and one more way to refine the image through touch and tone.
I first learned to hand-color photographs using Marshall Oils, which required cotton swabs, patience, and an open window. While I still admire the tactile charm of that method, Photoshop has its perks—chief among them: easy corrections, infinite undo, and no lingering fumes.
This time, I wanted to see if I could make artificial tulips feel real, not hypermodern or clinical, but in the antique sense. I wasn’t chasing photographic accuracy; I was chasing a visual language that history has already validated. I wanted the image to echo the quiet grace of early hand-tinted prints, preserve the soft graphic form of the black-and-white negative, and let color drift in like the blush on an age-old postcard.
The process was slow, meditative, and deeply satisfying. I built the tones layer by layer with a low-opacity brush—less like digital editing, more like tinting memory. The final palette remained soft: creamy whites, pale pink, a warm red, a buttery yellow—just enough to suggest living life as a tulip.
The backdrop stayed untouched. That luminous plastic sheet, softened by studio light, gave the image a quiet place to rest. In the end, what emerged was a still life shaped by experiment, accident, and curiosity—stitched together with gentle color and a playful spirit.
FINAL THOUGHTS: PERMISSION TO PLAY
TULIP CHOIR TOOLS
This image came together because I let myself ask, what if?
What if I used a panoramic camera for still life? What if I borrowed a close-up filter from my digital gear drawer? What if I photographed artificial tulips with a backdrop made from leftover plastic and treated them like heirlooms?
What I found wasn’t just a new technique—it was a renewed sense of freedom. Creative blocks don’t always need to be knocked down; sometimes, they just need to be sidestepped. And often, the most satisfying work comes from giving yourself permission to break the rules, question your habits, and follow your instincts straight into the unknown.
So if you’ve been stuck, waiting for perfect conditions or the right gear or a “serious” idea—don’t. Use what you have. Break what’s expected. Chase what delights you. Because joy, not perfection, is what keeps the work alive.
And you never know—your next favorite image might begin with a close-up filter, a camera that wasn’t meant for the job, and a few tulips that will never wilt.


