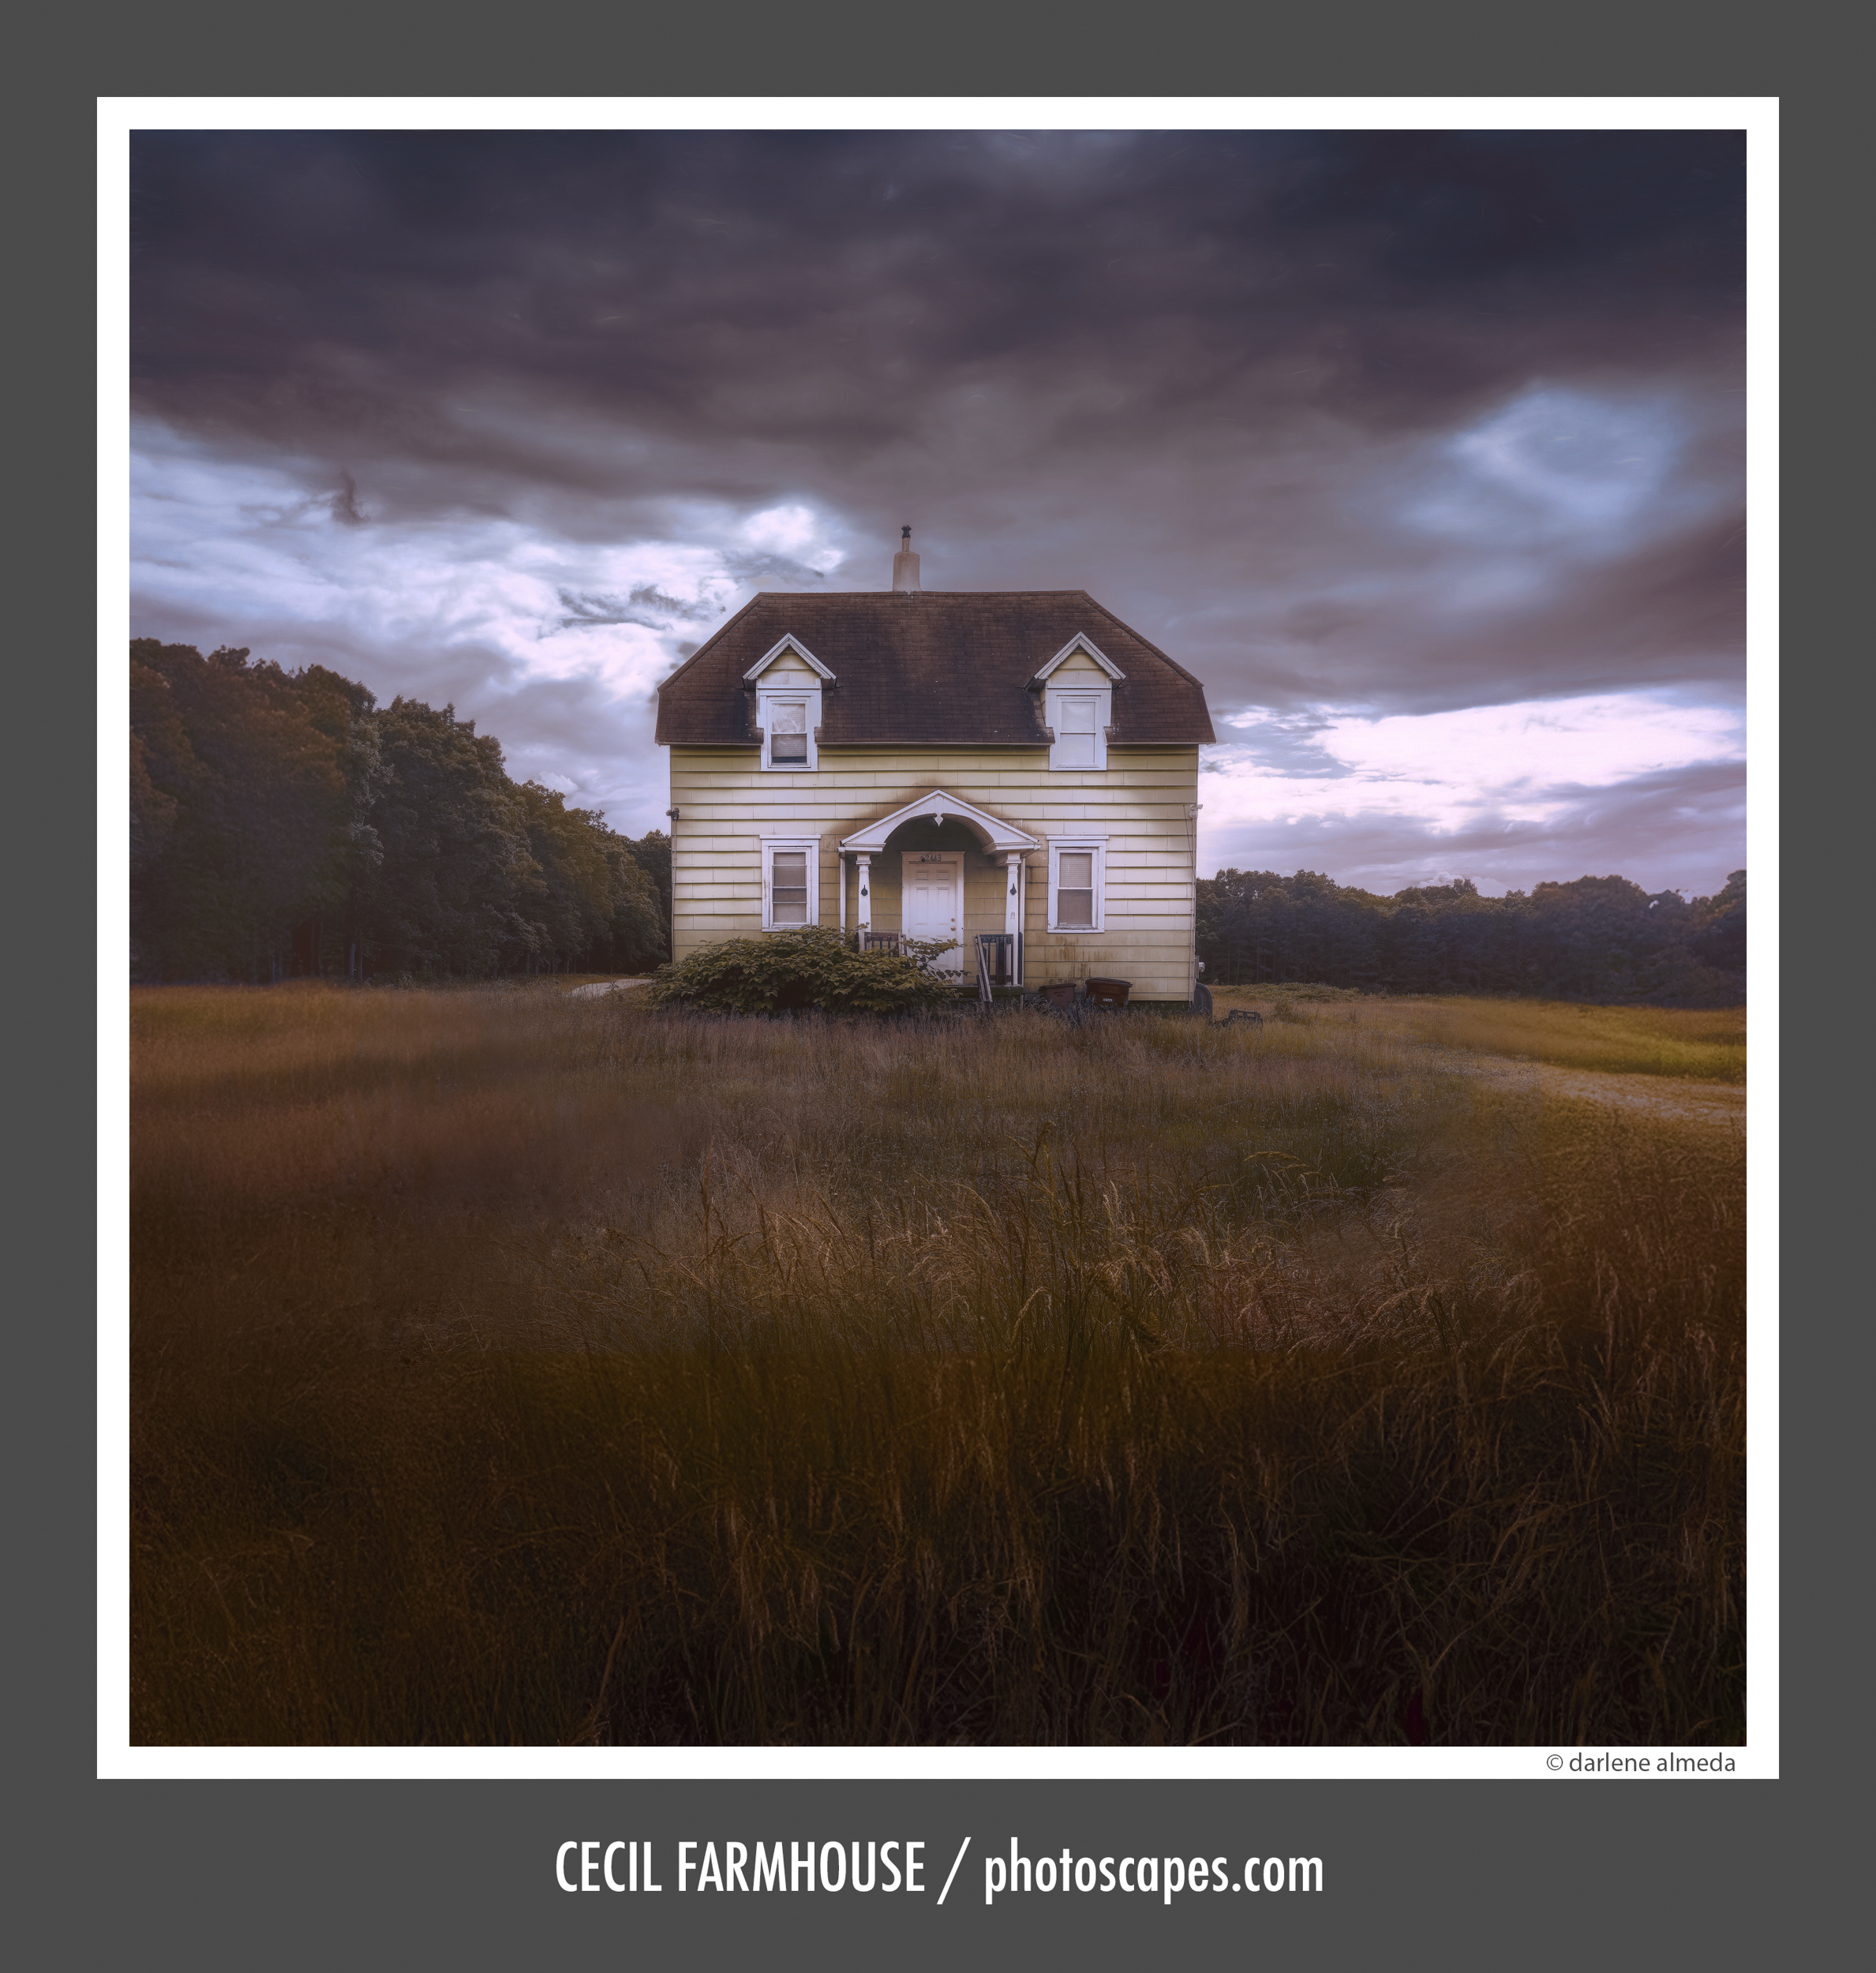
IMAGE: [ Hasselblad 907x 50c + 45P ]
Pre-visualization Objective: I aimed to capture the emotions I felt upon returning to this old, abandoned farmhouse from my past. It appeared neglected and in desperate need of repair, evoking a sense of decay and perhaps even a touch of haunting.
INTRO
I create my landscape photography using both film and digital technical cameras. I’ve been asked to share how I compose my images in the landscape with the gear I use. Learning to compose images is a complex topic that cannot be fully covered in a single article. However, we can often gain useful tips from other photographers that enhance our techniques, save time and expense, or clarify our unique perspectives. In this article, I aim to share the pre-visualization technique that helps me determine where to set up my camera.
Photographers who use technical cameras, whether pancake (like Alpa or Cambo), field, or view camera designs, often strive for perfection. This pursuit involves utilizing photographic equipment that many photographers might find cumbersome or unnecessary. Some choose technical cameras for the advantages of camera movements, larger-format films, high-megapixel digital backs, and superior lenses, all contributing to optimal optical quality.
If you are familiar with shooting a technical camera, you know it lacks the convenience of a through-the-lens (TTL) viewfinder for composing images. Instead, you might use a ground glass, tethering to a computer/tablet, or a digital back screen. All of these methods have their drawbacks when shooting out in the field.
My beginnings in photography stemmed from the 4×5 ground glass. So, early on, I had to develop a technique for scouting out shots in the field before carrying and setting up a heavy camera and all the additional gear that comes with it.
The good news is that you don’t need to be a technical camera shooter to benefit from my pre-visualization technique for scouting compositions. This method is for any photographer who wants to learn an effective way to pre-visualize scenes while out in the field looking for the perfect shot. Let’s get started.
SMART SCOUTING TIPS
A lot of my landscape photography begins with some research into an area. I then travel to the location and scout for interesting vistas, buildings, objects, and more. Once I find an area that catches my eye, I park and explore further on foot. For example, when I was in the New Jersey Pine Barrens area and photographed the Cecil Farmhouse, I had to walk through tall grass likely inhabited by snakes and other creatures. I always keep a pair of hiking boots in my camper van for occasions like this to help ensure my safety while walking in unfamiliar terrain.
My health and safety are paramount, so I take precautions to protect myself and advise all photographers to do the same. Because I often explore remote or abandoned areas, I wear camping pants with multiple zippered pockets to securely hold my cell phone and keys. These pants cover my socks and legs and tie at the bottom where they meet my shoes, providing extra protection. I started wearing camping pants with socks to protect against all the tick bites I endured. If you venture into wooded areas, you will encounter ticks and other disease-carrying insects. These pants also act as a second pair of hands, allowing me to stow filters, lens caps, cables, and other small items securely and cleanly.
Fortunately, I can count the number of times I’ve injured myself on photography exploration trips because they are few and far between, but I always try to be cautious. Once, I tripped and damaged a camera because I wasn’t watching the ground beneath my feet, focusing instead on the unknown terrain ahead. Recently, while in a very remote area, my camper van’s first aid kit saved the day when I cut my hand badly and had to use an entire roll of gauze to stop the bleeding.
So, wherever you scout for photography, remember to be smart and put safety first!
SCOUTING KIT
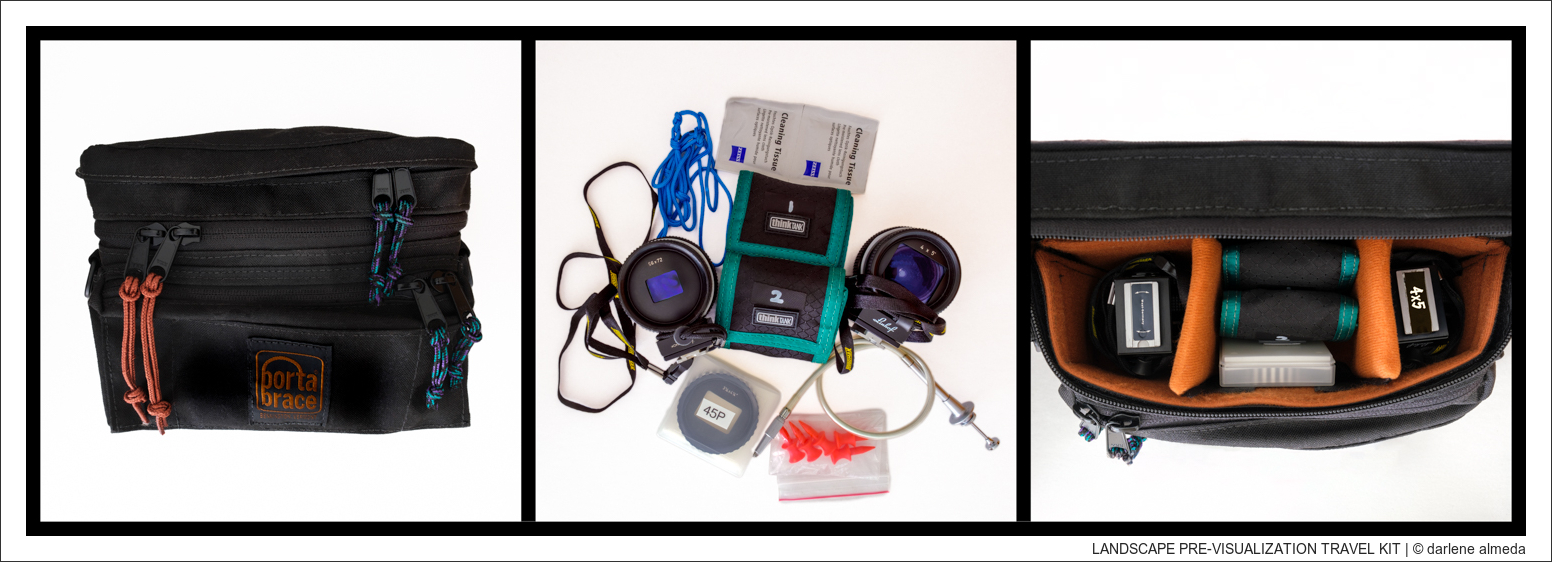
LANDSCAPE SCOUTING KIT
The small Porta Brace bag above is permanently stored under my camper van’s floor, along with two tripods and other accessories. This bag was initially designed as a fanny/hip pack, but I modified it into a strap bag (the strap is hidden in the photo). It is a well-made bag that has endured a lot over the years. Although you can still purchase one, the colorful pull-ties are my addition. A few years ago, I dismantled an old backpack and saved some of its components for recycling, incorporating some of those pieces into this fanny/hip pack.
This bag contains two Linhof Variable Viewfinders (4×5 & 6×9) with multiple masks (in green wallets marked 1 and 2, and essential backup items like lens cleaning cloths, location markers, an extra shutter cable, and other small items.
When I am ready to explore on foot, I grab the viewfinder and mask that fits the camera format I will be shooting, a water bottle, location markers (not always necessary), keys & phone, and begin to explore.
MY CAMPER VAN DESIGNED FOR PHOTOGRAPHY
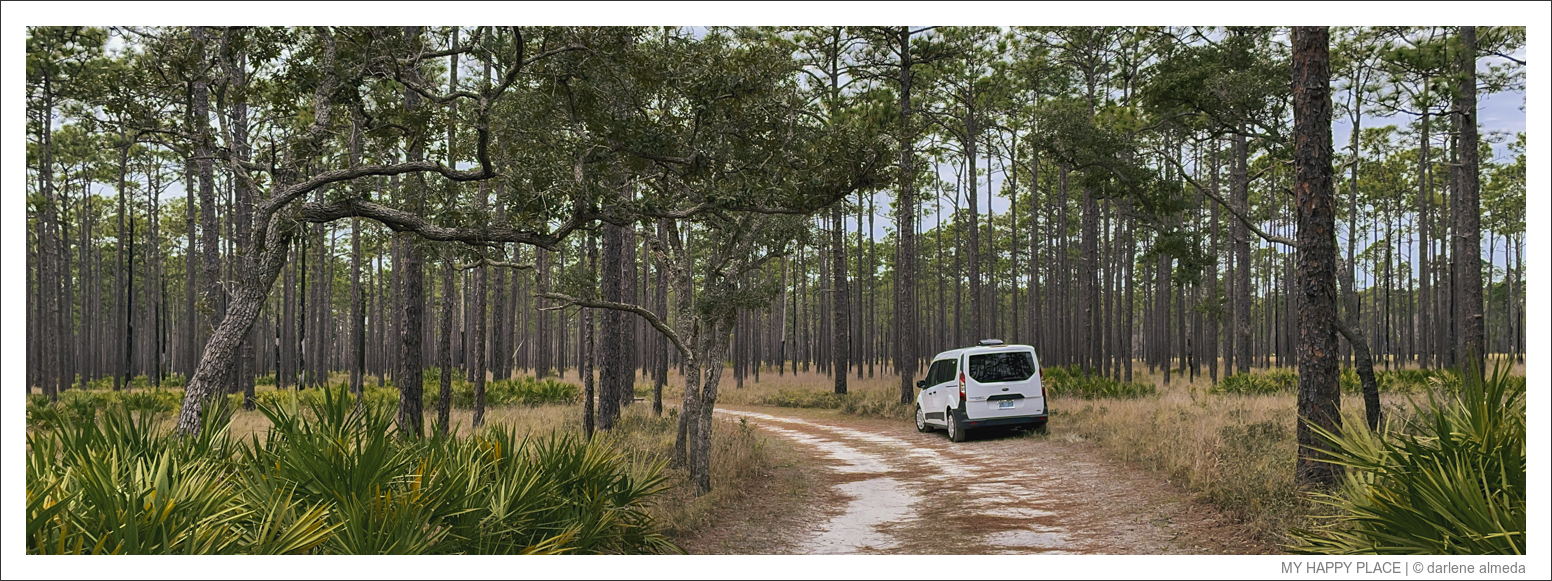
Another essential component of my exploration kit is my vehicle. Having a vehicle specifically designed for photography offers the convenience of permanently stowing gear like tripods and a backup bag of small items. When I bought my van, my primary aim was to use it for landscape and travel photography. Instead of purchasing a pre-made camper van from a dealer, I opted for a new van customized to my needs by a van conversion shop.
My van priorities included photography storage, sleeping, eating, and essential comforts for long road trips. I managed to fit all of this into a van that still fits in my garage when not in use. As a Floridian, I have to navigate hurricane seasons and HOA requirements, but I made it work thanks to good design and custom builders with decades of experience. Every year, when I take time off from travel, I tweak and improve whatever I can. My goal is for everything in the van to serve at least two purposes.
COMPOSING & DESIGNING
What makes a good composition, and how can we master the art of creating or recognizing it? If photography were a sport, the foundational skill would be “seeing.”
First, we need to identify what interests us enough to want to photograph it. Without a clear idea, design, or direction, you may not achieve your desired results. While you might have fun, you risk returning from your journey empty-handed of images.
As a commercial photographer, my job was easier because I knew ahead of time what I was going to photograph. I still needed to create visual impact, but the subject—whether a product, event, or portrait—was predetermined.
Today, I photograph for pleasure, and it has taken me years to undo all the commercial frameworks in my mind. However, the rules for creating a pleasing visual composition remain the same.
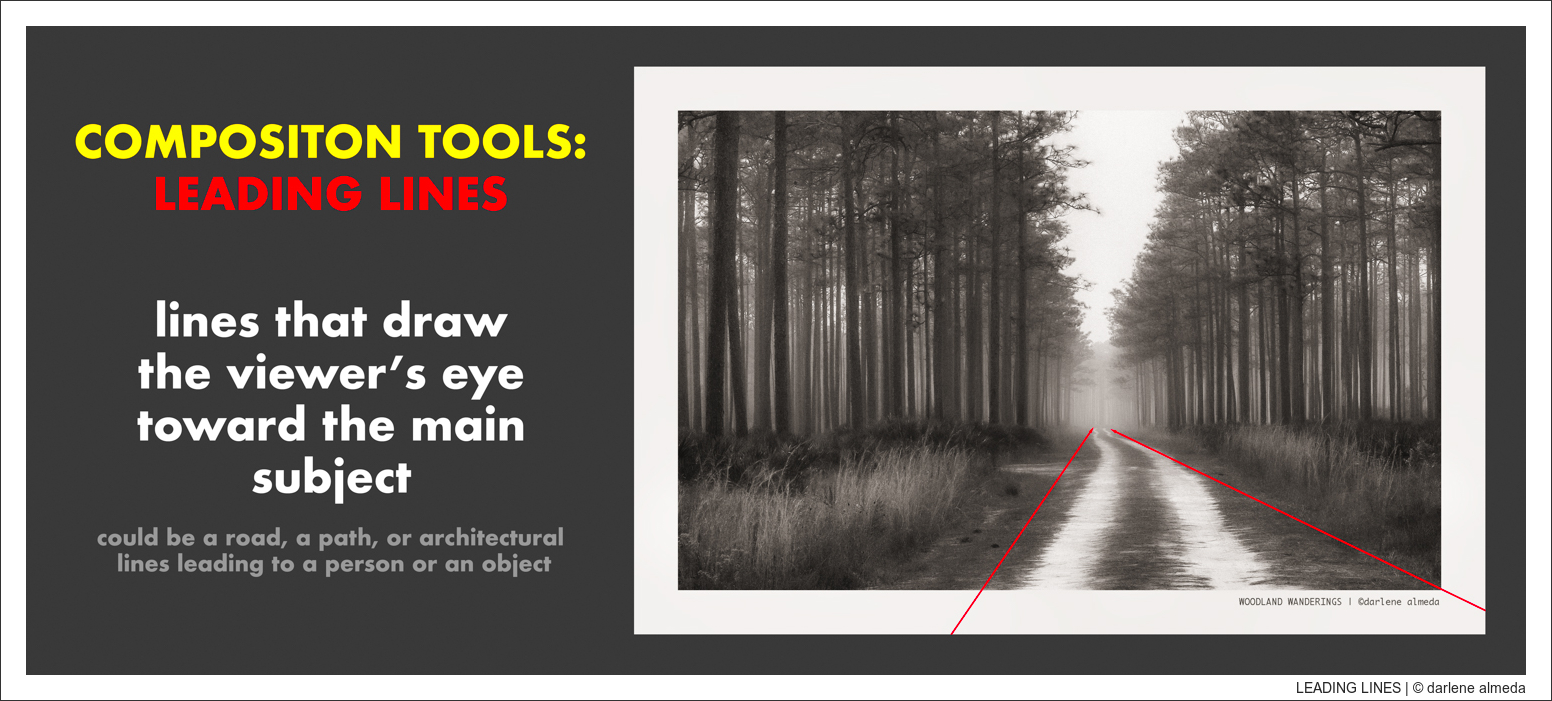
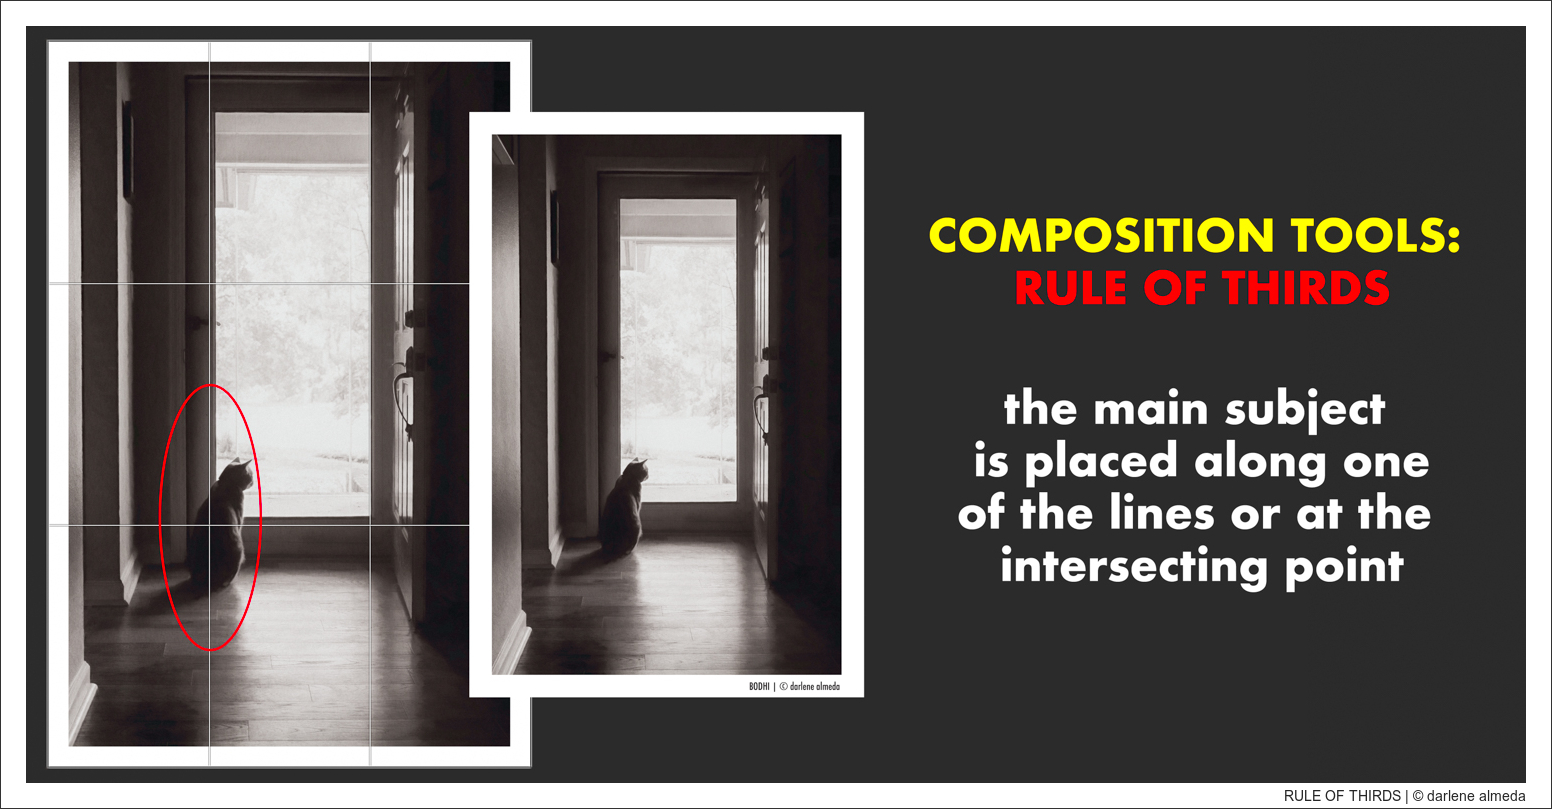
Below are three simple guidelines I follow instinctively. While there are many ways to create a great image, mastering these three will provide a solid foundation to build from.
I compose using a grid, whether on my 4×5 ground glass, 6×6 focusing screen, 44×33 digital back screen, or APS-C camera viewfinder. This approach makes finding the composition easier and speeds up post-processing.
Learning the three basic composition guidelines above is like learning three basic guitar chords. Just as you can play countless songs with those three chords, mastering these composition techniques allows you to create a wide variety of compelling images. By understanding and applying these fundamentals, you can significantly enhance your photography skills and develop your unique style.
STRENGTHEN YOUR VISUAL INTUITION
Just like athletes practice their sport to win and musicians practice between performances, accomplished visual artists practice as well.
I’ve dedicated much time to studying art history in college and in my personal life. I deeply love all visual arts, whether photography, paintings, collages, or other forms. Constantly updating my brain’s visual database with fresh visuals enhances my ability to spot compelling compositions wherever I go.
I must disagree with photographers who advise against studying other visual arts. It’s like telling an athlete not to practice or learn from the legends who came before them.
When I say “study,” I mean looking at art books and magazines, browsing online galleries, and attending in-person shows. Filling your visual database with fresh material can only help whether you pursue this on your own or through a structured program. Do it whenever you can; your visual intuition will strengthen, and your work will show it.
MY LANDSCAPE COMPOSING TOOLS
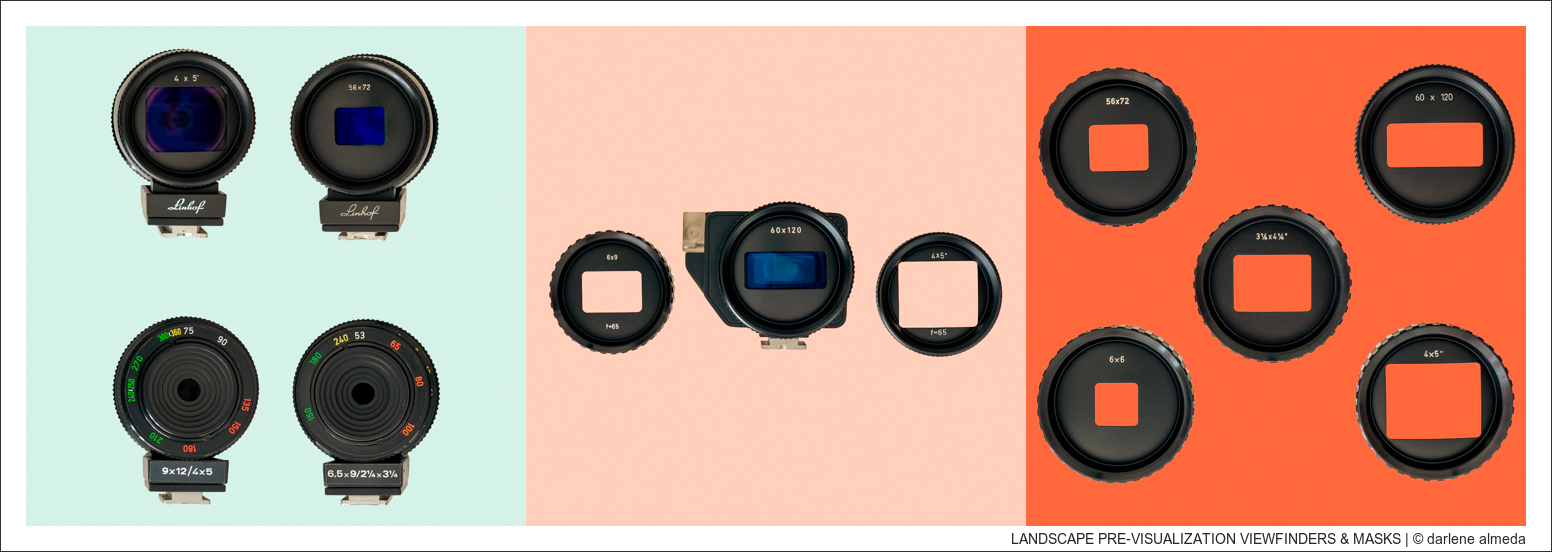
LANDSCAPE PRE-VISUALIZATION VIEWFINDERS & MASKS
Pictured above are my most essential tools for creating compositions besides my vision: handheld viewfinders. Without them, I wouldn’t know where to place my camera as quickly as I do.
Image #1 shows the Linhof Variable Viewfinders (Linhof VFs) for 4×5 and 6×9. They are the same except for the rear lens number indicators.
Image #2 shows a Linhof Technar viewfinder made for use with a 65mm lens. I use this viewfinder when shooting my Cambo Wide 650. It is a beautiful viewfinder to look through, and I use it a lot for shooting a 6×12 back on the camera. I have three masks for it and note how they are made for f=65 (focal length = 65mm).
Image #3 displays the masks I use for the Linhof VFs: 6×6, 56×72 (6×7), 3.25×4.25 (6×4.5), which can also be used for the 44×33 aspect ratio (4.25×3.25 is comparable to 44×33 in terms of similar but not identical proportions, but it is good enough for previsualization, in my opinion), 4×5, and 6×12.
While I love taking my time when exploring, I am pretty fast and efficient when it comes to shooting. Operating a camera is easy when you know what and where to shoot. I have a mental checklist to ensure my camera, lens, film, or digital back are correctly set. Most of my time is spent composing, which begins and ends while I explore the landscape.
If necessary, I could use a black frame cutout made from a mat board instead of a viewfinder. Still, my tool of choice is a pocketable handheld viewfinder that closely matches my camera lenses to the film or digital format.
With limited format sizes available, finding exactly what you need can be challenging. However, over time, I’ve been able to tweak my viewfinders to match my gear. For example, the Linhof VF 6×9, fitted with a 56×72 mask, matches my 44×33 digital sensor and lenses well enough. However, I recently acquired the 3.25×4.25 mask and have used it exclusively with my Hasselblad 45P lens and CFV50c II digital back for over a year. I found it to match the 44×33 sensor size very well, too.
This Lens Visualizer Tool helps with pre-visualizing lenses and formats.
DSLR CAMERA USERS
If your primary camera is a DSLR, you might also use it with a zoom lens to scout compositions. My Linhof viewfinders for 4×5 and 6×9 are variable viewfinders that operate similarly to a zoom lens, allowing me to select the lens size and the correct format frame.
THREE CAMERAS, THREE EXAMPLES
Next, we will look at three different cameras, along with an image from each and its behind-the-scenes story. I grabbed these from my Lightroom catalog, and while they weren’t made specifically for this article, they should effectively demonstrate how I approach composing, regardless of the camera, format, or whether it’s digital or film. When I’m out in the landscape scouting for images, I always have a viewfinder in hand.
6×17 PANORAMIC FILM CAMERA
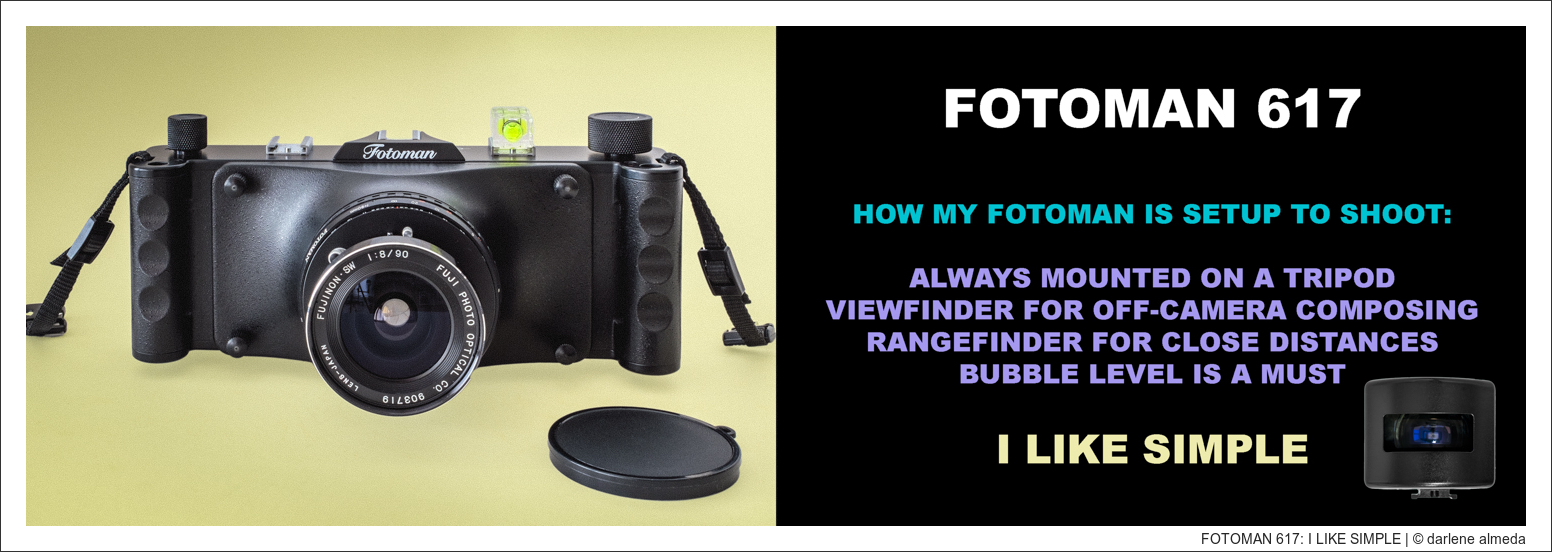
FOTOMAN 617 + FUJINON SW 90/8
FOTOMAN Viewfinder w/90 Mask + Ground Glass
Pictured above is my Fotoman 6×17 with a Fujinon SW 90/8 lens, and its detachable viewfinder is shown in the lower right corner of the graphic. This viewfinder is compatible with most Fotoman 6×17 cameras and is specifically framed for a 90mm lens. I rarely use the viewfinder on the camera, opting instead for the ground glass or the Mark II Artist’s Viewfinder app on my cell phone when I need precise framing.
While my Fotoman kit is somewhat heavy to carry around the landscape, especially when I’m scouting for a composition, exploring with its detachable viewfinder is a breeze. Once I identify a scene I want to capture, I return to my vehicle, set the camera on the tripod, and walk back to the shooting location—no need to drag the entire kit with me. Without its detachable viewfinder, which closely matches the lens and format, this process would be much more cumbersome.
Even though this is a 120-film camera, it operates very much like a 4×5 field camera, minus the bellows and film holders. It is no longer in production, and accessories for it were always limited. I made a bellows viewfinder for mine (instructions here) because composing on the ground glass is how I prefer to create images with it.
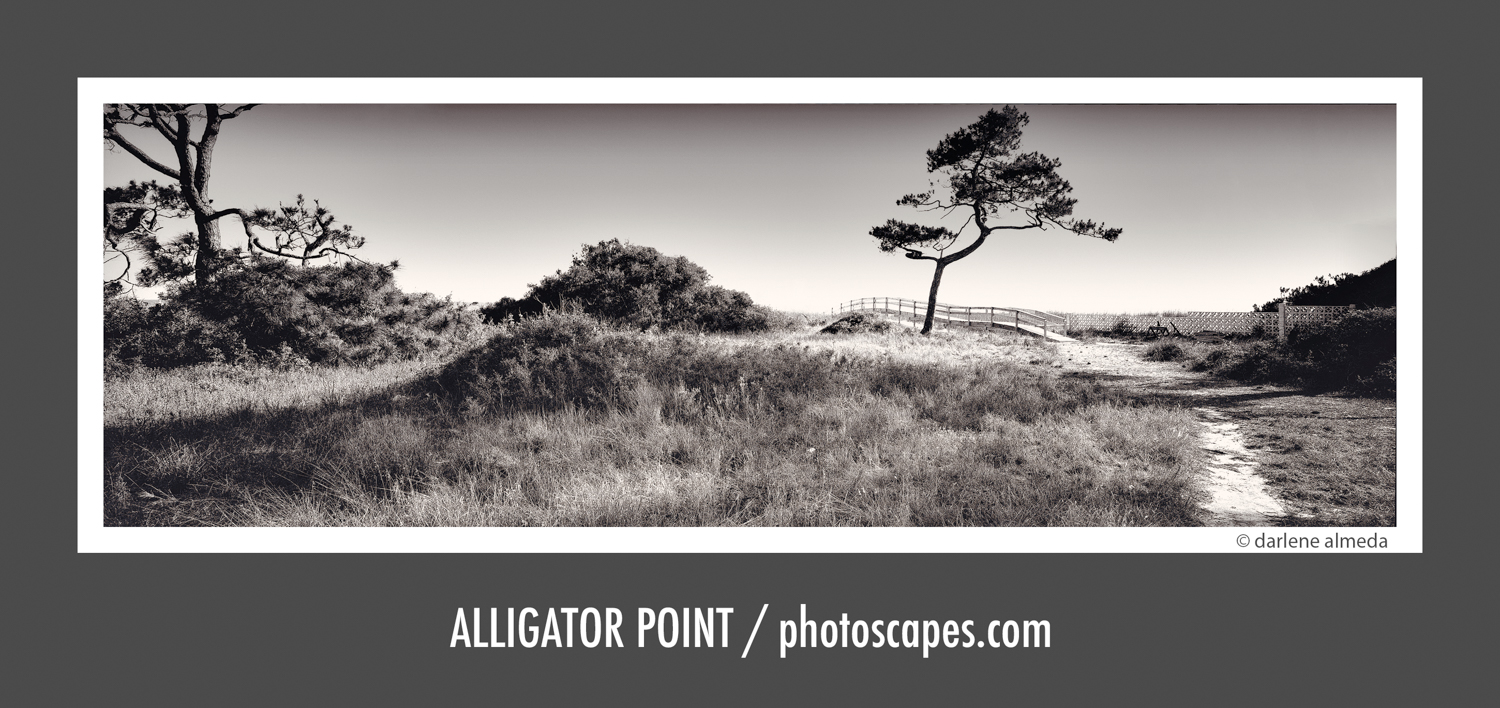
FOTOMAN 6×17 + RODENSTOCK 90/6.8 + ILFORD FP4+
Pre-Visualized with FOTOMAN 6×17 (90) VF
Pre-visualization Objective: It wasn’t until I peered through the 6×17 (90) viewfinder that I saw an image reminiscent of the Asian-style art I’ve always admired. Standing in just the right spot, I framed the scene, carefully excluding the peripheral trees, and finally envisioned the photo I wanted.
MEDIUM FORMAT TECHNICAL CAMERA
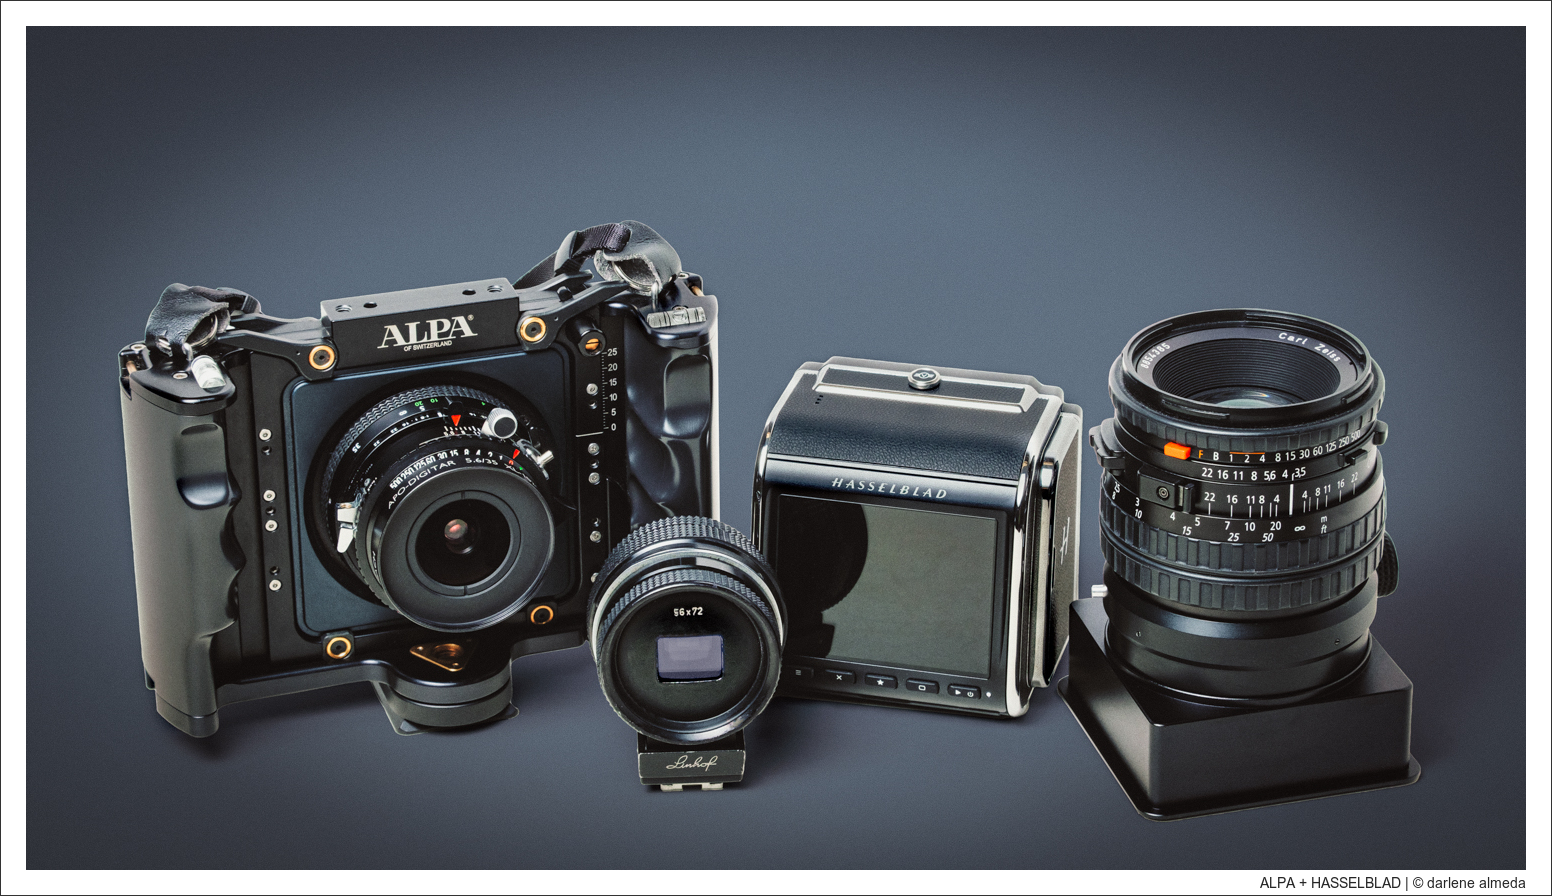
ALPA + HASSELBLAD DIGITAL KIT
ALPA SWA + SK 35/5.6, CFV II 50C, CFi 100/3.5, Linhof 6×9 VF + 56×72 Mask
Below is an image I saw through my Linhof VF 6×9 with a 56×72 mask in place. The mask adjusts the viewfinder to fit the format size of the digital back I was using at the time, the Hasselblad CFV-50c, which has a 44×33 sensor size.
I was standing on the other side of the water inlet from where the trees in the image were. The lighting and clouds caught my attention initially, but I needed to see if I could find anything else to add more interest to the composition. So, I used the viewfinder to study the scene. Because I was on the other side of the water, I had little room to move around. I was under palm trees, with a road behind the trees about twenty or so feet away.
I turned the viewfinder into the vertical position, and as I looked through it, adjusting its lens dial, which ranges from 53mm to 240mm, I saw the beauty of the big sky and knew it would be a vertical composition. The scene came to life at the 100mm lens range as the giant tree, without leaves, was spreading its arms out as if to say, “Look at me, look at me!”
Selecting the correct lens becomes straightforward once I determine whether the scene calls for a wide-angle, normal, or telephoto lens. If the viewfinder scene falls within the dial’s 53-65 range, it’s wide-angle; 70-100 is normal, and over 100 is telephoto. Remember, this is medium format, not 4×5 or 135mm.
I captured this image with a small amount of camera front rise on a beautiful day while exploring my local National Wildlife Refuge. The viewfinder helped me decide between using the 100/3.5 lens and the heavier 180/4 on this shoot. I love it when my gear and technique prevent me from setting up the wrong equipment, especially the heavier gear!
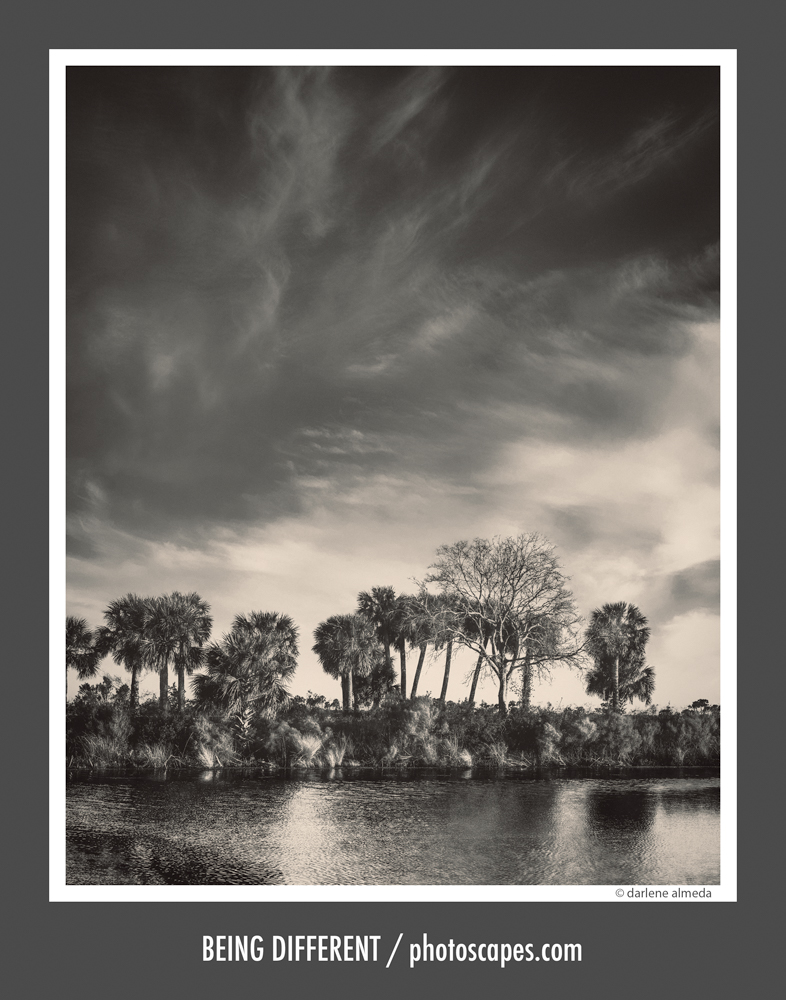
ALPA SWA + Hasselblad CFi 100/3.5 + CFV-50c
Pre-Visualized with Linhof 6×9 VF + 52×72 Mask
Pre-visualization Objective: I sought to reveal the stunning beauty of a big sky photograph. Initially, the trees and light captured my attention, but it wasn’t until I switched my viewfinder to a vertical position that the vastness of the sky truly drew me in.
MEDIUM FORMAT DIGITAL + STITCHING
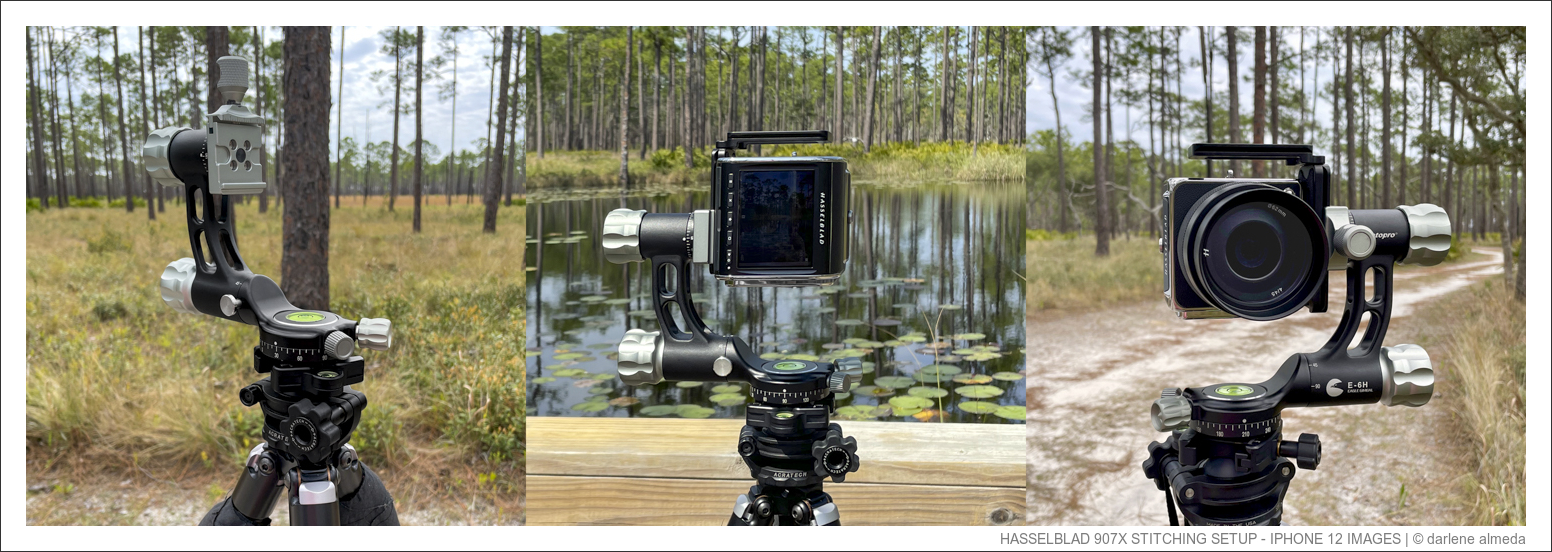
HASSELBLAD 907x STITCHING SETUP – IMAGES BY IPHONE 12
Pre-Visualized with Linhof 6×9 VF + 3.25×4.25 Mask
The image above features my Hasselblad 907x 50c paired with the Hasselblad 45P lens, mounted on an RRS Series #1 tripod with an Acratech Leveling Base and Fotopro Eagle E-6H Gimbal. This setup captured the photo below after my exploration walks and pre-visualization.
Before I made this image, I encountered a slight problem: I didn’t have the correct lens, but I had to make it work regardless! Photographers, indeed, are problem solvers. I first heard that in photography school, and it still resonates with me.
I came upon this beautiful pond in the middle of a state-owned forest, but to get the view I wanted, I had to walk to the end of a small pier. The problem was I had the Hasselblad 907x, with only the 45P lens. The 45P is a beautiful lens, but it is too long for the view I wanted. That didn’t stop me from pre-visualizing the shot through the viewfinder during my scouting.
Once I got back to the van, I pulled out my stitching gear shown above and got to work. The technique I used was stitching two bottom slices and two top slices. To be honest, I like stitched landscape vistas made with longer lenses.
Thank goodness it was a breezeless day in Spring 2024, with me alone on that small pier (no extra vibration), making for a beautiful experience surrounded by the pines and the singing birds. With the many options available to photographers today, it’s truly a wonderful time to be a photographer. 🙂
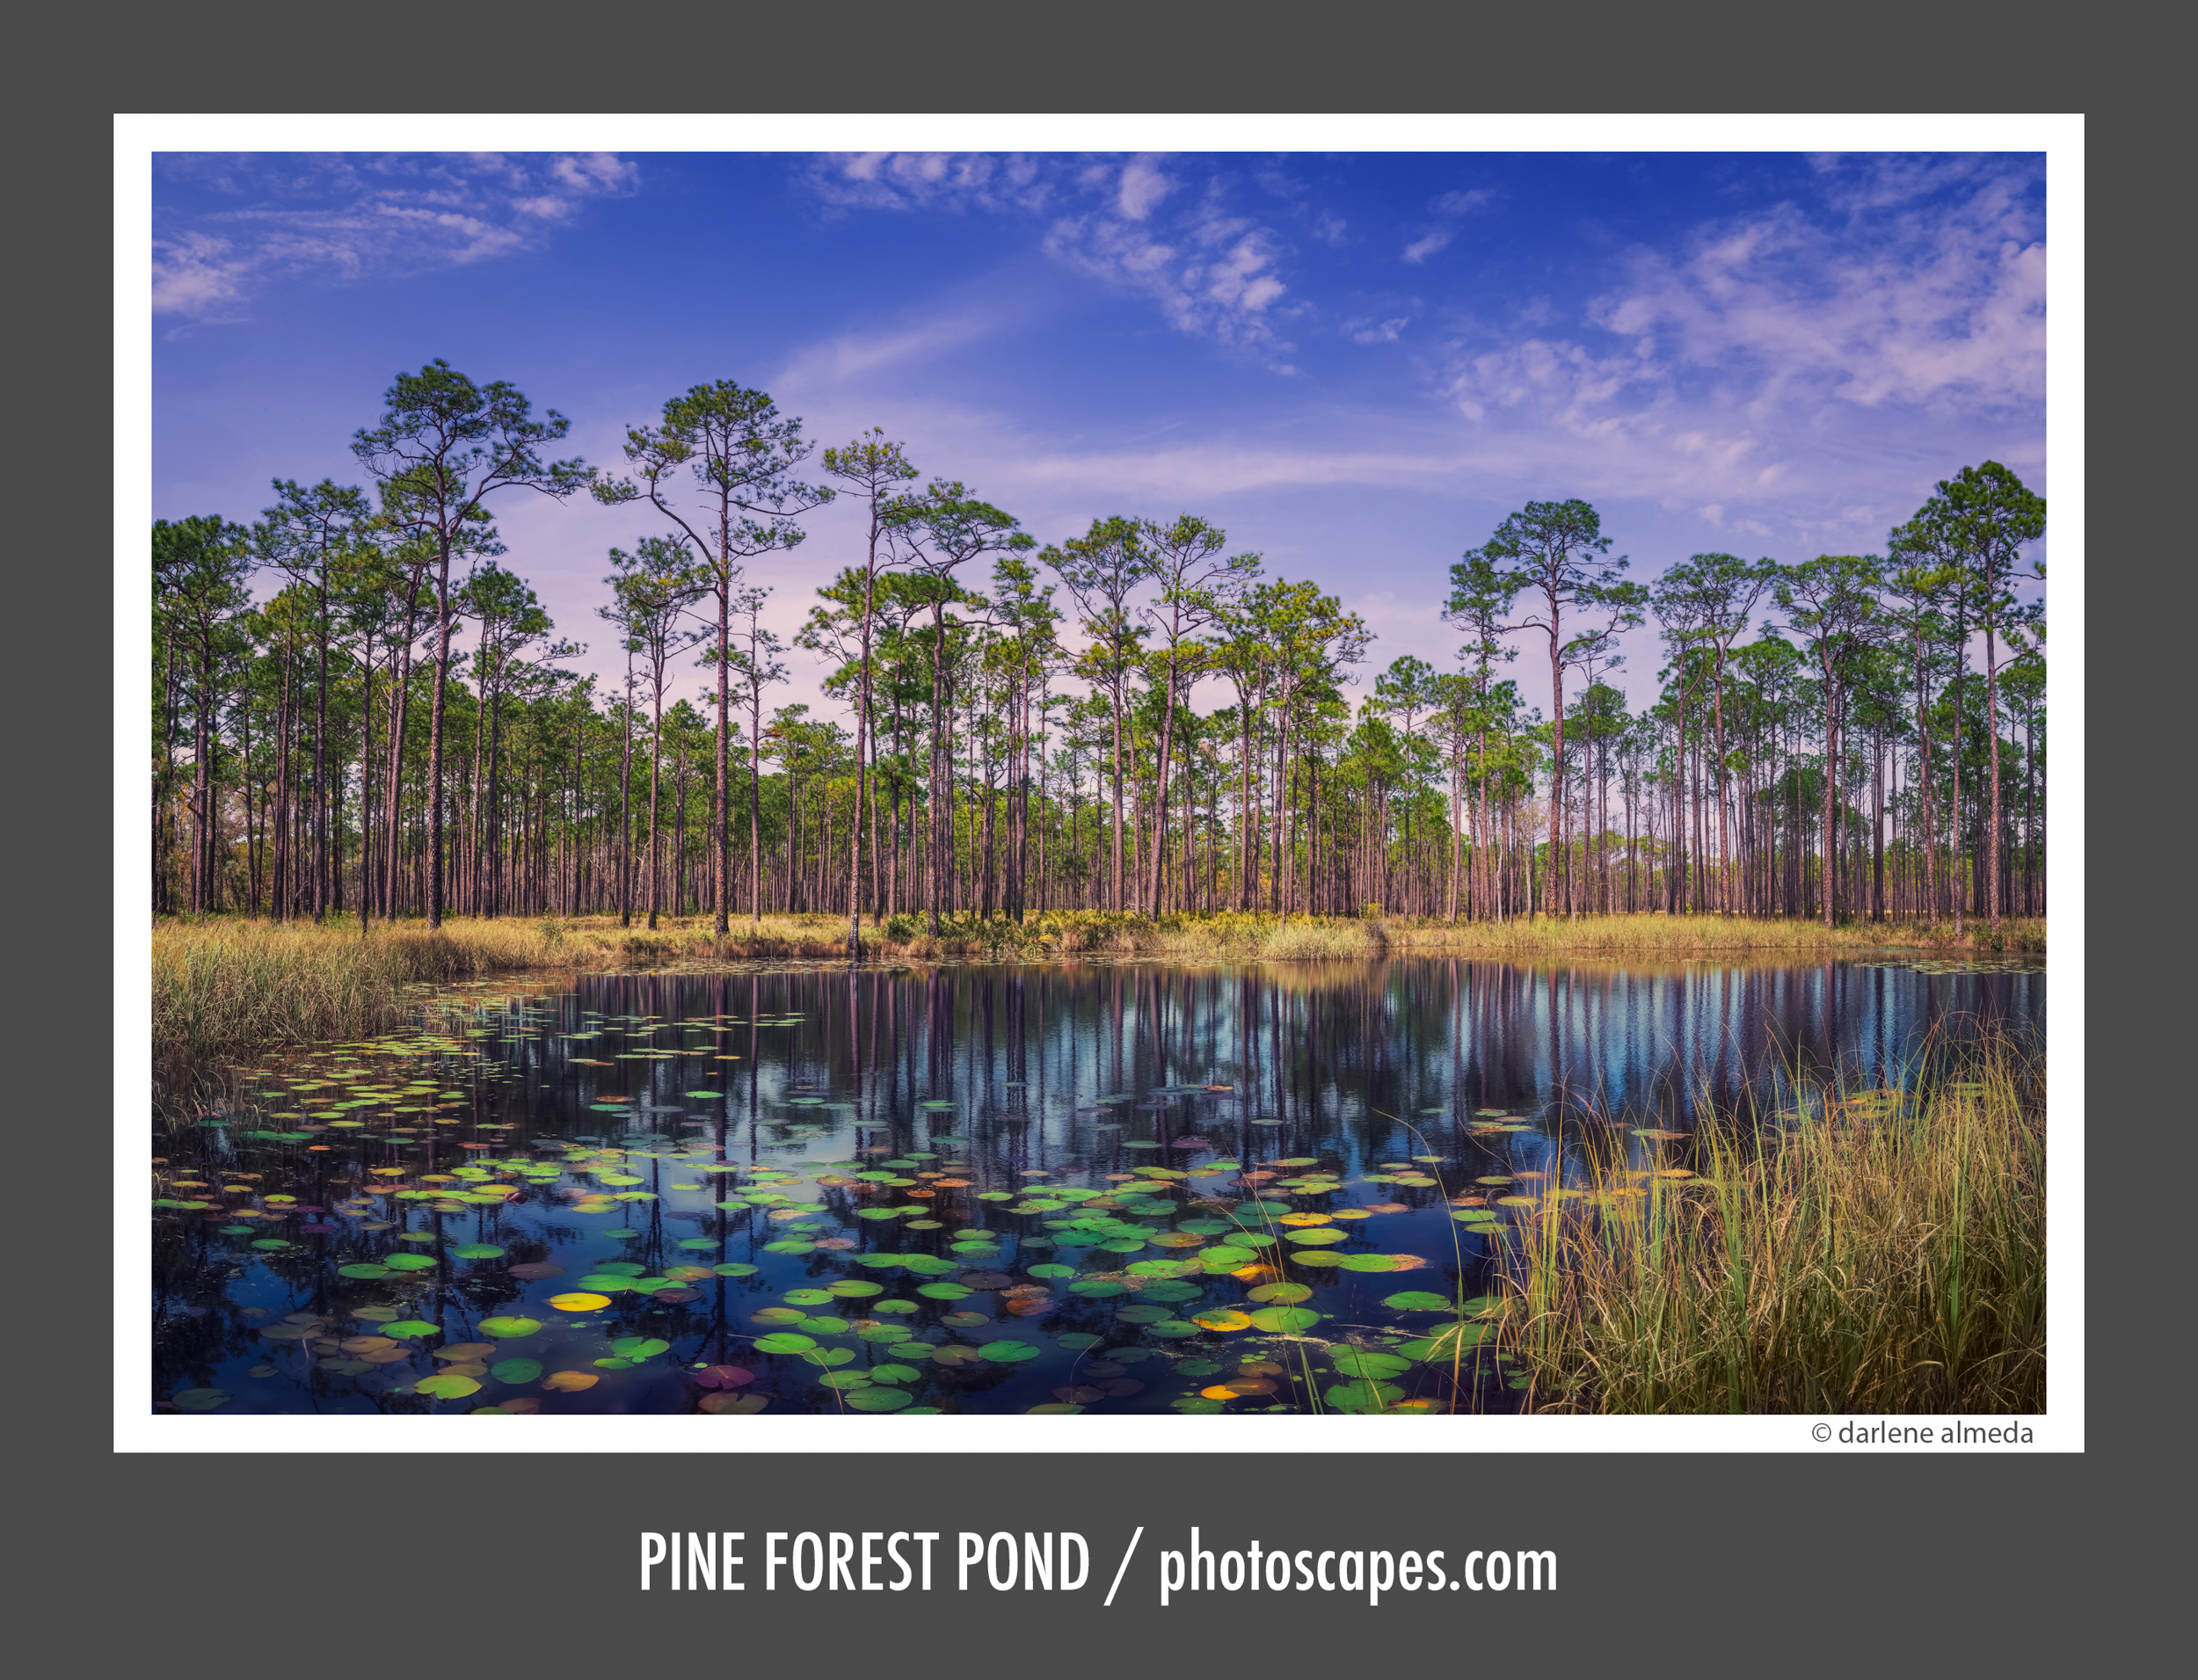
Pre-Visualized with Linhof 6×9 VF + 3.25×4.25 Mask
Hasselblad 907x 50c + 45P on RRS #1 w/Acratech LB & Fotopro E-6H*
Pre-visualization Objective: My goal was to immerse the viewer in the experience of standing before this breathtaking springtime pond, surrounded by its vibrant colors and calming atmosphere. I aimed to capture and share the sense of discovery I felt when I first explored the area.
SUMMARY
Pre-visualizing is the art of knowing what you want to shoot and making that image a reality. This skill develops through individual effort and is a lifelong journey for most photographers.
Studying art helps refine my “eye” and keeps my vision sharp and my thinking creative.
The gear I use today reflects a 30+ year career in the visual arts and years of buying and selling to obtain what I need. Although I’ve periodically updated my gear, the equipment mentioned in this article has been in my toolbox for many years. Constantly switching gear for the latest technology wasn’t always beneficial; I prefer to know my gear as well as my own hands. I encourage you to work with the gear you have and focus on studying art and observing scenes if you’re unhappy with your compositions.
If you take just one thing away from this article, I’ll be grateful, knowing that my experience and hard work have been put to good use!

